Quick Summary: Nail guns leave dents when the depth setting is too high, air pressure is excessive, or the wrong nail size is used. Adjusting the depth, lowering pressure, using the right nails, and employing a sequential trigger are key fixes for clean nail placement. Proper technique prevents wood damage.
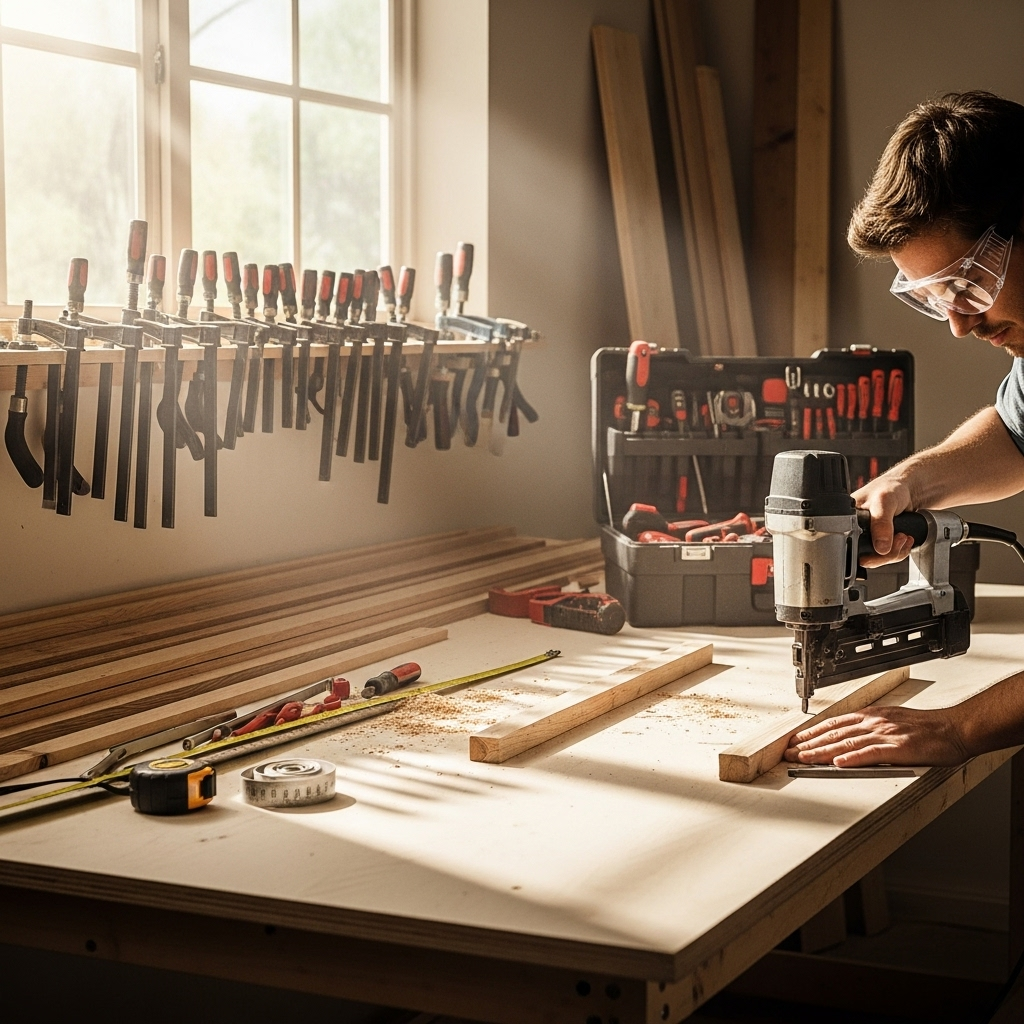
Hey there, DIYers and woodworking enthusiasts! Jack Shaffer, your friendly neighborhood Nailerguy, here. Ever fired up your nail gun, ready to join two pieces of wood, only to see an ugly dent marring your surface? It’s a frustrating sight, especially after you’ve spent time prepping your materials. But don’t worry, you’re not alone, and it’s a totally fixable problem!
This happens more often than you might think, whether you’re building a simple shelf, assembling some furniture, or working on a larger project. The good news is, understanding why it happens is the first step to preventing it. We’ll dive into the common culprits and show you just how easy it is to get those nails driven in cleanly, every single time.
Ready to make those dents a thing of the past? Let’s get started and learn how to achieve that perfect finish you’re aiming for!
Table of Contents
Understanding Why Your Nail Gun Leaves Dents
It’s easy to point a finger at the nail gun when things go wrong, but usually, it’s a combination of a few key factors. These powerful tools are designed to drive nails with force, and sometimes, when that force or depth isn’t quite right, it can leave a mark. Let’s break down the most common reasons you might be seeing those unwanted dents.
1. Nail Depth Setting is Too High
This is probably the most frequent offender. Most nail guns have an adjustable depth setting. This feature allows you to control how deep the nail sinks into the wood. If you have it set too deep, the nose of the nail gun will dig into the wood surface as the nail is driven, creating a noticeable indentation around the nail head.
Think of it like using a hammer with too much force. You’re not just driving the nail; you’re driving the tool itself into the material. For softer woods, even a slightly too-deep setting can cause damage. For hardwoods, you might need a deeper setting, but it still needs to be calibrated correctly.
2. Air Pressure is Too High
For pneumatic nail guns (the ones that connect to an air compressor), the air pressure is crucial. Too much air pressure delivers more force than necessary to drive the nail. This excess force can cause the nail gun’s nose piece to slam into the wood, creating a dent. It can also drive the nail too deep, leading to the same problem.
Most compressors have a regulator that allows you to dial in the exact pressure needed. The recommended pressure varies by nail gun model and the type of wood you’re working with. It’s always a good idea to check your nail gun’s manual for recommended settings. Starting with too much pressure is a common beginner mistake.
3. Using the Wrong Type or Size of Nail
Nail guns are designed to drive specific types and sizes of nails. If you use a nail that is too short for the material thickness, you might end up over-driving it or not getting enough holding power. Conversely, if you use a nail that is too tall relative to the depth setting, it can also cause issues.
More importantly, the head of the nail is designed to sit flush or slightly below the wood surface. If the nail head itself is undersized for the project or the nail is a type that isn’t meant to countersink, it might appear to leave a dent when in reality, the nail is just sitting too high.
4. Lack of a No-Mar Tip or Using a Damaged One
Many nail guns come with a “no-mar” tip, which is usually a soft rubber or plastic attachment that goes over the nose of the gun. This tip is specifically designed to protect the wood surface from dents and scratches. Not using it, or using one that is damaged or worn out, can lead to dents.
If the tip is missing, cracked, or has debris stuck to it, it won’t provide the necessary cushioning. Always inspect your no-mar tip before use. If it’s damaged, replace it. For some professional-grade nailers, these tips are sold as accessories.
5. Hitting Nails Too Close Together
When you’re firing multiple nails close to each other, the wood fibers can become compressed and weakened in that area. If you fire another nail too close to an already driven one, there’s less resistance, and the nail gun’s impact can cause the wood to crush and create a dent. This is particularly true with softer woods.
This often happens during rapid-fire nailing, where speed might be prioritized over precision. Spacing your nails appropriately and allowing slight distances between them can prevent this kind of localized damage.
6. Material Properties (Wood Type and Condition)
Some woods are simply more prone to denting than others. Softwoods like pine or fir dent much more easily than hardwoods like oak or maple. If you’re working with a very soft wood, even a correctly set-up nail gun can leave a slight impression.
The condition of the wood also matters. Old, brittle, or dried-out wood can fracture or dent more easily than fresh, robust lumber. Always consider the material you’re working with when setting up your nail gun.
Essential Fixes: How to Prevent Nail Gun Dents
Now that we know what causes those pesky dents, let’s talk about solutions! Fixing these issues is mostly about making small, precise adjustments to your nail gun and your technique. We’ll go through it step-by-step, so you can get back to building with confidence.
Step 1: Adjust the Depth Setting Correctly
This is your first line of defense. Most nail guns have a dial or lever near the nose that controls the depth. You’ll want to set this so that the nail head sinks just slightly below the surface of the wood, or sits perfectly flush, depending on your project’s needs. For a smooth finish, you want it flush or slightly countersunk.
How to Test and Adjust:
- Start with a scrap piece of the same wood you’ll be using for your project.
- Set the depth adjuster to a medium setting – not too deep, not too shallow.
- Fire a test nail.
- Examine the nail head and the surrounding wood.
- If the nail head is sticking out, turn the depth adjuster to sink the nail deeper.
- If the nail gun nose is creating a dent or the nail is driven too deep, turn the adjuster to set it shallower.
- Repeat until you achieve the desired depth without creating a dent.
Step 2: Dial In the Air Pressure
For pneumatic nailers, regulating air pressure is critical. Too much pressure is a common cause of dents. The ideal pressure depends on your specific nail gun, the type of wood, and the length of the nails you’re using. Consult your nail gun’s manual for recommended PSI (Pounds per Square Inch) ranges.
Recommended PSI Ranges (General Guide):
| Nail Gun Type | Typical PSI Range | Notes |
|---|---|---|
| Framing Nailer | 70-120 PSI | For structural work; pressure depends heavily on nail size and wood density. |
| Finish Nailer | 70-100 PSI | Used for trim and molding; accuracy is key. |
| Brad Nailer | 60-90 PSI | For fine woodworking and delicate trim; requires lower pressure. |
| Pin Nailer | 60-80 PSI | For very fine work where minimal marking is paramount. |
Always start at the lower end of the recommended range for your nailer and nail size, and gradually increase pressure only if needed. Just like with depth, test on scrap wood. You’re looking for a setting that drives the nail correctly without excessive force.
Step 3: Use the Correct Nails for Your Nailer
Every nail gun is designed for a specific collation angle and nail size. Using the wrong nails won’t just cause jams; it can affect how cleanly they are driven. Most importantly, ensure you are using the correct gauge (thickness) and length of nail for the task and your tool.
For example, a framing nailer uses thicker, longer nails for structural framing, while a brad nailer or pin nailer uses much thinner nails for delicate trim work. Using nails that are the wrong size for your nailer’s magazine or driving mechanism can lead to misfires and impact marks.
Step 4: Utilize the No-Mar Tip
This is a simple but vital step. Make sure your nail gun has its no-mar tip attached. If it’s missing or damaged, get a replacement. These tips are often made of a softer material that absorbs some of the impact, preventing the metal nose of the gun from pressing directly into the wood after the nail is driven.
Checking Your No-Mar Tip:
- Inspect it for cracks, tears, or missing sections.
- Ensure it’s securely attached to the nose of the nail gun.
- Check for any debris that might be lodged in it, which could scratch the wood.
- If it feels hard or brittle, it might be time for a replacement.
Step 5: Master the Firing Technique
How you position and operate the nail gun makes a big difference. Always ensure the nose of the nail gun is pressed firmly and squarely against the wood surface before you pull the trigger. This ensures the force is directed downwards into the nail, not into the wood itself.
Trigger Types and Firing Modes:
Many nail guns come with different trigger mechanisms, and understanding them is key to controlled firing:
- Sequential Trigger (or “contact trip”): With this mode, you must first press the nose of the gun against the surface (contact trip) and then pull the trigger to fire a nail. To drive another nail, you repeat the process: contact, trigger. This is the safest and most precise mode, ideal for preventing accidental fires and controlling nail placement, which helps avoid dents.
- Contact Trigger (or “fire while held”): In this mode, the nail gun can fire simply by pulling the trigger, if the safety contact on the nose is depressed. This allows for rapid nailing by holding the trigger down and “bouncing” the nose against the wood. While fast, it’s also easier to accidentally dent the wood or drive nails in unintended spots due to uncontrolled contact.
For beginners, or when you need precise nail placement and want to avoid dents, always use the sequential trigger mode. It gives you more control over each nail.
Step 6: Proper Nail Spacing
As mentioned, driving nails too close together can weaken the wood fibers and cause dents. Plan your nailing pattern. Generally, aim for at least 3/4 inch to 1 inch away from the edge of the wood and avoid placing nails too close to each other, especially in softer woods. If you need to place nails in a tight area, consider using a nailer with a smaller profile or carefully adjust your depth and pressure settings.
Step 7: Consider the Wood and Use Protective Measures
If you are working with very soft woods or delicate veneers, even with all precautions, there’s a risk of denting. In such cases, you can employ an extra layer of protection.
Protective Measures:
- Scraps of Plywood or Cardboard: Place a small piece of thin scrap wood, stiff cardboard, or even a piece of thin plastic between the nail gun’s no-mar tip and the workpiece. This adds an extra buffer.
- Hammer and Nails (for delicate work): For extremely delicate work where a nail gun’s impact is too risky, consider going back to basics with a hammer and finishing nails. It’s slower but offers maximum control.
- Precision Nailers: Invest in higher-quality nailers that offer finer control over depth and pressure, or consider specialized tools like pin nailers for minimal marking.
For more on selecting the right tool for the job, Resources like HomeConstructionHelp.com’s Guide to Nail Guns offer excellent insights into different types and their applications.
Troubleshooting Common Denting Scenarios
Sometimes, a specific scenario pops up that’s a bit trickier. Let’s cover a few common problems and their solutions.
Scenario 1: Dents Appear Even with Low Pressure and Shallow Depth
If you’ve tried adjusting depth and pressure and are still getting significant dents, here are a few more things to check:
- Damaged No-Mar Tip: Double-check your no-mar tip. Even small cracks can compromise its effectiveness.
- Nail Gun Malfunction: In rare cases, the nail gun itself might have an issue with its internal valving or spring, causing it to deliver impact inconsistently or with too much force. Consult your manual or a repair professional.
- Aggressive Triggering: Are you “slam-firing” even on a sequential trigger? Ensure you press the nose firmly before engaging the trigger.
- Extremely Soft Wood: Some very soft woods (like balsa or certain reclaimed timbers) will dent almost no matter what. Consider pre-drilling very small pilot holes for your nails if essential.
Scenario 2: Dents Only Appear on One Side of the Nail Head
This often indicates an issue with how the nail gun is being held or the nail itself.
- Uneven Pressure: You might be pressing down harder on one side of the nail gun’s nose than the other. Ensure the gun is held perfectly perpendicular to the wood surface.
- Bent Nails: If you’re using slightly bent nails, they might not enter the wood cleanly, causing the surrounding area to buckle slightly.
- Nail Binding: The nail might be sticking slightly in the gun’s magazine or channe,l causing it to enter the wood at an angle.
Scenario 3: Big Dents When Driving Nails into Edges or Corners
Wood is weakest at its edges and corners. Driving a nail here with typical settings can easily cause blowouts or large dents.
- Reduce Air Pressure: Significantly lower the air pressure when working near edges.
- Increase Depth Setting Slightly (Counter-intuitive): Sometimes, driving the nail slightly deeper (so the head sits flush or just below) can prevent the surrounding wood from crushing due to outward force. This requires careful testing.
- Use Smaller Nails: Switch to a smaller gauge nail (like brad or pin nails) if the structural integrity allows.
- Pre-drill: For critical joints near edges, pre-drilling a pilot hole for the nail can provide guidance and prevent splitting.
- Use a Nail Gun with a Swivel Exhaust: Some nail guns allow you to direct the exhaust away from your face and workspace. While not directly related to dents, it’s good practice. The Occupational Safety and Health Administration (OSHA) standards for pneumatic tools emphasize safe operation, which includes controlled impact.
Maintaining Your Nail Gun for Optimal Performance
A well-maintained nail gun performs better and is less likely to cause problems like denting. Regular maintenance ensures all parts are working smoothly and efficiently.
How to Maintain Your Nail Gun
- Cleanliness is Key: After each use, wipe down the exterior of your nail gun with a clean cloth. Remove any sawdust or debris that might have accumulated.
- Lubrication: For pneumatic nail guns, follow your manufacturer’s recommendations for lubrication. This typically involves adding a few drops of specialized pneumatic tool oil into the air inlet before each use or at specific intervals. This keeps internal seals and moving parts lubricated, ensuring smooth operation.
- Inspect O-rings and Seals: Periodically check the O-rings and seals within the tool. Damaged or worn seals can lead to air leaks, affecting performance and potentially causing inconsistent nailing.
- Check the Nose and No-Mar Tip: Regularly inspect the nose piece of your nail gun for any damage, dirt, or debris. Ensure the no-mar tip is in good condition and securely attached.
- Keep the Magazine Clean: The nail magazine should be kept free of debris. If nails are jamming or feeding poorly, clean the magazine thoroughly.
- Air Filter Maintenance