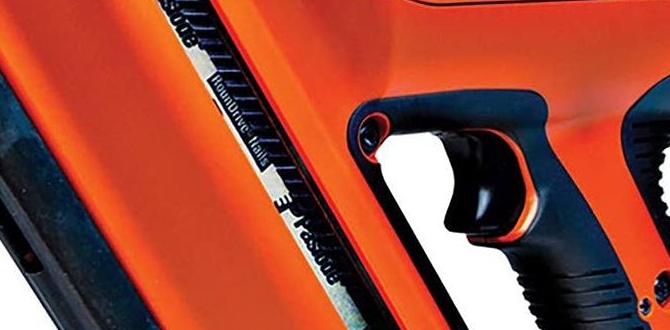
Nail gun jamming can be frustrating, but with these proven solutions, you can quickly fix most issues and get back to your project. This guide will walk you through simple troubleshooting steps to resolve nail gun jams safely and effectively, ensuring your DIY tasks are completed smoothly.
Hey woodworkers! Jack Shaffer here from Nailerguy. We all love the speed and precision a nail gun brings to our projects. But what happens when that satisfying thwack turns into a frustrating clunk? A jammed nail gun is a common headache for DIYers, but don’t let it stop you! It’s usually a simple fix that you can handle yourself.
In this guide, I’ll break down exactly why your nail gun might be jamming and, more importantly, how to fix it. We’ll go through clear, step-by-step solutions that will have you back to building in no time. Ready to conquer those jams? Let’s get started!
Table of Contents
Understanding Why Nail Guns Jam
Before we jump into fixing jams, it’s helpful to understand what causes them. Most nail gun jams happen because something is preventing the nail from being driven properly. This could be a misfed nail, a worn-out part, or even just a bit of dust and debris.
Think of your nail gun like a well-oiled machine that needs everything to be in alignment. When even one small thing is out of place, it can cause a bottleneck. The good news is, most of these issues are straightforward to solve with a little patience and the right approach.
Common Causes of Nail Gun Jams
- Improper Nail Loading: If nails aren’t seated correctly in the magazine or are the wrong size/type for your gun, they can misfeed, leading to a jam.
- Worn Driver Blade: This is the part that strikes the nail head. If it’s bent, dull, or damaged, it can cause nails to buckle or jam.
- Debris in the Magazine: Sawdust, dirt, or small wood fragments can get into the nail channel and obstruct the nails.
- Low Air Pressure (for pneumatic nailers): Not enough air means the nailer doesn’t have the power to drive the nail all the way, making it prone to jamming.
- Incorrect Nail Size or Type: Using nails that are too long, too short, or not designed for your specific nail gun can cause feeding problems.
- Internal Mechanism Issues: Springs can weaken, and other internal parts can wear down over time, affecting nail feeding.
Safety First: Preparing to Clear a Jam
This is the most important step. Before you even think about tackling that jam, safety has to be your number one priority. We want to fix the problem, not create a new one!
Always disconnect the power source. For pneumatic nail guns, this means disconnecting the air hose. For cordless or electric models, remove the battery or unplug it from the wall. This prevents accidental firing while you’re working on the gun.
- Disconnect Power: For pneumatic nailers, unplug the air hose. For cordless or electric models, remove the battery pack or unplug the power cord.
- Point Away from Yourself and Others: Always direct the nail gun away from any living beings or valuable items.
- Wear Safety Glasses: Even when not firing, there’s a risk of small parts flying.
Step-by-Step Guide to Clearing a Nail Gun Jam
Now that you’re safe, let’s get that nail gun unjammed!
Step 1: Identify the Jammed Nail
Look closely at the nose of your nail gun. Can you see a nail that hasn’t fully ejected or looks bent or stuck?
Step 2: Attempt to Gently Remove the Nail
Sometimes, a nail is just slightly out of place. Try these gentle methods first:
- Nose Plate Adjustment: Some nail guns have a small latch or button on the side of the nosepiece. Pressing this might release tension on the nail.
- Tap Gently: Using the rubber grip of your screwdriver or a small rubber mallet, gently tap the area around the jam. Be careful not to hit too hard, as you could damage the gun.
- Pull the Nail: If you can get a good grip on the head of the jammed nail with a pair of pliers, try to gently pull it straight out. Don’t force it if it feels stuck.
Step 3: Access the Nail Channel (If Necessary)
If the nail is really stuck, you might need to open up the nose of the nail gun. Most nail guns have a quick-release nosepiece or cover.
Consult your nail gun’s owner’s manual for specific instructions on how to open yours. Typically, you’ll look for a latch, lever, or screws that allow access to the internal mechanism where the nails feed.
Remember, different brands and models can have slight variations. A quick look at your manual (or a search online for your specific model) is always a good idea.
Step 4: Remove the Jammed Nail
Once you have access:
- Locate the Obstruction: Carefully examine the driver blade, the nail channel, and the feeding mechanism for the jammed nail.
- Use Pliers or a Tool: Again, if you can get a grip with pliers, that’s ideal. Some nail guns come with a small tool for this purpose. You can also use a flathead screwdriver, but be very careful not to scratch or damage the internal parts of the nail gun.
- Work Gently: Wiggle the nail gently to dislodge it. Avoid prying too hard, as this can cause damage.
- Clear Debris: While you’re in there, quickly check for any sawdust or debris that might have contributed to the jam and clear it out.
A well-maintained driver blade is crucial for preventing jams. You can learn more about maintaining your tools from reputable sources like Woodworkers Journal’s tool maintenance tips.
Step 5: Reassemble and Test
Once the jammed nail is removed and the area is clear:
- Reassemble: Carefully put the nosepiece or cover back on, ensuring all parts are properly aligned.
- Reconnect Power: Reattach the air hose or battery.
- Test Fire: Point the nail gun at a scrap piece of wood and fire a nail. Listen for the normal operation sound. If it works, fire a few more nails to ensure the jam is cleared and the gun is feeding correctly.
Troubleshooting Specific Nail Gun Types
While the general steps are similar, a few specific considerations apply to different types of nail guns.
Pneumatic Nail Guns
- Air Pressure: Check your compressor’s regulator. Most framing nailers need around 90-120 PSI, while finish nailers might operate at 70-100 PSI. Too little pressure is a common jam culprit. You can usually find recommended PSI ranges in your tool’s manual or on the manufacturer’s website.
- Air Hose Kinks: Ensure the air hose isn’t kinked or damaged, which can restrict airflow.
- Oilers: Regularly oiling pneumatic tools ensures the internal parts move freely.
Cordless/Battery-Powered Nail Guns
- Battery Charge: A low battery can lead to insufficient power, causing jams. Ensure your battery is fully charged.
- Motor Function: Listen for the motor. If it sounds weak or struggles, it might indicate a battery issue or a problem with the gun’s motor.
Electric/Corded Nail Guns
- Power Source: Ensure you’re using a suitable extension cord (heavy-duty gauge for longer runs) and that the power outlet is functioning correctly.
- Motor Health: Similar to cordless models, a struggling motor can be an issue.
Preventing Future Nail Gun Jams
Fixing a jam is great, but preventing them altogether is even better! Here are some tips to keep your nail gun running smoothly:
Regular Maintenance is Key
Just like any tool, your nail gun needs a little TLC.
- Cleanliness: Keep the nail gun clean, especially the nose and magazine. Wipe away sawdust and debris regularly.
- Lubrication: For pneumatic nailers, use a few drops of appropriate air tool oil in the air inlet before each use or as recommended by the manufacturer.
- Inspect the Driver Blade: Periodically check the driver blade for any bends, chips, or excessive wear. If it looks damaged, it’s time for a replacement.
- Check O-rings and Seals: Worn O-rings can cause air leaks which reduce power and contribute to jams.
Use the Right Fasteners
This can’t be stressed enough! Always use the correct type and size of nails specified for your nail gun model. Using the wrong nails is a leading cause of jams.
For example, a framing nailer uses larger, thicker nails designed for structural work, while a brad nailer uses thin, small-headed nails for delicate trim. Mismatching these will lead to problems.
You can often find a nail compatibility chart in your tool’s manual. Reputable sources like Fine Homebuilding offers guidance on selecting fasteners.
Load Nails Properly
Take a moment to ensure your nails are seated correctly in the magazine. They should slide in smoothly without resistance. If they feel forced or don’t sit flush, there might be an issue with the magazine or the nails themselves.
Proper Air Pressure (Pneumatic)
As mentioned, too little air pressure is a major jam contributor. Always set your air compressor regulator to the recommended PSI for your specific nail gun model. Too much pressure can also cause damage, so aim for the sweet spot.
Avoid Dry Firing
Dry firing, or firing the nail gun without a nail present, can damage the driver blade and the internal mechanisms over time. While a rare dry fire won’t usually cause a jam, making it a habit increases the risk.
When to Call a Professional (or Replace Your Nail Gun)
While many jams are simple to fix, there are times when it’s best to seek professional help or consider a replacement.
- Persistent Jams: If you’ve tried all the troubleshooting steps and the nail gun continues to jam repeatedly, there might be an internal issue you can’t easily fix.
- Damaged Parts: If you discover significant damage to the driver blade, piston, or other critical internal components, it might be more cost-effective to have it repaired by a professional or replace the tool.
- Lack of Confidence: If you’re uncomfortable disassembling your nail gun or working with its internal parts, don’t hesitate to take it to a tool repair shop.
Most manufacturers offer repair services or have authorized service centers. For example, DeWalt provides service and repair information for their tools.
Nail Gun Jam Troubleshooting Checklist
Here’s a quick handy chart to help you diagnose and fix common jam issues:
| Symptom | Possible Cause | Solution |
|---|---|---|
| Nail won’t drive, but you hear the tool cycle. | Low air pressure (pneumatic). | Increase air pressure to recommended PSI. Check compressor regulator. |
| Nail is bent or partially driven. | Incorrect nail type/size, worn driver blade, low air pressure. | Verify nail compatibility. Inspect/replace driver blade. Check air pressure. |
| Nail gets stuck before entering the wood. | Debris in the magazine, misaligned driver blade, improper loading. | Clean magazine. Inspect driver blade alignment. Reload nails carefully. |
| Nail gun makes a grinding or weak sound. | Low battery charge (cordless), weak motor, internal wear. | Charge battery. Inspect for motor issues. Consider professional service. |
| Nail is stuck deep in the nosepiece. | Severely bent nail, broken part within the mechanism. | Carefully access nosepiece and remove nail with pliers. If a part is broken, seek repair. |
Frequently Asked Questions About Nail Gun Jams
Q1: How do I safely disconnect my nail gun if it jams?
Always disconnect the power source first. For pneumatic nailers, this means unplugging the air hose from the tool. For cordless models, remove the battery. For corded electric models, unplug the power cord from the wall outlet.
Q2: Can I use WD-40 to fix a jammed nail gun?
It’s generally not recommended to use WD-40 or similar lubricants inside a nail gun, especially pneumatic ones. They can attract dust and gunk up the internal mechanisms over time. It’s better to use specific air tool oil for pneumatic tools or follow your manufacturer’s guide for lubrication.
Q3: What should I do if the jammed nail breaks off inside the gun?
If the nail breaks, you’ll need to carefully remove the broken piece. This might involve opening up the nosepiece as described in the guide. Use needle-nose pliers or a similar tool to grip and extract the fragment. Be patient and avoid damaging the internal parts.
Q4: How often should I lubricate my pneumatic nail gun?
Most manufacturers recommend adding a few drops of air tool oil into the air inlet before each use or at the end of each day of heavy use. Always check your tool’s manual for the specific lubrication schedule and type of oil required.
Q5: My nail gun jams on the first nail I try to fire. What could be wrong?
If it jams immediately, double-check that you have the correct nails loaded and that they are seated properly in the magazine. Also, ensure the air pressure is set correctly (for pneumatic) or the battery is fully charged (for cordless). A damaged driver blade or internal issue could also be the cause.
Q6: Can different brands of nails work in my nail gun?
While some generic nails might fit, it’s always best to use nails specifically recommended by your nail gun’s manufacturer. Differences in shank diameter, head size, and collation angle can lead to feeding issues and jams, even if they seem to fit at first glance.
Conclusion
Nail gun jams happen, but they don’t have to derail your projects. By understanding why they occur and following these straightforward steps for clearing and prevention, you can maintain your tools and keep them working efficiently. Remember to always prioritize safety by disconnecting power before attempting any fixes, and never force anything if it feels wrong.
Regular cleaning, proper lubrication, and using the right fasteners are your best defense against future frustrations. With a little care and attention, your nail gun will be a reliable workhorse for all your DIY endeavors. So, the next time you encounter a jam, you’ll know exactly what to do. Happy building!