Quick Summary: Mastering nail gun air pressure settings is crucial for perfect drives. Too low pressure causes misfires, too high sinks nails too deep. This beginner’s guide explains how to find the sweet spot for any project, ensuring professional results with every shot. We’ll cover common nailer types and essential tips for safety and efficiency.
Hey there, fellow DIYers and woodworkers! Jack Shaffer here, your go-to guy for all things nail guns. If you’ve ever wrestled with a nailer that just won’t cooperate – maybe it’s leaving nails sticking out or burying them so deep they’re lost – you’re not alone. This is often down to one simple, yet often overlooked, setting: air pressure. Getting the air pressure right can feel like a bit of a mystery, but I promise, it’s a skill that’s totally within your reach. With a few simple steps and a little understanding, you’ll be driving nails like a pro, making your projects look fantastic and saving you a ton of frustration. Let’s dive in and unlock the secret to perfect nail gun performance!
Table of Contents
What is Nail Gun Air Pressure and Why Does it Matter?
Think of your air compressor as the powerhouse for your nail gun. It stores pressurized air, and it’s that air that actually pushes the piston, which in turn drives the nail into your material. The “air pressure,” measured in Pounds per Square Inch (PSI), is essentially how much force that air is exerting when it’s released into the nail gun.
Why is this so important? It’s all about control and consistency. If the pressure is too low, the nail gun won’t have enough power to drive the nail all the way in. You’ll get nails sticking up, which is not only unsightly but can also be a safety hazard if you’re working on something you’ll be touching regularly. On the other hand, if the pressure is too high, you risk driving the nail too deep. This can split softer woods, damage the surface of your material, or even bend the nail. Getting the pressure just right ensures each nail is seated perfectly flush with the surface, giving your projects a clean, professional finish.
Understanding Your Nail Gun and Compressor
Before we get to adjusting the pressure, it’s important to know a couple of things about your tools.
Your Nail Gun’s PSI Range
Every nail gun is designed to operate within a specific PSI range. This is usually printed clearly on the tool itself, often near the air inlet. You might also find this information in the owner’s manual. This range is critical – operating outside of it can damage your nailer or lead to poor performance. For instance, a framing nailer might have an operating range of 70-120 PSI, while a brad nailer might only need 60-100 PSI.
Your Air Compressor’s Regulator
Your air compressor will have a regulator. This is the knob or dial that allows you to control the output pressure from the compressor. Most regulators have a gauge that shows you the current PSI setting. It’s also usually where you connect your air hose.
Common Nailer Types and Their Typical PSI Settings
Different nail guns are built for different jobs, and their required air pressure reflects that. Here’s a general guide to common types:
| Nailer Type | Typical PSI Range (min – max) | Common Uses | Special Considerations |
|---|---|---|---|
| Framing Nailer | 70 – 120 PSI | Building walls, roof framing, decks, fences | Needs higher pressure for driving large nails into dense lumber. |
| Finish Nailer | 60 – 100 PSI | Trim work, molding installation, cabinet building, light framing | Versatile, good balance of power and finesse. |
| Brad Nailer | 60 – 100 PSI | Attaching delicate trim, small moldings, hobby projects, attaching thin wood | Uses very thin nails (brads), generally requires less pressure. |
| Pin Nailer | 40 – 70 PSI | Attaching very thin trim or delicate moldings where minimal marring is desired | Drives near-invisible pins, requires lowest pressure. |
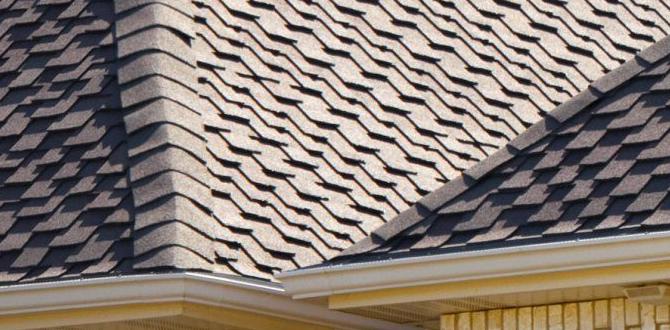
| Roofing Nailer | 70 – 110 PSI | Installing asphalt shingles and other roofing materials | Designed for specific roofing fasteners, pressure consistent for weatherproofing. |
| Stapler (Wide Crown) | 70 – 100 PSI | Sheathing, fencing, insulation | Drives staples, pressure varies with material thickness. |
Remember, this is a general guideline. Always check your specific tool’s manual for the manufacturer’s recommendation. Materials also play a role; softer woods might require slightly lower pressure than hardwoods to prevent over-driving.
How to Set the Correct Nail Gun Air Pressure: A Step-by-Step Guide
Now for the practical part! Follow these steps to dial in the perfect pressure for your project.
Step 1: Connect Your Tools and Check the Basics
First, ensure your air compressor is plugged in and has water drained from the tank (this is crucial for tool longevity and performance). Connect your air hose securely to the compressor’s outlet and then to your nail gun. Make sure the nail gun is on a stable surface and you are wearing your safety glasses!
Step 2: Consult Your Nail Gun Manual
As mentioned, the first place to look for recommended PSI settings is your nail gun’s manual. This will give you the ideal operating range. If you don’t have the manual, search online for the exact model number of your nailer.
Step 3: Set the Pressure on Your Compressor Regulator
Turn the adjustment knob on your compressor’s regulator counter-clockwise to release any residual pressure. Then, slowly turn it clockwise to increase the pressure. A common starting point for many nailers, especially brad and finish nailers, is around 80-90 PSI. For framing nailers, you might start higher, perhaps around 100 PSI.
Pro Tip: Always set your compressor pressure higher than your desired operating pressure initially, and then dial it down. This ensures the regulator has enough raw air to work with and can maintain a consistent output. You’ll essentially be using the regulator to lower the pressure from the tank to your tool’s needs.
Step 4: Perform a Test Drive
This is the most important step! Take a piece of scrap wood similar to what you’ll be working with for your project. Aim the nail gun at the scrap wood, keeping it perpendicular to the surface. Pull the trigger to fire a nail. Observe the result:
- Nail sunk too deep: The pressure is too high. Lower the PSI on your regulator by a few pounds (e.g., 5 PSI at a time).
- Nail sticking out: The pressure is too low. Increase the PSI on your regulator by a few pounds (e.g., 5 PSI at a time).
- Nail head is slightly proud but not problematic: This might be acceptable, or you could try a 1-2 PSI increase.
- Perfectly driven nail: You’ve found your sweet spot! The nail head should be flush with or very slightly below the surface, without damaging the wood.
Repeat this test drive, firing a few nails, after each adjustment until you achieve a consistent, perfect drive. Aim for the lower end of your tool’s recommended PSI range if you’re working with softer materials or don’t need extra driving power.
Step 5: Consider Your Material
The type of wood or material you’re fastening into matters.
- Softwoods (Pine, Fir): These require less PSI. Too much pressure can cause the nail head to sink too deeply, creating a “dent” in the wood.
- Hardwoods (Oak, Maple): These might need slightly higher PSI to ensure the nail drives fully.
- Engineered Woods (Plywood, MDF): These often behave like softwoods.
- Metal or Drywall: Specific tools exist for these, and they have their own pressure requirements, often dictated by the fastener and material thickness.
Always test on a scrap piece of the actual material you’ll be using for your project.
Step 6: Adjust for Nail Length and Type
Longer or thicker nails generally require more power (higher PSI) to drive effectively. Shorter, thinner nails (like brads or pins) need less pressure. If you switch nail sizes, you might need to make small adjustments to your PSI.
Factors Affecting Air Pressure
Several things can influence the air pressure your nailer receives, even if you’ve set your regulator correctly:
- Hose Length and Diameter: Longer and thinner air hoses create more resistance, causing a pressure drop. If you have an unusually long hose (over 50 feet) or a very thin hose (under 3/8 inch), you might need to set your regulator slightly higher to compensate for the loss. For most DIY tasks, standard 25-50 foot hoses with 1/4 inch or 3/8 inch diameter are sufficient.
- Number of Fittings: Each quick-connect fitting and swivel on your hose system adds a small amount of resistance.
- Air Compressor Duty Cycle: If you’re using a framing nailer for an extended period, your compressor might struggle to keep up, leading to pressure drops. Ensure your compressor has an adequate tank size and CFM (Cubic Feet per Minute) rating for the nailer you’re using, especially for repetitive tasks. The Compressed Air and Power blog from the U.S. Department of Energy offers great insights into optimizing compressed air systems.
- Altitude: While often a minor factor, air pressure is slightly lower at higher altitudes.
Troubleshooting Common Nail Gun Problems Related to Air Pressure
Let’s tackle some common issues you might face:
- Nails not driving fully: As discussed, this is usually low air pressure. Increase PSI gradually. Also, check for air leaks in your hose or nailer.
- Nails sinking too deep or splitting wood: This is too much air pressure. Decrease PSI. You might also be too close to the edge of the wood, which can lead to splitting.
- Nail gun not firing at all: This could be due to extremely low pressure, a safety mechanism engaged (check the nose of the gun), or a trigger issue. Ensure there’s enough air in the compressor tank and at the tool.
- Inconsistent nail depth: This often points to an air compressor that’s not keeping up (duty cycle issue) or a regulator that isn’t functioning properly. Ensure your compressor’s CFM rating meets your nailer’s requirements.
Safety First!
Nail guns are powerful tools. Always prioritize safety:
- Wear safety glasses: Always, no exceptions. Flying debris or accidental nail discharge can cause serious eye injury.
- Understand sequential vs. contact trip triggers: Most DIYers use contact trip (fire when you push the nose and pull the trigger). Be aware that bumping the trigger while the nose is depressed will fire a nail. Never point the nailer at yourself or others.
- Disconnect air when not in use: When changing nails, clearing jams, or leaving the tool unattended, disconnect the air hose.
- Keep fingers away from the trigger: Don’t “carry” the nailer with your finger on the trigger.
- Ensure the tool is right for the job: Using a framing nailer for delicate trim will cause damage.
For more detailed safety information, consult resources from organizations like the Occupational Safety and Health Administration (OSHA) regarding power tool safety.
What is Nailer Depth of Drive and How is it Related to Air Pressure?
The “depth of drive” is simply how deep the nail penetrates the surface of your material. Air pressure is the primary factor influencing this. When you adjust your air pressure, you are directly controlling the force that determines the depth of drive. A higher PSI generally leads to a deeper drive, and a lower PSI results in a shallower drive. While some advanced nail guns have a depth-of-drive adjustment wheel or knob directly on the tool, this adjustment typically works by slightly altering airflow or the piston’s travel, which is still fundamentally controlled by the main air pressure setting from your compressor.
FAQs About Nail Gun Air Pressure
Q1: What’s the best starting air pressure for a brad nailer on pine wood?
A: A good starting point for a brad nailer on pine wood is typically around 70-80 PSI. Always perform a test shot on a scrap piece and adjust up or down by 5 PSI increments until the brad drives flush without damaging the wood.
Q2: Can I use the same air pressure for framing nails and finish nails?
A: Generally, no. Framing nailers require higher PSI (70-120 PSI) to drive larger nails into tougher materials. Finish nailers need less pressure (60-100 PSI) for smaller nails and delicate work. Using the same pressure would likely overdrive finish nails or underdrive framing nails.
Q3: My nail gun is only firing weakly, what could be wrong?
A: This is usually low air pressure. First, check your compressor tank pressure and ensure it’s built up. Then, check the regulator setting on your compressor. Also, inspect your air hose for leaks, as even a small puncture can significantly reduce pressure at the tool.
Q4: How do I know if my air compressor has enough power for my nail gun?
A: Check the CFM (Cubic Feet per Minute) rating of your air compressor and compare it to the CFM requirement of your nail gun (found in its manual). The compressor’s CFM output should meet or exceed the nail gun’s demand, especially if you’ll be using it continuously.
Q5: What is the ideal air pressure for driving nails into hardwood floors?
A: For hardwood flooring, you’ll likely need a flooring nailer and a higher PSI setting, often in the 80-100 PSI range. The nailer needs to overcome the density of hardwoods. Always test on a scrap piece of the hardwood flooring material to ensure you don’t indent the surface.
Q6: Is it okay to set my nail gun pressure higher than the maximum recommended by the manufacturer?
A: Absolutely not. Exceeding the recommended PSI range can damage your nail gun, cause premature wear on seals, and lead to dangerous malfunctions. Always stay within the tool’s specified operating range.
Conclusion
There you have it! You’re now armed with the knowledge to confidently set your nail gun’s air pressure for perfect results on any project. Remember, the key is to start within the recommended range, perform test drives on your specific material, and make small adjustments until you hit that sweet spot. Don’t rush it; a few extra minutes spent dialing in the pressure will save you time and frustration down the line, and give your projects that polished, professional look. Keep practicing, stay safe, and enjoy building!