Build a stunning modern acacia wood console table with this easy-to-follow plan! Even beginners can create a beautiful, durable piece with simple tools and clear steps. Get ready for a rewarding DIY project that adds style and function to your home.
Hey there, fellow DIY enthusiasts! Jack Shaffer here, your go-to guy for all things woodworking and nailing. Ever walked into a furniture store and spotted that sleek, modern console table made of beautiful acacia wood, only to wince at the price tag? I know I have! These tables look fantastic in entryways, behind sofas, or even as a stylish desk.
But the cost can be a real barrier. Don’t let that stop you from getting the look you love. I’m here to show you that building your own modern acacia wood console table is totally achievable, even if you’re just starting out. We’ll break down the whole process into simple, manageable steps. Get ready to build something you’ll be proud of!
Table of Contents
Why Choose a Modern Acacia Wood Console Table Plan?
Acacia wood is a fantastic choice for furniture, and a modern console table build is perfect for beginners. Why? Let’s break it down.
Acacia wood is known for its beautiful, natural grain patterns and rich color. It’s strong and durable, making it a great material for a piece of furniture that will see daily use. Plus, its natural beauty requires minimal finishing to look amazing. Choosing a modern design means cleaner lines and simpler construction, which is ideal when you’re just getting your DIY legs under you.
This project is about more than just saving money. It’s about the satisfaction of creating something with your own two hands. You get to pick the exact dimensions to fit your space perfectly and choose a finish that matches your decor. And let’s be honest, bragging rights about your DIY skills? Priceless!
Tools and Materials You’ll Need
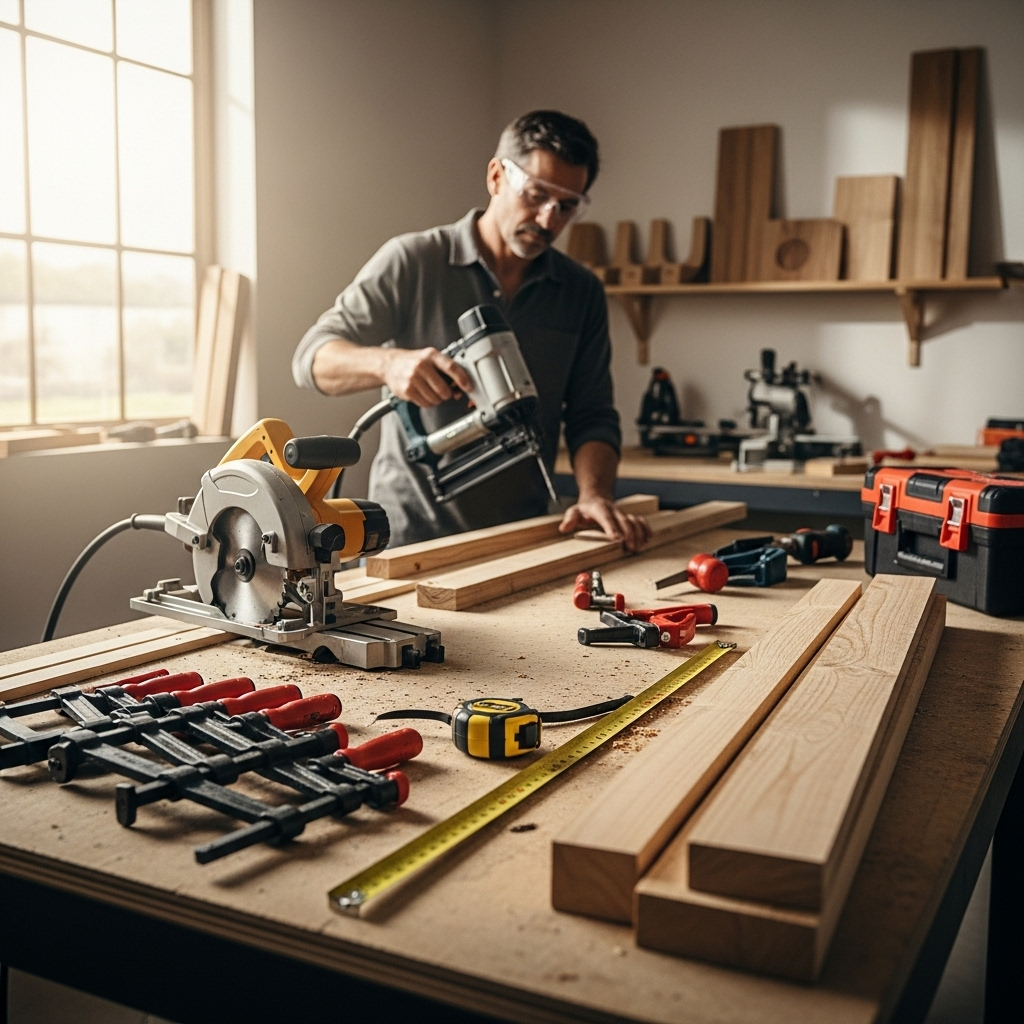
Before we start cutting and assembling, let’s gather our gear. Having everything ready makes the building process smooth and enjoyable. Safety first, always!
Essential Tools:
- Measuring Tape: For accurate measurements.
- Pencil: To mark your cuts.
- Safety Glasses: Protect those eyes! This is non-negotiable.
- Hearing Protection: Essential when using power tools.
- Dust Mask: Keep those airways clear, especially when sanding.
- Circular Saw or Miter Saw: For making straight and angled cuts. A miter saw is great for precise cuts, but a good circular saw will work too! For more on choosing a saw, check out this guide from Popular Mechanics.
- Drill/Driver: For pre-drilling holes and driving screws.
- Sander (Orbital or Belt): To smooth out the wood. An orbital sander is usually easier for beginners.
- Clamps: To hold pieces together while gluing or assembling.
- Wood Glue: A strong bond is key!
- Screws: Wood screws suitable for your project.
- Dovetail Saw or Hand Saw (Optional): If you decide to add some traditional joinery.
- Router (Optional): For creating decorative edges or dados.
Materials:
- Acacia Wood Boards: The star of the show! The number and size will depend on your chosen dimensions. Look for kiln-dried boards to minimize warping.
- Wood Screws: Appropriate length and gauge.
- Wood Glue: High-quality wood glue.
- Sandpaper: Various grits (e.g., 80, 120, 220).
- Wood Finish: Stain, polyurethane, oil, or wax, depending on your desired look.
- Wood Filler (Optional): To fill any small gaps or imperfections.
Designing Your Modern Acacia Wood Console Table
The beauty of a DIY plan is that you can customize it. Here are some typical dimensions for a modern console table, but feel free to adjust them!
A common size for a modern console table might be:
Length: 48 to 60 inches
Depth: 12 to 16 inches
Height: 28 to 32 inches
For this guide, let’s assume we’re building a table that is:
Length: 50 inches
Depth: 14 inches
Height: 30 inches
This will give us a good starting point. You’ll need to calculate the lengths of the individual pieces based on these overall dimensions.
Cutting List Example (for 50″ L x 14″ D x 30″ H table):
This is a simplified example. Your actual cuts will depend on the thickness of your wood and how you plan to join the pieces.
| Part | Quantity | Length | Width/Depth | Notes |
|---|---|---|---|---|
| Tabletop | 1 | 50 inches | 14 inches | Can be made from 2 boards joined together |
| Legs | 4 | 29.25 inches | 1.5 inches (or width of your stock) | Subtract thickness of tabletop from total height to get leg length. Adjust if using aprons. |
| Aprons (Front/Back) | 2 | 47 inches | 3 inches | Length will be tabletop length minus 2x width of side aprons (if side aprons are inset) or 2x leg width (if flush). |
| Aprons (Sides) | 2 | 11 inches | 3 inches | Length will be tabletop depth minus 2x leg width (if flush). |
Note: These are example dimensions. Always double-check your measurements and account for wood thickness before cutting.
Step-by-Step Building Guide
Now for the fun part! Let’s get building. Remember to measure twice, cut once, and always prioritize safety.
Step 1: Prepare Your Wood
Inspect your acacia wood boards. Ensure they are flat and free of major knots or defects that could compromise strength. If your boards are rough-sawn, you’ll need to mill them flat and square using a jointer and planer, or have them processed at a lumberyard. If you’re using pre-milled lumber, double-check its dimensions.
If you are joining boards to make a wider tabletop, you’ll want to prepare the edges for joining. Typically, this involves running a router with a straight bit along the edge of each board, or ensuring your saw blade is set to a perfect 90-degree angle for a clean, square cut. The goal is a tight, gap-free seam.
Step 2: Cut Your Pieces
Using your chosen saw (circular or miter saw), carefully cut all the pieces according to your cutting list. If you’re making a tabletop from multiple boards, cut those to length first. For the legs and aprons, accuracy is key. A miter saw will give you the cleanest, most precise cuts, especially for ensuring the tops and bottoms of your legs are perfectly square.
Pro Tip: For the tabletop, if you’re joining two boards, make your final cuts on both pieces so they have perfectly straight edges that will mate together. A slight bevel along the joining edge can also help create a tighter joint if your setup isn’t perfectly aligned.
Step 3: Assemble the Tabletop
Lay out the boards for your tabletop side-by-side on a flat surface. Apply a generous amount of wood glue to the mating edges. Bring the boards together and use clamps to hold them tightly. For extra strength, you can also use pocket hole screws or dowels on the underside of the tabletop to reinforce the glue seam. Wipe away any excess glue that squeezes out with a damp cloth before it dries.
Allow the glue to cure completely according to the manufacturer’s instructions. This usually takes at least a few hours, but 24 hours is best for maximum strength. Once dry, carefully remove the clamps. If needed, sand the assembled tabletop to ensure it’s perfectly flat and smooth. You can use a belt sander for initial flattening, followed by an orbital sander for a smoother finish up to 220 grit.
Step 4: Build the Base Frame (Aprons and Legs)
This is where your table starts to take shape. You’ll typically attach the aprons to the legs. There are several ways to do this:
- Pocket Holes: This is a beginner-friendly method. Drill pocket holes on the ends of your apron pieces. Then, position the aprons flush with the top of your legs (or inset slightly, depending on your design). Use wood glue and pocket hole screws to attach the aprons to the legs. Ensure the legs are square to the aprons. You can create two side assemblies (two legs with a side apron) and two front/back assemblies (two legs with front/back aprons), then join them.
- Dowels or Biscuits: These methods require a bit more precision and specialized jigs but create very strong, hidden joints.
- Mortise and Tenon: This is a more traditional and robust joinery technique. It involves cutting a “mortise” (a hole or slot) in the leg and a “tenon” (a tongue) on the end of the apron that fits snugly into the mortise. This is advanced and might be a good project for later!
For our beginner-friendly approach, we’ll focus on pocket holes or simple butt joints reinforced with glue and screws.
Using Pocket Holes:
- Drill pocket holes on the inside ends of your apron pieces.
- Temporarily assemble the base frame (all four legs and four aprons) on a flat surface. Measure diagonally from corner to corner to ensure the frame is square. Adjust as needed before permanently fastening.
- Apply wood glue to the leg where the apron will attach.
- Position the apron and drive pocket hole screws to secure it. Repeat for all four corners. Ensure the legs are perpendicular to the aprons.
Make sure the top edge of your aprons is flush with the top edge of the legs if you plan to attach the top directly to the aprons. Or, if you are recessing the tabletop slightly, ensure the aprons are set down by the desired amount.
Step 5: Attach the Tabletop to the Base
Once your tabletop is smooth and your base frame is assembled and square, it’s time to join them. There are a few ways to do this:
- Pocket Holes: The easiest way for beginners. From the inside of the apron frame, drill pocket holes angled upwards into the underside of the tabletop. Use wood glue and these pocket holes to attach the top securely.
- Figure-8 Fasteners or Z-Clips: These metal fasteners are designed to allow for wood movement due to changes in humidity. They are attached to the inside of the aprons and then screwed into the tabletop. This is a more advanced but recommended method for longer tables or if you live in a humid climate. For more on wood movement, you can read up on it at Wood Magazine.
Position the tabletop centered on the base. Working from the inside out, attach the top using your chosen method. Ensure the glue is applied to the aprons where they meet the tabletop (if using that method) and drive screws or fasteners.
Step 6: Sanding and Finishing
This is where your table really comes to life! Start with a coarser grit sandpaper (e.g., 80 or 120) to remove any imperfections, glue marks, or unevenness. Gradually work your way up to finer grits (e.g., 180, then 220) for a super smooth finish. Sand in the direction of the wood grain. For edges and corners, you can slightly round them over with sandpaper or a router for a softer feel and a more modern look.
Wipe down the entire table with a tack cloth or a slightly damp rag to remove all dust. Now, apply your chosen finish. Stain can add depth and color, while a clear protective coat like polyurethane or a natural oil finish will let the beautiful acacia grain shine through.
Apply your finish according to the product’s instructions. This usually involves applying thin, even coats with a brush, cloth, or sprayer, allowing drying time between coats, and often light sanding with very fine grit sandpaper (320 or 400) between coats for a glassy smooth result. For a rich, durable finish, multiple coats are recommended. A good quality polyurethane offers excellent protection against spills and wear.
Achieving a Modern Aesthetic
To really nail the “modern” look for your acacia wood console table, consider these design elements:
- Clean Lines: Keep the overall design simple and uncluttered. Avoid ornate carvings or decorative trim.
- Minimalist Hardware: If you add drawers or doors (which can be a more advanced step), opt for sleek, unadorned hardware like simple metal pulls or integrated finger pulls.
- Leg Style: Straight, tapered legs, or even hairpin metal legs can enhance the modern feel. Ensure your wooden legs are square or have a subtle taper.
- Finish Choice: A clear, satin, or matte finish will emphasize the natural beauty of the acacia without being overly glossy, which can sometimes look dated.
Troubleshooting Common Issues
DIY projects don’t always go perfectly, and that’s okay! Here are a few common issues and how to fix them.
Issue: Gaps in the Tabletop Seam
Solution: If you notice small gaps after assembly, you can fill them with a color-matched wood filler or an epoxy resin mixed with sawdust from your acacia wood. For larger gaps, you might need to re-glue or consider a decorative inlay.
Issue: Wobbly Table
Solution: This usually means the legs aren’t perfectly square to the aprons or the floor isn’t level. Double-check all your joints. If it’s just a slight wobble, you can add felt pads or shims to the bottom of the legs. For a more substantial wobble, you may need to reinforce the leg-to-apron joints.
Issue: Uneven Finish
Solution: This often happens when the finish is applied too thickly by hand, or if the surface wasn’t properly sanded and cleaned of dust. Lightly sand the affected area with very fine-grit sandpaper (400+) and reapply the finish in thin, even coats.
Frequently Asked Questions (FAQ)
Q1: Is acacia wood good for beginners?
A1: Absolutely! Acacia wood is relatively easy to work with, it’s durable, and its natural beauty means you don’t need a complex finish to make it look great. It’s a forgiving wood for DIYers.
Q2: How much does it cost to build a modern acacia wood console table?
A2: The cost varies greatly depending on the size of the table and the price of acacia wood in your area. However, building it yourself is almost always significantly cheaper than buying a pre-made one, potentially saving you hundreds of dollars.
Q3: What is the best way to join acacia wood for a tabletop?
A3: For a strong and seamless joint, wood glue combined with pocket holes or dowels is excellent for beginners. More advanced options include biscuits or traditional mortise and tenon joints. Ensure the edges of the wood are perfectly straight before joining.
Q4: What kind of finish should I use on an acacia wood table?
A4: A clear, durable finish like polyurethane (satin or matte is popular for modern looks) is great for protection. Natural oil finishes (like tung oil or linseed oil) enhance the wood’s grain and color but may require more frequent reapplication. For a modern aesthetic, avoid high-gloss finishes unless that’s specifically your goal.
Q5: Do I need specialized tools to build this table?
A5: You can build a simple console table with basic tools like a saw, drill, sander, and clamps. For cleaner cuts and easier joinery, tools like a miter saw and a pocket hole jig are highly recommended for a beginner project.