Have you ever wondered how to make your roofing projects easier? Are you tired of using the wrong tools and struggling with your nails? A Milwaukee framing nailer might be just the answer you need.
This tool is not just powerful; it can save you a lot of time. Picture this: You’re up on a roof, and the sun is blazing. The last thing you want is to be struggling with every single nail. With a Milwaukee framing nailer, you can quickly and easily secure your materials. It’s like having an extra pair of hands!
In this article, we will explore simple setup instructions for using the Milwaukee framing nailer. You’ll learn tips and tricks to make your roofing projects smoother. So grab your nailer and let’s get started on making your roofing easier and faster. Trust us, you don’t want to miss this!
Table of Contents
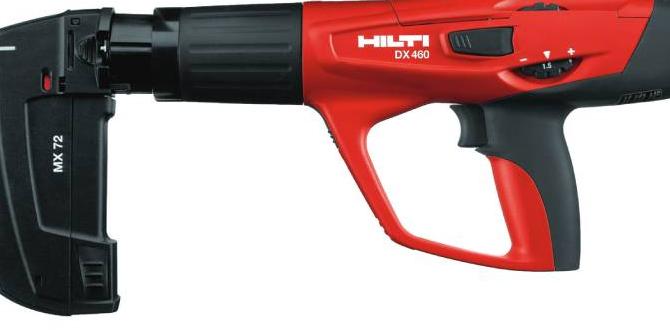
Milwaukee Framing Nailer For Roofing Setup Instructions

Milwaukee Framing Nailer for Roofing Setup Instructions
Using a Milwaukee framing nailer for roofing can make your project faster and easier. Start by gathering all your tools. It’s important to read the instruction manual, as each nailer may have unique features. Properly load the nails and adjust the depth for different materials. Have you ever struggled with uneven roofing? The right setup helps you avoid that. Following these simple steps ensures your nails go in smoothly, leading to a strong roof. Keep safety in mind, and enjoy your next roofing project!Preparing for Your Roofing Project
Essential safety gear and precautions. Collecting necessary tools and materials for setup.Your roofing project can be exciting but requires careful preparation. Start with safety gear. This includes a hard hat, gloves, and safety goggles. All of these help protect you from falling debris and sharp tools. Always check your equipment for any damage before starting.
Next, gather your tools and materials:
- Milwaukee framing nailer
- Nails
- Measuring tape
- Safety harness
- Roofing shingles
Having everything ready makes the job smoother and safer. Remember, safety first helps keep the fun in your project!
What safety gear is needed for roofing?
Essential safety gear includes hard hats, gloves, and safety goggles. These prevent injuries while you work on your roof.
What tools do I need for setup?
You’ll need a Milwaukee framing nailer, nails, and a measuring tape to complete the setup.
Step-by-Step Setup Instructions
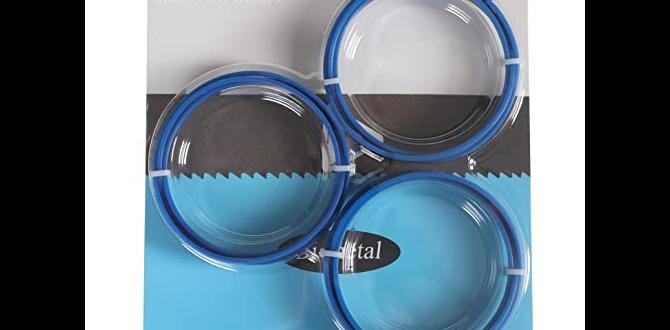
Detailed instructions for assembling the framing nailer. Installing the correct nails for roofing applications.First, grab your Milwaukee framing nailer and check that it’s all in one piece. You don’t want to be missing parts unless you’re going for the modern art look! Start by attaching the handle and the body. Use screws from the kit; they’re your nails’ BFFs. Then, pick the right nails for roofing. For this, 2 to 3-inch nails work great. Make sure to load them into the magazine correctly, like a pro! Remember, avoid using the wrong size, or you might end up with a surprise nail situation, and not the fun kind!
| Nail Length | Application |
|---|---|
| 2 inches | Thin roofing materials |
| 3 inches | Thicker shingles |
Adjusting Settings for Optimal Performance
Guide to setting depth and pressure adjustments. Tips for troubleshooting common performance issues.Getting the depth and pressure just right on your nailer is like tuning a guitar. If it’s off, you’ll end up with a cacophony of problems! Start by adjusting the depth dial. Turn it until the nail sits snugly against the surface without sticking out like a sore thumb. Next, check the pressure settings. Too high, and you might risk splitting wood; too low, and your nail might vanish into the void!
| Common Issues | Tips to Fix |
|---|---|
| Nails sink too deep | Lower pressure settings! |
| Nails don’t drive in | Increase the pressure |
| Misfiring | Check for jammed nails |
Regular maintenance can stop many of these issues in their tracks. Clean out the nailer often, and you’ll be laughing all the way to the roof!
Best Practices for Using the Nailer on Roofing
Techniques for efficient nailing patterns on roofing materials. Recommendations for maintaining consistent nail spacing.Using a nailer on roofs can be fun, like playing with a high-tech hammer! Start with clear nailing patterns. Lay out your materials and plan your nail locations. This will keep your roof looking neat and safe!
Consistent nail spacing is key. Aim for about 6 to 8 inches apart. This spacing helps the roof stay strong against wind and rain. A reliable method is to use a small piece of wood as a spacer. This can be your trusty sidekick!
| Spacing | Notes |
|---|---|
| 6 inches | Best for shingles in high winds |
| 8 inches | Good for regular conditions |
So grab that Milwaukee nailer and nail away! Happy roofing!
Maintenance and Care for Longevity
Regular maintenance tasks to keep the nail gun in top condition. Signs that your framing nailer may need professional service.Keeping your nail gun happy is a bit like pet care. Regular maintenance is key! Check for dirt and clear out any debris. Oiling your Milwaukee framing nailer keeps it smooth, like butter on toast. Inspect the nails and magazine for jams six times a day, just like those pesky 6th graders checking their phones.
If it starts making funny noises or declines your friendship, it might be time for a vet visit—uh, we mean, a professional service! Look for signs like misfires or air leaks. Treat your tool well, and it will last longer than your favorite pair of socks.
| Maintenance Tasks | Signs for Service |
|---|---|
| Clean and oil regularly | Unusual sounds |
| Check for jams | Misfires |
| Inspect the air hose | Air leaks |
Common FAQs About Milwaukee Framing Nailers
Answers to frequently asked questions from users. Tips on warranty and customer support options.Many folks have questions about Milwaukee framing nailers. Here, we’ve answered some common ones to help you out. First up, how long is the warranty? Most Milwaukee nailers come with a strong warranty that lasts up to three years. Customer support is also top-notch, ready to assist if you encounter issues. Additionally, don’t forget to check the manual for tips on maintenance—it’s like a treasure map for your tool! For quick reference, take a look at the table below:
| Question | Answer |
|---|---|
| What is the warranty period? | Up to three years |
| Where can I get support? | Visit Milwaukee’s official website |
Conclusion
In summary, using a Milwaukee framing nailer for roofing is straightforward with the right instructions. You’ll need to choose the right nail size, set the depth correctly, and maintain your tool. We encourage you to practice on scrap materials before starting your project. For more detailed tips, check out user guides or videos online to boost your skills!FAQs
What Type Of Milwaukee Framing Nailer Is Best Suited For Roofing Applications?The best Milwaukee framing nailer for roofing is the Milwaukee 2745-20. It is a cordless nailer, which means you don’t need a hose. This tool shoots nails quickly, making your work faster. It works well for putting on roofs. You’ll find it easy to use and very handy!
How Do You Properly Set Up The Milwaukee Framing Nailer For Roofing Materials?To set up the Milwaukee framing nailer for roofing, first, choose the right nails for roofing. Next, load the nails into the gun. Then, adjust the depth setting to fit the roofing material. Finally, check the air compressor to make sure it’s working well. Now you’re ready to use your nailer!
What Nail Sizes And Types Are Recommended For Use With A Milwaukee Framing Nailer When Roofing?You should use 1.75-inch to 2.5-inch nails with your Milwaukee framing nailer for roofing. These nails are often called framing or roofing nails. They hold the shingles tightly to the roof. Make sure the nails are suited for outdoor use, so they don’t rust. This way, your roof will stay strong and safe!
Are There Specific Safety Precautions To Take When Using A Milwaukee Framing Nailer On A Roofing Project?Yes, there are safety precautions you should follow. Always wear safety goggles to protect your eyes. Use gloves to keep your hands safe from sharp edges. Make sure your workspace is clean and free from tripping hazards. Always point the nailer away from yourself and others when you use it.
How Can You Maintain And Troubleshoot A Milwaukee Framing Nailer During Roofing Work?To keep your Milwaukee framing nailer working well, check the air compressor and make sure it has good pressure. Clean the nailer regularly to remove dust and debris. If it jams, turn it off, clear the jam, and restart it. Also, check for loose parts and tighten them if needed. By doing these things, you can help it work smoothly while you’re roofing.