Making a wooden napkin holder stand is a fantastic, beginner-friendly woodworking project that adds rustic charm and practical organization to any dining table. This guide provides clear, step-by-step instructions using common tools and materials, ensuring a successful and rewarding build.
Tired of flimsy paper napkins sliding off the table or looking less-than-stylish? You’re not alone! A well-made wooden napkin holder is more than just an accessory; it’s a statement piece that keeps your napkins tidy and accessible. Many store-bought options feel a bit… uninspired. But guess what? You can craft your own, and it’s easier than you think! This project is perfect for anyone new to woodworking. We’ll walk through every step, from picking your wood to the final finish. Get ready to impress yourself and your guests with your new DIY skill and a beautiful, functional napkin holder!
Table of Contents
Why Make Your Own Wooden Napkin Holder?
There are tons of reasons why building your own wooden napkin holder is a stroke of genius, especially for us DIY enthusiasts. It’s not just about saving a few bucks (though that’s a nice bonus!), it’s about the satisfaction, the customization, and the sheer fun of creating something with your own hands.
- Customization is King: Store-bought holders come in limited styles and finishes. When you make your own, you’re the designer! Choose the exact wood species, stain color, or even add decorative elements to match your kitchen or dining room decor perfectly. Want a modern farmhouse look? A sleek, minimalist design? A rustic, reclaimed wood vibe? You got it.
- Skill Building for Beginners: This project is a fantastic entry point into woodworking. It involves basic cuts, simple assembly, and finishing techniques that are fundamental to many other DIY projects. You’ll learn to measure, cut accurately, and join pieces securely – all valuable skills for future endeavors.
- Impressive Results, Simple Process: Don’t let the word “woodworking” intimidate you. This project is designed to be straightforward. With basic tools and clear instructions, you’ll achieve professional-looking results that will make you proud. It’s a quick win that boosts your confidence.
- Cost-Effective: Buying decent quality napkin holders can add up. Using common lumber and basic hardware, you can often create a superior product for a fraction of the retail price. It’s a budget-friendly way to add functional beauty to your home.
- Eco-Friendly Options: You can use scrap wood, reclaimed lumber, or sustainably sourced wood, making your project even more environmentally conscious. Giving old wood new life is incredibly rewarding.
- The Perfect Gift: A handmade wooden napkin holder makes a thoughtful and personal gift for weddings, housewarmings, or holidays. It’s a gift with a story, made with love.
Materials and Tools You’ll Need
Alright, let’s talk about what you’ll need to get this project done. The beauty of this build is that you likely have many of these items already, or they’re relatively inexpensive to acquire. We’re aiming for simplicity and accessibility here.
Materials List
Here’s a rundown of the bits and pieces you’ll need. Don’t worry if you’re not familiar with all the terms; I’ll explain them as we go.
- Wood: For this project, I recommend using common pine, poplar, or oak boards that are about 3/4 inch thick. You’ll need a piece about 6 inches wide and roughly 3 feet long. Pine is budget-friendly and easy to work with for beginners.
- Wood Glue: A good quality wood glue is essential for strong joints. Titebond II or Titebond III are excellent choices.
- Sandpaper: You’ll need a few grits: 120-grit for initial shaping and smoothing, and 220-grit for a fine finish. A sanding block or an orbital sander makes this easier.
- Finish: This could be a stain, paint, wax, or a clear coat like polyurethane. Choose something that complements your decor.
- Optional: Small screws or brad nails: For extra reinforcement if you prefer, though glue alone is often sufficient. If using, I recommend non-rusting ones like brass or stainless steel.
Tools List
These are the workhorses that will help you bring your napkin holder to life:
- Measuring Tape: For accurate measurements.
- Pencil: For marking your cuts.
- Safety Glasses: Absolutely crucial for protecting your eyes. Always wear them when cutting or sanding!
- Miter Saw or Hand Saw: A miter saw makes angled cuts easy and accurate. However, a good hand saw and a miter box will also work perfectly fine!
- Clamps: At least two clamps are needed to hold pieces together while the glue dries. Bar clamps or pipe clamps work well.
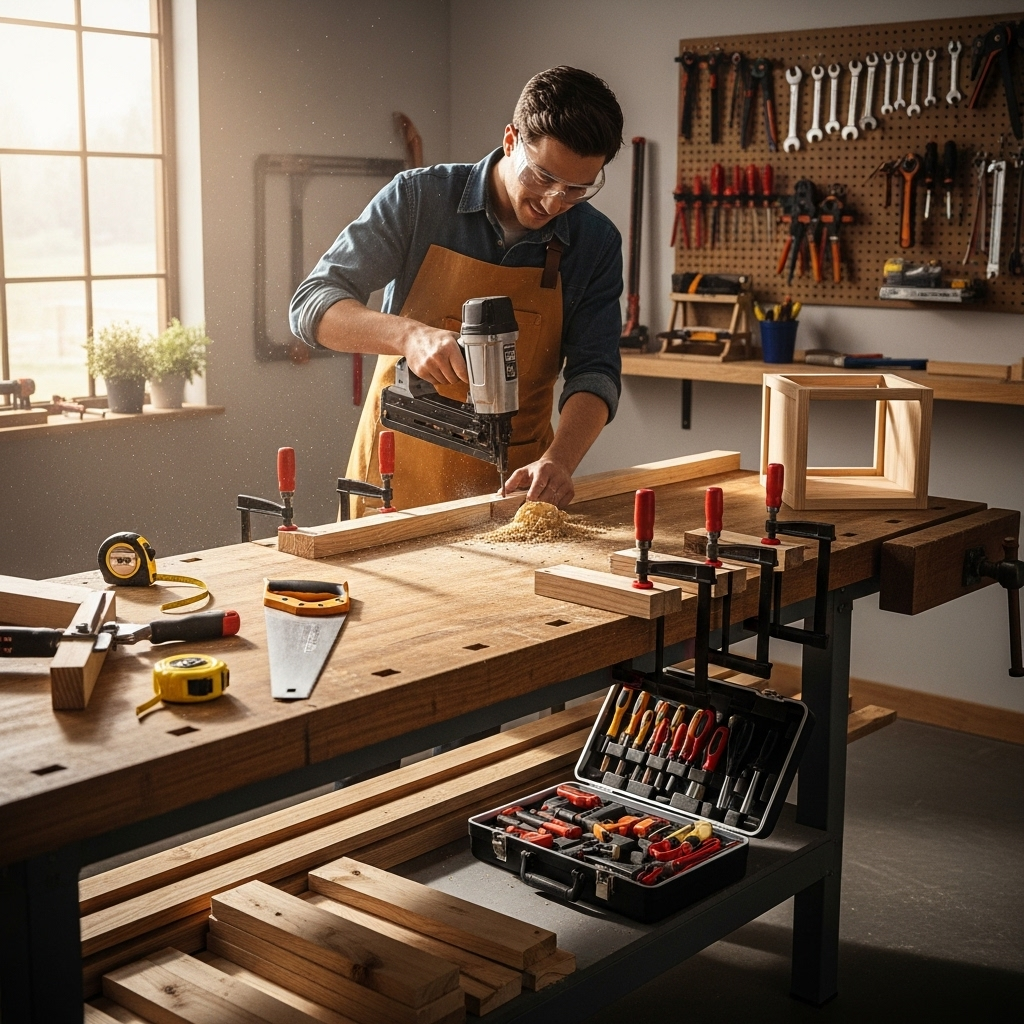
- Optional: Nailer (Brad or Finish Nailer): If you have one, a brad nailer or finish nailer can make assembly quicker and provide extra holding power. I’m a big fan here at Nailerguy! A 16-gauge nailer is usually suitable for this type of project.
- Optional: Router with a roundover bit: For softening the edges and giving a more finished look.
- Optional: Drill with drill bits: If you decide to pre-drill for screws or countersink.
Design Plans and Measurements
Let’s get down to the nitty-gritty of the design. This is a fairly standard design that works with most standard-sized napkins.
We’ll be making a napkin holder with a solid base, two side supports, and a back support. For a standard dinner napkin (around 7×7 inches when folded), these dimensions should work beautifully.
| Part | Quantity | Material Thickness | Dimensions (Length x Width) |
|---|---|---|---|
| Base | 1 | 3/4 inch | 7 inches x 5 inches |
| Side Supports | 2 | 3/4 inch | 6 inches (height) x 5 inches (depth) |
| Back Support | 1 | 3/4 inch | 7 inches x 3 inches |
| Optional: Front Lip | 1 | 3/4 inch | 7 inches x 1.5 inches |
Why these dimensions?
- The 7-inch length for the base and back support easily accommodates the width of most folded napkins, preventing them from spilling out.
- The 5-inch width of the base and sides provides good stability.
- The 6-inch height of the side supports is enough to hold the napkins upright without being too tall.
- The 3-inch height for the back support is just enough to act as a stopper.
- The optional 1.5-inch front lip adds a nice detail and helps keep napkins from sliding forward, especially if they’re fewer in number.
We’ll be making some cuts, including some angled ones for the side supports to give it a slightly more finished look. This enhances stability and aesthetics. For the side pieces (Part #2), we’ll cut the top edge at a slight angle, say 10-15 degrees, so it slopes down towards the front. This isn’t strictly necessary, but it looks sharp! If you’re using a miter saw, setting the bevel is straightforward. If you’re using a hand saw, you can try to freehand it or use a protractor to mark the angle.
Step-by-Step Guide: Making Your Napkin Holder
Let’s get our hands a little dusty and build this thing! Follow these steps carefully, and you’ll have a fantastic napkin holder in no time. Remember, safety first – always wear your safety glasses!
Step 1: Measuring and Cutting the Wood
This is where precision counts. Measure twice, cut once! Using your measuring tape and pencil, mark the dimensions onto your chosen wood board.
- Mark your cuts: Carefully mark the following pieces on your 3/4-inch thick board:
- One piece for the Base: 7 inches x 5 inches
- Two pieces for the Side Supports: 6 inches (tallest point) x 5 inches (depth). You’ll need to cut the top edge of these at a slight angle (e.g., 15 degrees) so they slope down towards the front. If you’re cutting a simple rectangle for the sides first, you can always trim the angle later.
- One piece for the Back Support: 7 inches x 3 inches
- (Optional) One piece for the Front Lip: 7 inches x 1.5 inches
- Make the cuts: Using your miter saw or hand saw, carefully cut out all the marked pieces. If you’re cutting the angled tops on the side supports with a miter saw capable of bevel cuts, set your saw to the desired angle (15 degrees is a good start) and make the cut along the top edge of both side pieces. Ensure the angle on both pieces is identical and slopes in the same direction.
Pro Tip: If you’re new to angled cuts, it might be easier to cut two rectangles for the side supports first (6″ x 5″) and then trim the angle off the top later. Or, practice on some scrap wood first to get a feel for your saw and the angle.
Step 2: Sanding the Pieces
Smoothness is key to a great finish. Before assembly, it’s much easier to sand all the individual pieces.
- Initial Sanding: Start with your 120-grit sandpaper. Sand all the surfaces and edges of your cut pieces. Pay special attention to any rough edges or saw marks. If you have a router with a roundover bit, now is a great time to gently round over the exposed edges of the base, back, and front lip pieces for a softer feel and look.
- Finer Sanding: Once you’re satisfied with the smoothness from the 120-grit, switch to your 220-grit sandpaper. Give everything a final pass. This will make the wood feel silky smooth and ready for finishing.
- Clean Up: Wipe away all the sawdust with a tack cloth or a slightly damp rag. Lingering dust will ruin your finish.
Safety Note: Always wear a dust mask when sanding, especially if you’re sanding indoors. Wood dust can be harmful.
Step 3: Assembling the Base and Sides
This is where our napkin holder starts taking shape! We’ll use wood glue for a strong bond.
- Apply Glue: Take the Base piece (7″ x 5″). Apply a bead of wood glue along one of the 5-inch edges of the Base piece, where one of the Side Supports will attach.
- Attach First Side Support: Position one of the Side Support pieces (6″ x 5″) onto the glued edge of the Base. Ensure the bottom edge of the Side Support is flush with the bottom of the Base, and the 5-inch depth of the side lines up perfectly with the 5-inch width of the base. The angled top should slope downwards towards where the front of your napkin holder will be.
- Clamp and Secure: Clamp the Side Support firmly in place. If you’re using screws or brad nails, now is the time to add them. Drive two or three 1.25-inch brad nails or screws through the Side Support into the edge of the Base. If using screws, it’s a good idea to pre-drill pilot holes smaller than your screw diameter to prevent the wood from splitting.
- Repeat on the Other Side: Apply glue to the opposite 5-inch edge of the Base. Attach the second Side Support, making sure it mirrors the first one (same height, same angle slope). Clamp and secure with nails or screws as you did before.
Important: Make sure the Side Supports are perfectly perpendicular (90 degrees) to the Base. Misalignment here will make the whole project look wonky.
Step 4: Attaching the Back Support
This piece will stop your napkins from sliding out the back.
- Apply Glue: Apply wood glue to the back edges of both Side Supports and the corresponding section of the Base where the Back Support will sit.
- Position the Back Support: Place the Back Support piece (7″ x 3″) onto the glued edges. It should fit snugly between the two Side Supports and rest on top of the Base. The 7-inch length of the Back Support should be flush with the outer edges of the Side Supports.
- Clamp and Secure: Clamp the Back Support in place. Drive nails or screws through the back of the Back Support into the edges of the Side Supports and the Base. Again, pre-drilling is recommended if using screws. Make sure the assembly is square.
At this point, you should have a U-shaped structure with a solid base, two angled sides, and a solid back. It’s really starting to look like a napkin holder!
Step 5: Adding the Front Lip (Optional)
This step adds a professional touch and extra functionality.
- Test Fit: Place your assembled napkin holder on a flat surface. Position the 7″ x 1.5″ Front Lip piece along the front edge of the Base, beneath the angled slope of the Side Supports. It should sit neatly on top of the Base and against the bottom front edge of the Side Supports.
- Apply Glue: Apply wood glue to the top surface of the Base where the lip will sit, and to the front edges of the Side Supports where the lip will meet them.
- Position and Secure: Place the Front Lip in position. Clamp it securely. Drive a couple of brad nails or screws through the Front Lip into the Base and into the bottom front edge of the Side Supports.
Step 6: Final Sanding and Prep for Finish
We’re almost there! A little more sanding to make it perfect.
- Smooth Everything: Do a light sanding with your 220-grit sandpaper over the entire assembled holder. This helps to blend any joints and ensures a uniformly smooth surface for your finish.
- Clean Again: Thoroughly wipe down the entire napkin holder with a tack cloth or a slightly damp rag to remove all traces of sawdust. This is critical for a clean finish.
Step 7: Applying the Finish
This is where your napkin holder gets its personality!
- Choose Your Finish: Decide if you want a natural wood look, a stained look, or a painted finish.
- Apply Stain or Paint:
- Stain: If staining, apply your chosen wood stain according to the manufacturer’s instructions. Use a clean cloth or brush. Wipe off any excess stain after the recommended time. Let it dry completely.
- Paint: If painting, apply a primer first, followed by 1-2 coats of your chosen paint color. Lightly sand between coats with 220-grit sandpaper for a super smooth finish.
- Apply Protective Top Coat: Once your stain or paint is completely dry, apply a clear protective top coat. Polyurethane (oil-based or water-based), lacquer, or a furniture wax will protect the wood from moisture and wear. Apply 2-3 thin coats, allowing each coat to dry thoroughly and lightly sanding with very fine grit sandpaper (320-grit or higher) between coats if recommended by the product.
- Cure Time: Allow the finish to cure fully (this can take several days to a week depending on the product) before putting it into heavy use.
External Resource: For detailed information on wood finishing techniques, the <a href="https://www.woodworkingnetwork.