Make strong, safe wooden rails by following this simple guide. Learn how to select the right wood, cut your pieces accurately, and securely attach them for a beautiful and functional result.
Ever looked at a staircase and admired its railings? They’re more than just decoration; they’re crucial for safety and stability. But if your current rails are wobbly, outdated, or missing altogether, you might be wondering how to make new ones. It can seem like a big job, right? Don’t worry! With the right tools and a little patience, you can build sturdy wooden rails that look great and keep everyone safe. This guide will walk you through everything you need to know, step-by-step. We’ll start with choosing your materials and end with a beautifully finished railing you’ll be proud of.
Table of Contents
Why Building Your Own Wooden Rails is a Rewarding Project
Building your own wooden rails might sound daunting, but it’s a project that offers some serious rewards. For starters, you’ll save a good chunk of money compared to hiring a professional. Plus, you get the satisfaction of a job well done, creating something beautiful and functional with your own two hands. It’s a fantastic way to learn new woodworking skills and boost your home’s value and appeal.
Choosing the Right Wood for Your Wooden Stair Rails
The wood you choose will significantly impact the look, durability, and cost of your wooden rails. For inside staircases, durability and appearance are usually top priorities. Here are some popular choices:
Hardwoods for Durability and Elegance
Hardwoods are generally a great choice for stair railings because they are strong and can withstand a lot of wear and tear. They also offer a beautiful, often rich, grain pattern.
- Oak: A classic choice. Oak is incredibly strong, durable, and has a distinctive grain. It takes stains well, allowing you to match it to your existing decor. Red oak is common and more affordable, while white oak is denser and more resistant to moisture.
- Maple: Another excellent hardwood. Maple is very hard and smooth, offering a clean, modern look. Its fine grain means it stains evenly, but it can be a bit trickier to work with than oak.
- Cherry: Offers a beautiful, warm reddish hue that deepens with age. Cherry is strong and relatively easy to work with, but it’s also more expensive.
- Walnut: For a truly premium look, walnut is stunning. It has rich, dark color and elegant grain. It’s strong but also one of the pricier options.
Softwoods for Budget-Friendliness and Ease of Use
Softwoods are generally more affordable and easier to cut and shape, making them a good option for beginners or those on a tighter budget. However, they can be prone to dents and scratches more easily than hardwoods.
- Pine: Pine is readily available and inexpensive. It’s lightweight and easy to work with. However, it’s softer, so it might show wear more quickly. For railings, choose a knot-free, clear pine if possible for a smoother finish.
- Fir: Similar to pine in terms of workability and cost, fir is also a decent softwood option. It offers a slightly stronger, more knot-resistant grain than some pine varieties.
Engineered Wood and Composites
While you asked about wooden rails, it’s worth noting that some composite materials can mimic the look of wood and offer superior durability and moisture resistance, especially for areas prone to humidity. If your project is in a challenging environment, you might explore these, but for a traditional wooden rail, stick to solid wood.
Safety First: Necessary Tools and Materials
Before you start cutting, make sure you have all your safety gear and tools ready. Working with wood and power tools can be enjoyable, but safety should always be your top priority. Here’s what you’ll need:
Essential Safety Gear:
- Safety Glasses: Non-negotiable. Protect your eyes from sawdust and flying debris.
- Work Gloves: Protect your hands from splinters and provide a better grip.
- Hearing Protection: Especially important when using power saws.
- Dust Mask: To avoid inhaling fine sawdust.
Essential Tools:
- Measuring Tape: For accurate measurements.
- Pencil: For marking cuts and layouts.
- Miter Saw or Circular Saw with a guide: For making straight, accurate cuts. A miter saw is ideal for precise angles.
- Jigsaw: Useful for cutting curves if your design requires it.
- Drill/Driver: For pre-drilling holes and driving screws.
- Random Orbit Sander and Sandpaper (various grits, e.g., 80, 120, 220): For smoothing the wood.
- Clamps: To hold pieces securely while gluing or fastening.
- Level: To ensure your rails are installed straight.
- Stud Finder: To locate wall studs for secure mounting.
Materials Recap:
- Chosen wood for rails, newel posts, and balusters (if applicable).
- Wood screws (appropriate length and gauge for your wood and mounting).
- Wood glue.
- Wood filler or putty (to fill holes).
- Sandpaper.
- Primer and paint or stain and sealer.
Planning Your Wooden Rail Design and Measurements
Before you even think about cutting, you need a plan. This is where you’ll figure out the exact dimensions and style of your railing. This step prevents costly mistakes and ensures your finished product is both beautiful and functional.
Understanding Stair Railing Codes and Standards
This is crucial! Building codes ensure your railings are safe for use. While codes can vary by location, here are some common requirements you’ll find:
- Height: Most codes require a handrail to be between 34 and 38 inches above the nosing of the treads. Measure from the leading edge of the stair tread.
- Grip: The handrail should be graspable. Typical diameters or shapes are specified. For example, diameters between 1.25 to 2.625 inches are often permitted.
- Continuity: The handrail should run continuously for the full length of the stairs. It generally shouldn’t wrap around itself.
- Clearance: There needs to be adequate space between the wall and the handrail (usually at least 1.5 inches).
- Baluster Spacing: If you’re using balusters (the vertical spindles), the spacing between them is critical. Most codes specify that a 4-inch sphere should not be able to pass through any opening, preventing small children from falling through. For more detailed information specific to your region, consult your local International Code Council (ICC) resources or your local building department.
Measuring for Your Staircase Rails
Accuracy is key here. Grab your measuring tape and pencil and follow these steps:
- Measure the Total Length: Measure the entire length of the staircase run where the handrail will be installed, from the top landing point to the bottom stair nose.
- Determine the Starting and Ending Points: Decide where your rail will start and end. Typically, it runs from about the first stair nose to the last stair nose, plus a bit of overlap at the top and bottom for stability and code compliance.
- Calculate Rail Height: Measure the height from the nosing of each step. You’ll want to establish a consistent height (usually 34-38 inches) across all steps. Mark this height at the beginning, middle, and end of your staircase run.
- Measure for Newel Posts: If you’re using newel posts (the larger, structural posts at the beginning, end, or turning points of a staircase), measure their required height based on your rail height.
- Measure for Balusters (if applicable): If you’re using balusters, measure the distance between the bottom of the handrail and the stair tread or stringer. This will determine the length of your balusters. Also, plan your spacing: divide the total length of the rail run by the desired baluster spacing (keeping in mind the 4-inch sphere rule).
Step-by-Step Guide: How to Make Wooden Rails
Now that you’ve planned and gathered your supplies, let’s build! This guide focuses on creating and installing a basic, sturdy wooden handrail.
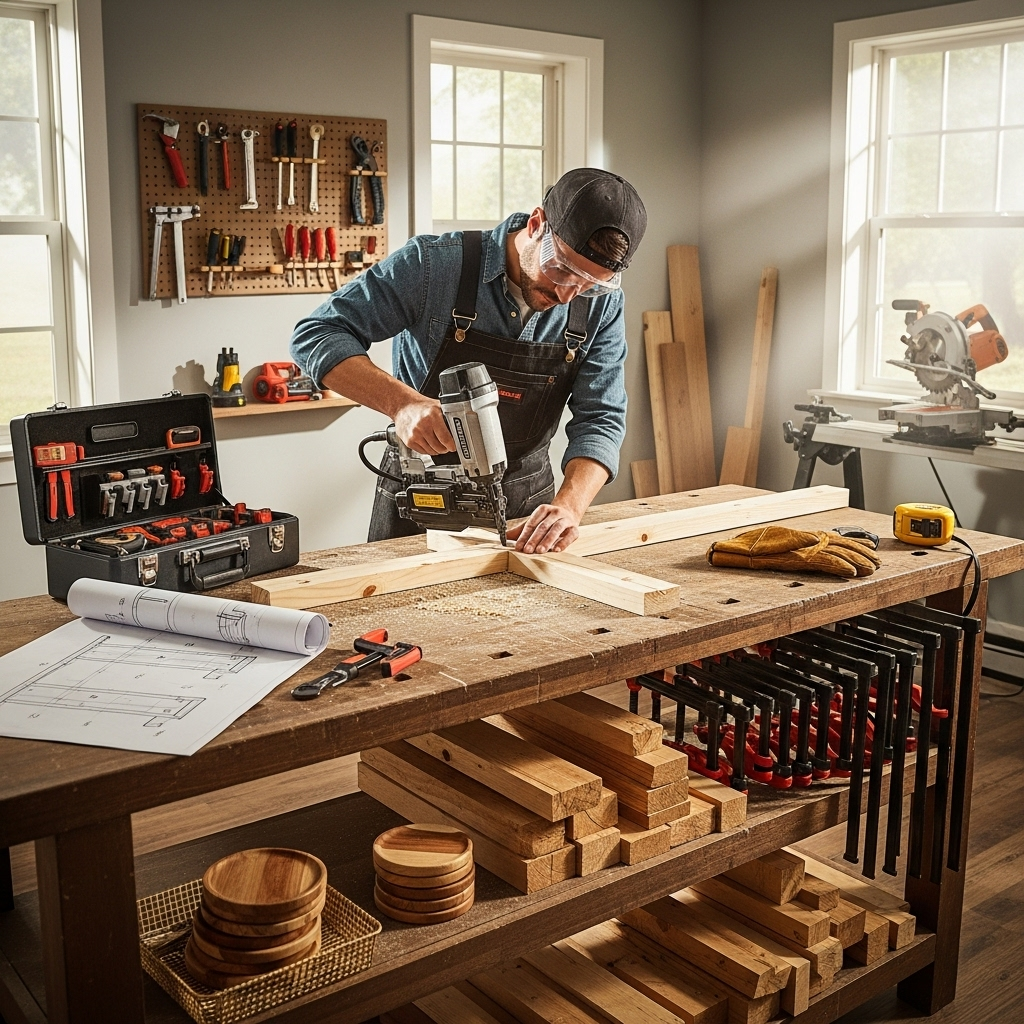
Step 1: Prepare Your Wood Pieces
Your wood might come from a lumber yard or home improvement store. Inspect it for any major knots, cracks, or warping. If you bought rough lumber, you’ll need to mill it smooth. For most DIY projects, pre-surfaced lumber is fine.
- Cut to Length: Using your miter saw or circular saw, cut your chosen wood for the handrail to the determined length. Make sure your cuts are square (90 degrees) unless your staircase has angled turns that require angled cuts. Always double-check your measurements before cutting.
- Cut Newel Posts (if applicable): Cut any newel posts to their required height. Ensure the tops are cut square to receive the handrail.
- Cut Balusters (if applicable): Cut balusters to the correct length. Remember to account for the angle of your stairs if you want them to sit perfectly plumb. Often, balusters are cut slightly longer, and the bottom is angled to match the stair tread slope for a flush fit.
Step 2: Shape and Refine Your Rails
This is where you’ll give your wooden rails their final form and smooth them out.
- Router (Optional): If you want a more finished look or a specific profile (like a rounded edge), you can use a router with a suitable bit. A roundover bit or a chamfer bit can soften the edges of the handrail for comfort and aesthetics. Always practice on scrap wood first.
- Sanding: This is a critical step for a smooth, safe finish. Start with a coarser grit sandpaper (like 80 or 120 grit) to remove any saw marks or rough spots. Then, move to a finer grit (like 180 or 220 grit) for a smooth touch. Sand in the direction of the wood grain. Don’t forget to sand the ends and any shaped profiles.
Step 3: Assemble and Attach Supports (if needed)
Before installing the rail, you need a secure way to attach it. This often involves mounting brackets or attaching it to newel posts.
- Locate Studs: Use a stud finder to locate wall studs along the staircase path. Mark their centers. This is where you’ll attach your railing brackets or newel posts for maximum strength. Visit ToolReviews.com for helpful tips on finding studs.
- Mount Brackets: If you’re using wall-mounted brackets, hold them in place, ensuring they align with your desired rail height and are screwed into the studs. Use a level to make sure they’re straight.
- Install Newel Posts (if applicable): Newel posts are usually attached to the floor and/or the subfloor securely using lag bolts or specialized connectors. Ensure they are plumb (perfectly vertical) before proceeding.
Step 4: Install the Wooden Handrail
This is the moment of truth! Carefully position and secure your rail.
- Position the Rail: Place your prepared handrail over the installed brackets or onto the newel posts. Ensure it’s at the correct, consistent height and runs smoothly along the staircase.
- Mark for Attachment: Lightly mark the position of the rail on the posts or brackets.
- Pre-Drill Holes: Remove the rail. Pre-drill pilot holes through the brackets and into the underside or back of the rail. If attaching to newel posts, you might pre-drill from through the post into the rail, or use specialized railing connectors that are hidden. Pre-drilling prevents the wood from splitting.
- Secure the Rail: Apply a bit of wood glue to the joining surfaces (if applicable, like between rail and post). Then, carefully position the rail back in place and drive screws through the pre-drilled holes to secure it. Use a level to ensure it’s straight as you tighten the screws.
- Attach Balusters (if applicable): Install balusters. These are typically attached to the stair tread or stringer at the bottom and to the underside of the handrail at the top. Many methods exist, from simple screws and plugs to specialized baluster connectors. Ensure they are plumb and spaced correctly, and that they are securely fastened according to your chosen method and local codes.
Step 5: Finishing Touches
The final steps bring everything together for a polished look and lasting protection.
- Fill Holes: If you have any screw holes that are visible (e.g., if you screwed from the outside of a newel post), fill them with wood filler or putty that matches your wood. Let it dry completely.
- Final Sanding: Once the filler is dry, lightly sand the filled areas smooth. You might give the entire rail a final light sanding with a very fine grit sandpaper (220 or higher) to ensure it’s super smooth.
- Clean: Wipe down the entire railing system with a tack cloth or a slightly damp cloth to remove all dust.
- Apply Finish: This is where your railing comes to life!
- Stain: If you want to enhance the wood grain and add color, apply your chosen wood stain according to the product directions. Wipe off excess stain.
- Sealer/Topcoat: Once the stain is dry, apply several coats of a protective clear finish like polyurethane or a clear varnish. This protects the wood from wear, moisture, and UV rays. Lightly sand with very fine grit sandpaper (220 or higher) between coats for an ultra-smooth finish.
- Paint: If you’re painting your rails, start with a good quality primer. Once dry, apply your chosen paint color, usually in two or more thin coats.
Tips for a Professional-Looking Finish
Achieving a professional look isn’t just about following steps; it’s about paying attention to the details. Here are a few extra tips to elevate your wooden rail project:
- Use Quality Materials: Investing in good quality wood and finishing products makes a noticeable difference in the final result and durability.
- Work in Good Lighting: Proper lighting helps you see imperfections and ensures your measurements and cuts are accurate.
- Take Your Time: Rushing through any step, especially measuring, cutting, and sanding, can lead to mistakes. Patience is your best tool.
- Practice Cuts on Scrap: Before cutting your actual railing, make a practice cut on a scrap piece of the same wood to ensure your saw is set up correctly and you’re comfortable with the cut.
- Feather Sanding: When finishing, light sanding between coats of finish is key. This isn’t about removing material but about creating a perfectly smooth surface for the next coat to adhere to.
- Consider the Angles: If your stairs have a consistent angle, you can often set your saw to match that angle to get perfectly plumb balusters without needing extreme adjustments later.
Common Issues and How to Solve Them
Even with the best planning, you might run into a snag or two. Here are some common problems and how to fix them:
| Problem | Solution |
|---|---|
| Wobbly Rail | Ensure all mounting brackets are securely attached to wall studs. Check that screws holding the rail to brackets or posts are tight. If using newel posts, they must be firmly anchored to the floor. |
| Uneven Rail Height | Re-measure the desired height from each stair nosing. While slight variations are sometimes unavoidable, significant differences may require repositioning brackets or rebating the rail ends to sit flush on posts. |
| Splintered Cuts | Use a sharper blade on your saw. For finer woods, consider using a plywood blade, which has more teeth and makes cleaner cuts. Ensure your saw is set to not cut too aggressively. Sanding thoroughly will also address minor splintering. |
| Gaps under Balusters | Measure the angle of the stair tread and cut the bottom of the baluster to match. Alternatively, use specialty shims or angled mounting brackets designed for balusters. |
| Visible Screw Heads | Use specialized wood screws that can be countersunk. After installation, fill the holes with a |