Make a sturdy wooden mailbox post with built-in storage! This guide breaks down building a functional and attractive mailbox unit, perfect for keeping packages safe and adding curb appeal to your home. Learn the simple steps, the tools you’ll need, and tips for a successful DIY project.
Hey there, DIYers! Jack here from Nailerguy. Ever found yourself juggling packages meant for your mailbox, or wished you had a little extra spot to stash garden tools or even a spare welcome mat? A standard mailbox post is functional, but a wooden mailbox post with storage? Now that’s smart! It boosts your curb appeal and gives you practical space right by your front door. If you’ve been looking for a project that’s both useful and rewarding, you’ve come to the right place. We’re going to walk through building one of these beauties from start to finish. It’s easier than you think, and by the end, you’ll have a fantastic addition to your home. Let’s get building!
Table of Contents
Why Build a Wooden Mailbox Post with Storage?
A traditional mailbox post does one job: hold your mailbox. But a wooden mailbox post with integrated storage offers so much more. Think of it as a mini command center for your front entryway. It increases functionality, enhances your home’s visual appeal, and can even solve those pesky “where do I put this for now?” problems.
Enhanced Curb Appeal
A well-built wooden post can transform a plain mailbox into an attractive feature. You can choose wood types, finishes, and designs that complement your home’s architecture, adding a touch of personalized style and increasing your property’s overall charm.
Practical Storage Solutions
The storage compartment is a game-changer. It’s perfect for:
- Securely holding larger package deliveries when you’re not home.
- Storing gardening gloves and small tools for quick access.
- Keeping a spare roll of trash bags or pet waste bags handy.
- Safely stowing away outdoor decorations like house numbers or decorative lights.
- Providing a clean spot to leave notes for delivery drivers or visitors.
Durability and Customization
Wood offers a natural, sturdy feel. With the right treatment and construction, your wooden post will last for years. Plus, you get to decide the exact size, style, and features of the storage area to perfectly suit your needs.
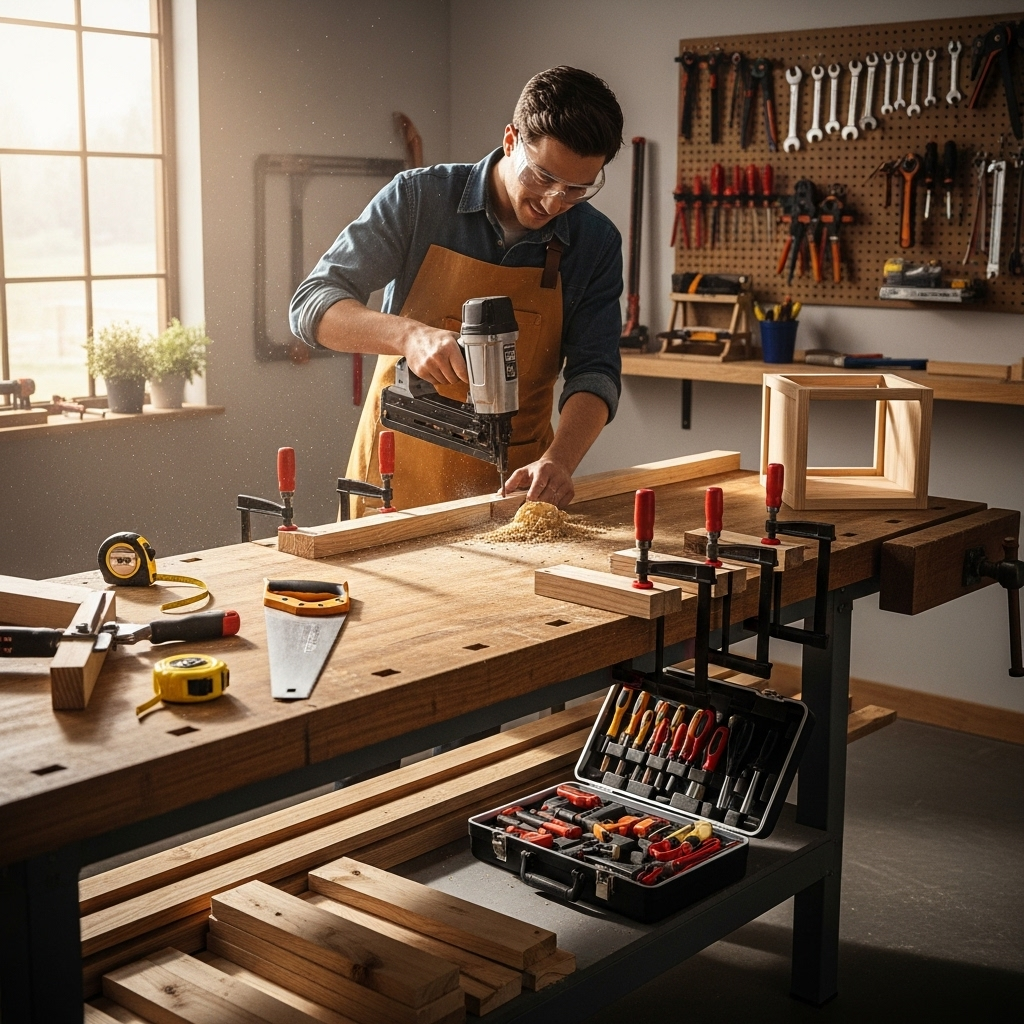
Gathering Your Tools and Materials
Before we jump into cutting and building, let’s make sure you have everything you need. Having all your supplies ready will make the building process smooth and enjoyable. Safety first, always!
Essential Tools
Here’s a list of the tools that will make this project a breeze. If you’re new to woodworking, don’t worry – many of these are standard DIY items.
- Measuring Tape: For accurate measurements every time.
- Pencil: To mark your cuts.
- Safety Glasses: Protect your eyes!
- Work Gloves: Keep your hands safe.
- Circular Saw or Miter Saw: For clean, straight cuts. A miter saw is great for precise angles.
- Drill/Driver: For pre-drilling holes and driving screws.
- Level: To ensure your post is plumb (straight up and down).
- Shovel or Post Hole Digger: For digging the hole for the post.
- Optional: Wood clamps can be very helpful for holding pieces together while assembling.
For more information on choosing the right saw for your DIY projects, check out this helpful guide from Family Handyman.
Materials You’ll Need
The type of wood you choose will affect the look and longevity of your post. Pressure-treated lumber is a great choice for outdoor projects because it resists rot and insects.
- Lumber:
- 4×4 Post: One for the main support (e.g., 8-foot length).
- 1×6 or 1×8 Lumber: For the mailbox support arm, storage box sides, and decorative elements (lengths will depend on your design).
- Plywood (exterior grade): For the storage box bottom and potentially the back (e.g., 1/2-inch or 3/4-inch thickness).
- Concrete Mix: For securely setting the post in the ground.
- Gravel: For drainage at the bottom of the post hole.
- Wood Screws (exterior grade, e.g., 2.5-inch and 1.5-inch): To assemble the entire structure.
- Wood Glue (exterior grade): For added strength at joints.
- Exterior Paint or Stain: To protect the wood and enhance its appearance.
- Sandpaper: For a smooth finish.
- Optional: Hinges and a latch if you plan for a door on your storage.
Step-by-Step Guide: Building Your Wooden Mailbox Post with Storage
Let’s get down to business! This guide assumes a basic design with a storage box attached to the side of the post. We’ll keep it straightforward for beginners.
Step 1: Design and Planning
Before cutting, sketch out your design. Consider the size of your mailbox, the desired location for the storage box (usually one side of the post), and its dimensions. Will it be a simple open cubby or a closed box with a lid? Think about how high the mailbox will sit. USPS regulations suggest the top of the mailbox should be 42-48 inches from the ground.
Key Design Considerations:
- Mailbox Height: Ensure it meets USPS standards.
- Storage Box Size: Big enough for your needs, but not so large it overwhelms the post.
- Box Placement: Typically off to one side of the main 4×4 post.
- Roof Overhang: Consider a small overhang on the storage box to protect contents from rain.
Step 2: Cut Your Lumber
Measure twice, cut once! Accuracy here saves headaches later. You’ll likely need to cut pieces for the main post, the mailbox support arm, and the storage box components.
Example Cuts for a Basic Design:
- 4×4 Post: 6-foot length (adjust based on desired height after sinking into ground). Remember, about 2 feet will go underground.
- Mailbox Support Arm (1×6 or 1×8): About 10-12 inches long.
- Storage Box Sides (1×6 or 1×8): Two pieces for the longer sides (e.g., 12 inches), two pieces for the shorter ends (e.g., 8 inches).
- Storage Box Bottom (Plywood): Cut to fit the inside dimensions of your box.
- Optional: A small piece for a roof on the storage box.
Step 3: Prepare the Post Hole
This is crucial for stability. Dig a hole at least 2 feet deep and about 8-10 inches in diameter. The wider hole helps accommodate the concrete.
- Choose a location that is at least 6 inches from the curb to avoid interference with snow plows or street sweepers, and ensure it’s accessible for mail delivery. The USPS provides guidelines for mailbox placement.
- Place about 4-6 inches of gravel at the bottom of the hole for drainage.
- Position your 4×4 post in the center of the hole.
- Use your level to ensure the post is perfectly plumb. Braces (scrap wood) can help hold it in place temporarily.
- Mix your concrete according to the bag’s instructions and pour it into the hole, filling it around the post. Slope the top of the concrete away from the post to direct water away.
- Let the concrete cure completely (usually 24-48 hours) before proceeding.
Step 4: Assemble the Storage Box
Now, let’s build the storage unit. This is like building a small wooden crate.
- Take one of your longer side pieces (e.g., 12 inches) and attach the shorter end pieces (e.g., 8 inches) to its ends. Use wood glue and exterior screws. Pre-drilling pilot holes will prevent the wood from splitting.
- Attach the second long side piece to the other ends of the short pieces, forming a rectangular box.
- Insert and attach the plywood bottom panel into the box. You can attach it from the underside with screws and glue.
- If you’re adding a lid, cut a piece of lumber or plywood to fit and attach it using exterior-grade hinges. You might also add a simple latch.
Step 5: Attach the Storage Box to the Post
Decide where you want the storage box on your main 4×4 post. Common placement is about 12-18 inches from the ground.
- Hold the assembled storage box against the 4×4 post at your desired height. Use a level to ensure it’s straight.
- Secure the box to the post from the inside of the box, driving long exterior screws through the back of the box and into the 4×4 post. For extra strength, you can add angle brackets on the interior corners where the box meets the post.
Step 6: Attach the Mailbox Support Arm
This arm will hold your mailbox. You can attach it directly to the 4×4 post or extend it slightly beyond the storage box.
- Determine the desired height for your mailbox (again, 42-48 inches from the ground is standard).
- Position your support arm (e.g., 1×6 or 1×8) at this height, extending outwards. Ensure it’s level.
- Secure the support arm to the 4×4 post using strong exterior screws. You might want to use at least two screws, well-spaced, for stability. For added strength, consider adding a decorative triangular brace underneath the arm, connecting it to the main post.
Step 7: Mount Your Mailbox
Now for the most important part – attaching the actual mailbox!
- Place your mailbox on top of the support arm.
- Measure and mark the screw hole locations on the support arm.
- Remove the mailbox, pre-drill pilot holes in the support arm, and then re-position the mailbox and secure it with appropriate screws (often provided with the mailbox or you may need to purchase them).
Step 8: Finishing Touches
This is where you make it look great and protect it from the elements.
- Sand down any rough edges or splinters.
- Apply a good quality exterior-grade primer.
- Paint or stain your entire wooden structure. Choose colors that complement your home. Look for products specifically designed for outdoor wood protection.
- Allow the paint or stain to dry completely according to the manufacturer’s instructions.
Design Variations and Considerations
The basic design is just the beginning! You can tailor your wooden mailbox post with storage to be even more functional and stylish.
Open Cubby vs. Enclosed Storage
An open cubby is simpler to build but offers less protection. An enclosed box with a lid or door keeps items more secure and weather-proof. If you choose an enclosed box, consider materials that can withstand frequent opening and closing, like exterior-grade hinges and a sturdy latch.
Decorative Elements
Add some flair with:
- Decorative Braces: Angled pieces of wood under the mailbox arm or supporting the storage box can add visual interest.
- Cap or Roof: A small peaked roof over the mailbox or storage box can offer extra weather protection and a classic look. Use shingles or metal flashing for a more durable roof.
- House Numbers: Mount your house numbers directly onto the post for clear visibility.
- Lighting: Consider a small solar-powered light to illuminate the area at night.
Material Choices
While pressure-treated pine is common, you could also use cedar or redwood for a more natural, rot-resistant option. These woods are more expensive but offer beautiful natural aesthetics and excellent durability without requiring as much preservative treatment.
Maintenance for Longevity
To ensure your beautiful, functional mailbox post lasts for years, a little regular maintenance goes a long way.
Annual Check-up
Once a year, ideally in the spring, inspect your post:
- Check for Loose Screws or Joints: Tighten any fasteners that have loosened over time. Re-glue any joints that seem weak.
- Inspect for Rot or Insect Damage: Look closely at the base of the post, especially near ground level, and any parts of the wood that remain moist.
- Examine the Finish: Check for peeling paint or faded stain.
- Clear Debris: Ensure the storage area and around the base of the post are clear of leaves and other debris that can hold moisture.
Refinishing
Depending on your climate and the quality of your initial finish, you may need to repaint or restain your post every 2-4 years. This is crucial for protecting the wood from UV rays and moisture.
Clean the surface thoroughly before applying a new coat of paint or stain. Pay attention to the end grain of the wood, as this is where moisture can penetrate most easily.
FAQ: Your Questions Answered
Got more questions? We’ve got answers!
Q1: How deep should I set my wooden mailbox post?
A1: For stability, a depth of at least 2 feet is recommended. This ensures the post is anchored well against wind and weather. Always check local building codes for specific requirements in your area.
Q2: What kind of wood is best for an outdoor mailbox post?
A2: Pressure-treated lumber is an excellent and cost-effective choice for outdoor projects as it’s treated to resist rot and insects. Cedar and redwood are naturally resistant to decay and insects and offer a beautiful look, but they are more expensive.
Q3: How do I make sure my mailbox post is straight?
A3: Use a level! When setting the post in concrete, place your level against the 4×4 on two adjacent sides. Use temporary braces made from scrap wood to hold the post perfectly plumb while the concrete cures.
Q4: Can I build the storage box after the post is in the ground?
A4: Yes, you can. You’ll assemble the box separately and then attach it to the already-set post. This is the most common method for adding storage to an existing or newly set post.
Q5: What are the USPS requirements for mailbox installation?
A5: The USPS generally requires the bottom of the mailbox to be 41-45 inches from the road surface, and the opening to be 6-8 inches back from the front of the post. Mailboxes should be placed to allow the carrier to leave mail without backing into the street. Always check the latest guidelines from the USPS website or your local post office.
Q6: How do I waterproof the storage compartment?
A6: Using exterior-grade lumber and screws is the first step. Applying a good quality exterior paint or stain will provide the main waterproofing. For extra protection, especially on the bottom panel, you could add a sealant or a small roof overhang to direct water away.
Conclusion
And there you have it! Building a wooden mailbox post with storage is a fantastic DIY project that combines practicality with a touch of style. You’ve learned how to plan your design, gather the right tools and materials, and assemble it step-by-step, ensuring a sturdy and beautiful result. Remember, the key is taking your time, measuring carefully, and using quality exterior-grade materials. This project not only enhances your home’s curb appeal but also provides a handy spot for deliveries and other essentials. Grab your tools, head to the lumber yard, and get ready to build a mailbox post that’s as functional as it is attractive. Happy building!