Make a stunning barn wood headboard yourself with this easy guide! Learn to source wood, plan your design, and assemble a rustic centerpiece for your bedroom, even if you’re new to DIY.
Turning reclaimed barn wood into a beautiful headboard is a project that adds rustic charm and a unique story to your bedroom. Many folks think this kind of project is too complicated, but I’m here to show you it’s totally achievable. We’ll walk through it step-by-step, from finding the right wood to putting the finishing touches on your brand-new focal point. Get ready to transform your space with this rewarding DIY!
Table of Contents
Gather Your Materials and Tools
Before we start cutting and assembling, let’s make sure you have everything you need. Having all your supplies ready will make the building process much smoother and more enjoyable. Think of it like a chef preparing all their ingredients before cooking!
Materials You’ll Need:
- Barn Wood Planks: The star of the show! The amount will depend on your desired headboard size. Aim for planks that are relatively straight and in good condition.
- Plywood or a 1×4/1×6 Frame: This will serve as the backing for your barn wood planks. Plywood offers a solid surface, while a simple wooden frame is lighter.
- Wood Screws: For attaching the barn wood to your backing and for assembling the frame if you go that route. Choose screws that are appropriate for the thickness of your wood.
- Wood Glue (Optional but recommended): For extra strength when attaching planks to the backing.
- Sandpaper: Various grits (e.g., 80, 120, 220) for smoothing any rough edges.
- Wood Finish (Optional): Polyurethane, wax, or stain, depending on the look you want.
- Mounting Hardware: Depending on how you plan to attach the headboard to your wall or bed frame (e.g., French cleat, L-brackets).
Tools You’ll Need:
- Measuring Tape: For precise measurements.
- Pencil: To mark your cuts.
- Safety Glasses: Absolutely essential for protecting your eyes!
- Work Gloves: To protect your hands from splinters and rough wood.
- Saw: A miter saw is ideal for accurate crosscuts, but a circular saw with a straight edge guide can also work. A handsaw will work for very small projects but is much more labor-intensive.
- Drill/Driver: To pre-drill holes and drive screws.
- Sander (Optional): A random orbital sander will make the sanding process much faster and easier than sanding by hand.
- Level: To ensure your headboard is installed straight.
- Stud Finder: If you plan to mount directly to the wall, this is crucial for secure installation.
Step 1: Source Your Barn Wood
This is where the magic begins! Finding the right barn wood sets the tone for your entire project. Remember, the charm of barn wood comes from its imperfections – the nail holes, saw marks, and weathered patina.
Where to Find Barn Wood:
- Salvage Yards and Architectural Salvage Stores: These places often have a great selection of reclaimed wood, including barn wood.
- Online Marketplaces: Check sites like Craigslist, Facebook Marketplace, or Etsy. You might find local sellers offering barn wood.
- Demolition Companies: Companies that specialize in demolishing old barns or buildings might have wood for sale.
- Friends and Family: If you know someone with an old barn, ask if you can salvage some wood! Always get permission first.
When selecting your wood, look for planks that are:
- Reasonably Straight: While some warp is expected and adds character, severely bowed or twisted planks can be difficult to work with.
- Free from Rot or Major Insect Damage: Small holes are fine, but crumbling wood is a no-go.
- Aesthetic: Choose wood with the color and texture you like. Some planks might be gray, others warmer brown. Mix and match for a beautiful variés!
Important Note on Safety: Always wear gloves and eye protection when handling old wood. It can have sharp edges, loose nails, and hidden splinters. You might also want to wear a mask to avoid inhaling dust.
Step 2: Prepare Your Barn Wood
Once you have your barn wood, it’s time to get it ready. This step is crucial for both appearance and safety.
- Clean the Wood: Start by brushing off any loose dirt, cobwebs, or debris with a stiff brush. For more stubborn dirt, you can use a damp cloth. Avoid soaking the wood, as this can cause it to swell or warp further. If you find any mold or mildew, a mixture of water and a little bit of mild detergent or diluted bleach can help, but again, use sparingly and dry thoroughly.
- Remove Old Fasteners: Carefully pull out any old nails, screws, or staples. A pry bar and hammer often work best for this. Be patient, as these can be stubborn. Some people choose to leave a few nail heads in for character, but make sure they are hammered down flush so they don’t snag anything.
- Inspect for Pests: Look for signs of wood-boring insects. If you’re concerned, you can treat the wood. One common method is kiln-drying it, but this is usually done by professionals. For DIY, letting it sit in direct sunlight for a while can help. Alternatively, you can seal the wood thoroughly later on.
- Cut to Size: Decide on the final dimensions of your headboard (width and height). You’ll also decide if you want a simple horizontal plank design, a more intricate pattern, or even a frame. Measure and mark your barn wood planks to the desired lengths. Use your saw to make clean, straight cuts. A miter saw is excellent for this if you have one.
- Rough Sanding (Optional): If some edges are too rough or splintery, give them a light sanding with 80-grit sandpaper. The goal here isn’t to make the wood smooth like furniture, but rather to knock down the most dangerous jagged bits. You want to preserve that rustic texture!
Step 3: Design and Layout Your Headboard
Now, let’s plan how your barn wood will look. This is where you get to be creative and visualize the final piece.
Popular Layout Options
- Horizontal Planks: This is the most straightforward design. Simply lay out your planks side-by-side, either all the same width or a mix of widths for more visual interest.
- Vertical Planks: Similar to horizontal, but arranged vertically.
- Herringbone or Chevron: These patterns involve cutting planks at angles to create a zigzag or V-shaped design. This is more complex but can be stunning.
- Framed Design: You can build a simple frame out of 1×4 or 1×6 lumber and then attach your barn wood planks inside the frame.
Your Layout Process:
- Determine Dimensions: As mentioned before, decide on the total width and height you want for your headboard. Consider your bed size and the proportions of your room.
- Arrange Planks: Lay out your barn wood planks on a flat surface (like the floor) in the configuration you desire. If you’re using a mix of widths, play around until you find a pattern you love.
- Mix and Match: Don’t be afraid to alternate different shades and textures of wood to create a dynamic look. Place lighter and darker planks next to each other.
- Check for Gaps: Lay the planks tightly together. If there are small gaps, that’s part of the rustic charm! Larger gaps might need to be addressed by trimming planks or filling them if you prefer a less open look.
- Photograph Your Layout: Once you’re happy with the arrangement, take a picture! This will be incredibly helpful when you start attaching the planks to your backing.
Step 4: Build the Backing Structure
The backing provides a solid foundation to attach your beautiful barn wood planks. There are two common approaches: a solid plywood sheet or a simpler wooden frame.
Option 1: Plywood Backing
This is the easiest and most stable option, especially for beginners.
- Cut Plywood: Cut a piece of 1/2-inch or 3/4-inch plywood to your desired headboard dimensions. This will be the base your barn wood attaches to.
- Position Barn Wood: Place your barn wood planks onto the plywood according to your chosen layout (refer to your photo!). Make sure the edges of the barn wood overhang the plywood slightly if you want a slightly larger finished headboard, or line them up perfectly.
- Mark and Pre-drill: As you position each plank, you can mark its location on the plywood. Once you start attaching, pre-drilling pilot holes through the barn wood and into the plywood is essential to prevent the wood from splitting, especially near the edges.
Option 2: Wooden Frame Backing
This is a great option if you want to save on material cost or if you want a lighter headboard. You’ll typically use 1×4 or 1×6 lumber.
- Cut Frame Pieces: Cut four pieces of lumber to create a rectangular frame matching your headboard dimensions. You might also add a couple of cross braces for extra rigidity, especially for wider headboards.
- Assemble the Frame: Use wood glue and screws to assemble the frame. Pre-drill holes to prevent splitting. Ensure the frame is square using a carpenter’s square.
- Attach Barn Wood: This method requires more careful fastening. You can attach the barn wood planks directly to the frame members. You might also need to add narrower support strips between the main frame pieces if your barn wood planks are significantly shorter than the headboard width. This is where a nailer can be very handy for speed and a clean look.
Step 5: Attach the Barn Wood Planks
This is the satisfying part where your headboard starts to take shape!
- Work in Sections: If using the plywood backing, start with one edge and work your way across. If using a frame, attach planks to each section of the frame.
- Apply Glue (Optional): For extra strength, you can apply a thin bead of wood glue along the back of each barn wood plank before positioning it.
- Secure the Planks:
- Screws: If using screws, pre-drill pilot holes through the barn wood and into the backing (plywood or frame). Drive screws in at an angle so they don’t show on the front if possible, or strategically place them so they look intentional or can be hidden by the next plank. Use screws that are long enough to get a good grip but not so long they poke through the backing.
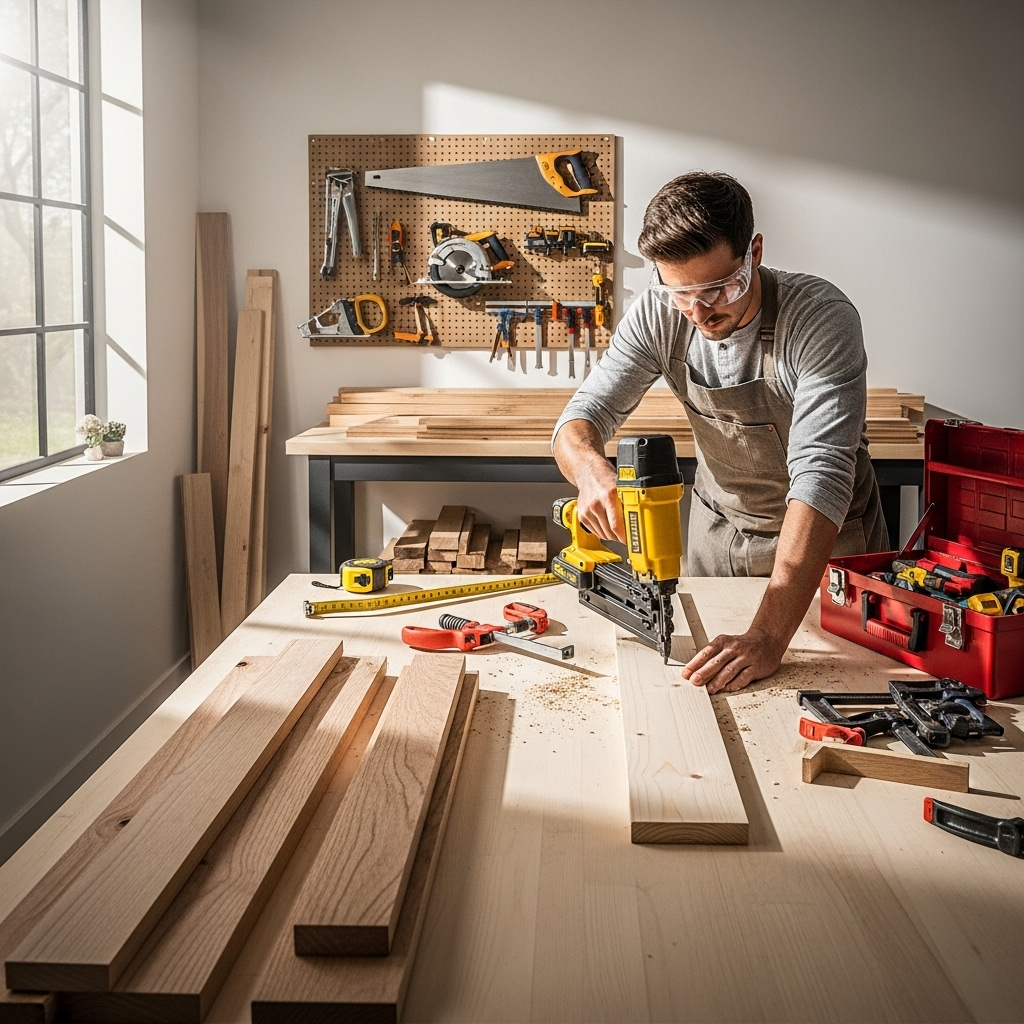
- Nailer: If you have a finish nailer or brad nailer, this is where it shines! Fire a few nails (e.g., every 8-12 inches) through the barn wood into the backing. This is faster and often creates a cleaner look as the nail heads are smaller.
- Maintain Alignment: As you attach each plank, ensure it sits flush against the previous one and remains straight according to your layout. Use your photo reference frequently.
- Trim if Necessary: If your final plank needs to be trimmed to fit, measure carefully and make the cut. Ensure the finished edge is facing outwards.
Step 6: Finishing Touches
Almost there! A few final steps can enhance the beauty and durability of your barn wood headboard.
Sanding and Cleaning
Once all the planks are attached, give the entire headboard a final once-over:
- Light Sanding: Use 120-grit or 220-grit sandpaper to gently smooth any sharp edges or splinters that might have been missed earlier. Focus on areas where you might touch it frequently. Remember, you’re not trying to make it perfectly smooth, just safe and pleasant to the touch.
- Final Dusting: Wipe down the entire headboard with a clean, dry cloth to remove all sawdust. A tack cloth works wonderfully for this.
Applying a Finish (Optional)
Applying a finish can protect the wood, bring out its natural beauty, and make it easier to clean. For barn wood, you often want to maintain its weathered look.
- Clear Coat: A matte or satin polyurethane is a popular choice. It adds a protective layer without making the wood look overly glossy or new. Apply thin, even coats with a brush or foam applicator, allowing each coat to dry thoroughly according to the product instructions.
- Wax: For a more natural, subtle sheen, a beeswax or furniture wax can be applied. This is easy to reapply if needed.
- Stain: If you want to alter the color, you can use a stain. However, many people prefer to let the natural patina of the barn wood speak for itself.
Test your finish on a scrap piece of the barn wood first! This is crucial to see how it will look and react with the wood’s existing color and texture.
Step 7: Mount Your Headboard
The final step is getting your creation onto the wall or the bed frame! There are a few common ways to do this.
Frequently Asked Questions (FAQ)
Is barn wood safe to use indoors?
Yes, barn wood is generally safe for indoor use, but it’s important to be cautious. Older wood can sometimes contain lead paint or be home to insects. Always inspect the wood carefully and consider sealing it with a non-toxic finish. If you’re sourcing from a reputable dealer, they often prepare the wood for use in homes. For more on lead paint safety, the EPA offers excellent resources.
Where can I find barn wood for a project?
You can find barn wood from various sources: salvage yards, demolition companies specializing in old buildings, online marketplaces like Craigslist or Etsy, and sometimes directly from old farm properties if owners are willing to let you salvage. Always get permission before taking any wood!
What tools do I need to make a barn wood headboard?
You won’t need a massive workshop! For most barn wood headboard projects, you’ll want a saw (miter saw or circular saw), a measuring tape, a pencil, safety glasses, gloves, a drill, screws, and sandpaper. A nailer, like a brad nailer or finish nailer, can speed things up considerably, but it’s not strictly essential for a beginner project.
How do I clean barn wood?
Start by brushing off loose dirt and debris with a stiff brush. For tougher grime, a damp cloth with a mild detergent can work. Avoid soaking the wood. If there’s any sign of mold or mildew, a diluted bleach solution can be used, but make sure to rinse thoroughly and let the wood dry completely. Always wear gloves and a mask when cleaning old wood.
How wide should my headboard be?
A good rule of thumb for headboard width is to make it at least as wide as your mattress and box spring, and often a few inches wider on each side to create a more substantial visual presence. For a standard queen bed, a common width is around 60-65 inches. For a king, aim for 76-80 inches.
Do I need to seal barn wood?
Sealing barn wood is often a good idea, especially if it’s going to be in your bedroom. It helps prevent splinters, makes it easier to clean, and can protect against dust. A clear matte polyurethane or a beeswax finish are popular choices that maintain the wood’s natural, aged look.