A lightweight framing nailer offers crucial power-to-weight balance for DIYers and pros alike. It makes demanding framing tasks easier, faster, and less fatiguing, ensuring you can build with confidence and efficiency without being weighed down. This review dives into what makes them essential and how to pick the right one.
Ever felt like your tool is working against you instead of with you? Building projects, especially framing, can be tough work. When you’re up on ladders or reaching awkward spots, every ounce of weight matters. A heavy nailer can leave your arm aching and slow you down. But what if there was a way to get all the power you need for framing without the back-breaking effort? That’s where lightweight framing nailers come in! They’re designed to be your best friend on the job, giving you the muscle for tough tasks while staying light and nimble. In this guide, we’ll explore why these tools are so fantastic and how to choose the perfect one for your next project. Get ready to build smarter, not harder!
Table of Contents
Why a Lightweight Framing Nailer is Your Next Essential Tool
When we talk about framing, we’re talking about the skeleton of your project – the walls, roofs, and floors. These are structural components that need strong, reliable fasteners. Traditionally, framing nailers were robust but often hefty. This weight, combined with the repetitive nature of driving hundreds of nails, can lead to fatigue, reduced accuracy, and a real toll on your body. Enter the lightweight framing nailer. These aren’t just “lighter versions” of their heavier counterparts; they represent a significant evolution in tool design, prioritizing both performance and user comfort.
The core idea behind a lightweight framing nailer is to achieve an optimal power-to-weight ratio. This means you get the driving force required for thick lumber and demanding applications, without the excessive bulk that can hinder maneuverability. For anyone tackling renovations, building additions, or even crafting larger outdoor structures, this can be a game-changer. It allows for longer working periods with less strain, leading to more consistent results and a more enjoyable building experience.
Think about a typical framing job. You’re often working overhead, on your knees, or in tight corners. A tool that’s too heavy here becomes a burden. It can make it harder to position the nailer accurately, leading to bent nails or misfires. More importantly, the strain on your arm, wrist, and shoulder can lead to discomfort and even injury over time. A lightweight framing nailer effectively combats this, feeling more like an extension of your arm than a separate, cumbersome tool.
The “Essential Power” Explained
When we say “essential power,” we’re not just talking about raw force, though that’s important. We’re talking about the kind of power that reliably drives full-size framing nails (like 2-inch to 3-1/2-inch nails) into common construction lumber, even hardwoods, without bending or needing multiple hits. This consistent driving power is crucial for structural integrity. You need a nailer that can sink nails flush with the surface consistently, no matter if you’re attaching studs to plates, building rafters, or assembling floor joists.
The “lightweight” aspect means this essential power is delivered in a package that’s easier to handle. Manufacturers achieve this through:
- Advanced Materials: Using lighter, yet strong, alloys and composites for the casing and internal components.
- Optimized Design: Streamlining the body and mechanics to reduce unnecessary weight while maintaining structural integrity.
- Engineered Power Sources: Whether it’s pneumatic, battery-powered, or cordless, the power delivery system is designed for efficiency without excess bulk.
This combination ensures that you’re not sacrificing performance for portability. You get the robust capability needed for framing, coupled with the agility that makes the job less physically demanding and more efficient.
Types of Lightweight Framing Nailers
Just like other power tools, framing nailers come in a few different flavors, each with its own advantages. Understanding these will help you decide what’s best for your power source and project needs.
Pneumatic (Air-Powered) Framing Nailers
These are the workhorses of the framing world. They rely on compressed air from an air compressor to drive nails. For a long time, pneumatic nailers were the standard, and for good reason.
- Pros:
- Generally the lightest and most compact for their power output.
- Very powerful and consistent.
- Lower initial tool cost compared to cordless alternatives.
- Excellent durability and longevity.
- No battery to charge or fuel cell to replace.
- Cons:
- Requires an air compressor, air hose, and potentially an air tank, adding to setup complexity and cost.
- Hose can be cumbersome and restricts movement.
- Noise level can be high.
- Need to be tethered to the compressor.
When looking for a lightweight pneumatic option, you’ll find models that are specifically designed to be more compact and use less air, further reducing their overall weight and the size of the compressor you might need.
Cordless Framing Nailers (Battery-Powered)
These nailers have exploded in popularity for DIYers and professionals alike. They use a battery to power a motor, which then drives the nail either via a spring-loaded system or by igniting a small amount of fuel (in the case of fuel-cell models).
- Pros:
- Ultimate freedom of movement – no hoses or cords!
- Quick setup: just grab and go.
- Perfect for remote locations or when working around obstacles.
- Quieter operation than most pneumatic nailers.
- Many offer adjustable depth settings for precision.
- Cons:
- Generally heavier than equivalent pneumatic nailers due to battery and motor.
- Higher initial cost due to the battery and charging system.
- Battery life can be a limitation on very long jobs; carrying spare batteries is recommended.
- Power can sometimes be less consistent on very dense materials compared to a robust pneumatic nailer.
Manufacturers are constantly improving battery technology, making some of the newer cordless models remarkably light and powerful, bridging the gap with pneumatic options.
Fuel-Cell Framing Nailers (Gas-Powered)
These are a type of cordless nailer that uses a small, disposable fuel cell (like propane or butane) in combination with a battery. The battery ignites the fuel, creating a small explosion that drives the nail.
- Pros:
- Excellent power and consistency, often rivaling pneumatic.
- Completely cordless and hose-free.
- Compact and lightweight design.
- Cons:
- Ongoing cost of fuel cells.
- Can have a distinctive smell from the fuel.
- Performance can be affected by temperature.
- Requires regular cleaning of the combustion chamber.
- Often have a slightly slower “time-to-fire” than battery-only cordless or pneumatic.
While they offer great portability, the recurring cost of fuel cells and the maintenance can be drawbacks for some users.
Top Lightweight Framing Nailer Features to Look For
When you’re sifting through the options for a lightweight framing nailer, certain features can make a big difference in usability and performance. Here’s what to keep an eye out for:
1. Weight and Ergonomics
This is the most critical factor for a “lightweight” nailer. Aim for tools under 7-8 pounds (for pneumatic) or under 9-10 pounds (for cordless, including battery). But don’t just look at the number in the specs; how the tool feels in your hand is paramount.
- Balance: Does it feel top-heavy or well-balanced? A good balance means less strain.
- Grip: A comfortable, non-slip grip is essential for control, especially when wearing gloves.
- Trigger: Is the trigger easy to reach and operate smoothly? Look for sequential (single fire) and contact (bounce fire) modes for versatility.
2. Nail Capacity and Size
Lightweight framing nailers are designed to handle common framing nails, typically from 2 inches up to 3-1/2 inches in length. Ensure the one you choose can accommodate the nail sizes required for your specific projects. Most will take either 2-inch stick nails or 3-1/2-inch construction nails. Pay attention to the angle of the magazine (e.g., 21-degree or 30-degree) as this determines the type of nails you can use and how they fit in tight corners.
3. Driving Power and Depth Control
As discussed, consistent power is key. Look for nailers that advertise their ability to sink nails flush, especially into denser woods. Features like adjustable depth control are incredibly useful. This allows you to fine-tune how deep the nail is driven, so you can set them flush for framing or slightly countersunk for applications where you might want to fill the nail head later.
4. Power Source Convenience
If you opt for cordless, consider battery platform compatibility. If you already own tools from a specific brand (like DeWalt, Milwaukee, Ryobi), choosing a nailer from the same platform means you can share batteries, saving money and hassle. For pneumatic, think about the air requirement – some lighter models are designed to run efficiently on smaller compressors.
5. Durability and Build Quality
Even lightweight tools need to withstand the rigors of a job site. Check reviews and specifications for mentions of robust construction, quality seals, and protective bumpers. A tool that’s built to last saves you money in the long run.
6. Ease of Maintenance
Can you easily clear a jammed nail? Most good framing nailers have tool-free jam clearing. Also, consider how often the tool needs lubrication or other maintenance. Less frequent and simpler maintenance is always a plus.
Our Top Picks: Lightweight Framing Nailer Review
While specific models change and new ones are released, certain brands consistently deliver excellent lightweight framing nailers. Here’s a look at some popular and well-regarded options that embody the “essential power” in a lighter package. Note: Actual weights and features can vary by specific model and battery inclusion.
| Brand & Model (Example) | Type | Approx. Weight (Tool Only) | Key Features | Best For |
|---|---|---|---|---|
| DeWalt DCN692/DCN693 (18V/20V MAX XR) | Cordless (Battery) | ~7.5 lbs | Brushless motor, dual speeds (select models), tool-free jam clearing, good battery life. | DIYers and professionals seeking cordless convenience and robust power. |
| Metabo HPT NT1865DM (18V/36V Multi-Volt) | Cordless (Battery) | ~7.7 lbs | Unique “Free Drive Nailing” technology for less recoil, can run on single battery or AC adapter. | Users who want a powerful, low-recoil cordless experience and battery flexibility. |
| Paslode Cordless Lithium-Ion 18-Gauge Brad Nailer (Example of lighter capability series) | Cordless (Fuel Cell + Battery) | ~4.5 lbs (Brad Nailer – shows brand’s lightweight lineage) | Known for reliable cordless gas framing nailers like the CF325XP which weighs around 8.5 lbs. | Those prioritizing ultimate cord-free freedom and accepting fuel cell costs. |
| Hitachi/Metabo HPT NR90AES1 | Pneumatic | ~4.1 lbs | Very lightweight for pneumatic, well-balanced, powerful, ideal for tight spaces. | Pro-level pneumatic users needing a light, agile, powerful tool for extended jobs. |
| BOSTITCH RN46 | Pneumatic | ~4.5 lbs | Compact, industrial-grade, lightweight for its power, quick driving action. | Contractors and serious DIYers wanting a dependable, lightweight pneumatic workhorse. |
Disclaimer: Model numbers and specifications can change. Always check the latest product details from the manufacturer before purchasing. This table is illustrative of the types of tools available that fit the “lightweight framing nailer” description.
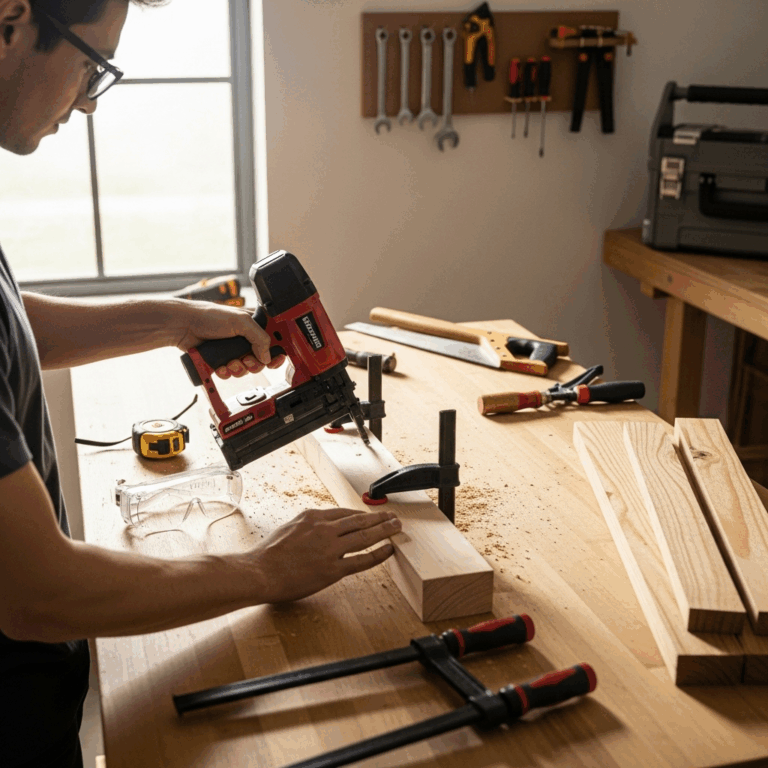
How to Use Your Lightweight Framing Nailer Safely and Effectively
Even with a lighter tool, safety and proper technique are paramount for successful framing. Here’s a quick rundown to get you started.
Essential Safety Gear
Before you even pick up the nailer, make sure you have the right safety equipment. This is non-negotiable!
- Safety Glasses: Always wear ANSI-approved safety glasses or a face shield. Flying debris or nail fragments are a real hazard.
- Hearing Protection: Nail guns are loud. Use earplugs or earmuffs to protect your hearing.
- Gloves: Work gloves protect your hands from splinters and provide a better grip on the tool.
- Sturdy Footwear: Steel-toed boots are ideal for job sites to protect your feet.
Setting Up Your Nailer
Pneumatic Nailer Setup:
- Connect Air Hose: Ensure the air compressor is OFF and the pressure is released. Connect the air hose securely to the nailer’s air inlet.
- Set Air Pressure: Refer to your nailer’s manual for the recommended operating pressure (typically 70-120 PSI). Adjust your compressor’s regulator accordingly.
- Load Nails: Open the magazine, place the appropriate nails in the track, and close the magazine securely. Ensure the nails are correctly oriented according to the magazine angle.
Cordless Nailer Setup:
- Charge Battery: Ensure the battery is fully charged.
- Install Battery: Slide the charged battery into its designated slot until it clicks into place.
- Load Nails: Open the magazine, place your nails in the track, and close it firmly.
- Install Fuel Cell (if applicable): For fuel-cell models, insert a new fuel cell according to the manufacturer’s instructions.
Proper Firing Technique
Most framing nailers have two modes: sequential and contact. For framing, you’ll often use contact mode for speed, but sequential provides more control when precision is needed.
- Select Mode: Switch between sequential and contact firing modes if your nailer offers them. For critical placements, use sequential. For rapid fastening, contact mode can be faster.
- Position the Nailer: Place the nose of the nailer firmly against the work surface where you want the nail to go. Ensure it’s perpendicular to the surface for best results.
- Drive Nail:
- Contact Fire: Depress the trigger first, then press the nose of the nailer against the wood.
- Sequential Fire: Press the nose of the nailer against the wood first, then pull the trigger.
- Maintain Pressure: Keep pressure on the nailer and the trigger until the nail is fully driven.
- Clear the Line of Fire: Always be aware of what’s behind your target. Ensure no one is on the other side of the material you are nailing.
Depth Adjustment
Getting the nail set just right can improve the strength of your joint and the finish.
- Locate Adjustment: Most nailers have a depth adjustment wheel or lever near the nose.
- Test Fire: Fire a nail into a scrap piece of the same lumber you’re using.
- Adjust: If the nail is sticking out too much, adjust the depth mechanism to drive it deeper. If it’s sinking too far (breaking through the wood or getting lost), adjust to drive it shallower.
- Repeat: Test again until you achieve the desired depth. For framing, flush or slightly countersunk is usually ideal.
Troubleshooting Common Issues
Even the best tools can have hiccups. Here are a few common problems and solutions:
- Nails Not Driving Fully:
- Check your air pressure (pneumatic) or battery charge (cordless).
- Make sure you’re using the correct nail size and type for the nailer.
- Ensure nails are loaded correctly in the magazine.
- The wood might be too dense, or the drive mechanism might need maintenance.
- Nail Jams:
- ALWAYS disconnect the
- ALWAYS disconnect the