Quick Summary:
A lightweight cordless nail gun unleashes essential power for DIY projects without the hassle of cords or compressors. They offer freedom, speed, and precision for home renovations and woodworking, making tasks easier and faster than ever before.
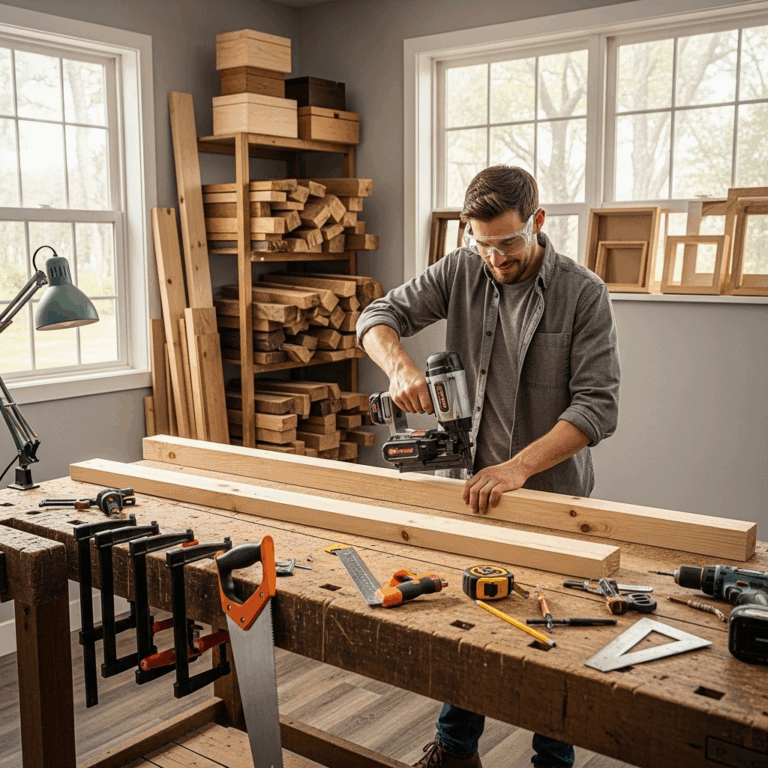
Hey there, fellow DIY enthusiasts and aspiring woodworkers! Jack Shaffer here, your friendly neighborhood tool guy from Nailerguy. Ever found yourself wrestling with tangled cords or lugging around a noisy air compressor just to hang a picture or build a simple shelf? It’s definitely a bummer and can make even the most exciting project feel like a chore. Well, get ready, because we’re about to dive into a tool that’s a total game-changer: the lightweight cordless nail gun. This little powerhouse is your ticket to freedom, speed, and excellent results, no matter your skill level. Let’s uncover why it’s become such a must-have for anyone who loves a good DIY project!
Table of Contents
The Magic of Lightweight Cordless Power
Imagine this: you’re working on a project, and you can move freely from one spot to another without a care in the world. No tripping hazards, no searching for an outlet, and definitely no noisy compressor shaking your workspace. That’s the dream, right? Lightweight cordless nail guns make this dream a reality. They run on battery power, meaning the motor and the mechanism to drive the nail are all contained within the gun itself. This innovation has revolutionized how we approach many DIY tasks, from framing small structures to adding decorative trim. They deliver enough power to sink nails effectively while being light enough to handle comfortably for extended periods.
Why Choose a Lightweight Cordless Nail Gun?
The benefits of opting for a lightweight cordless nail gun are numerous, especially for home DIYers and hobbyists. They simplify your workflow and improve the overall experience of tackling projects.
Unrivaled Portability and Freedom
- No Cords, No Limits: This is the most obvious benefit. You can take your nail gun anywhere – up on a ladder, into tight corners, or out to the backyard project without being tethered.
- No Air Compressor Needed: Say goodbye to the bulky, noisy, and often expensive air compressor. Cordless nail guns are self-contained units, significantly reducing setup time and the overall footprint required for your tools.
- Effortless Maneuverability: “Lightweight” is key here. These tools are designed to be easy to handle, reducing fatigue, especially when working overhead or in awkward positions. This means you can work longer and with more precision.
Speed and Efficiency Gains
- Rapid Nailing: Cordless nail guns can drive nails much faster than using a hammer. This dramatically speeds up assembly, whether you’re building furniture, installing trim, or working on fencing.
- Consistent Results: They drive nails to a consistent depth every time, giving your projects a professional and clean look. You can often adjust the depth setting to avoid over-driving or under-driving nails.
- Reduced Physical Strain: Less hammering means less wear and tear on your body. This is a huge advantage for those tackling larger projects or who may have physical limitations.
Versatility for Various Projects
Lightweight cordless nailers come in different varieties, each suited for specific tasks. Knowing which type you need will ensure you get the most out of your investment, whether you’re a seasoned pro or just starting out.
Common Types of Lightweight Cordless Nail Guns
While the “cordless” aspect is uniform, the “nail gun” part can vary. The most common types you’ll encounter are:
- Brad Nailers: These are perfect for delicate trim work, molding, and smaller decorative projects. They use slim, small-headed nails (brad nails) that leave tiny holes, making them easy to conceal.
- Finish Nailers: A step up from brad nailers, finish nailers use slightly larger nails with a more substantial head. They are ideal for installing baseboards, crown molding, and window casings where more holding power is needed, but you still want a relatively discreet fastener.
- Framing Nailers: While often heavier, there are increasingly lightweight and compact framing nailers available in cordless versions. These are designed for heavier-duty tasks like building decks, framing walls, or assembling larger wooden structures. They use much larger, thicker nails.
- Pin Nailers: The smallest of the bunch, these use extremely fine headless pins. They are great for attaching very delicate trim, securing small pieces of wood in intricate projects, or tacking small components without marking the surface.
Understanding the Power Source: Batteries
The heart of any cordless tool is its battery. For lightweight cordless nail guns, you’ll typically find them powered by Lithium-ion (Li-ion) batteries. These are popular for good reason.
- Longer Runtime: Li-ion batteries hold a charge well and offer a good amount of power for their weight.
- Faster Charging: Most modern Li-ion chargers can top up your battery relatively quickly, minimizing downtime on your project.
- No Memory Effect: Unlike older battery technologies, you don’t need to fully discharge Li-ion batteries before recharging, which is super convenient.
- Voltage Matters: Batteries come in different voltages (e.g., 12V, 18V, 20V). Higher voltage generally means more power, which is important for tasks requiring more force, like driving larger nails or into harder woods. For lighter tasks like trim work, a lower voltage might suffice and offer a lighter tool overall.
When choosing a nail gun, check how many batteries are included and their capacity (measured in amp-hours, Ah). Having at least two batteries is usually recommended so you can charge one while using the other, ensuring uninterrupted work.
Key Features to Look For in a Lightweight Cordless Nail Gun
Not all lightweight cordless nail guns are created equal! When you’re shopping around, keep an eye out for these important features to make sure you get a tool that fits your needs and budget.
Essential Features Breakdown
- Weight: As we’re focusing on lightweight models, this is paramount. Aim for a tool that feels comfortable in your hand. Check the tool’s specifications, but also try to hold it if possible.
- Ergonomics & Grip: A comfortable, non-slip grip is crucial, especially for extended use or when working in imperfect conditions.
- Depth Adjustment: The ability to easily adjust how deep the nail is driven is vital. Too shallow and the nail sticks out; too deep and you damage the wood. Look for tool-free depth adjustment if possible – usually a dial or wheel.
- Nail Jam Clearance: Jams happen! A tool with easy, tool-free access to clear jams will save you a lot of frustration.
- Sequential vs. Contact Fire Mode:
- Sequential (or Single Sequential) Mode: This is the safer mode. You must press the safety tip against the surface (the contact trip) before you pull the trigger to drive a nail. This prevents accidental firing.
- Contact (or Bump) Fire Mode: You hold the trigger down and then bump the nose of the gun against the surface to drive nails rapidly. This is faster but requires more caution. Many modern guns offer a switch to toggle between modes.
- LED Work Light: A small LED light that illuminates your work area, especially useful in dimly lit spaces or under cabinets.
- Belt Hook: A convenient hook to hang the nailer on your belt or a ladder rung when not in use.
- No Mar Tip: A rubber or plastic tip on the nose of the nailer to protect delicate surfaces from accidental marks or dents.
Technical Specifications That Matter
Beyond the basic features, a few technical details can influence performance:
- Nail Capacity: How many nails can the magazine hold? More capacity means fewer reloads.
- Nail Range: What lengths and gauges of nails can the tool fire? Ensure it matches the type of work you plan to do.
- Battery Compatibility: If you already own tools from a specific brand, check if the nailer uses the same battery platform. This can save money and simplify charging.
- Firing Rate: How many nails can it drive per minute? This is more relevant for high-volume tasks.
Getting Started: Your First Project with a Lightweight Cordless Nail Gun
Ready to put your new tool to work? Let’s walk through a simple, beginner-friendly project: installing some decorative molding around a window. This is a fantastic way to get comfortable with your nail gun’s capabilities.
Project: Installing Window Molding
Tools and Materials You’ll Need:
- Your lightweight cordless nail gun (a brad or finish nailer is ideal for this)
- Appropriate nails for your nail gun (e.g., 18-gauge brad nails, 1.5 to 2 inches long)
- Your chosen molding
- Measuring tape
- Pencil
- Miter saw (for precise angled cuts) or a handsaw with a miter box
- Safety glasses (mandatory!)
- Work gloves (optional but recommended)
- Wood filler and putty knife
- Sandpaper
- Paint or stain
Step-by-Step Guide:
- Measure and Plan: Carefully measure the perimeter of your window where the molding will go. For a clean look, you’ll want to cut your molding pieces at 45-degree angles (miters) so they join neatly at the corners.
- Cut Your Molding: Using a miter saw or a handsaw and miter box, cut your molding pieces. It’s often best to cut slightly long and then trim down to fit perfectly. Measure twice, cut once! Even slight inaccuracies can make the final result look unprofessional.
- Prepare Your Nail Gun:
- Make sure your battery is charged and inserted firmly.
- Select the correct nail size for your molding thickness and length.
- Load the nails into the magazine according to your nail gun’s manual.
- Ensure the safety tip is engaged and set your depth adjustment. For most molding, you’ll want the nail head to sit just slightly below the surface of the wood, enough to be filled but not so deep it splits the wood. Start with a shallower setting and test on scrap wood.
- Safety First: Put on your safety glasses. Always be aware of where the nail gun’s nose is pointed and ensure it’s never aimed at yourself or anyone else.
- Position and Fire:
- Hold a piece of molding up to the window frame.
- Set the nail gun’s safety tip firmly against the molding and the wall surface at your intended nailing point.
- If using sequential mode, press the safety tip firmly, then pull the trigger. If using contact mode, hold the trigger and then lightly bump the nose against the surface (be careful with this mode!).
- Drive nails every 6-8 inches along the length of the molding, and 1-2 nails near each end.
- For trim, you want to drive nails into the studs behind the drywall if possible for maximum holding power. Some nail guns have a magnetic or small pointer that can help you locate studs. For simpler trim work, just ensure the nails are sinking into the substrate (drywall or wood framing) adequately. A good resource for understanding home construction is the BuildingGreen website, which offers insights into material use and construction techniques.
- Repeat for All Pieces: Continue this process for all sides of the window molding, ensuring your angled cuts meet perfectly at the corners.
- Fill and Finish: Once all molding is in place, use wood filler to fill the small nail holes. Let it dry, then sand the area smooth. Finally, paint or stain your new molding to match or complement your room’s decor.
See? That wasn’t so intimidating, was it? Your lightweight cordless nail gun made quick, clean work of it!
Troubleshooting Common Issues
Even with the best tools, things can sometimes go awry. Here are a few common issues you might encounter with a lightweight cordless nail gun and how to fix them.
Helpful Fixes for Nail Gun Problems
- Nail Jam:
- Cause: Bent nail, incorrect nail size, or debris in the magazine.
- Fix: Disconnect the battery immediately. Consult your manual for the specific jam-clearing procedure. Usually, it involves opening a latch to access the mechanism and removing the obstruction. Ensure you’re using nails recommended for your tool.
- Nails Not Firing:
- Cause: Low battery, safety tip not depressed, magazine empty, air pressure issue (for pneumatic systems, but less common in battery-powered ones).
- Fix: Check battery charge. Ensure the safety tip is pressed firmly against the surface. Load more nails. Check your tool’s manual for any specific troubleshooting steps related to its firing mechanism.
- Nails Firing Too Deeply or Not Deeply Enough:
- Cause: Incorrect depth adjustment setting, firing into different wood densities.
- Fix: Adjust the depth setting dial on the nail gun. If nails are not sinking sufficiently, try increasing the depth. If they are sinking too much, decrease it. Always test your setting on a scrap piece of the same material.
- Tool Not Powering On:
- Cause: Dead battery, battery not seated correctly, internal fault.
- Fix: Ensure the battery is charged and properly clicked into place. If it still doesn’t power on, the battery might be depleted, or there could be a fault with the tool itself. Refer to your warranty or manufacturer support.
Remember, always disconnect the power source (battery) before attempting any maintenance or troubleshooting.
Comparing Lightweight Cordless Nail Guns: A Quick Look
The market is filled with great options. While specific models change, understanding what differentiates them can help you make an informed decision.
Key Comparison Points
| Feature | Entry-Level Models | Mid-Range Models | High-End Models |
|---|---|---|---|
| Weight (< 5 lbs is ideal for 'lightweight') | Often lighter for basic tasks, but can lack power. | Good balance of weight and power. | Excellent power-to-weight ratio, focus on ergonomics. |
| Battery Life | May require more frequent charging. | Good runtime, often includes two batteries. | Longest runtimes, cross-compatible with other tools. |
| Features (Depth Adj., Fires Modes, LED) | Basic functionality. | Tool-free adjustments, LED lights are common. | Advanced features, superior build quality. |
| Nail Driving Power | Sufficient for small brads and trim. | Handles brads and finish nails well, some may do light framing. | Drives nails consistently into various woods and materials. |
| Price Point | Most affordable. | Mid-range investment. | Higher investment, but often with better longevity and performance. |
When to Consider Different Types:
- For Delicate Trim & Crafts: A lightweight 18-gauge brad nailer or a 20-gauge headless pin nailer is perfect.
- For Baseboards & Crown Molding: A 16-gauge or 18-gauge finish nailer will offer better holding power without leaving huge holes.
- For Small DIY Projects (e.g., built-in shelving, small cabinets): A 16-gauge finish nailer or a compact 18-gauge brad nailer can work well.
- For Minor Framing or Deck Repairs: Look for a compact cordless framing nailer or a powerful 15-gauge finish nailer designed for harder tasks.
For beginners, starting with a good quality 18-gauge brad nailer or 16-gauge finish nailer is often the most versatile choice. Brands like DeWalt, Milwaukee, and <a href="https://www.ryobitools.com/