Have you ever looked at a floor and noticed how it meets a wall? That little gap can look messy. This is where laminate wood flooring transition strips come in. They are the perfect solution to make everything look tidy and nice. But what exactly are these strips?
Imagine walking from a cozy carpet to shiny laminate wood flooring. Suddenly, there’s a bump or a gap. It can feel a bit strange, right? Transition strips make that change smooth. They help your rooms look great and feel safe when you walk around.
Did you know that using transition strips can also help your flooring last longer? They protect the edges and keep everything in place. When changing floors, these strips are true heroes. They can match your style too, with many colors and designs available.
So, if you want a beautiful and safe home, learn more about laminate wood flooring transition strips. They might just be the missing piece in your flooring puzzle!
Table of Contents
Essential Guide To Laminate Wood Flooring Transition Strips

Understanding Laminate Wood Flooring Transition Strips
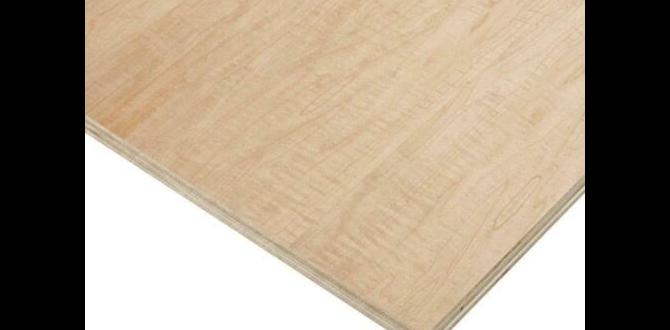
Looking to enhance your home’s look? Laminate wood flooring transition strips are essential. They help join different flooring types smoothly. These strips also guard against wear and tear. Did you know they come in various styles and colors? This means you can match them to your decor. Installing them adds a neat finish, making your space feel more polished. Why settle for less when a small detail can make a big impact?
What are Laminate Wood Flooring Transition Strips?
Definition and purpose of transition strips. Types of laminate wood flooring transitions.
Transition strips are important parts of laminate wood flooring. They help cover the space between two different floor types. This keeps everything looking neat and protects the edges of the flooring. Here are the main types of transition strips you might see:
- T-Molding: Used when floors of the same height meet.
- Reducer: Helps when one floor is higher than another.
- End Cap: Used at doorways or to finish edges.
- Threshold: Great for joining different rooms.
Each type helps keep your flooring safe, and they add a nice touch to your home.
Why are transition strips needed?
Without them, your floors might chip or get damaged. They provide a smooth, safe transition between different flooring styles, helping to prevent tripping. This is especially important in busy areas of your home.
Types of Transition Strips for Laminate Flooring
Tmolding: Uses and installation tips. Reducer strips: Purpose and application methods.
Transition strips are important for a smooth flow between different flooring types. T-molding is used mainly at doorways where two laminate floors meet. It helps cover gaps. To install, make sure both floors are even. Use a hammer for a secure fit. Reducer strips serve a different purpose. They help transition from a thicker floor to a thinner one. Apply them where height differences occur for safety and style. These strips can enhance the look of your room!
What are T-molding and reducer strips?
T-molding connects two similar floors, while reducer strips bridge the gap between different floor heights. Both make spaces safe and tidy.
Installation Tips:
- Ensure floors are level before installation.
- Use adhesive for better hold.
- Measure carefully to cut strips to the right length.
Choosing the Right Transition Strip
Factors to consider (floor height, aesthetics). Comparing materials and finishes.
Selecting the perfect transition strip is crucial for your flooring project. First, consider floor height. Uneven heights can create tripping hazards, which isn’t funny unless you’re a cat! Next, think about aesthetics. Your transition strip should blend well with your laminate wood flooring. You want it to look like a stylish belt holding up your favorite pants, not something that screams, “I don’t match!” Compare different materials like wood, metal, or vinyl, and their finishes. Here’s a quick comparison:
| Material | Durability | Style |
|---|---|---|
| Wood | Good | Classic |
| Metal | High | Modern |
| Vinyl | Fair | Colorful |
Choose wisely, and your space will thank you—plus, your feet won’t complain!
How to Install Transition Strips
Stepbystep installation guide for different types. Common mistakes to avoid during installation.
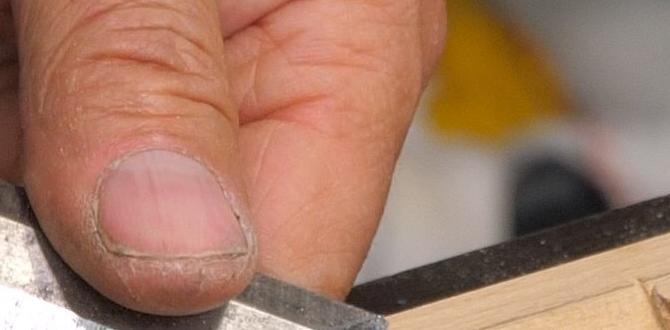
Installing transition strips can feel like an adventure! First, measure the doorway carefully. Cut the transition strip to fit. Use a saw, and remember: slow and steady wins the race! Next, secure it with glue or nails. Be sure the strip lies flat, like it’s having a comfy nap.
Common mistakes? Don’t skip the measuring part. Missing this means uneven strips, which is like having a crooked picture on the wall! Also, avoid using the wrong type of strip for your flooring. Choose wisely, or your floor might throw a tiny tantrum.
| Steps | Common Mistakes |
|---|---|
| Measure carefully | Skipping measurements |
| Cut with precision | Using a dull saw |
| Glue or nail down securely | Forgetting to check for level |
With this guide, you’re ready to shine in the world of flooring!
Maintenance and Care for Transition Strips
Cleaning tips and best practices. Longterm care and replacement signs.
Keeping your transition strips clean is important for their look and lifetime. Use a soft broom or a vacuum with a brush to sweep away dust and dirt. For deeper cleaning, a damp cloth does wonders. Just don’t drown them—no swimming allowed!
Look out for signs of wear, like scratches or gaps. If it feels more like a roller coaster than a floor, it might be time to replace them. Remember, good care can extend their life and keep your home looking fab!
| Cleaning Tips | Replacement Signs |
|---|---|
| Use a soft broom. | Scratches or gaps. |
| Try damp cloth for stubborn dirt. | Feeling uneven or unstable. |
DIY vs Professional Installation: Pros and Cons
Benefits of DIY installation. When to hire a professional. “`html
Installing laminate wood flooring can spark a DIY spirit in many. Doing it yourself can save money, boost your confidence, and let you strut your stuff in creative ways. You’ll get to decide how that transition strip looks. But beware, not everyone is cut out for this adventure!
Hiring a professional can feel like a cozy blanket on a cold day. They are experienced and can ensure everything fits just right. Plus, you won’t have to worry about any *oops* moments. It’s often worth the extra cash for peace of mind!
| DIY Installation | Hiring a Professional |
|---|---|
| Lower cost | Expertise and skill |
| Customize as you wish | Quick and hassle-free |
| Great for small spaces | Less risk of mistakes |
So, roll up your sleeves if you’re ready for the DIY challenge, or call in the pros if your floors could use some seasoned hands. Happy flooring!
“`
Cost Considerations for Transition Strips
Average costs for materials and installation. Budgeting tips for flooring projects.
Transition strips can be a sneaky cost in your flooring project. On average, you might spend about $2 to $8 per linear foot for materials. Installation costs usually add another $1 to $5 per foot. So, before you cry over your budget, plan wisely! Remember: measure twice, cut once, and always keep a little extra cash for those “uh-oh!” moments. It’s worth it for a smooth finish!
| Cost Item | Average Cost (per linear foot) |
|---|---|
| Materials | $2 – $8 |
| Installation | $1 – $5 |
Also, don’t forget to compare prices at different stores. You might find a steal or two! Happy flooring!
Frequently Asked Questions about Transition Strips
Common inquiries and expert answers. Tips for troubleshooting issues with transition strips.
Many people wonder about laminate wood flooring transition strips. Here are some common questions and expert answers:
What are transition strips used for?
Transition strips help connect different flooring types. They create a smooth flow between rooms. This stops trip hazards and protects edges.
How do I install transition strips?
Installation is easy! Follow these steps:
- Cut the strip to fit.
- Use adhesive or nails to secure it.
- Make sure it is level and stable.
What if my transition strip is loose?
You might need to reattach it. Check the adhesive first. If it’s worn, remove the strip and clean the area before reapplying.
Understanding these facts can help you keep your flooring looking great and safe! Always ask an expert if you’re unsure.
Conclusion
In conclusion, laminate wood flooring transition strips are important for a neat finish between different floor types. They help protect your flooring edges and create a smooth look. You can choose different styles and colors to match your decor. Now that you know their benefits, consider adding transition strips to your home. For more tips, check out our other articles!
FAQs
Certainly! Here Are Five Related Questions About Laminate Wood Flooring Transition Strips:
Laminate wood flooring transition strips are thin strips that help join two different types of flooring. They can hide gaps and make everything look neat. You can find them in many colors to match your floors. They also help prevent tripping. Using these strips makes your floor safer and nicer!
Sure! Please provide the question you’d like me to answer.
What Are The Different Types Of Transition Strips Available For Laminate Wood Flooring?
There are several types of transition strips for laminate wood flooring. First, we have T-molding. It joins two floors of the same height. Next is a reducer strip, which helps when one floor is lower than the other. There’s also a threshhold strip, used at doorways to cover gaps. Finally, you can find end caps that finish the edges where the flooring meets a different surface.
How Do You Properly Install Transition Strips Between Laminate Wood Flooring And Other Types Of Flooring?
To install transition strips between laminate wood flooring and other floors, start by measuring the space. You need to cut the transition strip to fit the area. Next, place it where the two floors meet. Use adhesive or small nails to keep it down. Finally, check to make sure it’s secure and looks nice!
What Is The Purpose Of Transition Strips In Laminate Flooring, And When Are They Necessary?
Transition strips are thin pieces of material that help connect different types of flooring. You use them when you have laminate flooring next to another type, like carpet or tile. They help keep the edges neat and safe, so people don’t trip. You need them whenever the floor changes to a different style or height. This makes everything look nicer and works better.
Can You Use The Same Transition Strip For Various Flooring Heights, Or Do You Need To Select Specific Ones?
You can’t use the same transition strip for different flooring heights. You need to pick specific ones that match each floor. Each type helps to make a smooth change between the floors. This way, it looks neat and is safer to walk on.
What Factors Should Be Considered When Choosing The Color And Style Of Transition Strips For Laminate Flooring?
When choosing transition strips for laminate flooring, think about the colors in your room. You want the strip to match or look nice with your floor and walls. Also, consider the style of your furniture. A simple strip may work better in a modern room, while a fancy one might suit an old-fashioned space. Lastly, make sure it’s the right size for the gap it will cover.
{“@context”:”https://schema.org”,”@type”: “FAQPage”,”mainEntity”:[{“@type”: “Question”,”name”: “Certainly! Here Are Five Related Questions About Laminate Wood Flooring Transition Strips:”,”acceptedAnswer”: {“@type”: “Answer”,”text”: “Laminate wood flooring transition strips are thin strips that help join two different types of flooring. They can hide gaps and make everything look neat. You can find them in many colors to match your floors. They also help prevent tripping. Using these strips makes your floor safer and nicer!”}},{“@type”: “Question”,”name”: “”,”acceptedAnswer”: {“@type”: “Answer”,”text”: “Sure! Please provide the question you’d like me to answer.”}},{“@type”: “Question”,”name”: “What Are The Different Types Of Transition Strips Available For Laminate Wood Flooring?”,”acceptedAnswer”: {“@type”: “Answer”,”text”: “There are several types of transition strips for laminate wood flooring. First, we have T-molding. It joins two floors of the same height. Next is a reducer strip, which helps when one floor is lower than the other. There’s also a threshhold strip, used at doorways to cover gaps. Finally, you can find end caps that finish the edges where the flooring meets a different surface.”}},{“@type”: “Question”,”name”: “How Do You Properly Install Transition Strips Between Laminate Wood Flooring And Other Types Of Flooring?”,”acceptedAnswer”: {“@type”: “Answer”,”text”: “To install transition strips between laminate wood flooring and other floors, start by measuring the space. You need to cut the transition strip to fit the area. Next, place it where the two floors meet. Use adhesive or small nails to keep it down. Finally, check to make sure it’s secure and looks nice!”}},{“@type”: “Question”,”name”: “What Is The Purpose Of Transition Strips In Laminate Flooring, And When Are They Necessary?”,”acceptedAnswer”: {“@type”: “Answer”,”text”: “Transition strips are thin pieces of material that help connect different types of flooring. You use them when you have laminate flooring next to another type, like carpet or tile. They help keep the edges neat and safe, so people don’t trip. You need them whenever the floor changes to a different style or height. This makes everything look nicer and works better.”}},{“@type”: “Question”,”name”: “Can You Use The Same Transition Strip For Various Flooring Heights, Or Do You Need To Select Specific Ones?”,”acceptedAnswer”: {“@type”: “Answer”,”text”: “You can’t use the same transition strip for different flooring heights. You need to pick specific ones that match each floor. Each type helps to make a smooth change between the floors. This way, it looks neat and is safer to walk on.”}},{“@type”: “Question”,”name”: “What Factors Should Be Considered When Choosing The Color And Style Of Transition Strips For Laminate Flooring?”,”acceptedAnswer”: {“@type”: “Answer”,”text”: “When choosing transition strips for laminate flooring, think about the colors in your room. You want the strip to match or look nice with your floor and walls. Also, consider the style of your furniture. A simple strip may work better in a modern room, while a fancy one might suit an old-fashioned space. Lastly, make sure it’s the right size for the gap it will cover.”}}]}