Transform your home with stunning laminate wood flooring! Explore brilliant design ideas and practical tips to choose and install beautiful, durable floors that fit your style and budget. Get inspired by laminate wood flooring pictures and create a space you’ll love.
Hey there, DIYers! Jack “Nailerguy” Shaffer here. You’re thinking about new floors, and you’ve stumbled upon laminate wood flooring. Maybe you’ve seen some amazing laminate wood flooring pictures and wondered, “Can I really do that?” Or perhaps you’re just a bit overwhelmed by all the choices. Don’t sweat it!
Flooring can seem like a big decision, but we’re going to break down laminate wood flooring so it’s super easy to understand. We’ll explore how to find the perfect look for your home, why it’s such a popular choice, and even touch on how it’s installed. You’ll be feeling confident and ready to tackle your project in no time. Let’s get those floors looking fantastic!
Table of Contents
Why Laminate Wood Flooring is a DIY Dream
Laminate wood flooring has exploded in popularity, and for good reason! It offers the beautiful look of real hardwood at a fraction of the cost. Plus, it’s incredibly durable, making it a fantastic option for busy homes with kids and pets. Think about it: you get that rich, warm aesthetic that hardwood provides, but with a tougher surface that can stand up to everyday life.
It’s a win-win for style and practicality! For beginners, laminate is often much more forgiving to work with than traditional hardwood. The click-and-lock installation systems mean you can often lay down a whole room without needing specialized tools or adhesives. This makes it a truly accessible project for anyone looking to upgrade their home on a budget and with a sense of accomplishment.
Decoding Laminate Wood Flooring Pictures: What to Look For
When you start browsing laminate wood flooring pictures, you’ll notice a few key elements that make each design unique. Understanding these will help you pinpoint exactly what you’re looking for.
The Wood Species Illusion
Laminate flooring is designed to mimic the appearance of various wood species. The patterns printed on the top layer can replicate:
- Oak: Known for its prominent grain patterns and often lighter, natural tones. It’s a classic choice that fits many decor styles.
- Maple: Features a smoother, finer grain and a lighter, creamy color, giving spaces a bright and airy feel.
- Walnut: Offers a richer, darker hue with striking grain variations, adding a touch of luxury and sophistication.
- Hickory: Typically has more color variation and a bolder grain pattern compared to oak or maple, bringing a rustic charm.
- Pine: Often seen in lighter, warmer tones with noticeable knots and softer grain, ideal for a cozy, farmhouse vibe.
Color Palette Power
The color of the laminate significantly impacts the mood of your room. Take inspiration from these common color families found in laminate wood flooring pictures:
- Light Tones (Whites, Creams, Light Grays, Pale Woods): These make rooms feel larger, brighter, and more open. They are excellent for smaller spaces or rooms with limited natural light. Think Scandinavian or modern farmhouse styles.
- Medium Tones (Natural Oak, Beige, Light Browns): These are versatile and warm, providing a classic, traditional look. They blend well with most furniture and decor colors.
- Dark Tones (Espresso, Dark Walnut, Charcoal, Deep Grays): These add a sense of drama, elegance, and sophistication. They work wonderfully to ground a space and create a cozy, intimate atmosphere. High contrast with lighter walls and furniture can be striking.
- Gray Washed/Distressed Looks: These offer a contemporary, weathered, or reclaimed wood aesthetic. They are great for modern, industrial, or coastal designs and often hide dirt and wear effectively.
Grain and Texture Details
Beyond the color and species, pay attention to the texture and grain detail in laminate wood flooring pictures. Some laminates aim for a smooth, almost polished look, while others incorporate:
- Embossed-in-Register (EIR): This is a fantastic feature where the texture of the laminate actually matches the visual grain and knots. It makes the flooring feel and look much more like real wood. You can often see this detail in higher-quality photos.
- Wire-Brushed: Mimics the effect of a wire brush being drawn across the wood, creating subtle ridges and a more textured, rustic feel.
- Hand-Scraped: Designed to look like traditional hand-scraped hardwood, this texture adds character and a vintage charm.
Plank Width and Length
The dimensions of the planks play a surprisingly big role:
- Standard Widths (around 5-7 inches): Offer a classic wood floor appearance that is versatile for most rooms.
- Wide Planks (8 inches and wider): Can make a room feel more grand and expansive, often associated with modern or rustic luxury styles.
- Longer Planks: Contribute to a more seamless, flowing look across larger areas.
Seeing these details in laminate wood flooring pictures helps you translate what you see into a physical product you can order.
Laminate Flooring vs. Other Flooring Types: The Pros and Cons
To truly appreciate laminate, let’s see how it stacks up against other popular flooring options. This comparison is based on general characteristics and can vary by specific product quality.
| Feature | Laminate Wood Flooring | Real Hardwood Flooring | Vinyl Plank Flooring (LVP) | Carpet |
|---|---|---|---|---|
| Cost | $$ (Generally affordable) | $$$$ (Most expensive) | $$ – $$$ (Mid-range to high) | $ – $$ (Broad range) |
| Durability | Very Good (Resistant to scratches, fading, stains) | Good (Can scratch, dent, fade; requires refinishing) | Excellent (Highly resistant to water, scratches, stains) | Fair (Prone to stains, wear, fading) |
| Water Resistance | Fair to Good (Varies; some are water-resistant, some not) | Poor (Susceptible to water damage) | Excellent (Waterproof options common) | Poor (Absorbs moisture) |
| Installation Difficulty (DIY) | Easy (Click-lock systems common) | Moderate to Difficult (Requires nailing/gluing, more tools) | Easy to Moderate (Click-lock or glue-down) | Moderate (Requires tack strips, stretching) |
| Maintenance | Easy (Sweep, damp mop) | Moderate (Requires special cleaners, caution with water) | Easy (Sweep, damp mop) | Moderate (Requires vacuuming, spot cleaning) |
| Feel Underfoot | Can be harder, sometimes hollow-sounding | Warm, solid, natural | Can vary; often softer than laminate, may have padding | Soft, warm |
| Repairability | Difficult (Planks usually need replacement) | Good (Can be sanded and refinished) | Difficult (Planks usually need replacement) | Difficult (Requires patching or re-carpeting area) |
As you can see from the table, laminate often hits a sweet spot between cost, durability, and ease of installation. It’s a fantastic way to get the look of wood without the high cost and intensive maintenance of real hardwood.
Choosing the Right Laminate for Your Space: A Step-by-Step Guide
Ready to pick out your perfect floor? Here’s how to navigate the process, using those inspiring laminate wood flooring pictures as your guide.
Step 1: Assess Your Room’s Needs
Before you fall in love with a specific look, think about the room:
Traffic Level: Is it a high-traffic area like a hallway or kitchen, or a low-traffic space like a guest bedroom? Higher traffic areas benefit from more durable laminate with a higher AC rating (see below).
Moisture Exposure: Will the floor be near water, like in a bathroom or laundry room? If so, you’ll need a water-resistant or waterproof laminate, or you might want to consider vinyl plank flooring (LVP) for better peace of mind. A standard laminate can swell if it gets too wet.
Existing Subfloor: Is your subfloor level and in good condition? Most laminate can be installed over a variety of solid subfloors, but significant imperfections might need addressing.
Your Personal Style: Look through those laminate wood flooring pictures online and in magazines. What colors, styles, and looks keep catching your eye? This is a great starting point.
Step 2: Understand AC Ratings
Laminate flooring has an AC (Abrasion Criteria) rating that tells you how durable it is. This is crucial for ensuring your floor stands up to wear and tear.
- AC1: Moderate residential use. Best for closets or low-traffic bedrooms.
- AC2: General residential use. Suitable for most rooms in a home.
- AC3: Heavy residential use. Ideal for all areas of the home, including high-traffic zones and hallways. This is generally the sweet spot for most DIYers.
- AC4: Commercial and heavy residential use. Good for busy homes or light commercial settings.
- AC5: Heavy commercial use. The most durable, designed for very high-traffic commercial areas.
For most homes, an AC3 or AC4 rating offers excellent durability and value.
Step 3: Get Samples!
This is vital! Don’t rely solely on laminate wood flooring pictures online. Colors can look very different on screen than in your home’s lighting. Order samples of your top choices and bring them into the room where they’ll be installed. Look at them at different times of the day, with natural light and artificial light.
Lay them next to your furniture, wall colors, and any existing decor. This is the best way to ensure you love the look before committing to a whole floor.
Step 4: Consider the Underlayment
Most laminate installations require an underlayment. This layer does a few important things:
- Provides Cushioning: Makes the floor feel more comfortable underfoot.
- Reduces Noise: Minimizes the “clacky” sound that can sometimes happen with laminate. This is especially important in apartments or multi-story homes.
- Levels Minor Imperfections: Helps smooth out small dips or bumps in the subfloor.
- Moisture Barrier: Crucial for preventing moisture from wicking up through the laminate, especially over concrete subfloors.
Some laminate planks come with attached underlayment, which simplifies the installation process.
Step 5: Think About Installation Method
Most modern laminate flooring uses a click-and-lock system. This means planks simply snap or click together. It’s a floating floor method, meaning the floor isn’t attached to the subfloor but rather rests on top of the underlayment.
For a successful DIY installation, make sure to follow the manufacturer’s specific instructions regarding expansion gaps around the perimeter of the room. This gap allows the floor to expand and contract with temperature and humidity changes, preventing buckling.
Design Inspiration: Laminate Wood Flooring Pictures in Action
Let’s dive into some popular design concepts you’ll see in laminate wood flooring pictures and how they can work in your home.
The Modern Farmhouse Look
This style often features light to medium-toned laminate with a slightly distressed or wire-brushed texture. Think wide planks that mimic reclaimed wood. Pair it with white or light-colored walls, shiplap accents, and comfortable, natural-fiber furniture. It’s cozy, inviting, and timeless.
The Sleek, Contemporary Vibe
For a modern aesthetic, opt for laminate with a smooth finish in either very light, almost white tones, or deep, dark, almost black hues. Gray-washed finishes also fit perfectly here. Consider narrower planks for a cleaner look or extra-wide planks for a bold statement. Clean lines, minimalist furniture, and metallic accents complete this style.
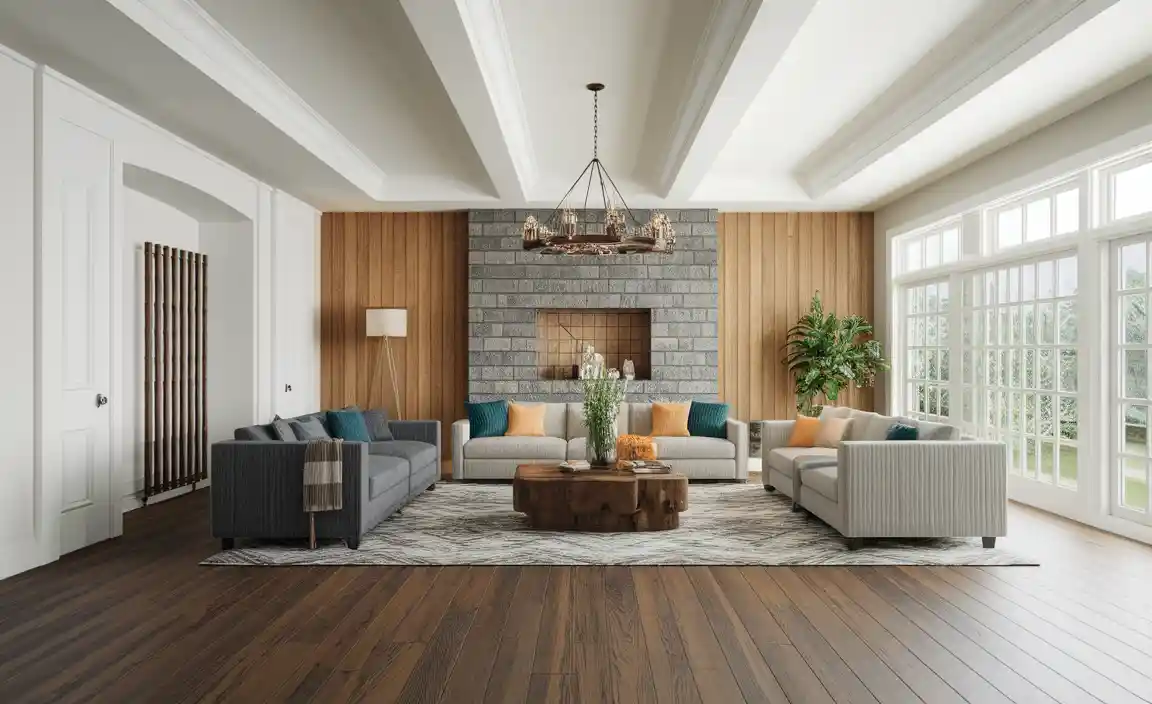
The Classic Traditional Appeal
If you love timeless elegance, medium-toned oak or walnut laminate with a natural grain pattern is your go-to. This look works beautifully with more traditional furniture, richer color palettes, and classic decor elements. It’s warm, inviting, and always feels sophisticated.
The Rustic Charm
Laminate that emulates hand-scraped textures, knots, and significant grain variation brings a rustic feel. Darker, earthy tones or even reddish-brown hues can enhance this. This style pairs well with natural wood furniture, stone accents, and a cozy, lodge-like atmosphere.
Installation Tips from Nailerguy
While we’re focusing on the visual aspect, a quick word on installation. Even though laminate doesn’t typically involve nails like solid hardwood, understanding the tools and process can boost your confidence.
Essential Tools for Laminate Installation
Even without a nailer, you’ll need a few key tools:
Measuring Tape
Pencil
Utility Knife: For cutting underlayment and sometimes scoring planks.
Tapping Block and Mallet: To gently tap planks together, ensuring a tight fit without damaging the edges. A rubber mallet or a dead-blow hammer is ideal.
Pull Bar: To help secure the last plank in a row against the wall.
Jigsaw or Miter Saw: For cutting planks to length and making any necessary notches around door frames or obstacles. A good miter saw makes straight cuts much easier and faster!
Safety Glasses: Always protect your eyes!
Knee Pads: You’ll be on your hands and knees a lot.
* Gloves: To protect your hands.
The Basic “Floating Floor” Installation Concept
The beauty of click-lock laminate is the “floating floor” method. Here’s the simplified idea:
- Prepare the Subfloor: Ensure it’s clean, dry, and level.
- Lay Underlayment: Roll out the underlayment, taping seams as per instructions. If it has a moisture barrier, ensure it’s facing the correct direction.
- Start the First Row: Begin in a corner, typically with the tongue side of the plank facing the wall (some systems differ, so check your instructions). Leave an expansion gap along the walls.
- Connect Planks: Angle the next plank into the first and lower it to lock. Use your tapping block and mallet to ensure a tight seam – you shouldn’t see a gap.
- Cut Planks: Measure and cut planks to fit the end of rows. You might need to cut out notches for radiators or door jambs.
- Subsequent Rows: Stagger the plank joints by at least 6-8 inches for strength and visual appeal. You’ll often use a pull bar to lock the last plank in a row.
- Last Row: Measure and cut planks for the final row, remembering to maintain the expansion gap.
- Install Trim: Cover the expansion gaps with baseboards and/or quarter-round molding.
For detailed instructions and visual aids, resources like Energy.gov’s guide to home remodeling (which includes flooring) can offer valuable general DIY advice.
Frequently Asked Questions About Laminate Wood Flooring
What is the difference between laminate and vinyl plank flooring (LVP)?
Laminate flooring has a core made of fiberboard with a printed image and a protective wear layer. Vinyl plank flooring (LVP) is made entirely of PVC (vinyl) and often has a softer feel and is typically waterproof. Laminate can look very realistic but is generally not waterproof, while LVP is a great option for very wet areas.
Can laminate wood flooring be installed in bathrooms or kitchens?
Standard laminate flooring is generally not recommended for bathrooms or kitchens due to its susceptibility to water damage. However, many newer “water-resistant” or “waterproof” laminates are now available, explicitly designed for these areas. Always check the product specifications and manufacturer’s warranty regarding moisture exposure.