Have you ever tried building something and wished for an easier way? Using a joist hanger can make strong and sturdy frames for your projects. But have you heard of a joist hanger nail gun? It’s a cool tool that saves time and effort!
Imagine being able to shoot nails into wood with just a pull of a trigger. Sounds fun, right? Setting up your joist hanger nail gun may seem tricky. However, it can be simple if you follow the right steps.
In this guide, we will walk you through the setup. We’ll cover everything from choosing the right nails to making sure the gun works perfectly. By the end, you will feel confident using your new tool. Let’s dive into the world of joist hanger nail guns and make your next project easier and more enjoyable!
Table of Contents
Joist Hanger Nail Gun Setup Guide: A Comprehensive Overview

Joist Hanger Nail Gun Setup Guide
Finding the right joist hanger nail gun setup can make your projects easier. Learn the steps to properly set up your nail gun for joist hangers. This ensures safe and effective nailing. Did you know a correct setup can save you time and improve accuracy? Think about how frustrating it is to struggle with tools! Follow these simple tips to achieve a perfect setup every time. You’ll experience smoother work and more success in your building tasks.Understanding Joist Hangers
Definition and purpose of joist hangers. Types of joist hangers and their applications.Joist hangers are metal brackets that support wooden beams or joists. They help hold structures like decks and floors together. Different types of joist hangers serve various purposes:
- Face-Mount Joist Hangers: These attach directly to the side of a beam.
- Top-Mount Joist Hangers: These sit on top of a beam for extra support.
- Flanged Joist Hangers: Their flanges allow for a stronger hold.
- Adjustable Joist Hangers: They can fit different sizes of joists.
Using the right type of joist hanger makes building safer and stronger. They are crucial in construction projects.
What are the benefits of using joist hangers?
Using joist hangers improves stability and load distribution of structures. They also reduce movement, creating a firmer base for homes and decks.
Importance of Proper Nail Gun Setup
Consequences of incorrect setup. Benefits of using the right tools for the job.Setting up a nail gun correctly is essential. If it is not set right, the nails might not go in the wood properly. This can lead to weak structures. On the other hand, using the right tools can make work easier. Here are some benefits:
- Improved Safety: A proper setup reduces the risk of accidents.
- Better Results: Nails will stay in place firmly.
- Time-Saving: You can finish tasks quicker with the right setup.
What happens with an incorrect setup?
With a wrong setup, you might face various problems. You could end up with bent nails or even damage to the wood. **This waste of materials can cost you more money.** Make sure to check your nail gun setup carefully before using it!
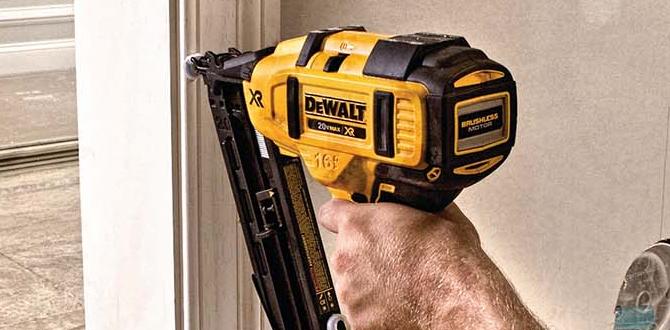
Choosing the Right Nail Gun
Types of nail guns suitable for joist hangers. Key features to look for in a nail gun.Finding the right nail gun is key for joining joist hangers. Two main types work well for this job: framing nailers and angle nailers. Look for features like:
- Lightweight design for easy handling
- Depth adjustment to control nail sink
- Quick reload mechanism to save time
With these tools, your projects will be more efficient and fun!
What type of nail gun is best for joist hangers?
The best choices are framing nailers and angle nailers. They shoot nails at high speed, making your work quicker and easier.
What features should I look for in a nail gun?
- Lightweight for easy use
- Adjustable depth settings
- Fast reloading capability
These features ensure a smoother experience.
Essential Tools and Materials
List of tools needed for setup. Recommended types of nails for joist hangers.To set up your joist hanger nail gun, you’ll need a few important tools and materials. Here’s what you should gather:
- Nail gun
- Joist hangers
- Safety goggles
- Measuring tape
- Level
For nails, use:
- 16d nails or
- Construction screws.
These tools and nails will ensure a safe and efficient setup. Happy building!
What nails are best for joist hangers?
Use 16d nails or construction screws for strong support. They hold the joist hangers securely in place, which keeps everything stable.
Step-by-Step Setup Instructions
Initial setup of the nail gun. Adjusting settings for joist hanger installation.First, grab your nail gun and make sure it’s clean. A clean gun works better and doesn’t throw fits! Next, plug it in or charge it up. Ensure the air pressure is set right; use about 100-120 PSI for most joist hangers. Adjust the depth setting. Too deep? You’ll bury nails. Too shallow? Well, the hangers might as well be on vacation! Below, find a quick table for settings:
| Setting | Recommendation |
|---|---|
| Air Pressure | 100-120 PSI |
| Depth Adjustment | Set for joist thickness |
Finally, load the nails and give everything a good shake! Well, not too much. You want to be excited, not cause a tornado. Your nail gun is now ready for action!
Safety Precautions
Personal protective equipment (PPE) required. Common safety practices while using a nail gun.Using a nail gun can be fun, but safety comes first! Always wear personal protective equipment (PPE) like safety glasses and earplugs. A good pair of gloves won’t hurt either. Keep your fingers away from the nail path, or you might poke an invisible hole in your plans! Remember to read the manual; it’s not just for decoration! Here’s a quick safety checklist:
| Item | Purpose |
|---|---|
| Safety Glasses | Protect eyes from flying debris |
| Ear Protection | Keep your eardrums happy |
| Gloves | Protect hands from sharp items |
Always point the nail gun away from yourself and others. Aiming it at your buddy might look funny, but it’s a bad idea! Remember, safety is no joke, even if your aim is.
Troubleshooting Common Issues
Identifying common setup problems. Solutions for effective use and performance.Setting up a nail gun can sometimes be tricky. Here are some common issues and how to fix them:
- Misfiring: Check if the nails are loaded properly.
- Jams: Clear any stuck nails from the tool.
- Weak shots: Ensure your air pressure is set correctly.
If you address these problems, your nail gun will work much better. Always remember to read the manual for help!
What are the signs of a setup problem?
Common signs include misfiring and nail jams. These point to something wrong with the setup or the nails used.
How can you improve the performance?
- Regularly check air pressure.
- Use the right nails for your gun.
- Keep your tools clean and well-maintained.
Maintenance Tips for Nail Guns
Routine maintenance practices. Signs of wear and when to replace parts.Nail guns work hard, and they need some love too! Here’s how to keep them in top shape:
- Check for dirt and clean the exterior.
- Regularly inspect the power cord for damage.
- Lubricate moving parts often.
- Replace worn-out O-rings immediately.
If you notice any strange sounds or decreased power, it’s time to act. Don’t ignore these signs! Regular checks help catch issues early, keeping your nail gun ready for any project.
How often should I maintain my nail gun?
You should maintain your nail gun every few weeks, especially if you use it often.Signs it’s time to replace parts:
- Broken or bent nails
- Frequent jams
- Noisy operation
Conclusion
In summary, setting up a joist hanger nail gun is simple when you follow the steps. Start with gathering the right tools and materials. Make sure to read the manual for specific instructions. Practice using the tool on scrap wood before starting your project. For more tips, check online resources or videos to help you get it just right!FAQs
What Type Of Nails Should Be Used With A Joist Hanger Nail Gun For Optimal Performance?You should use special metal connector nails with a joist hanger nail gun. These nails are strong and help keep everything steady. They are usually designed to fit perfectly with the gun. Remember, using the right nails makes your project safer and better!
How Do You Properly Set Up A Joist Hanger Nail Gun For Securing Hangers To Wooden Beams?First, you need to gather your tools. Get the joist hanger nail gun, the right nails, and safety gear like goggles. Next, load the nails into the gun. Make sure the nails are the right size for your hangers. Keep the gun steady and aim it carefully at the hanger to nail it to the beam.
What Safety Precautions Should Be Taken When Using A Joist Hanger Nail Gun?When you use a joist hanger nail gun, always wear safety goggles to protect your eyes. Keep your fingers away from the front of the gun to avoid getting hurt. Make sure the area is clear of people before you shoot nails. Always check if the gun is loaded when you pick it up. Finally, follow the instructions carefully to stay safe.
How Do You Troubleshoot Common Issues That May Arise While Using A Joist Hanger Nail Gun?To fix problems with a joist hanger nail gun, you can start by checking the power supply. Make sure it’s plugged in properly. If nails get stuck, try cleaning the gun and removing any jammed nails. You should also check that it’s loaded with the right nails. Lastly, if it doesn’t work, look for any loose parts and tighten them.
What Are The Recommended Joist Hanger Sizes And Types For Various Construction Projects?For your building projects, you need different sizes of joist hangers based on the beams’ width. If your joist is 2 inches by 6 inches, use a 2×6 hanger. If it’s larger, like 2×10 or 2×12, choose the matching hangers for those sizes. Metal hangers are strong and hold the wood well. Always check for weight limits to keep your project safe!