Imagine you are building a wooden deck or a shed. You want everything to be safe and strong. Using the right tools makes a big difference. One important tool is a joist hanger nail gun. It helps you join pieces of wood together quickly. But how do you set it up?
Many beginners feel confused when starting. They may think it’s too hard to use. Fortunately, it’s simpler than you may think! Setting up a joist hanger nail gun can be fun. Once you learn the basics, you will feel like a pro.
Did you know that using a nail gun can save you time and make your projects easier? With a few tips, you can master this tool in no time. Are you ready to dive in? Let’s explore how to get your joist hanger nail gun set up for success!
Table of Contents
Joist Hanger Nail Gun Setup For Beginners: A Step-By-Step Guide

Joist Hanger Nail Gun Setup for Beginners
Setting up a joist hanger nail gun is simpler than you think. First, ensure you have all the necessary tools, like your nail gun and the correct nails. Start by reading the manual for safety tips. Position the joist hanger, then hold it steady. Fire the nail gun, and watch the nails sink in smoothly. Did you know that using a nail gun saves time? With practice, you’ll gain confidence and speed. Dive in, and let your building projects come to life!Understanding Joist Hangers
Definition and purpose of joist hangers in construction. Different types of joist hangers available in the market.Joist hangers are metal connectors that hold wood beams in place. They are important in construction because they help support floors and roofs, making buildings safe and strong. There are many types of joist hangers available, including:
- Standard joist hangers
- Flush beam joist hangers
- Wide joist hangers
- Top-flange hangers
This variety ensures you can find the right hanger for your project. Strong joist hangers make sure everything stays where it should, preventing accidents and damage.
What are joist hangers used for?
Joist hangers are used to support the weight of joists and prevent them from falling.
Preparing for Your Nail Gun Setup
Essential tools and materials required for setup. Safety precautions to take before working with a nail gun.Before using your nail gun, gather the right tools and materials. You’ll need a nail gun, joist hangers, nails, and a safety helmet. Don’t forget safety goggles; flying nails can be as surprising as a squirrel on a trampoline! Always remember to check your nail gun for jams and ensure it’s not loaded when you’re setting it up.
| Essential Tools | Safety Precautions |
|---|---|
| Nail gun | Wear safety goggles |
| Joist hangers | Check for jams |
| Nails | Keep hands away from the firing area |
| Safety helmet | Always know where the safety switch is |
Prep your workspace. A clean area reduces accidents. With the right setup, you’ll be ready to tackle your project and become the nail gun master in no time!
Step-by-Step Nail Gun Setup
Detailed instructions on loading the nail gun. How to adjust settings for optimal performance.Begin by loading your nail gun properly. Remove the front door to access the magazine. Insert the nail strip, ensuring the pointed tips face out. Close the door securely. Next, set the air pressure if your tool allows this. Adjust the settings based on the thickness of your material. If your gun has a depth adjustment, try it out on a scrap piece. Test it a few times for best results.
How do I load a nail gun properly?
To load a nail gun, remove the magazine, insert nails with tips facing out, and close the magazine tightly.
Installing Joist Hangers Correctly
Proper techniques for positioning joist hangers. Common mistakes to avoid during installation.Positioning joist hangers the right way is crucial for a sturdy build. First, make sure the hanger sits flush against the beam. If it’s tilted, your future barbecues might turn into slanted ones! Avoid the common mistake of nailing from awkward angles. Always aim for a straight shot. Let’s keep it level, folks! Misplaced hangers can lead to a wobbly structure. Use this handy chart for quick tips:
| Tip | Common Mistake |
|---|---|
| Align properly | Nail it at an angle |
| Use the right nails | Using random nails |
| Check for level | Forgetting to level |
Remember, your joist hangers are the unsung heroes of your project, so treat them with respect! Keep it simple, and you’ll be building the next great structure in no time.
Tips for Effective Joist Hanger Installation
Best practices for achieving a secure attachment. Troubleshooting common issues during the process.Using joist hangers correctly makes your project strong and safe. Here are some key tips for adding them well:
- Measure twice and cut once. This saves time and materials.
- Use a level to keep everything straight.
- Choose the right nails for your hangers to ensure a tight fit.
If you run into problems, check for these common issues:
- Ensure the hanger sits flat against the wood.
- Check that the nails are not bent.
- Remember to drive nails in straight.
Following these tips will make your installation easier and safer!
What tools do I need for joist hanger installation?
You will need a nail gun, a level, a tape measure, and joist hangers. These tools make the job smoother and faster.
Maintenance of Nail Gun
Regular maintenance steps to ensure longevity. Signs that indicate your nail gun needs servicing.Taking care of your nail gun helps it last longer. Regular maintenance is key. Clean the gun after each use to remove dirt. Check for loose parts before starting. Lubricate moving parts to ensure smooth action. Here are signs your nail gun needs servicing:
- It jams often.
- It makes strange noises.
- It shoots nails inaccurately.
If you notice these signs, get it checked. A well-maintained nail gun saves time and work. Remember, taking care of your tools means they take care of you!
How often should you service your nail gun?
Service your nail gun every few months or after heavy use. Regular checks keep it running well!
Resources for Further Learning
Recommended books and online courses for beginners. Useful videos and tutorials for visual learners.Learning more about joist hangers can be fun! Here are some great resources to help you out.
- Books: Look for beginner guides on building and tools.
- Online Courses: Platforms like Coursera and Udemy have useful courses.
- YouTube Channels: Check channels dedicated to woodworking and DIY projects.
- Tutorials: Websites offer step-by-step guides for hands-on learners.
These tools make learning easier and more exciting!
What are the best online tutorials for beginners?
YouTube offers many detailed video tutorials. They show real-life setups and tips. Websites like DIY Network and Instructables also provide great instructions.
Conclusion
Setting up a joist hanger nail gun is easy for beginners. First, choose a suitable nail gun and gather your materials. Practice your technique on scrap wood. Always prioritize safety by wearing goggles and gloves. With these steps, you can tackle your project confidently. For more tips, explore guides on nail guns and woodworking techniques to enhance your skills!FAQs
What Is A Joist Hanger, And Why Is It Important In Construction?A joist hanger is a metal piece that holds up wooden beams called joists. It helps support the floor or roof in a building. We use joist hangers to make sure everything stays strong and safe. They stop the joists from falling down, which keeps our homes sturdy. Without them, the floors could be wobbly or weak.
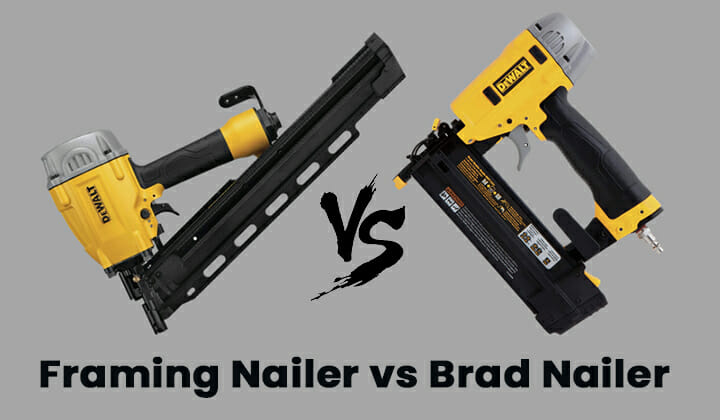
What Type Of Nail Gun Is Best Suited For Installing Joist Hangers?The best nail gun for installing joist hangers is a framing nail gun. It shoots thick nails that hold strong. You can use it to quickly attach the hangers to the beams. Make sure to get one that is easy to handle and works with the right size nails. This will help you finish your project faster and better!
How Do You Properly Set Up A Nail Gun For Use With Joist Hangers?To set up a nail gun for joist hangers, first, make sure you have the right nails that fit. Check the nail gun’s manual to know which type to use. Next, load the nails into the gun carefully. Adjust the power setting if your nail gun has one. Finally, wear safety goggles and test the gun on some scrap wood before using it on the actual hangers.
What Safety Precautions Should Beginners Take When Using A Nail Gun For Joist Hangers?When using a nail gun for joist hangers, you should always wear safety glasses. This protects your eyes from flying nails or debris. Keep your fingers away from the firing area of the nail gun. It’s important not to point the gun at anyone, even if it’s not loaded. Always check that the nail gun is off when you’re not using it.
Are There Specific Techniques For Aligning And Securing Joist Hangers With A Nail Gun?Yes, there are simple ways to use a nail gun for joist hangers. First, make sure the hanger is lined up right with the wood. You can hold it in place with one hand. Then, use the nail gun with the other hand to drive in the nails. Always wear safety glasses to protect your eyes!