Have you ever walked into a room and felt instantly cozy? One way to create that atmosphere is by using indoor birch wall panels. These panels can transform any plain wall into a warm and welcoming space. But do you know how to install them?
Imagine coming home to a room that feels fresh and inviting. With indoor birch wall panels, you can achieve that look easily. You may be surprised to learn that they are not just beautiful but also quite simple to install with the right tools. Many homeowners have discovered this secret.
In this article, we will explore the steps to install indoor birch wall panels. So, grab your tools and let’s get started on making your home even cozier!
Table of Contents
Indoor Birch Wall Panel Installation: A Step-By-Step Guide

Indoor Birch Wall Panel Installation
Transforming your space with indoor birch wall panels is easier than you think. Start by measuring your walls correctly to ensure a perfect fit. Did you know birch wood is known for its beautiful, light color and durability? Next, choose the right adhesive, and apply the panels with care. Remember to let them acclimate to your environment before installation for the best results. With a little patience, you can elevate your room’s style with natural charm.Benefits of Using Birch Panels Indoors
Aesthetic appeal and versatility in design. Durability and longevity of birch wood.Birch panels add beauty to any room. They come in many styles, making them fit any design. Their light color brightens spaces and complements various decor. Plus, birch wood is strong. It can last for years with proper care. It resists scratches and dents better than many other woods. With birch, you get both looks and strength.
Why choose birch wood for indoor spaces?
Birch wood is reliable and stylish. It combines natural beauty with long-lasting strength. This makes it perfect for walls, furniture, or decorations.
What makes birch panels special?
- Beautiful grain patterns
- Wide range of colors
- Easy to maintain
- Strong and durable
Choosing the Right Birch Wall Panels
Types of birch panels available on the market. Considerations for thickness, finish, and sourcing.Before installing birch wall panels, it’s important to choose the right type. There are various options available, like natural, veneer, or plywood birch panels. Consider these key factors:
- Thickness: Thicker panels provide more durability.
- Finish: Options range from matte to glossy. Pick one that fits your style.
- Sourcing: Check if the panels are locally made or imported for quality assurance.
Choosing carefully ensures your indoor birch wall panel installation looks great and lasts long!
What types of birch panels are available?
You can find many types of birch panels. Some popular ones include:
- Natural Birch Panels: Show the wood’s beauty.
- Veneer Panels: Thin layers of birch are glued to a base.
- Plywood Birch Panels: Strong panels made by stacking layers.
Essential Tools and Materials Needed
List of musthave tools for installation. Suggested materials to complement birch panels.To install indoor birch wall panels, you’ll need some essential tools and materials. Here’s what you should gather:
- Measuring tape
- Level
- Pencil
- Hammer
- Nails or screws
- Utility knife
- Wood glue
- Safety goggles
Also, consider these materials to enhance your birch panels:
- Wood filler
- Sealant or varnish
- Baseboards or molding
Having the right tools makes the installation process smooth and fun. Let’s create a cozy space!
What are some must-have tools for installation?
You will need items like a hammer, level, and measuring tape. These tools help ensure a good fit and proper alignment.
What materials complement birch panels?
Wood filler, sealant, and baseboards work well with birch panels. They enhance beauty and protect the wood surface.
Preparing the Installation Area
Steps for cleaning and preparing the wall surface. Importance of measuring and marking for accuracy.Start by giving your wall a good scrub. Dust and dirt are like pesky little gremlins that love hiding in corners. Use a cloth or sponge to wipe the surface clean. Next, measure the wall properly where you will install those beautiful birch panels. Grab a level to make sure everything is straight. Trust me, measuring is like doing a little dance—one wrong step and you’re off beat! Mark your spots with a pencil. This will help your panels fit perfectly.
| Steps for Preparation | Details |
|---|---|
| Clean the wall | Remove dust and dirt with a cloth or sponge. |
| Measure accurately | Use a tape measure and level for precision. |
| Mark your spots | Use a pencil for clear marking on the wall. |
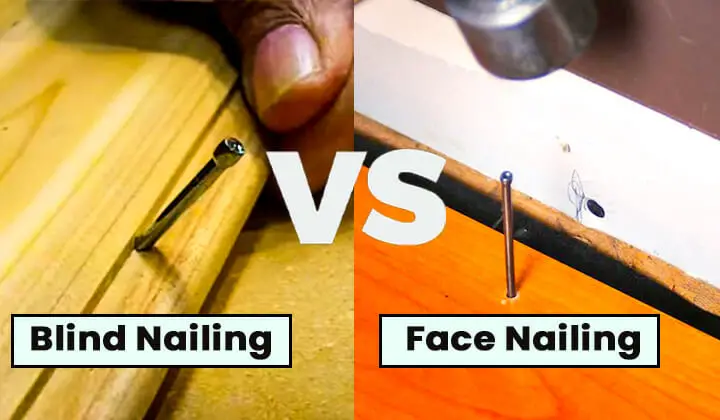
Installation Techniques for Birch Wall Panels
Stepbystep guide for mounting panels. Tips for aligning and securing panels effectively.To install birch wall panels, follow these steps: Start by measuring your wall. Cut the panels to fit. Use construction adhesive and a level to align each one. Secure the panels with screws or nails. Finish with a clean edge using trim.
For perfect alignment, follow these tips:
- Use a pencil for markings.
- Check each panel with a level.
- Space nails or screws evenly.
Did you know? Proper panel installation can prevent future problems. Secure panels correctly for a long-lasting look!
How can I secure birch wall panels effectively?
You can secure birch wall panels by using screws spaced 12 inches apart. Also, make sure to press the panels firmly against the wall while securing them.
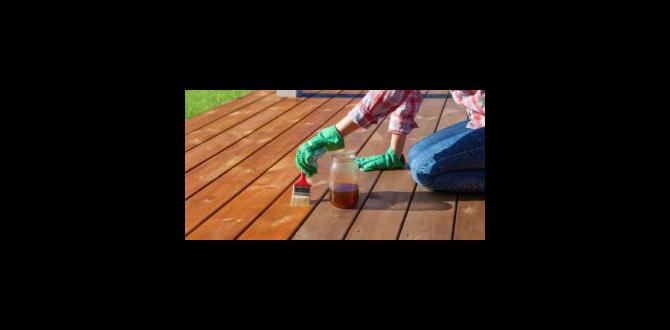
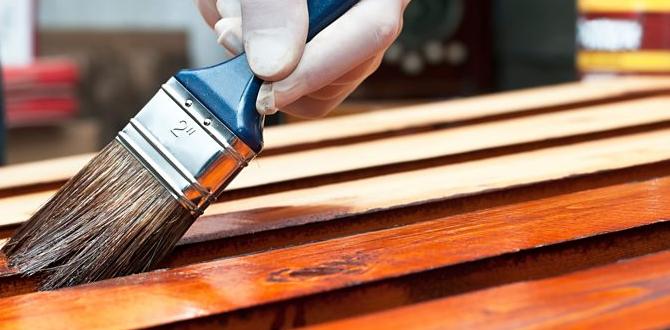
Finishing Touches After Installation
Options for sealing and finishing birch panels. Adding trim and other decorative elements.Once your birch panels are up, it’s time for the fun part—adding the finishing touches! First, consider sealing your panels. A good sealant keeps the wood safe from stains. Remember, a coat of varnish is like giving your panels a superhero cape!
Next, think about trim. Adding some snazzy trim can make your walls pop. It’s like wearing a fancy necklace! You can choose from traditional styles or something more modern. Don’t forget about decorative elements—shelves or artwork can jazz things up. Let your imagination run wild!
| Option | Description |
|---|---|
| Sealant | Protects the wood from stains. |
| Trim | Enhances the wall’s appearance. |
| Decorative Elements | Gives character and personal touch. |
Enjoy your new space! Remember, even the best walls need a little sparkle to shine!
Maintenance and Care for Birch Wall Panels
Recommended cleaning practices and products. Longterm care tips to maintain appearance and integrity.To keep birch wall panels looking great, use simple cleaning methods. A microfiber cloth dampened with water works well. Use a gentle wood cleaner for tough spots, but avoid harsh chemicals. For long-term care, keep panels dry and avoid moisture. Here are some easy tips:
- Dust regularly to prevent buildup.
- Avoid direct sunlight to prevent fading.
- Fix scratches with touch-up kits.
With these steps, your birch panels will stay beautiful for years!
How do I clean birch wall panels?
To clean birch wall panels, use a microfiber cloth and mild soap. Always wipe in the direction of the grain. This keeps the wood looking smooth and shiny!
Common Mistakes to Avoid During Installation
Frequent pitfalls and how to sidestep them. Troubleshooting installation issues.Let’s avoid some classic blunders while putting up those stunning birch panels! First, skipping wall preparation is like baking a cake without mixing the ingredients. You want a smooth surface to stick those panels on. Try checking that the wall is clean and dry. Measure twice, cut once is a golden rule; don’t become a lumberjack with wobbly cuts! If mismatched patterns emerge, remember: patience is key. Got a glitch? Don’t fret! Simply fill gaps with wood filler. Look at this table to dodge common mishaps:
| Mistake | Solution |
|---|---|
| Not measuring correctly | Double-check all measurements! |
| Ignoring wall prep | Clean and dry surfaces are best! |
| Rushing the installation | Take your time for best results. |
| Forgetting adhesive | Use quality adhesive for a strong hold! |
Follow these tips, and you’ll have a beautiful birch wall without the headaches!
Conclusion
In conclusion, installing indoor birch wall panels is a fun way to enhance your space. You can easily add warmth and charm to any room. Remember to measure carefully and choose the right tools. For more tips and step-by-step guides, explore additional resources. Let’s transform your walls together and create a cozy atmosphere!FAQs
What Tools And Materials Are Required For Installing Indoor Birch Wall Panels?To install indoor birch wall panels, you need several tools and materials. First, get the birch panels and some wood glue. You will also need a saw to cut the panels and a measuring tape to measure your walls. Don’t forget a level to make sure the panels are straight. Finally, have a hammer and nails ready to secure the panels in place.
How Do You Prepare The Wall Surface Before Installing Birch Wall Panels?To prepare the wall for birch panels, you need to clean it first. Remove any dust, dirt, or old paint. Then, check if the wall is smooth. If there are bumps or holes, fill them with putty and sand it down. Finally, make sure the wall is dry before you start.
What Are The Best Practices For Cutting And Fitting Birch Panels To Ensure A Seamless Installation?To cut birch panels, first measure where you want to cut. Use a straight edge and a sharp saw to make a clean cut. We should sand the edges gently to avoid rough spots. When fitting the panels, check that they line up nicely without gaps. Finally, use clamps to hold them tight while the glue dries.
How Should Birch Wall Panels Be Finished Or Treated After Installation To Enhance Their Durability And Appearance?After you install birch wall panels, it’s important to finish them. You can use a clear sealant to protect the wood and make it shine. It keeps the panels safe from water and scratches. You might also want to stain the wood for a different color or look. Finally, always follow the instructions on the product you use for the best results!
What Are Some Common Mistakes To Avoid When Installing Indoor Birch Wall Panels?When you install indoor birch wall panels, avoid a few common mistakes. First, don’t forget to measure your walls correctly. If you mismeasure, your panels won’t fit right. Also, remember to clean the wall before sticking the panels on. Dirt can stop them from sticking well. Finally, give the panels enough time to adjust to the room’s temperature before you start. This helps prevent warping later.