Quick Summary:
Improve nail gun accuracy by mastering grip, depth adjustment, and driving technique. Proper tool maintenance, choosing the right nails, and understanding your material are also key. Follow these proven tips for straighter, more consistent nailing on your DIY projects.
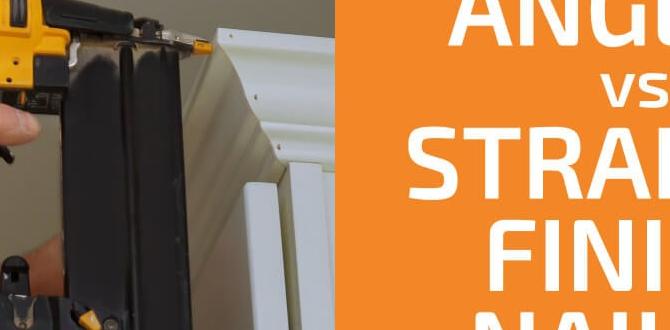
Welcome to Nailerguy! Ever fired a nail gun and had the fastener go in crooked or sink too deep? It’s a common hiccup, especially when you’re new to these amazing tools. But don’t worry, getting that perfect, straight nail every time is totally achievable. With a little practice and some smart techniques, you’ll be driving nails with impressive accuracy in no time. We’re going to walk through some simple, effective ways to boost your nail gun skills, making your projects look cleaner and saving you frustration. Let’s get started!
Table of Contents
Why Nail Gun Accuracy Matters
Accuracy with your nail gun isn’t just about making things look pretty, although that’s a big part of it! A precisely driven nail contributes to the overall strength and stability of your project. A nail that’s angled incorrectly or driven too shallow might not hold as well. Conversely, a nail driven too deep can damage the wood or even split it, compromising the structure. Think about it: if you’re building a sturdy bookshelf or a beautiful picture frame, you want those joints to be strong and seamless. Consistent, accurate nailing ensures your projects are both durable and aesthetically pleasing. It’s about building with confidence and pride in your craftsmanship.
Understanding Your Nail Gun’s Role
Before we dive into improving accuracy, let’s appreciate what your nail gun is designed to do. Nail guns are powered tools that drive nails much faster and more consistently than a hammer. They use either compressed air (pneumatic), electricity (corded or battery), or fuel cells. Each type has its strengths, but the core principle is the same: drive a nail precisely where you aim it. The accuracy you achieve depends on how well you use the tool, not just the tool itself. It’s a partnership between you and your nailer!
Proven Tips to Improve Nail Gun Accuracy
Getting your nail gun to hit the mark every time involves a combination of technique, tool setup, and material awareness. Here are some of the most effective ways to boost your accuracy.
1. Master Your Grip and Stance
This is the foundation of accuracy. Just like any tool, how you hold and position yourself makes a huge difference.
- Firm but Relaxed Grip: Don’t white-knuckle the handle. Hold the nail gun firmly enough so it doesn’t recoil unexpectedly, but keep your grip relaxed. A tense grip can lead to jerky movements and affect accuracy.
- Proper Stance: Stand balanced with your feet shoulder-width apart. This provides a stable platform from which to operate the nail gun. If possible, brace your non-dominant hand or arm against the workpiece for added stability.
- Consistent Contact: Ensure the nose of the nail gun is pressed firmly against the surface before you pull the trigger. This activates the safety mechanism (often called a contact trip or bumper) and prevents accidental firing. It also helps keep the gun steady right before the nail is driven.
2. Nail Gun Depth Adjustment: The Sweet Spot
This is one of the most common areas where beginners struggle. Too deep, and you damage the wood; too shallow, and the nail sticks out. Luckily, most nail guns have an adjustable depth setting.
- Locate the Depth Adjustment: This is usually a dial or a lever near the nose of the gun. You might need to consult your tool’s manual if you can’t find it.
- Start with a Medium Setting: For softwoods like pine, you’ll likely need it set to drive the nail slightly below the surface. For hardwoods, you might need it set to be flush or even slightly proud (sticking out a tiny bit) initially, then gently tap them flush with a hammer.
- Test on Scrap Material: Before you start on your project, grab a couple of pieces of the same wood you’ll be using. Fire a few test nails and adjust the depth until you achieve the desired result – typically flush or slightly countersunk.
- Be Aware of Nail Head Size: The depth setting also depends on the nail head. If you’re using finish nails with small heads, you might be able to sink them deeper than framing nails with larger heads.
Here’s a quick guide on common depth settings for different materials:
| Material Type | Typical Depth Setting | Desired Nail Head Outcome |
|---|---|---|
| Softwood (Pine, Fir) | Medium-Low | Slightly countersunk (nail head below surface) |
| Hardwood (Oak, Maple) | Medium-High | Flush or very slightly proud (then tapped flush) |
| Plywood/MDF | Medium-Low | Slightly countersunk |
| Drywall/Sheathing | Medium | Flush or slightly countersunk (depending on system) |
3. Proper Trigger Technique and Firing Modes
How and when you pull the trigger significantly impacts where the nail goes.
- Sequential Trigger Mode: This is essential for accuracy, especially when starting out. With sequential mode, you must first press the safety contact against the wood and then pull the trigger to fire a single nail. This gives you precise control over each shot. Most beginner-friendly nailers operate in this mode by default.
- “Bump” Firing (Contact Trip Mode): Some tools can be set to bump fire, where holding the trigger down and repeatedly touching the safety contact to the wood fires multiple nails rapidly. While fast, this mode is less accurate and is better for speed applications like roofing or framing floors where precise placement isn’t as critical. For improved accuracy, stick to sequential firing.
- Smooth Trigger Pull: Just like with a firearm, a smooth trigger pull is key. Jerking the trigger can move the nail gun as it fires. Focus on a steady pressure.
4. Tool Maintenance: Keep it Running Smoothly
A well-maintained tool is an accurate tool. Regular check-ups prevent many common issues.
- Lubrication (Pneumatic Nailers): Pneumatic nail guns require a few drops of specialized air tool oil regularly to keep the internal mechanisms moving freely. Check your manual for the recommended frequency. A lack of oil can lead to slow or weak nail driving.
- Clean the Nose and Safety Contact: Over time, wood dust and debris can build up around the nail-driving piston and the safety contact. Gently clean these areas with a soft cloth. This ensures the safety contact can depress properly and the piston can move without obstruction.
- Check Air Pressure (Pneumatic Nailers): For air-powered nailers, operating at the correct air pressure is crucial. Too little pressure results in nails not driving fully. Too much pressure can damage the tool or drive nails too deep. Your nailer’s manual will specify the recommended PSI range. You can find more info on pneumatic tool maintenance from resources like the Occupational Safety and Health Administration (OSHA) on safe operation.
- Battery Charge (Cordless Nailers): For cordless models, ensure batteries are fully charged. A weak battery can lead to inconsistent power delivery.
5. Choose the Right Nails for the Job
It sounds obvious, but using the correct type and size of nail is fundamental to accuracy and project integrity.
- Nail Type: Are you framing a wall, installing trim, or creating decorative boxes? Framing nails are thick and strong for structural work. Finish nails are thinner with small heads for visible trim. Brad nails are even thinner for delicate projects. Using the wrong type can lead to splitting or insufficient holding power.
- Nail Size: Ensure the length and gauge (thickness) of the nail are appropriate for the material thickness and project requirements. You typically want about two-thirds of the nail’s length to penetrate the second piece of wood in a joint.
- Nail Quality: Cheap, low-quality nails can bend or break during driving, leading to misfires or inaccurate placements. Stick to reputable brands of nails.
- Always Use Collated Nails: Nail guns use nails collated (held together) by paper, plastic, or wire. Ensure you’re using the correct collation angle and type the nail gun is designed for. Mixing collation types can jam the gun or lead to faulty drives. You can find guides on nail collation types from woodworking communities and manufacturers.
6. Understand Your Material
Different woods and materials behave differently. Knowing what you’re working with makes a big difference in accuracy.
- Wood Density: Denser hardwoods require more power and might need a slightly shallower depth setting or a pilot hole in very hard spots to prevent over-driving. Softer woods are more forgiving.
- Knots: Hitting a knot can cause a nail to deflect significantly. Try to avoid driving nails directly into knots if possible. If you must, aim to drive the nail at a slight angle or consider pre-drilling a small pilot hole.
- Wood Condition: Very fresh, wet wood can sometimes cause nails to loosen as it dries and shrinks. Make sure your lumber is reasonably dry for the best results.
- Layering Materials: When nailing through multiple layers (e.g., sheathing to studs, then siding to sheathing), consider the total thickness. You might need to adjust depth settings between layers, or ensure your nails are long enough to get adequate purchase in the underlying structure without over-penetrating the final layer.
7. Aiming and Positioning
It’s not just about pressing the gun to the wood; it’s about where you place that contact point.
- Visual Alignment: Look down the barrel of the nail gun, or at its nose, to align it with your desired nailing spot. Many nailers have a small sighting notch or groove that can help with precision.
- Edge Distance: Avoid nailing too close to the edge of the wood. This can cause the wood to split and the nail to miss its mark or not hold. Aim for at least 1/2 inch to 3/4 inch from the edge for most common applications.
- Angle of Approach: Try to keep the nail gun as perpendicular (90 degrees) to the surface as possible. Driving at a sharp angle can cause the nail to skim off or not penetrate fully.
- Pilot Holes (When Necessary): For very thin material, near edges, or in extremely hard wood, a small pilot hole drilled slightly smaller than the nail diameter can guide the nail straight and prevent splitting.
8. Practice Makes Perfect
There’s no substitute for hands-on experience. The more you use your nail gun, the more intuitive these techniques will become.
- Scrap Wood Sessions: Dedicate time to just practicing on scrap pieces of wood. Try different positions, different depths, and focus on consistent, straight shots.
- Start Simple: Begin with basic tasks like attaching trim or simple framing before tackling complex joinery.
- Observe and Learn: Watch experienced woodworkers if you can. Pay attention to how they hold the tool and position themselves.
Troubleshooting Common Accuracy Issues
Even with the best intentions, you might encounter problems. Here’s how to tackle them.
- Nails Driving Too Deep:
- Solution: Adjust the depth control on your nail gun to a shallower setting. Ensure the tool is clean and operating smoothly – sometimes, a sticking piston can over-drive nails.
- Nails Not Driving Fully (Too Shallow):
- Solution: Increase the depth setting slightly. For pneumatic nailers, check that your air compressor is set to the recommended PSI range and that your air hose isn’t kinked or too long. Ensure the battery is fully charged for cordless models.
- Nails Driving Crooked:
- Solution: Ensure the nail gun is held firmly and square to the surface. Check that you are using the correct collation angle for your nail gun. If you consistently hit knots or dense areas, try adjusting your aim slightly or pre-drilling.
- Wood Splitting:
- Solution: You’re likely too close to the edge. Increase your edge distance. If the wood is dense or thin, consider using smaller nails (finer gauge) or pre-drilling pilot holes. For framing, using less aggressive depth settings can also help.
- Nail Gun Jamming:
- Solution: Jams are often caused by bent nails, incorrect collation type, or a dirty tool. Always disconnect the power source (air or battery) before attempting to clear a jam. Consult your tool’s manual for specific clearing instructions. For a comprehensive guide on tool maintenance and safety, the Popular Mechanics guide offers excellent advice for DIYers.
By systematically addressing these common problems, you can get back to driving nails accurately.
Safety First, Always!
Before we wrap up, a quick but crucial reminder about safety. Your fingers are precious!
A nail gun is a powerful tool. Always wear safety glasses to protect your eyes from flying debris or accidental nail ricochets. Keep your fingers away from the nose of the gun, and never point it at anyone. Disconnect the power source (unplug the cord, remove the battery, or disconnect the air hose) whenever you are loading nails, clearing a jam, or stepping away from the tool. Understanding the trigger mechanism and using sequential firing for accuracy is also a safety practice.
For more in-depth safety guidelines on power tools, check out resources from the National Institute for Occupational Safety and Health (NIOSH).
Frequently Asked Questions About Nail Gun Accuracy
-
Q1: What’s the most common reason for inaccurate nailing?
A1: The most common reason is improper depth adjustment. Many users don’t take the time to set the depth correctly for the material, leading to nails being driven too deep or not deep enough.
-
Q2: Can I use just any nails in my nail gun?
A2: No, definitely not! You must use the specific size, type, and collation angle of nails that your nail gun is designed for. Using the wrong nails can cause jams, damage the tool, and lead to inaccurate drives.
-
Q3: My nail gun seems to have less power. What could be wrong?
A3: For pneumatic nailers, it could be low air pressure or a lack of lubrication. For cordless models, the battery might be low. Also, check if the nose of the gun or the piston is dirty or sticking, which can impede proper nail driving.
-
Q4: How do I prevent my nails from splitting the wood?
A4: Avoid nailing too close to the edge of the wood. If you’re working with hard or thin material, consider using a finer gauge nail or drilling a small pilot hole slightly smaller than the nail diameter before firing.
-
Q5: Is sequential firing really that important for accuracy?
A5: Yes, sequential firing (also called single-shot or contact trip) is crucial for accuracy. It requires you to press the safety contact to the wood and then pull the trigger for each nail, giving you full control over placement. Bump firing is faster but much less precise.
-
Q6: How often should I lubricate my pneumatic nail gun?
A6: It depends on the tool and usage, but a good rule of thumb is to add a few drops of air tool oil after every few hours of use or at the end of each day you’re working. Always consult your tool’s manual for specific recommendations.
Conclusion
Improving your nail gun accuracy is a journey, not a destination. By focusing on the fundamentals – a solid grip, proper stance, precise depth adjustment, and attentive trigger control – you’re already halfway there. Don’t forget that regular tool maintenance and choosing the right fasteners for your project are equally vital. Different wood densities and grain patterns might present unique challenges, but with a little observation and practice on scrap materials, you’ll learn to adapt. Remember, every nail you drive accurately builds not just your project, but also your confidence as a DIYer or woodworker. Keep these tips in mind, stay safe, and enjoy the