Quick Summary
Identifying air leaks in nail guns involves checking for hissing sounds, damaged O-rings and seals, loose fittings, fractured hoses, and worn internal components. Addressing these issues promptly ensures your nail gun operates efficiently and safely for all your projects.
Hey there, fellow woodworkers and DIYers! Jack Shaffer here, your go-to guy for all things nailers. Ever been in the middle of a project, ready to fire off some nails, only to be met with a frustrating hiss of escaping air? It’s a common problem, and let me tell you, it can really put a damper on your progress. But don’t worry, it’s usually not a cause for panic. Most air leaks are quite simple to find and fix. Today, we’re going to tackle this head-on and I’ll show you exactly how to identify the causes of air leaks in your nail gun, step by step. We’ll get your tool back in top shape so you can get back to building!
Table of Contents
Why Air Leaks Are a Problem (And How to Spot Them Early)
An air leak in your nail gun is more than just an annoying sound. It’s a sign that something isn’t quite right, and it can lead to several performance issues. For starters, a leak means your compressor has to work harder and longer to maintain the necessary air pressure. This wastes energy and can even shorten the lifespan of your compressor. More directly, a leaky nail gun won’t deliver consistent power. You might find nails not driving in fully, or worse, a weak firing that jams your tool. This can lead to costly repairs and project delays. So, spotting and fixing these leaks is crucial for both efficiency and the longevity of your tools.
One of the most obvious signs of an air leak is an audible hiss or puff of air escaping when the nail gun isn’t firing. You might also notice that the nail gun cycles differently, or that the air pressure gauge on your compressor drops more quickly than usual. If you have to constantly adjust the regulator to maintain adequate pressure, that’s another tell-tale sign. Don’t ignore these symptoms; they’re your nailer’s way of asking for a little attention!
Common Culprits: Where Air Leaks Tend to Hide
Nail guns, like any mechanical tool, have various points where air can escape. Understanding these common leak locations will save you a lot of time and frustration when troubleshooting. Think of it like a doctor knowing the human body – the more you know about where problems usually crop up, the faster you can diagnose and treat them.
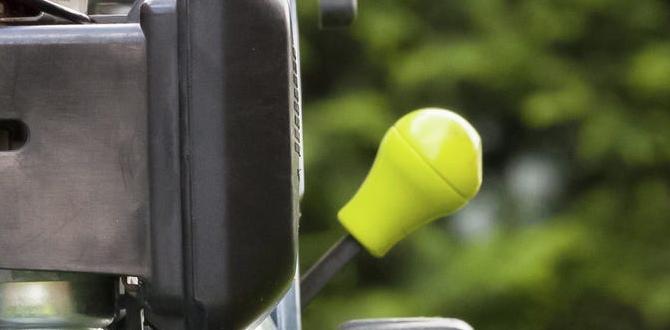
1. The Air Hose Connection
This is probably the most frequent offender. The connection point between your air hose and the nail gun, and the connection between the hose and the air compressor, are prime spots for leaks. These fittings can loosen over time due to vibration and frequent use. Even a slight gap can let air escape.
What to Look For:
- The point where the hose plugs into the nailer.
- The point where the hose connects to the compressor’s quick-connect fitting.
- Any quick-connect couplers you might be using as extensions.
2. O-Rings and Seals
Inside your nail gun, there are numerous O-rings and seals made of rubber or synthetic materials. These are designed to create airtight barriers between moving parts and stationary components. Over time, these can dry out, crack, become brittle, or get pinched and damaged, leading to leaks.
Common O-Ring and Seal Locations:
- Around the trigger mechanism.
- At the base of the magazine where it attaches to the main body of the gun.
- Around the piston and cylinder assembly.
- At the air inlet where the hose connects.
3. The Cylinder and Piston Assembly
The core of your pneumatic nailer is the cylinder where the piston moves up and down to drive the nail. Seals within this assembly are critical for maintaining pressure. If these seals wear out, or if the cylinder itself becomes scratched or damaged, air can bypass the piston, resulting in a loss of power and an audible leak.
This is often a more complex area to inspect, but it’s a very common source of significant air loss. You might hear a leak that seems to be coming from within the tool itself, rather than just the external connections.
4. The Nose Piece and Safety Contact Actuator
The nose piece is where the nail is ejected, and it often houses the safety contact actuator (the part you press against the material before pulling the trigger). Leaks can occur around this area if seals are damaged or if debris gets trapped, preventing a proper seal.
If you notice air escaping around the tip of the nail gun, especially when you press the safety actuator, this is likely to be the problem. Sometimes, a small piece of wood or construction debris can get lodged in here, preventing the seal from closing properly.
5. Damaged Air Hoses
While less common than leaks at the fittings, the air hose itself can be a source of trouble. Kinks, cuts, abrasions, or punctures in the hose can all lead to air escaping.
A damaged hose is usually visually obvious. Look for any signs of wear and tear, especially in areas where the hose might have been dragged over rough surfaces or stepped on.
Your Step-by-Step Guide: How to Identify Causes of Air Leaks
Now that we know where to look, let’s get down to the practical steps of finding that pesky leak. This process is straightforward and doesn’t require specialized tools, just a bit of patience and attention to detail. Safety first, always!
Step 1: Safety Check and Preparation
Before you start poking around your nail gun, it’s crucial to ensure you’re working safely. A pneumatic tool stores compressed air, and if it’s accidentally triggered, it can cause injury.
Safety Precautions:
- Disconnect the Air Supply: Always ensure the air hose is disconnected from the nail gun before you begin any inspection or repair. This is the single most important safety step.
- Release Residual Pressure: If your nail gun has a trigger, gently pull it a few times after disconnecting the air supply to release any trapped air.
- Wear Safety Glasses: Even when the tool is depressurized, it’s good practice to wear safety glasses as small components can sometimes spring loose.
- Work in a Well-Lit Area: Good lighting will help you spot small cracks, worn seals, or loose fittings more easily.
Step 2: The “Listen” Test
Once you’ve safely disconnected the hose, reconnect it to your compressor, but keep the compressor turned OFF. Then, slowly pressurize your system. Listen closely for any audible hissing sounds. This is the simplest way to pinpoint a leak area.
Move the nail gun around slowly, holding it up to your ear. Pay close attention to:
- The air inlet valve.
- The trigger mechanism.
- The nose piece.
- The magazine attachment point.
If you can hear a hiss, you’re already halfway to finding the problem!
Step 3: The “Feel” Test (Soapy Water Method)
If the listen test doesn’t reveal the source, or if the leak is very subtle, the soapy water method is incredibly effective. This is a classic troubleshooting technique used for all sorts of pressurized systems.
What You’ll Need:
- A spray bottle
- Water
- Dish soap (or any mild liquid soap)
- A clean cloth
How to Do It:
- Mix the Solution: In your spray bottle, mix about one part dish soap to four parts water. Shake it gently to create some suds.
- Connect and Pressurize: Reconnect the air hose to the nail gun and pressurize your air system to the recommended operating pressure for your nailer. Consult your nail gun’s OSHA regulations or manufacturer’s manual for proper pressure guidelines.
- Spray All Connection Points: Lightly spray the soapy water solution over all the suspected leak areas: the hose connections, the trigger, the nose piece, the magazine.
- Look for Bubbles: Air escaping from a leak will create bubbles in the soapy water. The more bubbles you see, the larger the leak. Follow the bubbles to the source.
- Clean Up: Once you’ve identified the leak, disconnect the air supply again and wipe down the nail gun with a clean, dry cloth to remove the soapy water.
This method works because the soap in the water makes even small air streams visible as bubbles.
Step 4: Inspecting Specific Components
Once you’ve identified a potential leak area, it’s time for a closer visual inspection. This often involves disassembling small parts, but don’t be intimidated – we’ll keep it simple.
Checking Hose Connections and Couplers
These are the easiest to inspect. Look for:
- Loose Fittings: Can you tighten the hose fitting by hand or with a wrench? Sometimes, they just need a snug turn.
- Damaged Threads: Are the threads on the fitting or the coupler worn or stripped?
- Cracked Couplers: Inspect the quick-connect couplers for any cracks or deformation.
- Worn O-rings in Couplers: Many quick-connect fittings have small O-rings that can degrade.
Examining the Air Inlet valve
This is where the hose connects to the nailer. Leaks here usually mean trouble with the valve itself or its seal.
- Damage to the Valve Stem: Look for any visible damage.
- Loose Valve Assembly: Can the valve assembly be tightened into the gun?
- Worn Valve Seal: This is less visible without partial disassembly.
Inspecting the Trigger and Safety Actuator
Leaks around the trigger or safety mechanism often point to internal seals or the trigger valve assembly.
- External Seals: Are there any visible rubber seals around the trigger that look worn or cracked?
- Debris: Sometimes, dirt or sawdust can get into the trigger assembly and prevent it from sealing correctly.
For deeper work on the trigger valve, you might need your tool’s manual. Many manufacturers provide exploded diagrams that are incredibly helpful. You can often find these on the manufacturer’s website or through online tool forums like those found on Sawmill Creek, a great resource for woodworking tool discussions.
Checking the Magazine and Nose Piece
Leaks specifically from the front of the nailer usually relate to the nose piece seals or the magazine’s connection.
- Magazine Seals: Look for a rubber or plastic gasket where the magazine attaches to the gun body. Is it intact and properly seated?
- Nose Piece Seals: The nose piece itself houses seals around the driver blade assembly. These are often internal but can cause external leaks if damaged.
- Debris: Small wood chips or metal shavings can get lodged between the magazine and the body, or in the nose piece, preventing a good seal.
Step 5: Addressing Internal Leaks (When to Call the Pros or Tackle it Yourself)
If you’ve gone through the external checks and the soapy water test, and you still suspect a leak, it’s likely an internal issue. This is where things get a bit more involved.
Common Internal Leak Sources:
- Piston Seal: This is a rubber seal that encircles the piston. If it’s worn, cracked, or damaged, air will leak past it, reducing driving power and causing a leak noise from the exhaust port.
- Cylinder O-rings: O-rings within the cylinder can also wear out or get damaged.
- Exhaust Valve/Port Seals: Seals around the exhaust valve or port can fail, allowing air to escape directly from the exhaust.
Repairing Internal Leaks
Repairing internal leaks often requires disassembling the nail gun further. For many beginner DIYers, this can feel daunting. Here’s a general guideline:
- Consult Your Manual: Your nail gun’s user manual is your best friend here. It will often have instructions or diagrams for basic maintenance and repair, including how to access the piston and cylinder.
- Gather the Right Parts: You’ll likely need replacement O-rings or seal kits. These are usually specific to your nail gun model. Generic kits might exist, but it’s best to use manufacturer-recommended parts. Your tool supplier or the manufacturer’s website will be the best place to source these.
- Use the Right Tools: You might need a set of Allen wrenches, screwdrivers, pliers, and potentially a specialized seal removal tool or a set of picks.
- Take Photos as You Go: Seriously, this is a lifesaver! As you take parts apart, snap pictures of each step. This makes reassembly much easier.
- Clean Components: While you have the gun disassembled, clean out any dust, debris, or old lubricant from the internal parts.
- Lubricate: Apply a light coat of pneumatic tool oil to new seals and internal moving parts as recommended by the manufacturer before reassembly. This helps them seat properly and prolongs their life.
If you’re uncomfortable with disassembly or if the problem seems particularly complex, it’s always a good idea to seek professional help from an authorized repair center or a qualified tool technician. Sometimes investing in a minor repair is cheaper than buying a new tool, but if the cost of repair approaches the cost of a new, more efficient model, it might be time to upgrade.
A Table of Common Air Leak Causes and Their Solutions
To help you quickly diagnose issues, here’s a handy reference table:
| Symptom / Location | Probable Cause | Solution |
|---|---|---|
| Hissing sound at hose connection (gun side) after pressurizing. | Loose hose fitting on the nail gun; damaged threads; faulty quick-connect coupler. | Tighten fitting; inspect/replace coupler; check threads for damage. |
| Weak nail drive, inconsistent firing, and a hiss from the exhaust port. | Worn or damaged piston seal; faulty cylinder O-rings. | Disassemble and replace piston seal and/or cylinder O-rings. Requires disassembly. |
| Air escaping from around the trigger area when firing or even when idle. | Worn trigger valve seals; debris in trigger mechanism; faulty trigger valve assembly. | Clean trigger area; consider replacing trigger valve assembly or its seals. |
| Loss of air pressure on compressor gauge when gun is idle, with no obvious external hiss. | Internal seals (piston, cylinder, exhaust); microscopic crack in the tool body. | Extensive internal inspection and part replacement, or professional repair. |
| Air leaks from the nose piece when the safety actuator is pressed. | Damaged nose piece seals; debris trapped in the nose mechanism; magazine seal issue. | Clean nose piece; inspect and replace nose seals; ensure magazine is properly seated. |
| Noticeable bulge or sag in the air hose, or a visible cut/puncture. | Physical damage to the air hose. | Immediately replace the damaged air hose. Do not use a damaged hose. |
| Air escaping from the compressor quick-connect fitting when the hose is attached. | Faulty quick-connect fitting on the compressor side; worn O-ring in the fitting. | Inspect and clean the fitting; replace the fitting or its internal components. |
Maintaining Your Nail Gun for Leak Prevention
The best way to deal with air leaks is to prevent them from happening in the first place! Regular maintenance can significantly extend the life of your nail gun and keep it running smoothly.
Regular Cleaning is Key
After each use, and especially after working with treated lumber or dusty materials, clean your nail gun. Pay attention to:
- The Nose Piece: Wipe it clean and ensure no debris is lodged in the safety actuator or nail slot.
- The Magazine: Remove sawdust and debris from the magazine track.
- Exterior Surfaces: Keep the main body of the gun clean.
Lubrication Schedule
Most pneumatic nail guns require regular lubrication. This is typically done by adding a few drops of specialized pneumatic tool oil into the air