Have you ever tried hanging a picture or fixing a squeaky floor? It can be hard to find the right tools for the job. A finish nailer from Home Depot can make your projects much easier. This handy tool drives nails into wood without leaving big holes.
Think about this: you want to add crown molding to your living room. You could hammer each nail by hand, but that takes a lot of time. Wouldn’t it be great if you could do it quickly and neatly? With a finish nailer, you can!
Did you know that professional builders use finish nailers all the time? That’s because these tools help them work faster and more efficiently. So why not learn how to use one? It could change the way you tackle projects at home.
Let’s dive into how to use a finish nailer from Home Depot. You might find it’s easier than you think!
Table of Contents
How To Use A Finish Nailer Home Depot: A Step-By-Step Guide

How to Use a Finish Nailer at Home Depot
Using a finish nailer can make home projects easy and fun. This tool helps secure wood pieces like trim or molding tightly. First, choose the right finish nailer for your job at Home Depot. Always check the nails and practice on a scrap piece. Did you know that a finish nailer can save time compared to using a hammer? Keep safety in mind and wear goggles. Enjoy creating a polished look in your home!Understanding Finish Nailers
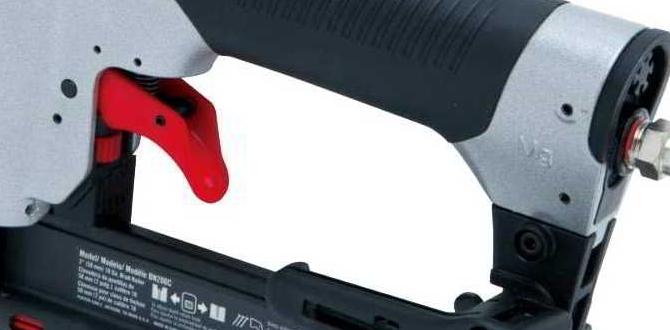
Explanation of what a finish nailer is. Types of finish nailers available in Home Depot.A finish nailer is a handy tool that helps you join pieces of wood by shooting tiny nails called finish nails. These nails are thinner and leave smaller holes, making them perfect for neat work. At Home Depot, you can find two main types of finish nailers: pneumatic and cordless. Pneumatic nailers need an air compressor, while cordless nailers run on batteries. So, whether you love the sound of air compressors or prefer the freedom of batteries, there’s a finish nailer for you!
| Type | Power Source | Best For |
|---|---|---|
| Pneumatic | Air Compressor | Heavy-duty projects |
| Cordless | Battery | Light to medium work |
Choosing the Right Finish Nailer
Factors to consider: brand, power source, and size. Recommended models available at Home Depot.Finding the perfect finish nailer can feel like searching for a unicorn. First, consider the brand. Trusted names like DeWalt and Ryobi often make solid choices. Next, think about the power source. Charged-up battery nailers provide freedom, while corded ones offer consistent power. Lastly, size matters! A lightweight model is great for smaller jobs, but bigger tasks may need something more robust. Check out these recommended models at Home Depot:
| Brand | Model | Power Source | Weight |
|---|---|---|---|
| DeWalt | DCN681D1 | Battery | 5 lbs |
| Ryobi | P325 | Battery | 4.5 lbs |
| Metabo HPT | NT65MA4 | Air | 3.9 lbs |
Choosing the right finish nailer doesn’t need to feel like rocket science. Remember these tips, and your DIY projects will be a hit!
Essential Safety Precautions
Personal protective equipment (PPE) required. Safety tips before operating a finish nailer.Safety should always come first! Before using a finish nailer, put on your personal protective equipment (PPE). This includes safety goggles, gloves, and hearing protection. Your eyes and ears deserve a safe day, too! Always check that the nailer is unplugged or the air supply is off before loading it. Double-check your surroundings; no one wants an unexpected nail party! Here are some important safety tips:
| Safety Tip | Description |
|---|---|
| Wear PPE | Goggles and gloves protect you. |
| Check the nailer | Make sure it’s not loaded when not in use. |
| Watch your fingers | No one wants a surprise manicure! |
Remember, safety is not just a word; it’s a way of life! Keep those digits safe and nail like a pro!
Preparing for Your Project
Tools and materials needed. How to measure and mark your work area.Before you dive into your project, gather your tools and materials. You’ll need a finish nailer, safety goggles, nails, and wood pieces. A measuring tape and a pencil are also key for marking. Don’t forget a fun attitude; it can make the work easier!
| Tools | Materials |
|---|---|
| Finish Nailer | Wood |
| Safety Goggles | Nails |
| Measuring Tape | |
| Pencil |
Now, let’s measure carefully. Use your measuring tape to find where you want to place your materials. Mark the spots with your pencil; neat lines are key! If you mess up, no worries—just be sure not to call it “abstract art!”
Remember, preparing well saves time and headaches. Happy crafting!
Step-by-Step Guide to Using a Finish Nailer
Loading the finish nailer with nails. Adjusting the nail depth settings.Using a finish nailer can seem tricky, but it’s easy! Start by loading it with finish nails. Open the magazine and insert the nails until it’s full. Close it tightly. Next, adjust the nail depth settings. This helps your nails go in just right. Too deep can split wood, while too shallow leaves them sticking out. Find the right depth for your project. Now you’re ready to nail!
How do I load nails into a finish nailer?
To load nails, open the nailer’s magazine, insert the nails, and close it securely.
How do I adjust the depth settings?
- Locate the depth adjustment knob.
- Turn it clockwise for deeper nails.
- Turn it counterclockwise for shallower nails.
Common Techniques for Using a Finish Nailer
Tips for achieving flush nails. How to handle corners and edges effectively.To use a finish nailer well, achieving flush nails is key. Keep the nailer flat against the wood. If it sinks too deep, back off slightly. For corners and edges, angle the nailer carefully. This gives a clean look without splintering. You can also use a scrap piece of wood to support the nailer in tricky spots.
How can I make sure my nails are flush?
To ensure nails sit flush, press the nailer firmly against the surface and check the depth setting. Adjust as needed for smooth results.
Tips for handling corners and edges:
- Angle the nailer slightly away from the corner.
- Use a scrap piece as a base for stability.
- Go slow to avoid splintering the edges.
Maintenance and Care for Your Finish Nailer
Regular maintenance tips for longevity. Troubleshooting common issues.Taking care of your finish nailer can make it last longer and work better. Here are some easy tips:
- Clean the tool after each use to remove dust.
- Check for loose screws and tighten them.
- Lubricate moving parts regularly.
- Store it in a dry place to avoid rust.
If you face problems, try these steps:
- If it jams, turn it off and remove the nails.
- For weak pressure, check the air source.
- If it leaks oil, replace worn seals.
With good maintenance, your finish nailer can work for years. Keep it clean, and it will keep you happy!
How do I keep my finish nailer in good shape?
Regular cleaning, lubrication, and proper storage are key to maintaining your finish nailer.
Alternative Uses for a Finish Nailer
Projects beyond trim work. Creative applications for DIY enthusiasts.Don’t think a finish nailer is just for trim work! This handy tool can help with many fun projects. For starters, why not create a DIY photo frame? Use it to build sturdy shelves or even a birdhouse. The finish nailer makes quick work of attaching pieces together, so you can spend more time being creative. Just remember, it’s not a magic wand—safety first! Fun fact: Less time on building means more time for snacks!
| Creative Uses | Description |
|---|---|
| Photo Frames | Craft a unique frame for your favorite picture. |
| Shelves | Build simple and sturdy shelves for your treasures. |
| Birdhouses | Create a cozy home for feathered friends. |
Frequently Asked Questions
Answers to common queries about using a finish nailer. Tips for firsttime users.Got some questions about using a finish nailer? You’re not alone! Many first-time users wonder how to get started. For example, How do I select the right nail size? Typically, 16-gauge nails work best for most projects. Another question is How do I avoid jamming? Keeping the tool clean really helps. Remember, don’t treat your nailer like a drum; it doesn’t like being banged! Here’s a quick reference table to make things easier:
| Question | Answer |
|---|---|
| What size nails should I use? | 16-gauge is usually perfect. |
| Can I use it for outdoor projects? | Yes, just choose galvanized nails. |
| How do I avoid accidents? | Keep your fingers clear and wear goggles! |
With these tips, you’ll nail it—pun intended! Happy building!
Conclusion
In conclusion, using a finish nailer from Home Depot is easy and rewarding. First, gather your materials and safety gear. Then, practice your nailing technique on scrap wood. Finally, get creative with your projects! Remember to read the manual for safety tips. For more help, check out Home Depot’s website or ask an employee for advice. Happy building!FAQs
What Safety Precautions Should I Take When Using A Finish Nailer From Home Depot?When using a finish nailer, always wear safety glasses to protect your eyes. Keep your fingers clear of the nail area to avoid getting hurt. Make sure to point the nailer away from yourself and others. Always check if the tool is loaded and in good shape before using it. Finally, never try to catch or hold a nail once it’s fired.
How Do I Choose The Right Size Finish Nails For My Project?To choose the right size finish nails, think about what you’re working on. For thin wood or trim, use smaller nails, like 1 inch long. For thicker wood, you might need longer nails, up to 2.5 inches. Always make sure the nails are strong enough to hold your project together. If you’re unsure, ask a grown-up for help!
What Type Of Finish Nailer (Electric, Pneumatic, Or Manual) Is Best For My Home Diy Projects?For home DIY projects, an electric finish nailer is usually the best choice. It’s easy to use and doesn’t need a compressor. You just plug it in and start nailing. It’s great for small tasks, like fixing trim or making furniture. If you want something simple and quick, go for electric!
Can I Use A Finish Nailer For Baseboards And Trim Installation, And What Techniques Should I Follow?Yes, you can use a finish nailer for baseboards and trim. A finish nailer helps you attach the wood easily and quickly. To use it, hold the nailer straight against the trim. Make sure it’s flush with the wall, then squeeze the trigger to shoot the nail in. Remember to fill any holes with putty afterward for a clean look.
How Do I Properly Maintain And Clean My Finish Nailer To Ensure Optimal Performance?To keep your finish nailer working well, clean it often. First, unplug it or take out the battery. Use a soft cloth to wipe off dust and dirt. Check for stuck nails and remove them gently. Finally, oil moving parts lightly according to the instructions. This helps it work better and last longer!