If you’re new to woodworking, you’ve probably heard of a finish nailer. This handy tool is like magic for joining pieces of wood. Can you imagine building something beautiful with ease? It sounds great, right?
Using a finish nailer is not just for experts. Even beginners can master it quickly. In fact, many people start with this tool when they explore their DIY creativity. Picture this: you have a fun project in mind, but you feel stuck with the tools. Instead of feeling confused, a finish nailer can help you finish faster.
Did you know that using a finish nailer can save you time? You can complete your projects without the fuss of hammers and nails. Plus, it gives your work a clean and professional look. Imagine impressing your friends and family with your skills. How cool would that be?
In this article, we will show you how to use a finish nailer for beginners. You will learn some simple steps to make your projects shine. So, are you ready to dive into the world of finish nailers?
Table of Contents
How To Use A Finish Nailer For Beginners: A Step-By-Step Guide

How to Use a Finish Nailer for Beginners
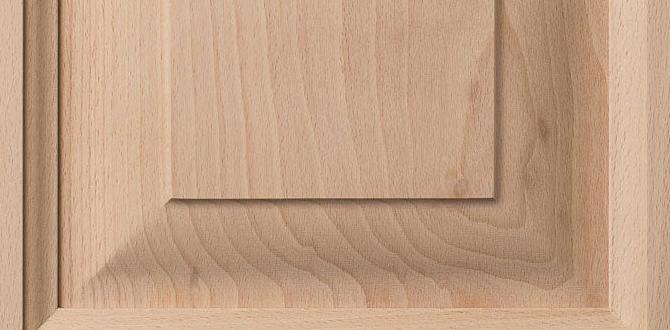
Using a finish nailer can make your woodworking project faster and easier. First, learn the safety rules. Always wear goggles to protect your eyes. Make sure you understand the nail sizes. Size matters! The right nail can hold things together better. Practice on scrap wood before your main project. Did you know that finish nailers can also be used for crown molding? They can create a polished look in no time. So, grab your finish nailer and start building!Understanding Finish Nailers
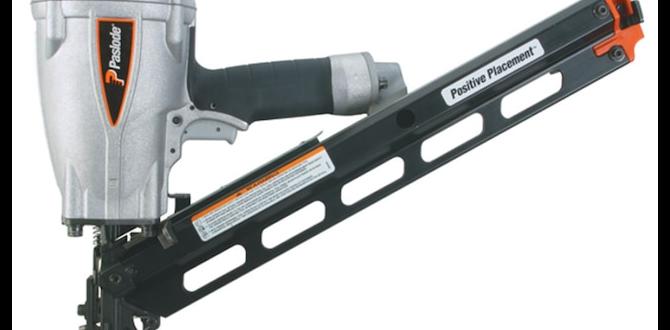
Definition and types of finish nailers. Differences between finish nailers and other types of nailers.A finish nailer is a tool that helps you drive nails into wood. It is often used for trim work, like baseboards or cabinets. There are two main types: pneumatic and cordless. Pneumatic nailers use air compressors, while cordless nailers run on batteries. This tool is different from others, like framing nailers. Finish nailers use smaller nails for finer work, while framing nailers use larger ones for heavy-duty jobs.
What is the difference between finish nailers and other types?
Finish nailers are designed for precision, while other types focus on speed and strength.
Here are some key differences:
- Finish nailers: Use small nails, good for trim and furniture.
- Framing nailers: Use larger nails, meant for building frames.
- Brad nailers: Use even smaller nails, ideal for lightweight projects.
Essential Safety Precautions
Personal protective equipment (PPE) needed. Safety tips while using a finish nailer.Before diving into the world of finish nailers, remember that safety comes first! Always wear personal protective equipment (PPE) like safety glasses, ear protection, and gloves. You don’t want a rogue nail or loud noise to ruin your day. While using a finish nailer, keep your fingers clear of the firing area and never point it at anyone. Just imagine a nail flying like a superhero—definitely not cool! Stay focused and avoid distractions. Remember, safety is key, and having fun is just a bonus!
| Essential PPE | Safety Tips |
|---|---|
| Safety Glasses | Keep fingers away from the firing area. |
| Ear Protection | Avoid distractions while working. |
| Gloves | Never point the nailer at anyone. |
Choosing the Right Finish Nailer
Key features to consider (e.g., pneumatic vs. electric). Recommended brands and models for beginners.Picking the right finish nailer can feel like choosing a kid’s favorite ice cream flavor—so many options! First off, you need to decide between a pneumatic nailer, which uses air pressure, and an electric one that’s easier to handle. Pneumatic nailers are great for tough jobs, while electric models are perfect for newbies. Brands like Bostitch and DeWalt offer user-friendly models. Check out this helpful table!
| Brand | Model | Type |
|---|---|---|
| Bostitch | N62FNK | Pneumatic |
| DeWalt | DCN660B | Battery Electric |
| Makita | XFN060 | Battery Electric |
With these choices, even your pet goldfish could pick a good nailer!
Preparing Your Project
Selecting the right type and size of nails. Importance of surface preparation and layout planning.Starting your project the right way is essential. Begin by choosing the correct type and size of nails. The size should match your material’s thickness. Also, think about how strong the nails need to be. Good surface preparation helps too! Make sure your wood is clean and smooth. Plan where to place each nail to avoid mistakes.
- Select the nail size according to your project needs.
- Clean all surfaces before nailing.
- Map out your nailing layout to make it easier.
How do I choose the right nails for a finish nailer?
Select nails based on the project type and material thickness. For example, use 1-1/4 inch nails for thin boards and 2 inch nails for thicker materials. Always check if the nails fit your finish nailer.
Basic Techniques for Using a Finish Nailer
Stepbystep guide on how to load the nailer. Proper stance and handling techniques to ensure accuracy.First, let’s load your finish nailer. Open the magazine and insert the nails. Make sure they’re facing the right way, or you might just end up with a nail surprise! Next, handle the nailer with care. Stand firm and keep both hands on it for better control. Keep it at a slight angle to avoid those awkward misfires. Remember, no one wants a “nail fail” moment!
| Step | Description |
|---|---|
| 1 | Open the magazine. |
| 2 | Insert nails correctly. |
| 3 | Stand with both hands on the tool. |
| 4 | Angle for accuracy. |
Common Mistakes to Avoid
Issues caused by incorrect nail size or type. Misalignment and its effects on the finish.Using the wrong nail size or type can turn your beautiful project into a hot mess! If the nail is too long, it might poke out the other side, making your work look like Swiss cheese. Yikes! Nail misalignment is another sneaky danger. If nails aren’t straight, your finish can end up lopsided, ruining your masterpiece. Remember, a happy nail makes a happy project! Here’s a quick table to show the right nail types:
| Nail Size | Recommended Use |
|---|---|
| 18-gauge | Thin trim and molding |
| 16-gauge | Medium trim and baseboards |
| 15-gauge | Thicker moldings |
So, choose wisely, and your projects will shine bright like a diamond!
Maintenance and Care for Your Finish Nailer
Routine cleaning and lubrication practices. Troubleshooting common problems with a finish nailer.Taking care of your finish nailer is a breeze! Regularly clean it to remove dust and debris. This helps keep it working smoothly. A little lubrication goes a long way too, so don’t forget to oil the moving parts—which is much easier than it sounds! If you run into issues, like jams or air leaks, don’t panic! Check the nails or the air hose. They might need a little TLC. Trust me, your finish nailer will thank you!
| Common Problems | Solutions |
|---|---|
| Nail jams | Clear out the jam and reload nails. |
| Air leaks | Check hoses and connections for damage. |
| Low power | Ensure enough air pressure in the tank. |
Exploring Advanced Techniques
Tricks for achieving a clean finish on corners and edges. How to incorporate a finish nailer into complex projects.To get a clean finish on corners and edges, try these tricks. First, use painter’s tape to outline your area. This helps keep nails neat. Next, position your finish nailer at a slight angle when using it on edges. This reduces visible marks. For complex projects, integrate your finish nailer by planning where to place fasteners. This ensures strong joints without fuss.
How can I keep corners looking great?
You can keep corners looking great by using painter’s tape and placing nails at the right angle. This makes everything smooth and tidy.
| Tip | Description |
|---|---|
| Painter’s Tape | Lines corners to avoid messy marks. |
| Angle Your Nailer | Improves finish quality at edges. |
| Plan Ahead | Choose nail placement for strong joints. |
FAQs About Finish Nailers
Answers to common beginner questions. Additional tips to improve skills with a finish nailer.Many beginners have questions about finish nailers. Here are some common ones:
What should I know before using a finish nailer?
Be sure to wear safety glasses. Understand the type of nails you need. Practice on scrap wood first. This will help you feel comfortable.
How can I improve my skills with a finish nailer?
- Start slow. Take your time to aim carefully.
- Adjust the depth. Make sure the nails sink evenly.
- Keep it clean. Regularly check for jams and debris.
With these tips, you’ll be nailing like a pro in no time!
Conclusion
In summary, using a finish nailer is easy with practice. You should always wear safety gear and hold the tool steady. Start by choosing the right nails and adjusting the depth settings. Remember to keep your fingers clear when nailing. Now that you have the basics, grab a finish nailer and start your next project! Happy nailing!FAQs
What Safety Precautions Should I Take When Using A Finish Nailer For The First Time?When using a finish nailer, wear safety glasses to protect your eyes. Always keep your fingers away from the tip of the tool. Make sure to point the nailer away from yourself and others. Always check that the nailer is not loaded when you are changing the nails. Finally, read the manual carefully to understand how the tool works.
How Do I Choose The Right Size And Type Of Finish Nails For My Project?To choose the right size of finish nails, think about what you’re building. They come in different lengths. For small projects, like trim, use shorter nails. For bigger pieces, use longer nails. The type of finish nail matters too. If your project is indoors, standard finish nails work well. For outdoor projects, use galvanized nails because they won’t rust. Always pick the size and type based on your project needs!
What Are The Steps For Properly Loading A Finish Nailer With Nails?To load a finish nailer, first, make sure it’s unplugged or not loaded. Open the magazine by releasing the latch. Then, grab your finish nails and place them in the magazine, making sure they fit snugly. Close the magazine securely to hold the nails in place. Finally, check that everything is safe and ready before using it!
How Do I Adjust The Depth Of The Nail Penetration When Using A Finish Nailer?To adjust the depth of the nails with a finish nailer, look for a dial or a slider on the tool. You can turn the dial or move the slider to change how deep the nail goes. If you want the nail to go deeper, turn it one way. If you want it to go less deep, turn it the other way. Always test on a scrap piece of wood first to see how it works!
What Techniques Should I Follow To Ensure Straight And Accurate Nailing With A Finish Nailer?To nail straight and accurate with a finish nailer, first hold the tool steady. Make sure you angle it straight against the wood. Press the nose firmly to avoid slipping. Start slowly, then pull the trigger with a steady hand. Always wear safety glasses to protect your eyes!