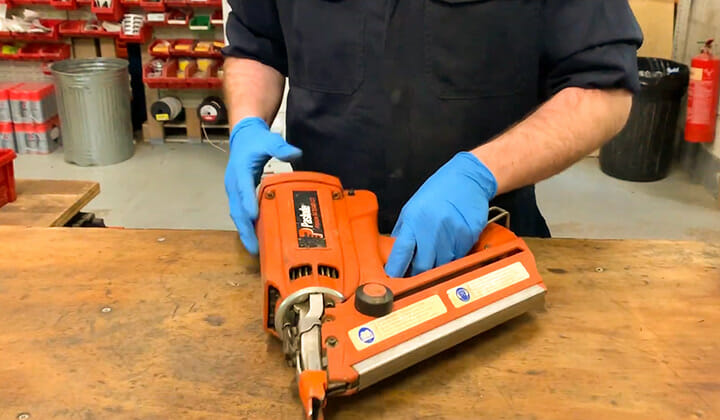
Have you ever wondered why your pneumatic nailer isn’t working as well as it should? Maybe it’s time to learn how to oil a pneumatic nailer. This important task can keep your tool running smoothly and help you finish your projects faster.
Picture this: You’re in the middle of a big project, and suddenly, your nailer starts to sputter and stall. Frustrating, right? Proper oiling can prevent this from happening. It ensures that the moving parts of your nailer work together nicely. When these parts are lubricated well, you get cleaner shots and less wear on the tool.
Did you know that many people forget to oil their tools regularly? This can lead to damage and costly repairs. By taking a few moments to oil your pneumatic nailer, you can save money and time while boosting its performance. Let’s dive into how easy it is to keep your pneumatic nailer in top shape!
Table of Contents
How To Oil A Pneumatic Nailer For Optimal Performance When It Comes To Maintaining A Pneumatic Nailer, Proper Lubrication Is Key To Ensuring Its Longevity And Efficient Operation. Knowing How To Oil A Pneumatic Nailer Not Only Enhances Its Performance But Also Prevents Potential Malfunctions, Saving You Both Time And Money. Here’S A Comprehensive Guide On How To Effectively Oil Your Pneumatic Nailer. Understanding Your Pneumatic Nailer Before Diving Into The Oiling Process, It’S Essential To Understand The Components Of Your Pneumatic Nailer. Typically, These Tools Consist Of: – **Housing:** The Outer Shell That Provides Stability. – **Trigger Mechanism:** Controls The Firing Of The Nailer. – **Pneumatic Cylinder:** Where Air Pressure Powers The Nailing Action. – **Nose:** Where The Nails Exit. Why Oiling Is Important Oiling Your Pneumatic Nailer Is Crucial For Several Reasons: 1. **Prevents Rust:** Metal Components Are Susceptible To Rust, Which Can Lead To Malfunctions. 2. **Reduces Friction:** Lubrication Minimizes Friction Between Moving Parts, Enhancing Performance. 3. **Extends Lifespan:** Regular Oiling Helps Maintain The Tool In Good Working Condition, Extending Its Lifespan. How To Oil A Pneumatic Nailer Follow These Steps To Effectively Oil Your Pneumatic Nailer: 1. **Gather Supplies:** – Quality Pneumatic Tool Oil (Usually Recommended By The Manufacturer). – Clean, Lint-Free Cloth. – Safety Goggles (To Protect Your Eyes). 2. **Disconnect Air Supply:** – Ensure The Nailer Is Disconnected From The Air Compressor To Avoid Accidental Firing. 3. **Add Oil:** – Locate The Oil Inlet On The Nailer. This Is Typically Found Near The Air Inlet. – Place A Few Drops Of Pneumatic Tool Oil Directly Into The Oil Inlet. Usually, 2-3 Drops Are Sufficient, But Refer To The Manufacturer’S Guidelines. 4. **Cycle The Tool:** – Once The Oil Is Added, Reconnect The Air Supply And Fire The Nail Gun A Few Times Without Nails. This Disperses The Oil Throughout The Internal Components. 5. **Wipe Off Excess Oil:** – Use The Lint-Free Cloth To Wipe Any Excess Oil From The Outside Of The Tool. 6. **Regular Maintenance:** – Make It A Habit To Oil Your Pneumatic Nailer Every 2-3 Days Of Heavy Use Or After Every Few Thousand Nails Fired, Depending On The Usage Frequency. Additional Tips – **Check For Leaks:** While Oiling, Inspect Your Nailer For Air Leaks, As This Can Last Affect Performance. – **Read Manufacturer Instructions:** Always Consult The User Manual For Specific Maintenance Recommendations For Your Model. – **Use Proper Oil:** Avoid Using Non-Pneumatic Oil, As It Can Damage The Internal Components. Conclusion Knowing How To Oil A Pneumatic Nailer Is Essential For Maintaining Its Performance And Longevity. By Following These Steps And Practicing Regular Maintenance, You Can Ensure Your Nailer Operates Smoothly And Effectively For Years To Come.

How to Oil a Pneumatic Nailer
To keep your pneumatic nailer running smoothly, regular oiling is essential. Start by turning off the tool and disconnecting it from the air supply. Add a few drops of pneumatic tool oil into the air inlet. This simple step reduces friction and extends the life of your nailer. Did you know that a well-oiled tool can increase accuracy and performance? Regular maintenance can make a huge difference in your projects!Understanding Pneumatic Nailers
Explanation of pneumatic nailer components. Importance of proper maintenance for longevity.Pneumatic nailers are handy tools for quick nailing. They use compressed air to drive nails. Key parts include the trigger, air compressor, and magazine. Each part works together to make nailing fast and easy. Proper maintenance is essential. It keeps your nailer running well and lasts longer. Regular oiling prevents rust. Check your nailer often to ensure it’s clean and working fine.
Why is maintenance important?
Proper maintenance helps tools last longer, saves money, and keeps projects running smoothly.
Key points on maintenance:
- Clean your nailer after use.
- Oil it regularly to avoid rust.
- Check air pressure for the best results.
Signs Your Pneumatic Nailer Needs Oil
Common indicators of inadequate lubrication. Effects of neglecting oil maintenance.Pneumatic nailers can be picky! If they start making weird sounds, struggle to fire nails, or leak air, they might need some oil. Ignoring oil maintenance can lead to serious problems, like jams and increased wear. Keep an eye out for these signs; they might be your nailer’s way of asking for a little love! Remember, a happy tool makes for a happy project!
| Signs | Effects |
|---|---|
| Weird sounds | Can cause jams |
| Struggling to fire | Increased wear |
| Air leakage | Less efficiency |
Selecting the Right Oil
Types of oil compatible with pneumatic nailers. Differences between oil types and their impact on performance.Using the right oil can make your pneumatic nailer happy, just like a dog with a new squeaky toy. The most common types of oil are mineral oil and synthetic oil. Mineral oil works great for most nailers, but synthetic oil often lasts longer and performs better. It’s like choosing between a classic lemonade and a fancy sparkling drink—both are good, but one might tickle your taste buds more. Each type of oil affects how smoothly your nailer runs. Remember, using the right oil keeps your tools in tip-top shape!
| Type of Oil | Performance |
|---|---|
| Mineral Oil | Good for everyday use |
| Synthetic Oil | Better for long-lasting performance |
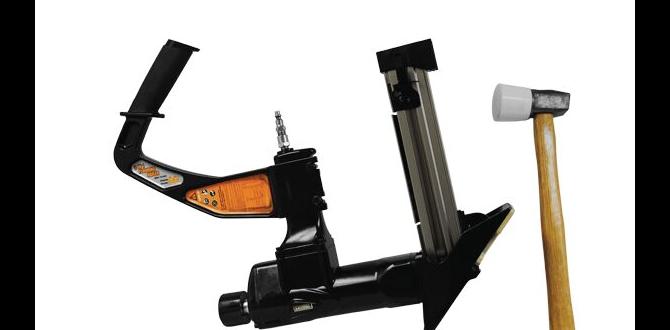
Step-by-Step Guide to Oiling Your Pneumatic Nailer
Preparation and necessary tools for oiling. Detailed steps for applying oil correctly.To oil your pneumatic nailer, start with the right tools. You will need nailer oil, a clean cloth, and some safety goggles. First, turn off the nailer and disconnect it from the air source. Next, locate the oiling port, usually found on the side. Open the oil bottle and squeeze in a few drops. Wipe off any extra oil with the cloth to keep it clean.
What is the best oil to use for a pneumatic nailer?
The best oil for a pneumatic nailer is air tool oil. This type of oil is specially designed for tools like nailers, helping them work smoothly and last longer.
Preparation Steps:
- Gather necessary tools.
- Ensure the nailer is off and unplugged.
- Locate the oiling port.
Proper oiling keeps the nailer running well and prevents jams. Following these steps will help you maintain your tool for a longer time.
Common Mistakes to Avoid When Oiling
Overoiling and its consequences. Using the wrong type of oil and its impact.Many people make mistakes while oiling their pneumatic nailers. One big mistake is over-oiling the tool. This can cause buildup and make the nailer less effective. Another common error is using the wrong type of oil. The wrong oil can harm the tool and make it break faster. It’s important to follow guidelines for the best performance.
- Over-oiling: Can lead to a sticky buildup.
- Wrong oil: May damage internal parts.
- Results: Decreased performance and tool lifespan.
What happens if you over-oil your pneumatic nailer?
Over-oiling can cause parts to become gunky, leading to jams and reduced power. A clean nailer works better, so avoid putting too much oil.
Can any oil be used for a pneumatic nailer?
No, only specific oils should be used. Using the wrong oil could damage the tool and void the warranty.
Maintaining Your Pneumatic Nailer After Oiling
Regular maintenance tips to prolong nailer life. Scheduling oiling frequency based on usage.After you’ve oiled your pneumatic nailer, it’s important to keep it in tip-top shape. Regular maintenance is like giving your nailer a nice spa day. Check and clean the tool often to catch dust and debris. If your nailer is used daily, consider oiling it every few days. For light use, once a month might be enough. Here’s a handy table to help you plan your oiling schedule:
| Usage Level | Oiling Frequency |
|---|---|
| Heavy | Every 1-3 days |
| Moderate | Weekly |
| Light | Monthly |
Remember, a happy nailer means happy projects! Treat it well, and it will keep nailing like a pro.
Troubleshooting Pneumatic Nailer Issues Related to Oiling
Identifying problems stemming from inadequate lubrication. Solutions for restoring optimal nailer function.Pneumatic nailers can act up when they don’t get enough oil. If your nailer is making odd noises or the nails aren’t going in straight, lack of lubrication could be the culprit. Adding oil can fix these issues quickly!
To restore your nailer’s peak performance, follow these steps. First, clean the air filter and add a few drops of pneumatic oil to the inlet. Make sure to wipe off excess oil, or you might end up with a slippery nailer and nail guns don’t make good dance partners!
| Issue | Solution |
|---|---|
| Nailer jams | Oil and clean |
| Inconsistent firing | Add oil to the air inlet |
With regular oiling, your nailer will be as happy as a squirrel with a pile of acorns!
FAQs About Oiling Pneumatic Nailers
Common questions and answers about oiling processes. Tips for new users regarding oil maintenance.Many users have questions about how to keep their pneumatic nailers happy and healthy. First off, how often should you oil it? Experts say every 1,000 nails is a good rule. If you hear grumpy noises, that’s a sign it needs a snack of oil! Remember to use just a few drops to avoid a slippery mess. Also, don’t forget to clean it regularly. A tidy nailer is a happy nailer!
| Question | Answer |
|---|---|
| How often should I oil my nailer? | Every 1,000 nails or so. |
| What happens if I don’t oil it? | It might get cranky and stop working! |
New users should know that a little oil goes a long way. If you’re unsure, always refer to the manual for tips. Think of it as giving your nailer a refreshing drink—just enough to keep it running smoothly!
Conclusion
In conclusion, oiling a pneumatic nailer keeps it running smoothly. You should use special oil and apply it regularly. Check your nailer’s manual for specific instructions and oil amounts. By taking these simple steps, you ensure your tool lasts longer and works well. Now, try oiling your nailer and see the difference! For more tips, check out further reading on tool maintenance.FAQs
Here Are Five Related Questions On The Topic Of How To Oil A Pneumatic Nailer:To oil a pneumatic nailer, first, you need to turn it off and disconnect it from the air supply. Then, find the oil hole on the nailer. Put a few drops of special oil for tools into this hole. This helps keep the nailer working smoothly. Finally, reconnect the air and test it carefully.
Sure! Please ask your question, and I’ll be happy to help with a short answer.
What Type Of Oil Is Best To Use For A Pneumatic Nailer?You should use special oil made just for pneumatic nailers. It’s usually called “air tool oil.” This oil helps the nailer work smoothly. You can find it at hardware stores. Always remember to check the instructions for your nailer!
How Often Should You Oil Your Pneumatic Nailer For Optimal Performance?You should oil your pneumatic nailer every time you use it. Put a few drops of oil in the air inlet. This helps it work smoothly and last longer. If you use it a lot, you might need to do this more often. Keeping it oiled keeps your nailer happy!
What Are The Steps For Properly Oiling A Pneumatic Nailer?To oil a pneumatic nailer, first, make sure it’s unplugged and safe. Next, find the oil hole on the nailer. Use a few drops of special air tool oil. Then, keep the nailer upright and press the trigger to spread the oil. Finally, wipe any extra oil off and put it away safely.
Can Using Too Much Oil Damage A Pneumatic Nailer?Yes, using too much oil can damage a pneumatic nailer. If you add too much oil, it can get messy and cause problems. The nailer might not work right, and it could make a mess of your project. It’s best to use just a little oil to keep it running smoothly. Always check the instructions for the right amount!
Is It Necessary To Oil A Pneumatic Nailer If It Has An Automatic Lubrication System?No, you don’t need to oil a pneumatic nailer with an automatic lubrication system. The system takes care of adding oil for you. It helps keep the tool working well. Just make sure to check it often to see if it’s working right.