Have you ever wanted to create something special with your own hands? Making small wooden boxes is a fun and creative way to start. These boxes are perfect for keeping treasures, gifts, or even tiny trinkets. You might think, “I’m not a woodworker!” But don’t worry. With the right guidance, anyone can learn how to make these lovely boxes.
Did you know that wooden boxes date back thousands of years? They were used for storage, gifts, and even as art. Today, you can find endless designs and styles. Imagine making a box for your favorite keepsakes. What would you put inside it?
In this DIY guide, we’ll explore the steps to make small wooden boxes. We’ll share tips and tricks along the way. Soon, you’ll have a beautiful box made by you. Ready to create something amazing? Let’s get started!
Table of Contents
How To Making Small Wooden Boxes: A Diy Guide For Everyone
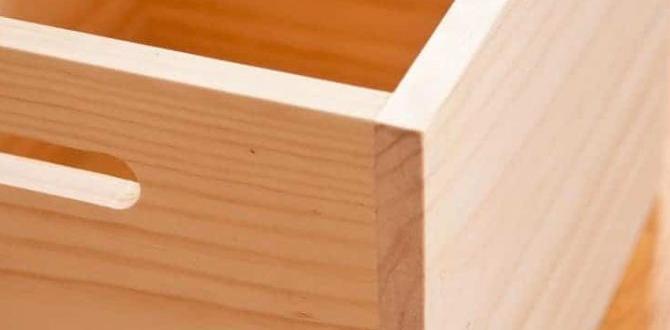
How to Making Small Wooden Boxes: A DIY Guide
Crafting small wooden boxes can be a fun and rewarding project. With just a few basic supplies and simple steps, you can create beautiful storage solutions for your treasures. Imagine giving a handmade gift that holds special meaning! Start by choosing the right wood and tools. Measure and cut carefully to make each piece fit perfectly. Sanding smooths rough edges and improves the look. Don’t forget to personalize your box with a unique design. Discover the joy of DIY!Choosing the Right Wood for Your Box
Types of wood suitable for small boxes (e.g., pine, cedar, plywood). Importance of wood quality and grain for aesthetics and durability.Picking the right wood for your small boxes can make a big difference! Common choices include pine, cedar, and plywood. Pine is great for beginners because it’s soft and easy to cut. Cedar not only smells fantastic but also repels bugs. Plywood is strong and can be a budget-friendly option. Picking quality wood ensures your boxes look nice and last longer. Plus, good grain adds that extra flair. Who doesn’t want their box to look sharp?
| Type of Wood | Benefits |
|---|---|
| Pine | Easy to work with, light, affordable |
| Cedar | Beautiful aroma, bug-resistant |
| Plywood | Strong, cost-effective, versatile |
Essential Tools and Materials
List of musthave tools (saw, sandpaper, nails, glue, etc.). Other materials needed (finishes, safety equipment, measuring tools).Building small wooden boxes is fun and requires some basic tools and materials. First, grab a saw for cutting, sandpaper for smoothing edges, and nails or glue to hold everything together. Don’t forget your measuring tools—a box that’s too big could fit a cat! Also, safety should come first; wear gloves and goggles to protect yourself. Here’s a handy table to keep everything organized:
| Tools | Materials |
|---|---|
| Saw | Wood |
| Sandpaper | Nails |
| Measuring tools | Glue |
| Safety equipment | Finishes |
These essentials will help you create something special. So grab your tools, channel your inner carpenter, and let’s make those boxes!
Designing Your Wooden Box
Sketching out box dimensions and design ideas. Importance of considering functionality and aesthetics in design.Start by sketching your box. Draw its shape and size on paper. Think about how big you want it to be. This helps in planning. Next, consider how you’ll use it. Will it hold toys or keep treasures safe? A good design is both useful and nice to look at.
Here are some tips for your design:
- Decide the box’s size.
- Choose a fun shape, like square or rectangle.
- Think about adding a lid or compartments.
Remember, a great box combines functionality and beauty. Have fun with your ideas!
What should I consider in my design?
Think about size, shape, and purpose when designing.Step-by-Step Instructions for Box Construction
Preparing and measuring wood pieces accurately. Detailed assembly steps from cutting to securing joints.First, gather your wood and tools. Measure each piece carefully. Remember, “measure twice, cut once!” It’s a wise saying, trust me! When you cut, be straight and steady for clean edges. Next comes the assembly. Start by laying out your pieces. Use wood glue on the joints and secure them with screws. Make sure everything is snug, so your box doesn’t fall apart like a soggy sandwich. Check the final shape and touch up any rough spots!
| Task | Details |
|---|---|
| Measure | Use a ruler for accuracy. |
| Cut | Stay steady for straight lines. |
| Assemble | Glue and screw all joints tight. |
Finishing Touches for Your Box
Sanding techniques for a smooth finish. Options for staining, painting, or sealing the wood.For a sleek box finish, start with sanding. Use different grits to make the wood smooth as a baby’s bottom. Begin with rough sandpaper to remove bumps, then work your way to finer sandpaper for a soft touch. Next, consider your color choices. You can use stains for a rich look, or paint to add your favorite pop. Sealing is essential too; it keeps your wood safe from spills. Make your box shine with these tips!
| Finishing Option | Effect |
|---|---|
| Staining | Adds color and highlights wood grain. |
| Painting | Offers vibrant color choices. |
| Sealing | Protects wood from moisture and damage. |
Common Mistakes to Avoid
Highlighting frequent errors during construction and finishing. Tips on how to troubleshoot and correct mistakes.Building small wooden boxes can be fun, but mistakes happen. Common errors include uneven cuts and glue that doesn’t hold. These can lead to wobbly boxes or broken pieces. Here are some tips to fix them:
- Check measurements right away. Accurate cuts save time and wood.
- Use clamps while glue dries, ensuring a strong bond.
- When sanding, go slowly to avoid mistakes.
- If mistakes happen, more wood can cover flaws easily.
Remember, practice makes perfect! Each box teaches something new.
What are common mistakes in making wooden boxes?
Common mistakes include making pieces too short or using too much glue. It’s important to measure twice. This can prevent problems later on. Focusing on accuracy and patience leads to better results.
Creative Ideas for Customizing Your Wooden Box
Suggestions for adding personal touches (decor, etching, etc.). Unique uses for small wooden boxes to inspire creativity.There are many ways to make your wooden box special. You can decorate it with paint or stickers. Another fun idea is to use etching for a personal touch. Think about these uses:
- Gift box for special occasions.
- Secret storage for treasures.
- Home for small plants.
- Organizer for art supplies.
- Recipe holder in the kitchen.
These ideas will inspire your creativity. You can make your box unique and fun!
What are some ways to customize a wooden box?
You can paint, draw, or stick on cool designs. Using different materials makes it more personal!
Maintenance Tips for Wooden Boxes
How to care for and preserve the integrity of your box. Recommendations for cleaning and periodic maintenance.To keep your wooden box looking great, pay attention to its care. Clean it gently using a soft cloth. Avoid harsh chemicals that can damage the wood. Humidity can cause wood to warp, so keep the box in a dry area.
Here are some quick tips for maintenance:
- Dust regularly to prevent buildup.
- Wipe spills immediately to avoid stains.
- Use wood polish every few months for shine.
With proper care, your box can last for years. Remember, a little effort goes a long way!
How to clean a wooden box?
To clean a wooden box, start with a soft, dry cloth. For deeper cleaning, lightly dampen the cloth with water and wipe the surface. Avoid soaking the wood.
Conclusion
In conclusion, making small wooden boxes is a fun and creative project. You can gather your materials, choose a simple design, and start building. Remember to sand the edges for a smooth finish. With practice, you’ll improve your skills. Now, grab your tools and start making your own unique boxes! For more ideas, check out other DIY guides.FAQs
What Materials And Tools Do I Need To Make Small Wooden Boxes?To make small wooden boxes, you’ll need some wood, like pine or cedar. You’ll also need a saw to cut the wood, sandpaper to make it smooth, and glue to hold the pieces together. A paintbrush and wood stain or paint can help make your box look nice. Don’t forget small nails or screws for extra strength!
What Are Some Beginner-Friendly Woodworking Techniques For Constructing Wooden Boxes?To make wooden boxes, start by cutting the wood into pieces. Use a square to help make straight edges. You can use wood glue to hold the pieces together. Then, add screws for extra strength. Finally, sand the edges to make them smooth.
How Can I Personalize Or Decorate My Wooden Boxes After Completing The Assembly?You can decorate your wooden boxes in fun ways! First, you can paint them with bright colors. Try using stickers or markers to add drawings. You can also glue on sparkly gems or colorful paper. Finally, you can write your name or a special word on the box. Have fun making it your own!
What Are The Best Types Of Wood To Use For Making Small Wooden Boxes?The best types of wood for small boxes are pine, cedar, and plywood. Pine is light and easy to work with. Cedar smells nice and resists bugs. Plywood is strong and comes in many colors. You can choose any of these woods for your project!
Are There Any Common Mistakes To Avoid When Making Small Wooden Boxes?Yes, there are some common mistakes to avoid. First, make sure to measure your wood carefully. If you cut wrong, the pieces won’t fit together. Second, remember to sand the edges. This makes the box safe and smooth. Lastly, use enough glue when putting pieces together so they stay strong.
