Table of Contents
How To Make Thick Wood Shelves: Diy Durability Guide

How to Make Thick Wood Shelves: DIY Durability Guide
Want to build strong and thick wood shelves? This DIY guide shows you how. Start with quality wood for strength. Choose the right tools like a saw, drill, and sandpaper. Did you know proper measurements can prevent wobbling? Use brackets for extra support and always finish with a protective seal. With simple steps, you can create beautiful, durable shelves that impress friends and add charm to your space. Get ready to unleash your creativity!Selecting the Right Wood for Your Shelves
Types of wood suitable for thick shelves. Pros and cons of various wood types (e.g., oak, pine, plywood).Choosing the right wood is like picking the perfect ice cream flavor. You want something great to enjoy! Here are some common types:
| Wood Type | Pros | Cons |
|---|---|---|
| Oak | Strong, durable, great grain | Can be expensive, heavy |
| Pine | Light, easy to find, budget-friendly | Soft, may dent easily |
| Plywood | Stable, can be cut easily | Looks less classy, can warp |
Oak is tough and can hold a lot of weight. Pine is light and easy on the wallet, but handle it gently! Plywood is sturdy and great for any project, but it lacks style points. Choose wisely and your shelves will be the talk of the town—just like that fruitcake no one wants after the holidays!
Essential Tools and Materials
List of tools needed (saws, drills, sanders, etc.). Recommended materials for shelf construction (brackets, screws, finishes).To build strong wood shelves, you need the right tools and materials. First, grab a saw for cutting wood, a drill for making holes, and a sander to smooth those rough edges. Your shelves will appreciate the tender care! Then, don’t forget brackets to support the wood, screws to fasten it all together, and a nice finish to give it that wow factor.
| Essential Tools | Recommended Materials |
|---|---|
| Saw | Brackets |
| Drill | Screws |
| Sander | Finishes |
With these items, you’re ready to build shelves that can hold anything from books to that giant puzzle you never finished. Remember, safety first! Always wear goggles, or you might look like a raccoon after a night out!
Designing Your Shelf Layout
Factors to consider when designing shelf dimensions. Tips for maximizing space and aesthetic appeal.Think about what you want to put on your shelves. Heavy books? They need solid support! Light trinkets? They can sit on smaller shelves. Measure your space carefully; you don’t want your shelves to be too big or too small. Keep things balanced for a neat look. Use taller shelves for tall items and shorter ones for small ones. It’s like playing Tetris with wood! Here’s a quick guide:
| Item Type | Recommended Shelf Depth | Recommended Shelf Height |
|---|---|---|
| Books | 10-12 inches | 12-15 inches |
| Decorative Items | 6-10 inches | 8-10 inches |
| Plants | 8-12 inches | 10-12 inches |
Arrange items by size for a pleasing view. Play with colors to add flair. Remember, creativity is key! Happy designing!
Step-by-Step Construction Process
Detailed instructions on cutting and assembling the wood. Techniques for ensuring durability and stability.Start by measuring and cutting your wood into the right size for your shelves. Use a saw to make sharp, clean cuts. Then, lay out the pieces on a flat surface to see how they fit together. To build a strong shelf, you can use screws or wood glue to hold them tightly. Make sure everything is level. This helps keep it stable when you load it. Finally, sand the edges smooth so they are safe to touch.
How to ensure durability in wood shelves?
To make your shelves last longer, use thick wood and strong fasteners like screws. Regularly check for any signs of damage, especially if you place heavy items on them. Consider adding brackets for extra support. Keeping shelves dry and clean will also help in reducing wear and tear.
Finishing Your Wood Shelves
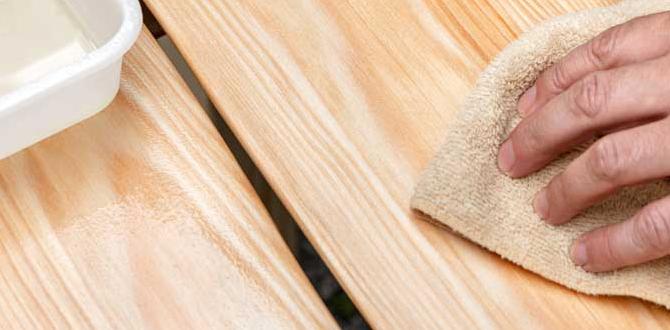
Types of finishes (stains, paints, sealants) and their benefits. Application techniques for a professional look.To finish your wood shelves, you have a few fun choices. You can use stains for color and to show the wood’s beauty. Paints give bright colors but hide the wood grain. Sealants help protect the wood from water and dirt. Each finish has great benefits!
Here are some easy application tips:
- Use a brush for even coats.
- Start with a light layer, then add more.
- Sand lightly between layers for a smooth finish.
What is the best finish for wood shelves?
The best finish depends on your style. Stain is perfect for a natural look, while paint offers bright colors. Choose sealants for protective layers that help shelves last longer.
Hanging and Supporting Your Shelves
Various mounting options (floating shelves, bracketmounted). Tips for weight distribution and safety measures.When it’s time to hang those sturdy shelves, you have fun choices! You can go for floating shelves, which seem to defy gravity, or use trusty bracket-mounted options that hold things steady. Remember to spread out the weight evenly. If you pile everything on one side, your shelf might look like it’s seen a sock-eating monster! Safety first: always check if your wall can handle the weight. A little planning keeps your treasures safe and sound.
| Mounting Option | Weight Capacity |
|---|---|
| Floating Shelves | Up to 50 lbs |
| Bracket-Mounted | Up to 100 lbs |
Maintenance and Care for Long-lasting Shelves
Cleaning and maintenance routines to preserve wood integrity. How to address common issues like warping or scratches.Keeping your wood shelves looking great is easier than pie! Regularly dusting them with a soft cloth will help prevent dust bunnies from setting up camp. Cleaning with a mild soap and warm water is a good idea for those sticky finger spots. If you notice warping, try to keep shelves away from direct sunlight, as wood gets cranky in the heat. For scratches, a bit of wood polish can work wonders.
| Issue | Solution |
|---|---|
| Dust Build-Up | Use a soft cloth regularly |
| Warping | Avoid direct sunlight |
| Scratches | Apply wood polish |
By following these simple steps, your shelves can last longer than the last mystery novel you read!
Conclusion
In conclusion, making thick wood shelves is fun and rewarding. Start by choosing strong materials and use sturdy tools. Follow our step-by-step guide for best results. Always sand your shelves for a smooth finish. Now it’s your turn to try! Gather your supplies and create your own durable shelves. For more tips, keep reading and explore new projects!FAQs
What Types Of Wood Are Best For Making Thick And Durable Shelves?For thick and durable shelves, you can use oak, maple, or birch. These woods are strong and last a long time. Pine is cheaper but might not hold heavy things as well. Always check the wood for any cracks or damage before using it. Happy building!
How Do You Determine The Ideal Thickness For Wood Shelves Based On Their Intended Use?To find the best thickness for wood shelves, think about what you will put on them. If the shelves will hold heavy books, they need to be thicker, like about 1 inch. For lighter items, like toys or photos, thinner shelves of about ¾ inch can work. We must also consider how long the shelves are; longer shelves need to be thicker to be strong.
What Tools And Materials Do I Need To Construct Sturdy Wooden Shelves?To build sturdy wooden shelves, you need some tools and materials. First, get wooden boards for the shelves and brackets for support. You will also need screws and a drill to assemble everything. A saw can help cut the wood to the right size, and a level makes sure the shelves are straight. Finally, a measuring tape helps you get the right measurements.
How Can I Properly Finish And Seal Wood Shelves To Enhance Their Durability And Appearance?To finish and seal wood shelves, start by sanding the wood smooth. Then, you can use a wood stain to add color. After the stain dries, apply a clear sealant like polyurethane. This helps protect the wood and makes it shiny. Let everything dry properly to keep your shelves looking great!
What Are Some Effective Mounting Methods To Ensure Thick Wood Shelves Remain Secure And Level?To keep thick wood shelves secure and level, you can use brackets. Strong metal brackets hold the shelves against the wall. Make sure you drill into the wall studs, which are the wooden beams inside the wall. You can also use a level tool to check if the shelves are straight. Lastly, always use screws that fit well and are strong enough to hold the weight.