Do you love building things with your own hands? Have you ever wanted to learn how to make a miter box? It’s a handy tool that helps you cut wood at angles. Imagine creating beautiful picture frames or furniture with ease! If you’re a beginner, this DIY guide is perfect for you.
Making your own miter box can be fun and rewarding. It sounds tricky, but it’s easier than you think. Picture this: you start with some wood, a few tools, and your creativity. In no time, you will have a tool that makes precise cuts.
Did you know that a miter box helps you create perfect corners? This tool can be used for various projects. You can build anything from a simple shelf to a more complex model. Every time you use it, you’ll feel like a pro!
In this easy DIY guide for beginners, we will walk you through the steps. You’ll learn what materials to use and how to put it all together. So, grab your tools, and let’s get started on your exciting journey to make a miter box!
Table of Contents
How To Make Miter Box: Easy Diy Guide For Beginners

How to Make Miter Box: Easy DIY Guide for Beginners
Creating your own miter box is a fun project anyone can tackle. You’ll learn to cut precise angles for wood pieces. This DIY guide shows you simple steps using basic tools. Did you know that having the right angle can make furniture look professional? You’ll feel proud of crafting a miter box, as it helps with various projects at home. Surprisingly, this tool can be made from materials you have lying around!
Understanding the Basics of a Miter Box
Definition and purpose of a miter box. Importance of miter angles in woodworking.
A miter box is a handy tool for cutting wood at precise angles. It helps you create perfect cuts for frames, molding, and other projects. Miter angles are important because they ensure a snug fit between pieces. Without the right angles, your project can look uneven or not fit together well.
- Miter box helps cut angles easily.
- It makes woodworking projects neater.
- Correct angles improve the look of your work.
What is a miter box used for?
A miter box is used to cut wood at sharp angles. This is useful for making items like frames or corners. It shows you how to hold the wood and cut it right every time.
Materials Needed for Your DIY Miter Box
List of essential materials (wood, screws, etc.). Recommended tools for construction (saw, drill, etc.).
To build your miter box, you need some essential materials and tools. Start with sturdy wood for the frame. You will also need screws to hold it all together. Don’t forget a saw for cutting and a drill for making holes. These items will help you create a solid miter box.
- Wood: 1×6 inch boards
- Screws: 1-2 inch wood screws
- Tools: Hand saw or miter saw
- Drill: For drilling holes
What do I need to make a miter box?
You need wood, screws, a saw, and a drill to create a miter box.
Step-by-Step Instructions for Building a Miter Box
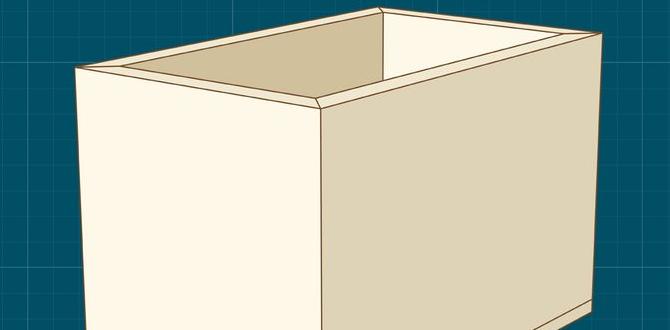
Preparing your workspace and measuring wood. Cutting and assembling the miter box components.
First, clear a big space. We want to avoid tripping over anything while we build our miter box. Then, grab your measuring tape and mark the wood pieces. Make sure to measure twice and cut once! Next comes the fun part. Cut the pieces to size with your saw. Assemble them according to your measurements. Use some glue or screws to hold it all together. It’ll be sturdy enough that it won’t knock when you hit it with your hammer, unlike your friend who keeps missing the nail!
| Tools Needed | Measurements |
|---|---|
| Saw | Mark your wood accurately |
| Measuring Tape | Safety Gear |
| Wood Glue or Screws | Follow the plans |
Design Considerations for Optimal Performance
Choosing the right dimensions for your miter box. Tips for adding features (stop blocks, clamps, etc.).
Perfecting your miter box design is crucial for great cuts. Start by choosing dimensions that suit your projects. A common size is 12 inches long and 5 inches wide, but adjust depending on your materials. Add useful features to improve its function:
- Stop blocks: These help to make repeated cuts the same length.
- Clamps: Use clamps to hold your wood tightly in place.
These small adjustments can make a big difference! Aim for a sturdy and easy-to-use miter box for the best results.
What dimensions are best for a miter box?
The best dimensions can vary. Typically, a good size is 12 inches by 5 inches. This size works for many projects.
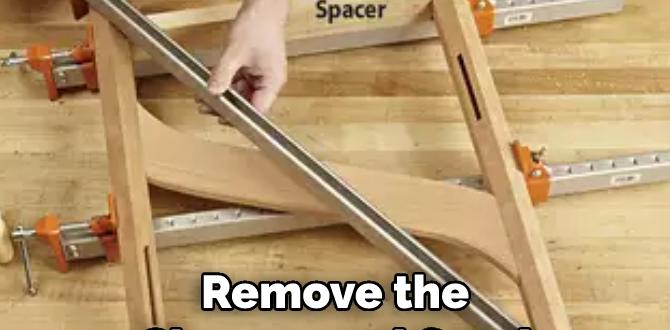
Techniques for Accurate Cuts
How to position the wood for precise angles. Common mistakes to avoid when using a miter box.
For clear cuts, position your wood properly in the miter box. Make sure the wood fits snugly and is pushed against the back wall. This keeps it steady. Avoid moving the wood while you cut. Some common mistakes include:
- Not securing the wood tightly.
- Forgetting to check your angle before cutting.
- Using a dull saw blade.
Remember, a focused setup helps you make better cuts and builds your confidence in this fun project!
How should I position the wood in a miter box?
Place the wood against the back of the box and secure it tightly to avoid slips.
Finishing Touches and Maintenance
Sanding and sealing your miter box. Tips for maintaining the miter box for longevity.
Once your miter box is built, don’t forget the final touches! Start by sanding all surfaces until they’re smooth. This keeps your cuts neat and prevents splinters. Next, apply a sealant to protect against moisture and wear. Think of it like sunscreen for your miter box! For longevity, store it in a dry place and give it a gentle clean after each use. Trust me, your miter box will thank you with a happy, long life!
| Tip | Description |
|---|---|
| Sanding | Smooth out rough spots for clean cuts. |
| Sealing | Protect wood from moisture. |
| Storage | Keep it dry, away from damp areas. |
| Cleaning | Wipe down after each use to prevent damage. |
Conclusion
In conclusion, making a miter box is a fun and easy DIY project. You need simple tools and materials. First, gather your supplies and follow the steps carefully. With practice, you will improve your skills. Now that you know how to make a miter box, try it out! Explore more DIY projects to keep learning and creating.
FAQs
What Materials Do I Need To Create A Simple Miter Box At Home?
To make a simple miter box at home, you need a wooden board. You will also need a smaller piece of wood for the sides. Get some screws or nails to hold everything together. Lastly, use a saw to make the cuts at angles. Remember to have fun while building it!
What Are The Essential Tools Required For Building A Diy Miter Box?
To build a DIY miter box, you need a few tools. First, get a saw for cutting wood. Next, you’ll need a ruler or tape measure for measuring. A pencil helps you mark the wood. Finally, use screws or nails to hold everything together. With these tools, you can make your miter box!
How Do I Accurately Measure And Cut Angles For Construction In A Homemade Miter Box?
To measure and cut angles in a homemade miter box, you first need to decide the angle you want. Use a protractor, which is a tool that measures angles, to find the right angle. Then, mark that angle on your wood. Place the wood in the miter box so the mark lines up with the cut slot. Finally, carefully saw along the line to make your cut.
Are There Any Safety Tips I Should Follow While Using A Diy Miter Box?
Yes! When using a DIY miter box, always wear safety glasses to protect your eyes. Keep your fingers away from the blade. Always ensure the box is stable and on a flat surface. Use both hands to hold the wood while cutting. Lastly, stay focused and never rush!
Can I Adapt My Homemade Miter Box For Different Types Of Saws Or Materials?
Yes, you can adapt your homemade miter box for different saws and materials. Just change the way you position the saw or the thickness of the pieces. If you want to cut thicker wood, make sure the box is deep enough. You may need to adjust the angle for different cuts too. Have fun experimenting!