Have you ever wanted to add a personal touch to your tea time? A wooden tea box can do just that! It’s a perfect blend of art and function, bringing warmth to your home while keeping your favorite teas neatly organized.
Imagine sipping your favorite tea, slowly unearthing a delightful blend from your own handcrafted wooden tea box. Doesn’t it sound wonderful? Plus, making one is easier than you might think!
In this DIY Mastery Guide, you will learn how to make a wooden tea box that looks great and serves its purpose. Not only will you impress your friends with your crafting skills, but you will also enjoy the process of building something truly unique.
Did you know that many people find crafting relaxing? It’s a fun way to spend your afternoon. By the end of this guide, you’ll be ready to create your own wooden tea box!
Table of Contents
How To Make A Wooden Tea Box: Diy Mastery Guide & Tips

How to Make a Wooden Tea Box: DIY Mastery Guide
Creating a wooden tea box is a fun project that adds a personal touch to your tea time. You will learn about selecting the right wood and tools needed for this craft. Step-by-step instructions help you cut, assemble, and finish your box. What’s more? You can customize the design. Imagine gifting a handmade tea box filled with tea bags. It’s a great way to impress friends and family while enjoying a satisfying DIY experience!
Materials Required
List of essential tools and materials needed for the project. Recommendations for types of wood suitable for tea boxes.
Gathering the right materials is key for your wooden tea box. You’ll need a few essential tools, like a saw, sandpaper, and wood glue. Choosing the right wood is important too. Opt for sturdy options like cedar or pine for a nice finish and aroma. Below is a handy list to get you started:
| Materials | Purpose |
|---|---|
| Saw | Cut wood to size |
| Sandpaper | Smooth the edges |
| Wood Glue | Hold pieces together |
| Cedar or Pine | Best wood types |
With these materials, you won’t be lost in the woods—unless you’re building a treehouse instead!
Step-by-Step Process
Detailed instructions on cutting and preparing the wood. Assembly techniques for joining pieces securely.
First, gather your materials like wood, a saw, and some glue. Measure and cut the wood into the right sizes for your tea box. Make sure your cuts are straight; it makes everything fit together nicely! Next, assemble the pieces like a puzzle. Use glue to keep them snug, but don’t go crazy—too much glue can make things slippery! Check the joints to ensure they are strong. Finally, let it dry well and stand back. Voila, you’re a DIY expert!
| Materials | Tools Needed |
|---|---|
| Wood pieces | Saw |
| Glue | Measuring tape |
| Sandpaper | Clamps |
Remember, even the best builders started with a few wobbly shelves! And hey, if it doesn’t go perfectly, it can always be a new art piece, right?
Design Options for Tea Boxes
Ideas for different shapes and sizes of tea boxes. Tips for customizing designs with compartments or drawers.
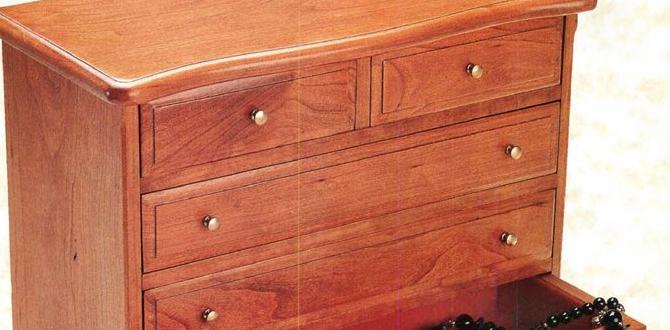
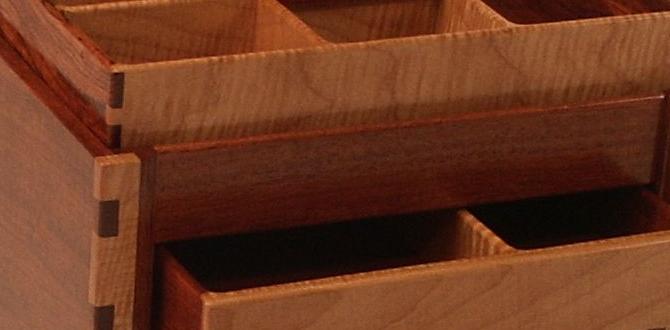
There are many fun ways to design your tea box. You can choose different shapes like rectangles, squares, or even a cool tea kettle shape. Don’t forget about size! A big box for lots of different teas or a smaller one that fits on your shelf is up to you. Want to jazz things up? Add compartments or tiny drawers for your favorite blends. How about a magical surprise drawer for candy? That’ll keep tea time exciting!
| Shape | Size | Feature |
|---|---|---|
| Rectangle | Large | Multiple compartments |
| Square | Medium | Single drawer |
| Tea Kettle | Small | Fun surprises |
Finishing Touches
Recommended stains, paints, or sealants for durability. Techniques for achieving a professional finish.
Choosing the right finish can make your wooden tea box look great and last longer. Popular options include:
- Oil-based stains: They add rich color and protect the wood.
- Water-based paints: These dry fast and are easy to clean.
- Sealants: These keep moisture out and prevent damage.
To get a professional touch, sand the surface smooth before applying finish. Use even strokes and let each layer dry. A top coat can give a shiny, lasting look. This makes your tea box not just pretty, but tough too!
What finish is best for a wooden tea box?
Oil-based stains and water-based paints are both great choices for a wooden tea box. They offer protection and beauty, ensuring your box lasts for years.
Personalizing Your Tea Box
Suggestions for engraving or painting designs. Ideas for adding decorative elements like handles or clasps.
Making your tea box stand out makes it extra special. Consider engraving a design, like leaves or a fun tea pun. You could have “Tea Time” engraved, which makes everyone smile. Painting your box is another great option! Choose bright colors or soft pastels that match your kitchen.
Adding decorative handles or clasps can give your box a unique touch. Think about cute animal handles or shiny metal clasps. These little details can change your tea box from ordinary to extraordinary!
| Decoration Ideas | Example |
|---|---|
| Engraving | “Tea Time” or nature designs |
| Painting | Bright colors or soft pastels |
| Handles | Animal shapes or vintage styles |
| Clasps | Shiny metal or colorful ones |
Common Mistakes to Avoid
Typical errors beginners make and how to prevent them. Tips for troubleshooting issues during the project.
Many beginners make common mistakes while crafting a wooden tea box. Here are some key traps to watch for:
- Ignoring Measurements: Always double-check sizes. A small mistake can ruin your box.
- Using the Wrong Wood: Soft woods may break easily. Select sturdy types for durability.
- Skipping Sanding: Rough edges can hurt. Sanding is important for safety and looks.
- Not Testing Joints: Ensure all pieces fit well before gluing. Check for gaps.
If you face issues, don’t worry! Reassess your work. Take a break, then return with fresh eyes. Remember, practice makes perfect!
What are some typical DIY mistakes?
Common DIY mistakes include poor measurements, using unsuitable materials, neglecting surface finishing, and not testing the fit of joints.
How can I troubleshoot problems during the project?
To troubleshoot, step back to assess errors. Seeking help from guides or friends can offer new perspectives.
Maintenance Tips for Wooden Tea Boxes
Best practices for cleaning and caring for wooden boxes. How to ensure longevity and enhance the box’s appearance over time.
Keeping your wooden tea box clean is simple. Use a soft cloth to wipe it down. Avoid soaking it in water. For tough stains, use a little soap. Be gentle to protect the wood’s finish.
To help your box last longer and look better, consider these tips:
- Store it in a dry place.
- Avoid direct sunlight.
- Apply a wood polish every few months.
- Keep it away from heat sources.
These steps will keep your tea box looking lovely for years to come.
How should I clean my wooden tea box?
For cleaning, use a soft cloth. Wipe it gently to avoid scratches. Avoid soaking it in water. This keeps the wood safe from damage.
Inspiring Tea Box Ideas
Showcase of creative projects from other DIY enthusiasts. Links to resources for further inspiration and guidance.
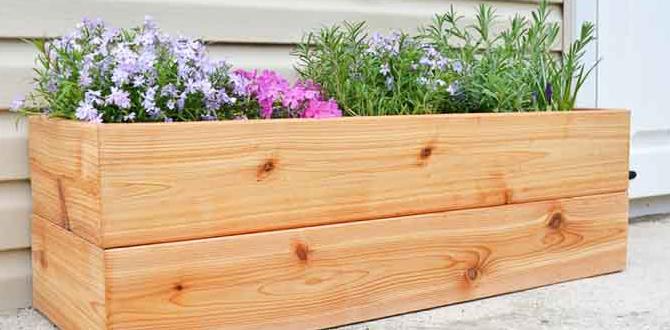
Are you ready to be inspired? Many DIY enthusiasts have crafted amazing tea boxes that could make even a teapot blush! From vintage-style wooden boxes with cute decals to sleek modern designs, the possibilities are endless. Check out these creative projects and let your imagination run wild. Each design adds a personal touch to tea time. Need more ideas? Here’s a table with links to fantastic resources:
| Project Name | Link |
|---|---|
| Rustic Charm Box | See Here |
| Modern Minimalist | See Here |
| Whimsical Garden Box | See Here |
These links are like a treasure map for tea box lovers! Dive in and start your DIY adventure today!
Conclusion
In conclusion, making a wooden tea box is fun and rewarding. Gather your materials, follow the steps carefully, and let your creativity shine. You’ll have a beautiful box to store your tea. Don’t forget to try different designs! For more tips and ideas, check out other DIY projects. Happy crafting!
FAQs
What Types Of Wood Are Best Suited For Making A Wooden Tea Box, And Why?
The best woods for making a tea box are cedar, pine, and maple. Cedar smells nice and keeps tea fresh. Pine is easy to work with and more affordable. Maple is strong and looks pretty, making your tea box special. Choose a wood that you like best!
What Essential Tools And Materials Do I Need To Create A Wooden Tea Box?
To create a wooden tea box, you’ll need a few essential tools and materials. First, gather some wood, like pine or cedar. You will also need a saw to cut the wood, sandpaper to smooth the edges, and wood glue to hold the pieces together. Don’t forget a paintbrush and some paint or stain to make it pretty! Lastly, use a ruler to measure everything correctly.
How Can I Customize My Wooden Tea Box For Different Types Of Tea And Their Packaging?
You can customize your wooden tea box by adding labels. Write the type of tea on a small tag. You can also use colorful paper to separate different teas. Make sure each tea has enough space so they don’t mix. Finally, you can decorate the box with drawings or stickers!
What Are The Best Finishes To Apply To A Wooden Tea Box For Both Aesthetics And Durability?
To make a wooden tea box look nice and last a long time, we can use a few finishes. One great option is polyurethane, which keeps the wood safe and shiny. Another choice is clear varnish; it also protects and looks pretty. You can also use beeswax for a natural finish that feels smooth. Remember to let it dry completely before using the tea box!
Can You Provide A Step-By-Step Guide For Assembling And Finishing A Wooden Tea Box?
Sure! Here’s how you can make a wooden tea box. 1. **Gather materials**: You need wood pieces, glue, nails, and sandpaper. 2. **Cut the wood**: Cut four sides, a bottom, and a lid for your box. 3. **Assemble the box**: Use glue to stick the sides to the bottom and nail them together. 4. **Sand the edges**: Smooth the edges with sandpaper so they feel nice. 5. **Finish the box**: Paint or stain it to make it look pretty. Let it dry. Now your tea box is ready to fill with tea!