Have you ever looked at a clock and wondered about its design? Building a wooden clock case might seem hard, but it can be fun! Imagine creating a piece that not only tells time but also looks amazing. You can impress your friends and family with your skills.
Many people enjoy crafting with wood. It brings satisfaction and a sense of accomplishment. You can start with small projects, like a simple box or a frame. But why not take it a step further? Learning how to make a wooden clock case is a great way to challenge yourself!
Did you know that wooden clock cases have been around for centuries? They were popular back in the day because wood was easy to find and work with. Today, many still prefer wooden designs for their classic beauty. With a little patience and precision, you can carry on this tradition.
So, are you ready to pick up your tools and get started? Let’s explore how to make a wooden clock case together! You’ll discover the joy of woodworking and the thrill of creating something unique. It’s time to craft your masterpiece!
Table of Contents
How To Make A Wooden Clock Case: Craft With Precision

How to Make a Wooden Clock Case: Craft with Precision
Creating a wooden clock case can be a fun project. Start by choosing high-quality wood. Measure and cut pieces carefully for a perfect fit. As you build, think about the design that will best show off your clock. Did you know that a well-crafted case not only looks good but can also help preserve the clock? With some patience and attention to detail, you’ll make a stunning wooden clock case that any maker would be proud of!Understanding Materials for Your Wooden Clock Case
Types of wood suitable for clock cases. Essential tools and equipment needed.Making a wooden clock case starts with choosing the right wood. Popular options include oak, which is strong and hard, and pine, known for being easy to work with. Don’t forget to check out hardwoods like maple; they look great! You’ll also need tools like a saw, drill, and some sandpaper for smooth edges. Remember, if your tools dance around, they might make more mess than precision!
| Type of Wood | Characteristics |
|---|---|
| Oak | Strong and durable |
| Pine | Lightweight and easy to work with |
| Maple | Beautiful grain and very sturdy |
Gather these tools and set up your workspace. Having the right materials helps turn ticking time into art! It’s like clock magic.
Designing Your Clock Case
Factors to consider in the design process. Tips for sketching your clock case layout.Creating your clock case design is like building a cozy home for your clock! First, think about size—will it fit on your shelf? Next, choose your shape. Round? Square? Maybe a wacky octagon? Grab some paper and sketch it out. Start with simple lines, then add flair like fancy edges or fun patterns. Remember, your clock case should not only hold the clock but also make it pop! Here’s a simple table to help guide your design:
| Factor | Tip |
|---|---|
| Size | Measure the clock, and add some space—no one likes a crowded home! |
| Shape | Be creative! Maybe try something unique that reflects your style. |
| Materials | Pick wood that’s strong yet pretty. Nobody wants a flimsy fortress! |
Keep it fun, and don’t stress! Designing can be like doodling in art class—let your imagination run wild!
Measuring and Cutting the Wood
Techniques for accurate measurements. Stepbystep cutting instructions.Crafting a wooden clock case can be a rewarding project. First, your measurements must be spot on. Use a reliable tape measure and always double-check. Remember, “measure twice, cut once” is a motto you’ll love! Next, in your cutting process, follow this simple guide:
| Step | Action |
|---|---|
| 1 | Mark your measurements clearly on the wood. |
| 2 | Secure the wood using clamps. |
| 3 | Use a saw for straight cuts. Don’t forget your safety goggles! |
With these techniques, you’ll avoid mishaps and add a splash of fun to your crafting. Just remember, cutting wood isn’t like slicing a pizza—precision is key!
Assembling the Wooden Clock Case
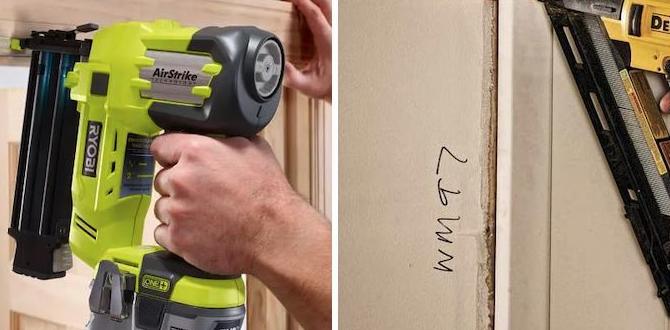
Methods for joining pieces together. Recommendations for adhesives and fasteners.Joining pieces for your wooden clock case can be a fun adventure! You can choose from methods like screws, nails, or even some magical wood glue. For a strong bond, consider using PVA glue or . They hold tight and make sure your clock doesn’t become a puzzle! If you’re feeling a bit fancy, use dowels for a neat look. Remember, measure twice and glue once – or your clock might end up with a few extra holes!
| Method | Best Use |
|---|---|
| Screws | For joining thick pieces |
| Nails | Quick assembly |
| Wood Glue | For a strong bond |
| Dowels | For a clean finish |
Finishing Touches: Sanding and Staining
Importance of sanding for a smooth finish. Choosing the right stain and applying it correctly.To perfect your wooden clock case, sanding and staining are key steps. Sanding smooths out rough spots. Use a fine-grit paper for best results. It helps the stain go on evenly. Choose the right stain color to match your style. Apply the stain carefully with a brush or cloth. Wipe off any extra after a few minutes for a beautiful finish.
What is the best way to choose a stain?
Select a stain that matches your wood type and desired look. Test it on a small area first to see how it dries. Choose between water-based for quick drying or oil-based for a deeper color.
- Sanding makes wood smooth.
- Different stains create unique looks.
- Always test your stain choice.
Installing the Clock Mechanism
Types of clock movements available. Steps to properly install the movement and clock face.Choosing the right clock movement is important for your wooden clock case. There are three main types: Quartz, Mechanical, and Hybrid. Each type works differently and fits various styles. To install the movement, follow these steps:
- First, mark the center point on the clock face.
- Next, insert the movement through the back of the clock case.
- Attach the clock hands carefully, starting with the hour hand.
- Finally, secure the clock face and adjust the time.
This simple process ensures your clock works perfectly and looks great!
What types of clock movements are there?
Clock movements can be Quartz, Mechanical, or Hybrid. Quartz movements are popular for their accuracy. Mechanical movements are classic and often need winding. Hybrid movements combine both styles for unique designs.
Maintaining and Caring for Your Wooden Clock Case
Tips to preserve the wood and finish. Recommended cleaning methods and frequency.Taking care of your wooden clock case is as important as making it. To keep the wood looking great, regularly dust it with a soft cloth. Use a damp cloth as needed, but avoid soaking it. Think of your wooden clock as a pet; it needs love and care! Clean it once a month to keep it happy. To protect the finish, consider using a quality wood polish a couple of times a year. It gives your clock a shiny look and keeps it from getting dull.
| Care Tip | Frequency |
|---|---|
| Dust Cleaning | Monthly |
| Damp Cloth Wipe | As needed |
| Wood Polish | Every 6 months |
Remember, a little care goes a long way. Your clock will tick well for years, making you the proud parent of a fine piece of art!
Conclusion
In conclusion, making a wooden clock case is a fun project. You need to measure carefully, cut accurately, and sand smoothly. Follow these steps, and you’ll create something special. Don’t forget to choose a nice finish for a great look. Now it’s your turn! Gather your materials and start crafting. For more tips, keep reading about woodworking!FAQs
What Types Of Wood Are Best Suited For Crafting A Wooden Clock Case, And Why?The best types of wood for a clock case are oak, maple, and walnut. Oak is strong and lasts a long time. Maple has a nice smooth look, and walnut has a pretty dark color. These woods are easy to work with and look great when finished. Plus, they help the clock keep time well.
What Tools And Materials Are Essential For Building A Durable And Aesthetically Pleasing Wooden Clock Case?To build a strong and nice-looking wooden clock case, you need some special tools and materials. First, get wood like pine or oak for a sturdy frame. You’ll need a saw to cut the wood, a drill for making holes, and sandpaper to make it smooth. Finish with wood glue to hold things together and paint or varnish to make it look pretty. Don’t forget a measuring tape to size everything right!
How Can I Accurately Measure And Cut The Wood To Ensure All Pieces Fit Together Perfectly?To measure the wood, first, use a measuring tape. Place it along the wood and mark where you need to cut. Always double-check your measurements to avoid mistakes. When cutting, use a straight edge to guide your saw. This helps make clean cuts so the pieces fit perfectly.
What Techniques Can I Use For Finishing The Wood To Enhance Its Appearance And Protect It From Wear?To finish wood and make it look nice, you can use stain or paint. Stain adds color and shows the wood’s grain. Paint adds color but hides the wood’s natural patterns. After that, use a clear finish like polyurethane to protect it from scratches. This helps keep your wood looking great for a long time!
How Do I Properly Assemble The Components Of The Clock Case To Ensure Stability And Functionality?To put the clock case together, first lay all the pieces on a flat surface. Next, find the corners and use screws to attach them firmly. Make sure the back panel fits snugly to keep everything in place. Double-check that each piece is even and tight. Finally, test the clock to see if it works properly.