Have you ever wanted to create something special with your own two hands? Imagine making a wooden box without using any nails! Sounds interesting, right? Many people think building a box is hard. But it can be fun and easy. This DIY project is perfect for beginners and experts alike.
Picture this: you are at home, looking for a fun activity. Suddenly, you find some leftover wood. Why not make a wooden box? You can store toys, keep your treasures safe, or even give it as a gift. It’s a great way to show creativity!
Did you know that people have made wooden boxes for thousands of years? They used simple techniques to join the wood, just like we will in this article. You’ll learn tips and tricks to craft a beautiful box that lasts.
So, are you ready to dive in and start your own DIY mastery? Let’s explore how to turn a few pieces of wood into something amazing. Get your tools ready; an adventure awaits!
Table of Contents
How To Make A Wooden Box Without Nails: Diy Mastery Guide Creating A Wooden Box Without Nails Is A Great Diy Project That Combines Creativity With Craftsmanship. Whether You’Re Looking To Make A Decorative Piece, A Storage Solution, Or A Thoughtful Gift, Using Alternative Methods To Nails Can Lead To A Beautiful, Sturdy Result. In This Article, We’Ll Explore Various Techniques, Materials, And Tips To Help You Master The Art Of Building A Wooden Box Without Relying On Traditional Fasteners. Understanding The Benefits Of Nail-Free Woodworking Building A Wooden Box Without Nails Offers Several Advantages: – **Aesthetic Appeal**: Joinery Methods, Such As Dovetail Or Mortise And Tenon, Can Provide An Attractive Finish. – **Strength And Durability**: Properly Executed Joints Can Be As Strong As Nailed Connections. – **Sustainability**: Using Eco-Friendly Adhesives And Joints Can Lessen The Environmental Impact Of Your Project. Materials Needed Before You Start Your Diy Wooden Box Project, Gather The Following Materials: – **Wood**: Choose High-Quality Hardwood Or Plywood For Durability. – **Wood Glue**: A Strong Adhesive Designed For Woodworking To Hold Joints Together. – **Wood Clamps**: For Securing Joints While The Glue Dries. – **Sandpaper**: To Smooth Edges And Surfaces. – **Finish**: Paint, Stain, Or Sealer For Aesthetic Enhancement And Protection. Step-By-Step Instructions 1. Design Your Box Start By Sketching A Design For Your Box. Consider Dimensions That Suit Your Needs, And Decide On The Style – Boxy, Tapered, Or Any Other Shape. 2. Cut Your Wood Pieces Using A Saw, Carefully Cut Your Wood According To Your Design. Typically, You’Ll Need: – Two Rectangular Pieces For The Top And Bottom. – Four Side Pieces That Will Form The Walls. 3. Create Joinery Instead Of Nails, Use Traditional Woodworking Joinery Methods: – **Dovetail Joints**: Ideal For Connecting The Sides To The Front And Back. – **Lap Joints**: Overlapping Pieces Can Create A Solid Structure. – **Box Joints**: A Simple Yet Effective Joint For Box Corners. 4. Assemble The Box – Apply Wood Glue To The Edges Of Your Joints. – Fit The Pieces Together, Ensuring Perfect Alignment. – Use Clamps To Hold The Joints In Place While The Glue Dries, Following The Glue Manufacturer’S Recommendations For Drying Time. 5. Sand And Finish Once The Glue Has Cured, Sand Down All Surfaces For A Smooth Finish. Pay Attention To Corners And Edges. Finally, Apply Your Desired Finish To Enhance The Look And Protect Your Wooden Box. 6. Final Touches After The Finish Has Dried, Add Any Additional Touches, Such As Handles, Linings, Or Decorative Elements. Conclusion Learning **How To Make A Wooden Box Without Nails** Not Only Enhances Your Woodworking Skills But Also Allows For Innovative, Sustainable Crafting. By Utilizing Various Joinery Techniques And The Right Materials, You Can Produce Stunning Wooden Boxes That Will Last For Years To Come. Whether For Personal Use Or As Gifts, Your Nail-Free Creations Will Surely Impress. So Gather Your Tools And Let Your Diy Mastery Begin!

How to Make a Wooden Box Without Nails: DIY Mastery
Creating a wooden box without nails is simpler than you might think! This DIY project uses clever techniques like wood joinery. You can make a sturdy and beautiful box using just wood and glue. Did you know ancient craftspeople often used these skills? Not only is it fun to build, but it also sparks creativity. Imagine making a unique gift or storage solution for your room! With the right steps, you can master this art in no time.
Essential Tools and Materials
List of necessary tools for constructing a wooden box.. Types of wood best suited for nailfree projects..
Making a wooden box without nails is a fun project! First, gather the right tools. You will need a saw, a chisel, sandpaper, and wood glue. These tools are like magical wands for woodworkers! Then, choose wood that likes to play nice. Pine and cedar are great choices as they stick together well without nails. They also smell nice, like a forest adventure! Ready to start building? Let’s get cracking!
| Tool | Purpose |
|---|---|
| Saw | Cut wood into pieces |
| Chisel | Shape and refine edges |
| Sandpaper | Smooth surfaces |
| Wood Glue | Hold pieces together |
Understanding Joint Techniques
Explanation of various joint methods (dovetail, finger joints, etc.).. Advantages of using joints over nails in woodworking..
Woodworking is fun! Using joints is a smart way to hold pieces together without nails. One popular method is the dovetail joint. This joint is shaped like a dove’s tail. It locks pieces tightly. Another type is the finger joint, where both ends have interlocking fingers. These joints are strong and look nice too.
Choosing joints has many benefits:
- Better strength compared to nails
- More attractive finishes
- Environmentally friendly
Joints make your projects last longer. You’ll also enjoy the process more!
What are common joint techniques in woodworking?
The most common types of joints include dovetail, finger, and mortise and tenon joints. These techniques create strong bonds in woodworking without using nails.
Step-by-Step Guide to Building the Box
Detailed procedures for measuring and cutting wood pieces.. Instructions for assembling the box using joint techniques..
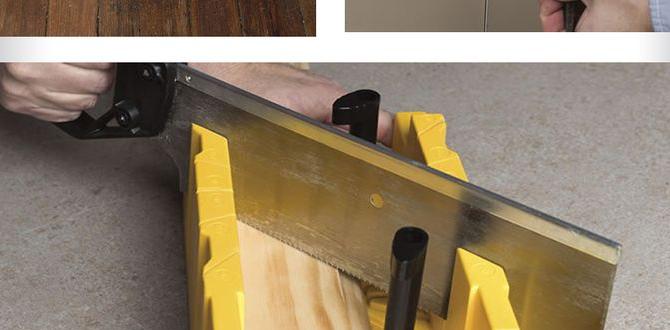
To build your wooden box, start by gathering your wood pieces. Measure each piece carefully using a ruler. Cut the wood according to your measurements. Be sure to keep the cuts straight. Next, you will use special joints to put the wood together without nails. These joints can hold the box firmly. Here’s how:
- Create finger joints by cutting notches into the edges.
- Use dowel joints by drilling holes through the wood and inserting dowels.
- Try lap joints where two pieces overlap each other.
Choose any joint technique you like. Each will help you create a sturdy and beautiful box!
How do I cut wood pieces straight?
To cut wood straight, use a square to mark your lines. Then use a saw, moving slowly and steadily. Always wear safety gear!
Finishing Touches for Your Wooden Box
Tips on sanding and smoothing the surfaces.. Suggestions for stains, paints, and protective finishes..
To make your wooden box shine, pay attention to the finishing touches. First, sanding is key. Use fine sandpaper to smooth rough edges. Start with coarser paper and move to finer grit for a polished surface. Next, choose a stain or paint to add color. Dark colors hide scratches, while light colors show wood grains. Finally, apply a protective finish like varnish or wax. This keeps your box safe and beautiful!
What is the best finish for a wooden box?
The best finish depends on what look you want. A clear varnish highlights the wood’s natural beauty. A paint adds color and style. For a rustic look, try a wood stain. Choose the one that suits your taste!
Tips for Finishing Your Box:
- Sand surfaces carefully for smoothness.
- Test stains on a small area first.
- Apply multiple coats of finish for durability.
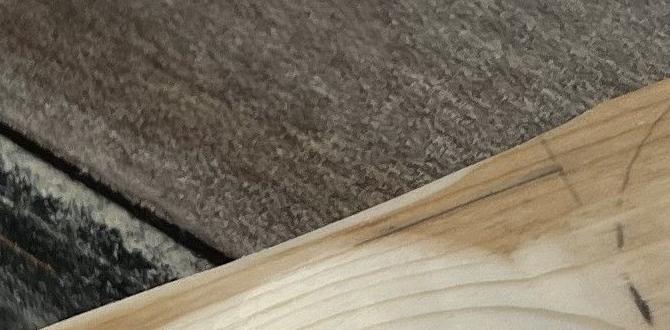
Common Mistakes to Avoid
List of frequent errors made during construction.. How to troubleshoot issues with joints and alignment..
Many builders make common errors when making wooden boxes. Avoid these mistakes to improve your project:
- Poor measurements can lead to misaligned joints.
- Using the wrong type of wood can cause weak spots.
- Skipping safety checks can result in accidents.
If joints don’t fit, double-check your cuts. Use a square to check angles. If misalignment happens, sand down the edges slightly. This helps pieces fit together better.
What should I do if my box doesn’t line up correctly?
Check your measurements again and adjust if needed! Use clamps to hold pieces steady while they dry. This can make a huge difference.
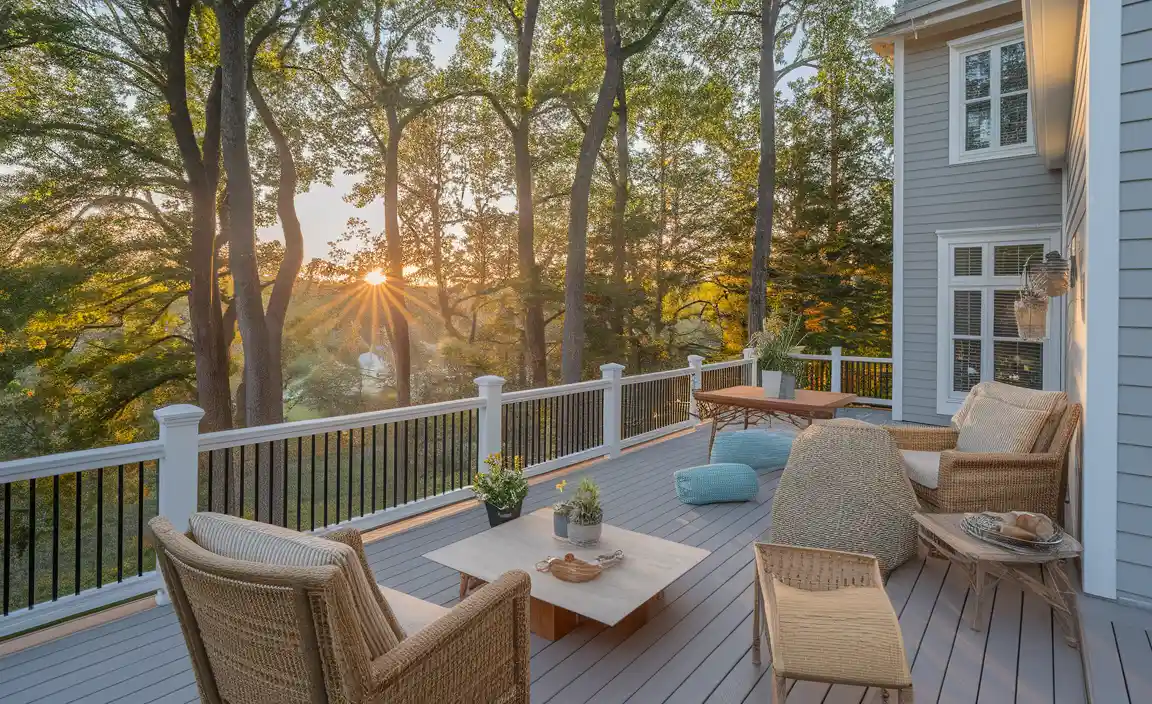
Creative Variations and Customizations
Ideas for adding personal touches and modifications.. Examples of different designs and styles to inspire creativity..
Crafting a wooden box can be a fun adventure! Personalizing it adds an extra sprinkle of joy. Think about painting it with bright colors or adding stencils of your favorite animals. How about decorating it with stickers? You can also try using different wood types. Pine for light and airy vibes, or oak for rustic charm. Check out these fun ideas:
| Design Ideas | Customization |
|---|---|
| Painted Box | Use bright colors or patterns. |
| Engraved Designs | Add names or quotes. |
| Mixed Wood Styles | Combine different types for unique looks. |
| Decorative Handles | Use fun knobs or ropes. |
Mix and match these ideas to create your perfect box. Remember, creativity is key! As the saying goes, “There are no mistakes, only happy accidents.” So, let the wood chips fall where they may!
Maintenance and Care for Wooden Boxes
Best practices for maintaining the integrity of the box.. How to restore or repair without using nails..
Wooden boxes can last a long time if you take care of them. Keep them out of direct sunlight to avoid warping. Clean with a damp cloth, but never soak them. For small scratches, use a little wood wax to restore shine. If the box gets damaged, you can fix it without nails. Try these methods:
- Apply wood glue to cracks and hold them together.
- Use clamps to keep parts in place while they dry.
- Sand rough edges for a smooth finish.
These tips will help keep your wooden box beautiful and strong!
How can I maintain my wooden box?
Regular cleaning and minimal exposure to moisture can greatly extend your wooden box’s life.
Conclusion
In summary, making a wooden box without nails is fun and rewarding. You learn to use wood glue and joints to hold pieces together. Focus on measuring and cutting accurately for the best results. With practice, you’ll improve your skills. So, grab some wood, and start creating your own box today! For more tips, check out DIY guides online.
FAQs
What Are The Essential Materials Needed To Create A Wooden Box Without Using Nails?
To make a wooden box without using nails, you need some wood pieces. You also need strong glue to stick the wood together. Get a saw to cut the wood and sandpaper to smooth the edges. Finally, use a paintbrush and some paint if you want to decorate your box.
What Woodworking Techniques Can Be Employed To Join Pieces Of Wood Securely Without Nails?
You can use several techniques to join wood pieces without nails. One method is to use glue. It sticks the wood together strongly. Another way is to cut shapes called dovetails or mortise and tenon. These special cuts lock the wood together tightly. You can also use wooden pegs to hold the pieces in place.
How Can I Ensure That My Wooden Box Is Durable And Properly Sealed If I’M Not Using Nails?
To make your wooden box strong without nails, you can use wood glue. Apply it carefully on the edges where the pieces meet. Clamp the pieces together until the glue dries. You can also seal the box with a waterproof finish, like paint or varnish, to keep it safe from moisture. This will help your box last longer and keep things safe inside!
Are There Specific Types Of Wood That Are Better Suited For Building A Nail-Free Wooden Box?
Yes, some types of wood are better for nail-free boxes. Softwoods like pine and cedar are great choices. They are easy to cut and shape. Hardwoods like oak are strong but harder to work with. Choose a wood that is smooth and not too heavy for your project!
What Tools Are Recommended For Crafting A Wooden Box Without Nails, And How Do I Use Them Effectively?
To make a wooden box without nails, you can use wood glue, clamps, and a saw. First, cut your wood pieces to the size you want. Then, apply wood glue to the edges where the pieces will join. Use clamps to hold the pieces together while the glue dries. Make sure to let the glue set for the time on the bottle before using your box.