Have you ever accidentally burned a wooden piece, feeling that sinking feeling in your heart? You’re not alone! Many people worry when they see charred edges on their favorite wooden furniture. But what if I told you there’s hope? You can learn how to fix burnt wood with some expert tips and tricks.
Imagine bringing that damaged wood back to life. A little effort can lead to stunning results. Whether it’s a table, chair, or floor, perfect restoration is possible. The good news is that you don’t need to be a professional to make it happen.
In this article, we will dive into simple ways to restore burnt wood. We will cover the best methods, tools, and materials you’ll need. Let’s turn your burnt mess into a beautiful success story!
Table of Contents
How To Fix Burnt Wood: Expert Tips For Perfect Restoration

How to Fix Burnt Wood: Expert Tips for Perfect Restoration
Have you ever accidentally scorched your favorite wooden table? Don’t worry; you can fix it! Start by gently sanding the burnt area. This removes charred wood and prepares the surface. Next, apply a wood stain or finish to match the color. Did you know that some household items, like baking soda, can help? Mixing it with water can clean up minor burns. With these expert tips, your wood can look good as new!Understanding the Causes of Burnt Wood
Types of burn damage: Surface vs. deep burns. Common causes of wood burning: Fire accidents, hot items, etc..Burnt wood can be tricky! There are two main types of damage: surface burns, which singe the wood’s top layer, and deep burns, which go way beyond the surface. Common culprits for burnt wood include fire accidents and hot items like pans or furniture left too close to heat. Think of it like roasting marshmallows: too much heat and you end up with a charred treat! Those blackened edges might make you laugh, but fixing them is a serious task.
| Type of Burn Damage | Description |
|---|---|
| Surface Burns | Just a little singe on the top layer. |
| Deep Burns | Goes deeper, affecting the wood’s integrity. |
Assessing the Damage
How to evaluate the extent of burn damage. Tools needed for assessment: Visual aids and magnifiers.To fix burnt wood, you first need to assess the damage. Look closely at the surface. Is it deep or just a light burn? Use tools like magnifiers to see better. This helps identify any cracks or soft spots. A good assessment helps in planning repairs.
- Check the color of the wood.
- Feel for rough or soft areas.
- Take notes on your findings.
What tools do I need for assessment?
You will need visual aids like a magnifier to spot small details. Strong light can also help. These tools make it easier to see all the damage clearly.
Essential Tools and Materials for Restoration
Listing necessary tools: Sandpaper, wood filler, etc.. Recommended materials for finishes and color matching.When restoring burnt wood, you’ll need some key tools and materials. First, grab sandpaper to smooth out the burnt areas. Choose a range of grits for the best results. Next up, wood filler will help fix any holes or cracks. This is like the band-aid for your wood! For those finishing touches, consider using stain or paint to match the wood’s original color. Here’s a handy table:
| Tool/Material | Purpose |
|---|---|
| Sandpaper | Smooths the surface |
| Wood Filler | Repairs cracks and holes |
| Stain/Paint | Color matching and finishing |
With these essentials, you’ll be on your way to turning that charred piece of wood back into a masterpiece. It’s like giving your wood a spa day – minus the cucumbers on the eyes!
Step-by-Step Techniques to Repair Burnt Wood
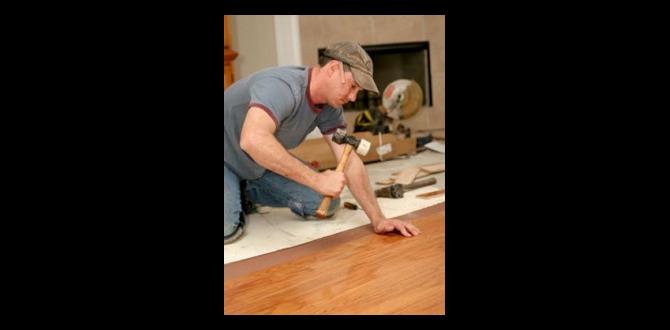
Sanding the burnt area: Methods and tips. Using wood filler: When and how to apply.First, you need to sand that burnt wood like it’s winter and you’re a snowman trying to melt! Grab some sandpaper and gently scrub the burnt area. Start with rough paper and gradually move to a finer grit for a smooth finish. Tip: Always sand in the direction of the grain to keep your wood looking sharp!
Next, let’s talk about wood filler. If the burn did more than just tan your wood, you might need some help! Apply wood filler to the damaged spots. Wait for it to dry, then sand it smooth. Remember, too much filler will make you a “pain-ting” artist if you catch my drift. Pro tip: Choose a filler that matches your wood’s color for a seamless blend!
| Step | Action | Tip |
|---|---|---|
| 1 | Sanding | Sand with the grain |
| 2 | Apply Wood Filler | Match the color |
Advanced Restoration Methods
Staining and sealing burnt wood for a refined finish. Techniques for matching existing wood color.To make burnt wood look great again, you can use staining and sealing tricks. First, choose a stain that matches the wood’s original color. This helps blend in the repaired area. Then, apply a sealant to protect the wood and give it a shiny finish. Here are some quick steps:
- Test the stain on a small area.
- Apply the stain with a soft cloth.
- Let the stain dry, then add a sealant.
These methods can restore the beauty of your wood, making it strong and looking new.
How can I match the color of my wood?
To match wood color, use samples from your wood or purchase color-matching kits. Mixing stains can help achieve the right tone.
Preventive Measures to Avoid Future Burns
Protective coatings and treatments for wood surfaces. Best practices for maintaining wood furniture and surfaces.Wood surfaces need special care to stay safe and beautiful. Using protective coatings helps shield wood from burns. Always apply a finish, like varnish or oil, for added protection. Clean furniture regularly with a soft cloth. Avoid using harsh chemicals that could damage it. To keep wood looking good, follow these tips:
- Use coasters under hot items.
- Place rugs or mats under furniture.
- Avoid direct sunlight to prevent fading.
These steps help maintain your wood and reduce the risk of burns.
How can I protect my wood surfaces from burns?
Using protective coatings and cleaning regularly are key steps. Also, be cautious with hot items and direct sunlight. Small changes can save your beautiful wood for years.
DIY vs. Professional Restoration Services
Pros and cons of hiring a professional. When to consider professional help for extensive damage.Choosing between DIY and hiring a professional can feel like picking between pizza and tacos—both are tasty but serve different needs! DIY restoration is great for minor burns. It’s cost-effective and can be fun, like a craft project gone right. However, if the damage is extensive or you’re unsure what to do, calling in the experts is wise. They have experience and tools that can save your favorite wooden piece. Remember, *better safe than sorry*!
| Pros of DIY | Cons of DIY |
|---|---|
| Cost-effective | Risk of further damage |
| Creative outlet | Time-consuming |
| Immediate results | Limited expertise |
If your wood is more charred than a toast on Sunday morning, it might be time to call a pro!
Conclusion
In conclusion, fixing burnt wood is possible with the right techniques. We discussed cleaning, sanding, and applying a wood stain. You can restore your wood surfaces with patience and care. Remember to test products first before use. For more tips on wooden furniture care, keep exploring and practice your skills. You’ll be amazed by the results!FAQs
What Are The Best Methods To Remove Burn Marks From Wood Surfaces?To remove burn marks from wooden surfaces, you can try a few simple methods. First, rub a mixture of baking soda and water on the mark. Use a soft cloth and gently scrub until it fades. You can also use a pencil eraser to rub the mark away carefully. If the mark is still there, try using a little bit of fine sandpaper, but be gentle! Always finish by applying some furniture polish to make the wood shine again.
How Can I Prevent Further Damage To Wood After It Has Been Burnt?To stop more damage to burnt wood, you should first clean it carefully. Use a soft brush or cloth to remove loose ash and dirt. Then, let the wood dry completely in a warm place. After it’s dry, you can apply a special wood sealant to protect it. This will help keep out moisture and stop it from getting worse.
What Tools And Materials Do I Need For Restoring Burnt Wood?To restore burnt wood, you’ll need a few tools and materials. First, get sandpaper to smooth the wood. You might also need a putty knife to remove loose bits. Use wood filler to fix holes or cracks. Finally, grab some wood stain or paint to make it look nice again. Don’t forget a clean cloth for wiping away dust!
Are There Specific Techniques For Restoring Different Types Of Wood Finishes?Yes, there are different ways to fix wood finishes. For a shiny finish, you can clean it with a soft cloth and some polish. If the finish is dull, you might use a special product to make it shine again. For scratches, you can use a marker or fill them in with wood filler. Always test your method on a small area first!
How Can I Properly Stain Or Refinish Wood After Repairing Burn Damage?To stain or refinish wood after fixing burn damage, first, sand the area smooth. Use a clean cloth to wipe off dust. Then, choose a wood stain that matches the rest of the wood. Apply the stain with a brush, following the grains. Finally, let it dry and apply a protective coat, like clear varnish, to keep it safe.