Have you ever noticed cracks in your favorite wood furniture? Many people face this issue. It can be disappointing when something you love shows signs of damage. But, don’t worry! You can learn how to fill cracked wood easily.
Imagine walking into your living room and seeing a beautiful, smooth table. No cracks, just a flawless finish. Sounds nice, right? With the right tips, you can achieve that look.
This article shares expert tips on how to fill cracked wood. We’ll show you simple steps to fix those pesky cracks. You will learn about the tools you need and the best materials to use. Your wooden items will look new again!
Get ready to dive in. Let’s make your wood pieces shine and impress everyone!
Table of Contents
How To Fill Cracked Wood: Expert Tips For A Flawless Finish
Are you tired of those annoying cracks in your wooden furniture? Filling cracked wood can be easy with the right tips. Start by cleaning the area, then choose a suitable filler. Applying the filler correctly will ensure a smooth finish. Sand it down for an even surface. Did you know a well-filled crack can enhance the beauty of your wood? Follow these steps, and watch your furniture transform from damaged to dazzling!
Understanding Wood Cracks
Types of wood cracks: surface vs. structural. Common causes of wood cracking in furniture and structures.
Wood cracks are sneaky little surprises that can pop up anywhere. There are mainly two types: surface cracks, which are like tiny lines on the wood’s outer layer, and structural cracks, which can make the whole piece wobble like a three-legged chair at a talent show.
Common culprits include dry air, temperature changes, and even pests trying to make furniture their snack! Knowing these types and causes helps you fix them faster than you can say “crack-a-lackin’!”
| Type of Crack | Description |
|---|---|
| Surface Crack | Minor cracks on the surface. |
| Structural Crack | Serious cracks affecting stability. |
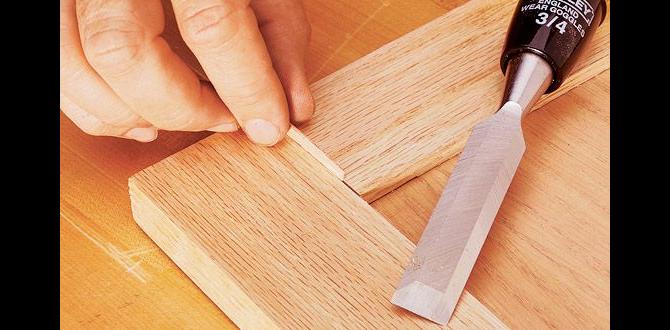
Preparation Before Filling Cracks
Cleaning the cracked area for optimal adhesion. Tools needed for prepping wood surfaces.
Before fixing those cracks, you need to clean the area. Dust and dirt can play hide-and-seek with your filler, making it hard to stick. Grab a soft cloth and wipe the surface well. Don’t forget to check what tools you’ll need! Here’s a helpful table:
| Tool | Purpose |
|---|---|
| Sandpaper | To smooth the edges |
| Putty Knife | For applying the filler |
| Cloth | To clean the area |
With everything ready, you’ll be on your way to a flawless finish. Remember, a clean start means a happy end!
Step-by-Step Guide to Filling Cracks
Detailed process for applying filler: techniques and tips. Curing time and conditions for best results.
To fill cracks in wood, follow these steps for the best results. First, clean the crack well. Use a small brush or vacuum to remove dust and debris. Next, choose the right filler. Apply it using a putty knife, pushing it deep into the crack. Smooth the surface lightly. Use a damp cloth to wipe off extra filler. Let it dry completely before sanding. For a flawless finish, curing usually takes about 24 hours. Keep the area dry and warm to aid drying.
How long does wood filler take to dry?
The drying time for wood filler varies. But usually, it takes **about 24 hours** to cure fully. Factors like humidity and temperature can affect this time. Ensure a cool, dry place for best results.
Tips for Applying Filler:
- Choose a filler that matches your wood.
- Work in small sections for better control.
- Always follow the manufacturer’s instructions.
Sanding and Finishing Techniques
Best practices for sanding filled cracks to achieve a smooth finish. Options for staining and sealing after filling cracks.
Sanding is like giving your wood a spa day. Start by using fine sandpaper for those cracks you just filled. This creates a smooth surface. Use a sanding block or an orbital sander for best results. Don’t rush; your wood will thank you! After sanding, it’s important to choose the right stain or seal. Water-based options dry fast and are easy to clean. Oil-based stains, however, can bring out more depth in the wood. Choose what suits your project!
| Type | Benefits |
|---|---|
| Water-Based Stains | Fast drying, easy cleanup! |
| Oil-Based Stains | Rich color and depth! |
Preventing Future Cracking
Maintenance tips for wood furniture to avoid cracking. Humidity and temperature control strategies.
Maintaining wood furniture is key to preventing future cracks. Regular care keeps your pieces looking great. Here are some simple tips:
- Dust regularly to avoid buildup.
- Use wood polish to nourish the finish.
- Keep furniture out of direct sunlight.
- Control humidity with a dehumidifier.
- Ensure a stable room temperature.
Wood prefers a comfortable, balanced environment. High humidity or extreme heat can lead to damage. By following these tips, you can help your furniture last longer.
How can I control humidity and temperature for my wood furniture?
Use a humidifier in dry months and a dehumidifier in humid times. Keep your home temperature steady, around 70°F (21°C), to help protect your wood.
Conclusion
In conclusion, filling cracked wood is simple with the right steps. First, clean the crack well. Then, choose a suitable filler. Apply it carefully, and sand for a smooth finish. Don’t forget to match the color! By following these expert tips, you can restore wood to its former glory. Now, grab your tools and start fixing your furniture!
FAQs
What Are The Best Materials To Use For Filling Cracked Wood, And How Do They Differ In Application And Finish?
The best materials for filling cracked wood are wood glue, epoxy, and wood filler. Wood glue is great for small cracks and sticks well. Epoxy works on bigger cracks and can be very strong. Wood filler is easy to use and comes in many colors. Each material might look different when dry, so choose one that matches your wood.
How Can I Determine The Size And Depth Of The Crack To Choose The Appropriate Filling Technique?
To find out the size of the crack, use a ruler to measure its length and width. For depth, use a stick or a small object to check how deep it goes. Now, think about how big and deep the crack is. A small crack might need a simple filler, while a bigger one may need a strong patch.
What Preparation Steps Should I Take Before Applying A Filler To Ensure A Flawless Finish?
Before applying filler, start by cleaning the area. Use soap and water to remove dirt. Next, dry the spot well with a clean towel. You should also check for cracks or holes that need to be filled. Finally, gather your tools, like a putty knife, to make the job easier.
Are There Specific Tools Or Techniques That Can Help Achieve A Smooth Surface After Filling The Crack?
Yes, there are tools and techniques to help make a smooth surface after filling a crack. You can use a putty knife to spread the filling evenly. Sandpaper helps smooth out any bumps after it dries. A damp cloth can clean up the area. Finally, a good coat of paint can make everything look nice and even!
How Can I Finish Or Stain The Filled Area To Match The Surrounding Wood And Make The Repair Less Noticeable?
To finish or stain the filled area, start by choosing a wood stain that matches your wood. You can test the stain on a small spot to see if it looks good. Use a brush or a cloth to apply the stain gently. Let it dry completely. If needed, you can add a clear coat to give it a shiny look and protect it.