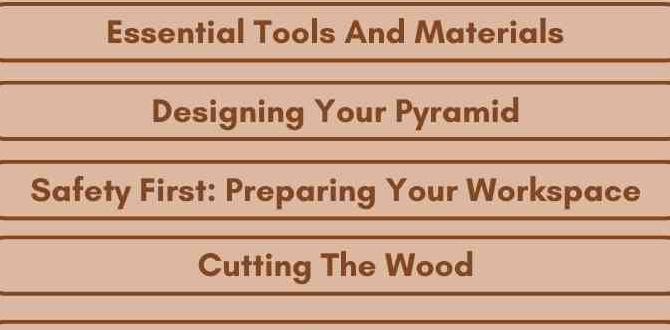
Table of Contents
How To Build Tapered Wood Columns: A Diy Guide For Beginners — Building Tapered Wood Columns Can Add A Refined Touch To Any Woodworking Project, Whether You’Re Enhancing The Aesthetic Of Your Home Or Creating Something Unique For Your Outdoor Space. This Diy Guide Will Walk You Through The Step-By-Step Process Of Crafting Your Own Tapered Wood Columns, Covering Essential Tools, Materials, And Techniques. Let’S Dive In! Materials Needed – Wood Of Your Choice (Such As Cedar, Pine, Or Oak) – Wood Glue – Finishing Nails Or Screws – Sandpaper (Various Grits) – Waterproof Wood Sealant – Wood Stain Or Paint (Optional) Tools Required – Miter Saw Or Table Saw – Jigsaw – Router – Measuring Tape – Clamps – Safety Goggles – Dust Mask Step-By-Step Guide 1. Design Your Tapered Column Begin By Deciding On The Dimensions And Design Of Your Column. Typically, Tapered Columns Are Wider At The Base And Narrower At The Top. Draft A Simple Plan On Paper, Including Measurements. 2. Select And Prepare The Wood Choose A Suitable Wood That Fits Your Design. Cut Your Wood To The Desired Lengths Using A Miter Saw Or Table Saw. Ensure You Wear Safety Goggles During This Process. 3. Create The Tapered Shape Use A Jigsaw To Cut The Narrow End Of Your Column. Line The Cut With A Straight Edge And Carefully Cut The Taper From The Bottom To The Top. Ensure Both Sides Are Symmetrical. 4. Smooth The Surfaces Once The Taper Is Cut, Sand The Entire Surface Of The Column Using Various Grits Of Sandpaper. Start With A Coarser Grit To Remove Any Saw Marks, Then Finish With A Finer Grit For A Smooth Surface. 5. Assemble The Column If Your Design Includes Multiple Pieces, Assemble Them Using Wood Glue And Secure With Finishing Nails Or Screws. Use Clamps To Hold Everything In Place Until The Glue Dries. 6. Finish The Column After The Assembly Is Secure And The Glue Has Dried, Apply A Waterproof Wood Sealant To Protect Against The Elements. You Can Also Stain Or Paint The Column To Match Your Decor. 7. Install The Tapered Column Finally, Install Your Tapered Wood Columns In Their Designated Location. Ensure They Are Level And Securely Anchored For Stability. Tips For Success – Always Measure Twice Before Cutting To Avoid Mistakes. – Take Breaks During Sanding To Maintain Accuracy And Prevent Fatigue. – Consider Using A Router To Add Decorative Edging To Your Columns. Conclusion Building Tapered Wood Columns Can Be A Fulfilling Diy Project That Dramatically Enhances The Appeal Of Your Home Or Garden. By Following This Guide And Utilizing The Right Materials And Tools, You Can Create Stunning Columns That Not Only Serve A Functional Purpose But Also Elevate Your Space Aesthetically. Happy Woodworking!

How to Build Tapered Wood Columns: A DIY Guide
Creating tapered wood columns can transform your space. Picture adding unique character to your home. This DIY project guides you through choosing the right wood, cutting angles, and assembling securely. You’ll learn to create tapered shapes that provide a stunning visual effect. Plus, using basic tools makes this task achievable. Ready to impress friends and family with your craftsmanship? Dive in and discover how easy it can be to elevate your home with beautiful wood columns!Understanding Tapered Wood Columns
Definition and purpose of tapered wood columns. Benefits of using tapered columns in construction.Tapered wood columns are special supports that narrow at the top. They add style and strength to buildings. Using these columns helps to make a structure look more elegant. They can fit many designs, from classic to modern.
- Enhances beauty: The unique shape is eye-catching.
- Improves stability: Tapered columns can support heavier loads.
- Space-saving: They take up less room in narrow areas.
In short, tapered wood columns are both beautiful and useful in construction.
What are the advantages of using tapered wood columns?
Tapered wood columns offer beauty, support, and flexibility. They fit many building styles and provide more strength for various designs.
Tools and Materials Needed
List of essential tools for building tapered columns. Recommended types of wood for durability and aesthetics.To build tapered wood columns, you need the right tools and materials. This helps make the job easier and more fun! Here’s a list of what you’ll need:
- Saw: A miter saw or jigsaw will work best.
- Measuring tape: For accurate measurements.
- Sandpaper: To smooth rough edges.
- Wood glue: To hold pieces together.
- Drill: For making holes if needed.
For wood, choose durable types such as:
- Fir: Strong and affordable.
- Oak: Beautiful and very sturdy.
- Cedar: Great for outdoor use.
Picking the right materials and tools makes your project successful!
What tools do you need to build tapered wood columns?
You will need a saw, measuring tape, sandpaper, wood glue, and a drill. These tools help you measure, cut, and finish your columns nicely.
Measuring and Planning Your Columns
Techniques for accurate measurement and cutting. Importance of creating a detailed plan and design.Before you dive into building tapered wood columns, you need to measure and plan carefully. Start by gathering your tools—no, you can’t use a tape measure that’s seen better days! Accurate measurements are key. Use a reliable measuring tape and a square for straight cuts. Planning your design is like making a roadmap; it helps you avoid unnecessary detours and surprises. A detailed sketch can keep you from slicing a column that’s way too short.
| Steps to Measure and Plan | Tips |
|---|---|
| 1. Measure your height and width | Double-check two times! No one likes a last-minute trip to the store. |
| 2. Draw a detailed design | Your sketch doesn’t need to win a prize, but it should be clear. |
| 3. List the materials | Write it down so you don’t buy the wrong stuff! |
Remember, being detailed in your planning saves time and wood. Proper measurements lead to a smoother project, which means less chance of a column looking like a crooked tree!
Cutting and Shaping the Wood
Stepbystep process for cutting the wood to the correct dimensions. Methods for tapering the wood effectively.First, measure the wood carefully. Use a tape measure to find the right lengths. Mark these points with a pencil. For cutting, use a saw. A circular saw or a hand saw can work well. Go slowly to stay safe.
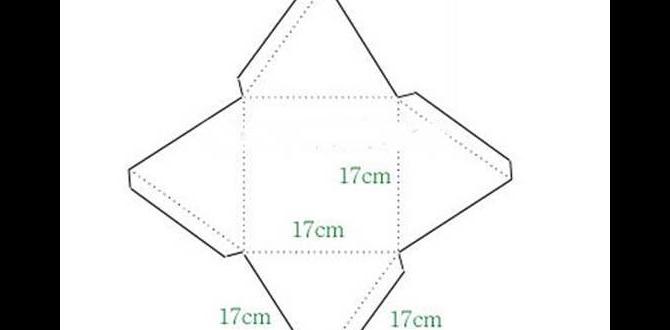
Next, taper the wood. You can do this with a planer or angle cutting. It helps to make one end wider than the other. This gives the column a nice shape.
Follow these steps:
- Cut all pieces to size.
- Mark where to taper.
- Use the tools to create the taper.
- Check your work often.
It’s like drawing a triangle. Keep it smooth and even!
How do I measure wood for tapering?
Measure your wood’s length and width from different points. Make clear marks for where to cut. Always double-check before making cuts to avoid mistakes.
Assembling the Tapered Columns
Detailed instructions for joining the pieces together. Tips for ensuring stability and alignment.Start by joining the cut pieces of wood at their ends. Use wood glue and clamps to hold them tight. Don’t skip the glue; it’s like the secret sauce for strong bonds! Make sure everything is lined up straight. You can check alignment with a compass or even a pizza slice! For extra support, use screws at regular intervals. See the table below for tips on your joining process:
| Step | Tip |
|---|---|
| 1 | Apply wood glue generously. |
| 2 | Clamp pieces securely to avoid movement. |
| 3 | Double-check alignment before fastening. |
| 4 | Use screws for added stability. |
Following these steps will help you build strong and sturdy columns. And remember, the only things that should wobble are your dance moves at a party!
Finishing Touches for Your Columns
Staining and sealing options for enhanced appearance. Techniques for achieving a professional finish.Once you’ve crafted those lovely tapered wood columns, it’s time for the finishing touches! Staining adds color, while sealing protects your hard work. Choose shades that complement your home. Light stains show off the wood grain, while dark stains add drama. For a professional finish, use a foam brush or cloth to apply your stain evenly and follow with a sealant. A tip: let each layer dry completely—impatience might lead to sticky, messy columns!
| Finishing Option | Effect |
|---|---|
| Light Stain | Highlights the wood grain |
| Dark Stain | Adds depth and drama |
| Sealant | Protects against moisture |
Installing Tapered Wood Columns
Guidelines for proper installation and securing. Safety considerations during installation.Before you get started, make sure your workspace is safe and clear. You wouldn’t want a rogue hammer to take a swing at your toes! Use the right tools and secure the columns tightly. It’s like hugging a tree, but less messy. Check that the ground is level too. Uneven surfaces can lead to wonky columns. Don’t forget to wear safety gear—better safe than sorry. Remember, if you need an extra hand, grab a friend! They can help hold things steady.
| Tip | Importance |
|---|---|
| Clear Workspace | Prevents accidents |
| Right Tools | Ensures proper installation |
| Level Ground | Avoids tilting columns |
| Safety Gear | Keeps you protected |
Maintaining Tapered Wood Columns
Tips for regular maintenance and inspection. How to address common issues and repairs.To keep your tapered wood columns looking great, regular maintenance is key. Check for cracks, chips, or peeling paint at least twice a year. For a quick fix, you can use wood filler or touch-up paint. A little care goes a long way! If you spot any signs of rot or insect damage, don’t panic! Sand it down and apply some wood sealer. Lastly, give them a good wash with soap and water, because even columns need a bath now and then.
| Maintenance Task | Frequency | Tips |
|---|---|---|
| Inspection | Twice a year | Look for cracks and chips |
| Repair | As needed | Use wood filler for small fixes |
| Cleaning | Annually | Soap and water do the trick! |
Conclusion
In conclusion, building tapered wood columns is a fun and rewarding project. Start by gathering your materials and tools. Measure carefully and cut your wood to shape. Sand the columns for a smooth finish. Don’t forget to stain or paint them for a great look. Now, you can enhance your space! Check out more DIY guides for inspiration. Happy building!FAQs
What Tools And Materials Are Needed To Build Tapered Wood Columns?To build tapered wood columns, you need some basic tools and materials. First, you will need wood, usually 2x4s, to create the column. You also need a saw to cut the wood and a sander to smooth it out. A measuring tape helps you get the right sizes, and glue or screws hold the pieces together. Finally, paint or stain can make your columns look nice.
What Are The Steps Involved In Measuring And Cutting Wood For Tapered Columns?To measure and cut wood for tapered columns, first, decide how tall and wide you want the column. Next, use a tape measure to mark the wood where you need to cut. Then, use a straight edge to connect your marks. Finally, carefully saw along the line to create the taper. Always remember to wear safety goggles!
How Do You Achieve A Smooth, Finished Look On Tapered Wood Columns After Cutting?To make wood columns smooth after cutting, start by sanding the edges. Use coarse sandpaper first, then switch to finer sandpaper for a smooth touch. Wipe off any dust with a clean cloth. Finally, apply a wood finish or sealant to protect the surface and make it shine.
What Design Considerations Should Be Made When Planning Tapered Wood Columns For A Project?When planning tapered wood columns, you should think about a few important things. First, decide how tall and wide you want the columns. Next, choose strong wood that can hold up well over time. Also, think about how the columns will fit with the rest of the building. Finally, make sure the shape looks nice and works with your design.
Are There Any Tips For Securing And Installing Tapered Wood Columns Safely And Effectively?To install tapered wood columns safely, first, measure where you want to place them. Make sure the ground is level. Use strong screws or bolts to hold them in place. If the columns are tall, ask a friend for help to keep them steady. Double-check everything to ensure they are straight and secure!
