Have you ever thought about making something unique for your home? A wooden sink can be a beautiful addition to any bathroom or kitchen. Imagine having a sink that not only works well but also tells a story. It’s a piece of art that you create with your own hands.
Building a wooden sink may sound complicated, but it can be fun and rewarding. In this step-by-step DIY guide, we will show you just how easy it is. You don’t need to be an expert in woodworking. With some tools, materials, and a bit of patience, you can have your very own wooden sink.
Did you know that wooden sinks can last for many years if you take care of them? They can handle water just as well as other materials. Plus, they offer a warm, rustic look that is hard to beat. Are you ready to dive in and start your exciting project?
Table of Contents
How To Build A Wooden Sink: Step-By-Step Diy Guide

How to Build a Wooden Sink: Step-by-Step DIY Guide
Building a wooden sink can be a fun project! First, gather materials like wood, adhesive, and tools. Cutting the wood to size is key, so measure carefully. Remember to sand and seal the wood to avoid water damage. Curious about the finishing touch? A coat of varnish gives that lovely shine! Following these simple steps helps you create a unique and practical piece for your home. Plus, it’s a great way to impress friends and family!Materials and Tools You Will Need
List of essential materials for building a wooden sink. Recommended tools for the construction process.Building a wooden sink can be fun! First, gather what you need. Here’s a handy list:
| Materials | Tools |
|---|---|
| Wood (preferably water-resistant) | Saw |
| Wood glue | Drill |
| Sandpaper | Screwdriver |
| Varnish or sealant | Measuring tape |
| Plumbing fixtures | Clamps |
These materials and tools will help you create a sink that your friends will envy. Remember, a good plan is like a good sandwich—layered and satisfying!
Choosing the Right Type of Wood
Characteristics of durable woods suitable for sink construction. Considerations for working with different woods (e.g., softwoods vs. hardwoods).Picking the right wood is essential for building a durable sink. Look for wood that resists water and damage. Hardwoods like oak and maple are strong and last long. Softwoods like pine are easier to work with but may not last as long. Consider these points:
- Hardwoods: Sturdy and durable.
- Softwoods: Lighter and easier to cut.
- Water resistance: Look for treated options.
Think about what fits your needs. Choose wisely for long-lasting use.
What wood is best for a sink?
Hardwoods like oak and teak are best. They resist water and last longer than softwoods.
Preparing the Wood
Steps for cutting and shaping the wood. Importance of sanding and finishing for durability and aesthetics.First, grab your trusty saw and cut the wood into the pieces you need. Remember, measure twice and cut once—no one wants a sink with a wonky edge! After cutting, it’s time for some shaping. This part is like giving your wood a haircut—make those edges smooth and neat.
Sanding is super important, too. It helps avoid splinters that can make your hands look like they tried to wrestle a porcupine. Plus, a good finish makes your wooden sink shine like it’s ready for a photo shoot. A well-sanded wood will last longer and look great.
To give you a clearer idea, here’s a quick table:
| Step | Action |
|---|---|
| 1 | Measure and cut your wood. |
| 2 | Shape edges for a smooth finish. |
| 3 | Sand the surfaces for comfort and style. |
With these steps, your wooden sink will be both pretty and practical!
Designing Your Wooden Sink
Tips for creating a functional and stylish sink design. Options for sink depth, width, and shape.Creating a wooden sink can be fun! Start with a design that is both practical and stylish. Think about how deep and wide you want your sink. Here are some ideas:
- Depth: Choose between 8-12 inches for washing dishes easily.
- Width: A width of 24-36 inches gives enough space.
- Shape: Round sinks look nice, but rectangular sinks are better for big pots.
Consider the style of your home too. A cozy cabin might need a rustic look, while a modern place can use clean lines. Always plan your sink around your needs!
What factors should I consider when designing a wooden sink?
Think about size, shape, and how it fits with your kitchen. You want it to look good and be easy to use!
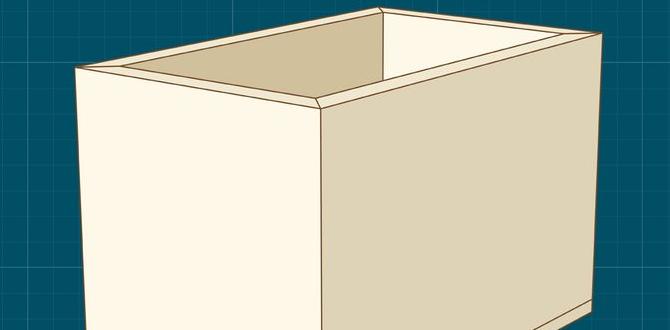
Constructing the Sink Basin
Detailed instructions for assembly of the sink basin. Techniques for waterproofing and sealing the wood.Start by measuring and cutting your wood pieces for the sink basin. You’ll need a rectangle for the base and sides that fit snugly together. Use wood glue to hold them in place, and add screws for extra support. Now, let’s make it waterproof! Apply a good sealant to all the edges. Think of it as giving your wood a cozy raincoat! Be sure to let it dry completely. When you’re done, your sink basin will be ready to make a splash!
| Step | Action |
|---|---|
| 1 | Cut wood pieces for the base and sides. |
| 2 | Assemble using wood glue and screws. |
| 3 | Apply sealant to waterproof. |
Finishing Touches and Maintenance
Recommended finishes to enhance appearance and longevity. Care and maintenance tips for keeping a wooden sink in good condition.To keep your wooden sink looking great, apply finishes like polyurethane or teak oil. These protect the wood and enhance its beauty. Regular maintenance is key. Here are some tips:
- Wipe down the sink after use.
- Avoid harsh chemicals; use mild soap instead.
- Reapply finish every few months for lasting protection.
- Inspect for scratches and sand lightly if needed.
With these simple steps, your wooden sink will remain in great shape for years!
How often should I maintain my wooden sink?
You should perform maintenance every few months. This keeps your sink looking fresh and increases its lifespan.
Common Challenges and Solutions
Typical issues faced during the building process and how to overcome them. Tips for troubleshooting plumbing difficulties and woodrelated problems.Building a wooden sink can be tricky. It’s normal to face some challenges. Here are common issues and solutions:
- Pipes Might Leak: Ensure all connections are tight. Use plumbers tape for extra security.
- Wood Might Warp: Store wood in a dry place. Seal it properly to prevent moisture.
- Measurements Can Be Off: Always double-check before cutting. Use a level to ensure everything is straight.
With these tips, you can fix problems easily. Stay patient and enjoy building your sink!
What are common plumbing issues while building a wooden sink?
Leaky pipes are a common plumbing issue. You can fix this by ensuring all joints are well-sealed. Use plumber’s adhesive where needed. Also, always check for leaks after installation.
Inspiration and Ideas for Custom Designs
Examples of unique wooden sink designs for inspiration. Suggestions for incorporating additional features, such as storage or decor.Get creative with your wooden sink designs! Think about different shapes like round or angular styles. You can add cool features, too. For example:
- Include storage shelves underneath for towels or soaps.
- Use colorful tiles for decoration around the sink.
- Add a wooden mirror to match your sink.
These ideas can make your sink look unique and help keep your space organized!
What are some unique wooden sink designs?
Some unique designs include live-edge sinks, which keep the natural shape of the wood, and floating sinks that look modern and stylish.
Conclusion
In conclusion, building a wooden sink can be fun and rewarding. Follow our step-by-step guide for success. Remember to gather your tools and materials first. Take your time with each step to ensure quality. Now that you know how to create a beautiful wooden sink, why not start your project today? Happy crafting, and don’t forget to explore more DIY ideas!FAQs
What Materials Are Needed To Build A Wooden Sink From Scratch?To build a wooden sink from scratch, you will need some wood, like pine or cedar. You also need wood glue to hold the pieces together. Don’t forget screws to make it strong. You will need a sink basin, which can be made of metal or plastic. Finally, get some waterproof sealant to keep it from leaking.
How Do I Properly Seal And Waterproof A Wooden Sink To Prevent Water Damage?To seal and waterproof a wooden sink, start by cleaning the wood to remove dirt. Next, apply a special sealant, which is like a water-proof paint. Use a paintbrush for even coverage. Let it dry completely before using the sink. Check the seal often and reapply if you see any wear. This will help keep your sink safe from water damage!
What Tools Are Essential For Constructing A Wooden Sink?To build a wooden sink, you need a few important tools. First, get a saw to cut the wood to the right size. You’ll also need a drill to make holes for screws. Sandpaper is great for making the wood smooth. Finally, a measuring tape helps you measure everything accurately.
Are There Specific Design Considerations To Keep In Mind When Building A Wooden Sink For A Bathroom Or Kitchen?Yes, there are important things to think about when making a wooden sink. First, you need to choose the right kind of wood that can handle water. It should be strong and waterproof. Next, you must think about the shape of the sink. Make sure it fits well in your bathroom or kitchen. Finally, use a good finish to protect the wood from damage.
What Maintenance Practices Should Be Followed To Ensure The Longevity Of A Wooden Sink?To keep your wooden sink looking good for a long time, you should clean it regularly. Use a soft cloth and mild soap. Avoid harsh chemicals that can hurt the wood. Make sure to dry it well after cleaning to prevent water damage. Finally, apply mineral oil every few months to protect and shine the wood.