Have you ever tried to use a finish nailer and felt frustrated? You’re not alone! Many people struggle with getting the guide aligned just right. This small mistake can turn a simple project into a big headache. Wouldn’t it be nice to know an easy way to get it perfect every time?
Imagine starting a woodworking project with confidence. You pull out your finish nailer, and it’s all set. The guide aligns perfectly, and you can focus on creativity instead of corrections. Knowing how to align the finish nailer guide can make all the difference.
In this article, we will share simple steps to help you align your finish nailer guide. Whether you’re a beginner or a seasoned pro, these tips will make your work easier. Get ready to dive in and learn something new!
Table of Contents
How To Align Finish Nailer Guide For Perfect Results

How to Align Finish Nailer Guide
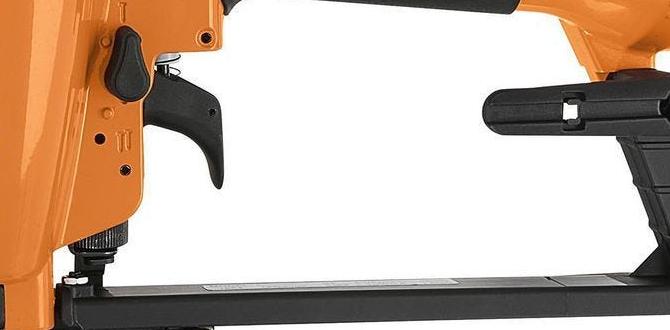
Aligning your finish nailer guide is simpler than you might think! First, check your nailer’s alignment by marking a straight line on the wood. This helps ensure accuracy. Did you know that small misalignments can lead to uneven nails? Adjust the guide until it perfectly lines up with your mark. After that, secure it tightly. This can save time and prevent material waste. So, are you ready to nail your projects without a hitch?Understanding the Basics of Finish Nailers
Explanation of what a finish nailer is and its applications. Importance of proper alignment for effective nailing.A finish nailer is a powerful tool used to drive small nails into wood. It helps with jobs like installing trim, baseboards, and cabinets. This tool makes work faster and cleaner than using a hammer. Properly aligning the nailer is very important. Good alignment ensures nails go in straight and hold wood pieces firmly. Misalignment can cause problems like splitting wood or crooked nails. Always check your guide for better results!
What are the common uses of a finish nailer?
Common uses include:
- Building furniture
- Installing moldings
- Decking projects
- Cabinet assembly
Why is proper alignment important?
Proper alignment helps nails stick better and look neat. Misaligned nails can damage your work or leave gaps. It’s crucial for strong connections in your projects.
Tools and Materials Needed for Alignment
List of tools required for aligning the finish nailer guide. Description of materials that will be used during the process.To align the finish nailer guide properly, you need some simple tools and materials. Here’s a list of what you’ll need:
- Finish Nailer
- Measuring Tape
- Level
- Square
- Wood Blocks
- Safety Goggles
These tools help ensure your work is straight and safe. Using wood blocks provides a sturdy base for your guide. Always wear safety goggles to protect your eyes during the process!
What materials are necessary for this task?
You’ll need materials that keep things aligned. Use wood blocks for support. They help hold the nailer in place. A good level ensures everything is straight.
Preparing Your Work Area
Tips for setting up a safe and efficient workspace. Importance of proper lighting and organization.Before you work, set up a space that feels nice. A clean area helps you stay safe and work better. Make sure your tools are handy and organized—no one likes the “where did I put that?” dance! Good lighting is key. Without it, you might nail your foot instead of that pesky board! Lighting should shine on your work, not your eyes. So, let’s keep it bright and tidy!
| Tip | Description |
|---|---|
| Clear Space | Remove clutter to avoid accidents. |
| Proper Lighting | Good lighting prevents mistakes. No foot nails! |
| Tool Organization | Keep tools in reach for quick access. |
How to Inspect Your Finish Nailer
Steps to check for wear and tear before alignment. Identifying common issues that may affect alignment.Before aligning your finish nailer, it’s smart to check for wear and tear. Look for any cracks, dents, or rusty parts. These can mess with your nailer’s performance. Common issues include loose screws or a clogged nose. Even dust bunnies can sneak in and create problems! Ensure everything is snug, or you might end up sending your precious nails flying in the wrong direction—ouch!
| Common Issues | Effect on Alignment |
|---|---|
| Worn-out parts | Can cause nail misfires |
| Loose screws | Leads to uneven nailing |
| Blocked air vents | Affects nail drive power |
Step-by-Step Guide to Aligning the Finish Nailer Guide
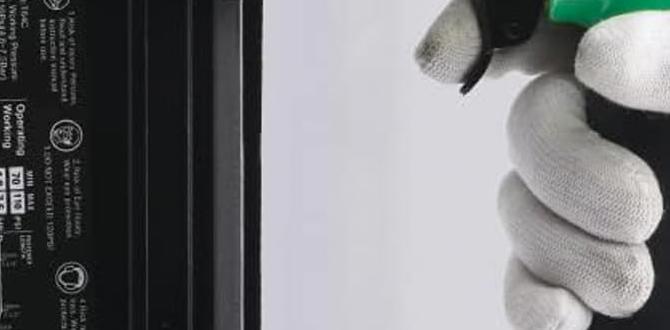
Detailed procedure for aligning the nailer guide. Safety precautions to follow during the process.Before aligning your finish nailer guide, ensure you wear safety glasses and gloves. Start by unplugging the nailer to avoid accidents. Then, carefully position the guide against the work surface. Adjust it until the nailer’s tip points where you want the nail. Tighten the guide screws to secure your settings. Finally, check again to make sure it’s straight. This way, you can nail with precision!
What precautions should I take while aligning the finish nailer guide?
Wear safety glasses and gloves to protect yourself. Always unplug the nailer before adjusting the guide. Double-check that the path is clear of obstacles. Finally, keep children and pets away while you work.
- Wear safety gear
- Keep hands clear of the tip
- Check the surroundings
Testing the Alignment
Methods to verify that the guide is correctly aligned. Troubleshooting tips for misalignment issues.To check if your nailer guide is aligned, start by simulating a nail placement. Hold the nailer against a scrap piece of wood and see if the nail hits the right spot. If it doesn’t, you may need to adjust the guide.
Here are some quick tips for troubleshooting:
- Make sure the guide is clean and clear of debris.
- Double-check the screws or clamps holding the guide.
- Try aligning the guide with a straight edge or ruler.
Getting this right can make your projects easier and your results better. A well-aligned guide leads to neat, strong nail placements.
What should I do if my nailer guide is misaligned?
If your nailer guide is misaligned, you should loosen the screws and adjust it until it points straight. Then, retighten the screws. Make sure everything is level before you start nailing again.
Maintenance Tips for Long-lasting Performance
Routine maintenance practices to keep the finish nailer in optimal condition. When to seek professional help or parts replacement.To keep your finish nailer running like a champ, regular upkeep is key. Clean it after each use to avoid gunk buildup. Check the air filter and oil it occasionally, like giving your nailer a spa day. Watch for any unusual sounds or leaks—those often mean it’s time to call in the pros! If it starts making noises akin to a broken record, don’t hesitate to seek professional help. This helps ensure your tool remains dependable and ready to work.
| Maintenance Tip | Frequency |
|---|---|
| Clean the nailer | After each use |
| Oil the parts | Every few uses |
| Check the air filter | Monthly |
| Professional check-up | Annually |
Common Mistakes to Avoid When Aligning
List of frequent errors novice users make during alignment. Advice on how to circumvent these mistakes for better results.Many beginners make mistakes while aligning. These errors can lead to uneven nails or damaged work. To help, here are some common mistakes and tips to avoid them:
- Misreading instructions: Follow the manual closely for best results.
- Wrong angle: Ensure the nailer is held straight for proper alignment.
- Skipping measurements: Always measure twice before nailing.
By remembering these tips, you can improve your skills and get better results!
What are the common mistakes with a finish nailer?
Common mistakes include misreading instructions and not holding the nailer straight. Avoiding these errors leads to smoother work and fewer problems.
Resources for Further Learning
Recommended books, magazines, or online courses on finish nailers. Links to video tutorials and community forums for additional support.To learn more about finish nailers, check out these resources. Books and magazines can share tips and tricks. Online courses often provide hands-on skills. Video tutorials on websites like YouTube are also great. You can find community forums where users discuss their experiences. Here’s a quick list:
- Books: “Finish Carpentry” by Gary Katz
- Magazines: “Fine Homebuilding”
- Online Courses: Udemy and Skillshare
- Video Tutorials: YouTube channels like Home Repair Tutor
- Community Forums: Reddit’s r/DIY
Conclusion
In summary, aligning your finish nailer guide is crucial for good projects. First, check your nails’ depth. Next, adjust the guide to ensure accuracy. Always test on scrap wood first. Remember, practice makes perfect! For more tips, consider reading our other guides. You’ll feel more confident and create better work with just a little effort. Happy nailing!FAQs
What Steps Are Needed To Properly Align The Guide On A Finish Nailer Before Starting A Project?To align the guide on a finish nailer, first, check the tool for any damage. Then, make sure the guide is clean and free from any debris. Next, adjust the guide to match the material’s thickness you will work with. After that, test it by nailing into some scrap wood. Finally, you’re ready to start your project!
How Can I Troubleshoot Misalignment Issues With My Finish Nailer Guide?To troubleshoot misalignment with your finish nailer guide, first check if the guide is securely attached. Make sure there are no loose screws or parts. Next, look at the nails you are using. The wrong size can cause problems. Finally, try adjusting the guide to align with the spot where you want to nail. If it still doesn’t work, ask an adult for help!
What Tools Do I Need To Ensure Accurate Alignment Of The Guide On My Finish Nailer?To make sure the guide on your finish nailer is lined up correctly, you need a few tools. First, use a tape measure to check distances. A level tool helps keep things straight. You may also need a screwdriver to tighten or adjust the guide. Lastly, a pencil can help mark any spots you need to remember.
Are There Specific Techniques For Aligning The Finish Nailer Guide With Different Types Of Materials?Yes, there are some easy ways to line up the finish nailer guide. First, make sure the guide sits flat against the material. For soft materials like pine, you can use a lighter touch. For hard materials like oak, press a little harder to sink the nail well. Always double-check your aim before you pull the trigger!
How Often Should I Check And Adjust The Alignment Of My Finish Nailer Guide During A Project?You should check and adjust the alignment of your finish nailer guide often, especially if you notice problems. It’s a good idea to check it every time you change materials or if you start to see uneven nails. If something feels off, stop and fix it. This helps make sure your work looks great and works well!