Have you ever noticed a crack in your wooden furniture? It can be frustrating! You might think repairs need to be complicated. But did you know that homemade wood filler can make fixing those cracks simple? That’s right! A few easy ingredients can help you create a perfect blend for your repairs.
Imagine transforming a damaged piece back to its original beauty. It’s like magic! You can save money and feel proud of your handiwork. Plus, homemade wood filler is often better than store-bought options, as you control every ingredient.
In this article, you’ll discover an easy DIY recipe for homemade wood filler. You’ll learn how to mix it, apply it, and make your repairs last. With just a little time and effort, you’ll achieve perfect results. Ready to dive in and impress your friends with your skills? Let’s get started!
Table of Contents
Homemade Wood Filler: Easy Diy Recipe For Perfect Repairs

Homemade Wood Filler: Easy DIY Recipe for Perfect Repairs
Looking for a way to fix wood damage without spending much? Homemade wood filler might be your answer. It’s simple to make and uses materials you probably already have at home! With just a few ingredients like sawdust and glue, you can whip up a mixture that fills cracks and holes perfectly. Did you know that this filler can match the color of your wood? Say goodbye to costly repairs and hello to DIY creativity!Understanding Wood Filler
Definition and purpose of wood filler in woodworking. Different types of wood filler available in the market.Wood filler is like a superhero for your furniture! It helps fix holes, cracks, and dents, making your wood look as good as new. There are many types of wood fillers in stores. Some are made from **wood particles** and are perfect for small repairs, while others are **latex-based**, great for larger gaps. Each type has its special power, just like superheroes! Here’s a quick look at some popular options:
| Type of Wood Filler | Best For |
|---|---|
| Wood Putty | Small scratches |
| Epoxy Filler | Large holes |
| Latex Filler | Indoor use |
| Polyester Filler | Outdoor projects |
Choose wisely, and your wood will be smiling again in no time!
Benefits of Homemade Wood Filler
Costeffectiveness compared to storebought options. Customization to match specific wood types and colors.Homemade wood filler has many great benefits. First, it saves money. Making your own filler costs much less than buying in a store. Cost-effective solutions help you manage your budget better. Next, you can customize it! You can match the filler to different wood types and colors easily. This helps your repairs look natural and seamless. With these perks, DIY wood filler is a smart choice for any project.
What are the main benefits of homemade wood filler?
Cost savings and custom colors are key advantages. You can spend less money while achieving better results by matching the wood’s natural appearance.
Benefits:
- Save money compared to store-bought options
- Customize filler to match specific wood colors
Essential Ingredients for DIY Wood Filler
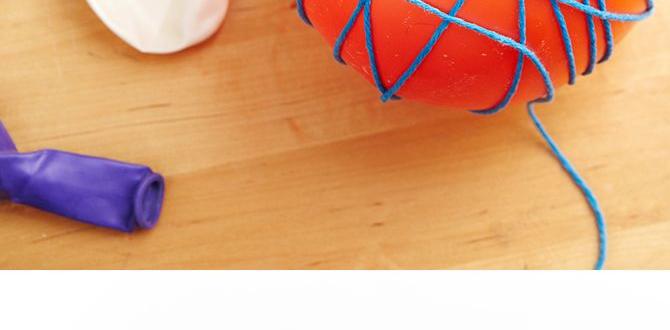
Common materials required for creating homemade wood filler. Alternative options based on availability and preferences.Making your own wood filler can be easy and fun! Here are some basic ingredients you need to get started. Wood glue is a must; it helps everything stick together. Then, grab some sawdust from your previous projects—no one likes extra dust lying around! If you’re feeling fancy, use wood flour for a smoother finish. But wait! Don’t panic if you lack these items; you can also use joint compound or spackle instead. They work wonders too! Check out this helpful table:
| Ingredient | Use |
|---|---|
| Wood Glue | Binds the mixture |
| Sawdust | Adds texture |
| Wood Flour | Smooths out filler |
| Joint Compound | Alternative filler |
| Spackle | Quick fix option |
With these simple ingredients, you’ll be filling wood holes like a pro in no time! Remember, creativity counts. If your filler doesn’t look perfect, blame it on the wood’s personality. It always adds a twist!
Step-by-Step Recipe for Homemade Wood Filler
Detailed instructions for mixing materials effectively. Tips for achieving the right consistency and texture.Gather your supplies, including wood glue, sawdust, and a small mixing container. Start by pouring a bit of wood glue into the container. Then, add sawdust little by little. Mix them well until you have a dough-like consistency. If it’s too thick, add more glue; if it’s too runny, sprinkle in more sawdust. Remember, the goal is to achieve a spreadable texture that won’t drip off! Try a 1:1 ratio as a starting point, but feel free to adjust!
| Material | Amount |
|---|---|
| Wood Glue | 1 part |
| Sawdust | 1 part |
Mix until smooth, resembling creamy peanut butter. If your mixture looks like cottage cheese, don’t worry; it’s an easy fix! Just keep stirring and adding until it gets tasty—or at least looks nice! Happy repairing!
Application Techniques for Wood Filler
Best practices for applying filler to various surfaces. Tools needed for a smooth finish and seamless look.Applying wood filler can be easy if you follow some best practices. Start by cleaning the area to remove dust and dirt. Use a putty knife for smooth application. For wide cracks, a larger knife works better. Apply the filler in layers. Let it dry before adding more for a seamless look. Moreover, sanding can help achieve a smooth surface. Here are some tools you might need:
- Putty knife
- Sanding block
- Clean cloth
- Gloves
What is the best way to apply wood filler?
The best way to apply wood filler is to spread it evenly and in thin layers. Let each layer dry before adding more. This helps to avoid cracks and gives a nice finish.
Drying and Sanding Process
Recommended drying times for optimal results. Techniques for sanding and finishing the patched area.After applying your homemade wood filler, it’s important to let it dry. Most fillers need at least 2 to 4 hours to dry completely. This ensures a strong patch. If possible, let it dry overnight for best results. Once dry, it’s time to sand.
Use fine-grit sandpaper for a smooth finish. Start lightly and increase pressure as needed. This will help blend the patched area with the surrounding wood. A smooth finish makes your repair look professional.
What are the best tips for sanding wood filler?
- Sand gently to avoid damage.
- Clean dust from sanding before applying finish.
- Use a sanding block for flat surfaces.
Common Mistakes to Avoid
Typical errors made when using homemade wood filler. How to troubleshoot and rectify issues during application.Using homemade wood filler can be tricky. Here are some common mistakes to avoid:
- Not mixing the ingredients well. This can lead to a weak filler that won’t hold.
- Applying too much at once. This can cause uneven patches.
- Using the filler on damp wood. Moisture can prevent it from setting properly.
If you face issues, try these solutions:
- Mix thoroughly for a consistent blend.
- Apply thin layers and let each one dry first.
- Ensure the wood is dry before filling.
Following these tips helps you get a smooth, strong repair!
What is the best way to fix mistakes with homemade wood filler?
Start by removing excess filler carefully. Sand down the area once dry, then reapply with proper technique. This will improve the finish.
Maintenance and Longevity of Wood Filler Repairs
Tips for ensuring the durability of repairs made with homemade wood filler. Signs that indicate it’s time to redo repairs.To keep your wood filler repairs strong and lasting, take a few simple steps. First, ensure the area is clean and dry before applying the filler. This helps it stick like peanut butter on bread! Always sand the surface before redoing any repairs; smooth surfaces make for strong bonds. Check regularly for any cracks or peeling. If you spot trouble, it’s time for some *wood filler magic* again.
| Tip | Sign of Damage |
|---|---|
| Keep it clean and dry | Visible cracks |
| Smooth the surface | Peeled areas |
| Regular checks | Discoloration |
Remember, the stronger the repair, the longer your wood will hold up. So, be the superhero of your home, saving it from wood decay one repair at a time!
FAQs about Homemade Wood Filler
Frequently asked questions related to usage and effectiveness. Clarifications on common misconceptions regarding wood fillers.Many people have questions about using homemade wood filler. They wonder if it is effective and how to use it properly. Here are some clarifications:
How effective is homemade wood filler?
Homemade wood filler works well for small repairs. It can fill gaps and cracks nicely. However, it might not be strong enough for heavy damage.
Can I use it on all types of wood?
Yes, but some woods may absorb it differently. Test it on a small area first to see how it looks.
Will it dry and match the wood?
Homemade wood filler usually dries lighter than the wood. Staining it after drying can help match the color.
Conclusion
In conclusion, making homemade wood filler is simple and rewarding. You can use basic ingredients to create effective repairs. This DIY recipe saves money and helps you fix wood flaws easily. Try it out for your next project! For more tips and tricks, explore other DIY guides to enhance your skills. Happy repairing!FAQs
What Are The Common Materials Needed To Make Homemade Wood Filler?To make homemade wood filler, you need just a few things. Start with sawdust from the wood you are using. Next, you need a glue, like white school glue or wood glue. You can also use some wood glue mixed with a bit of water. Mix these ingredients together until it becomes a paste.
How Can You Customize Homemade Wood Filler To Match The Color Of The Wood You Are Repairing?To match the color of your wood, you can mix paint or stain into your wood filler. Start with a little bit and blend it well. You can add more until it looks right. Test it on a small area to make sure it matches your wood. This way, your repair will look neat and natural!
What Are The Pros And Cons Of Using Homemade Wood Filler Versus Store-Bought Options?Homemade wood filler is often cheaper and you can make it with stuff you already have. It’s fun to mix and customize it to match your project. But sometimes, it might not be as strong or last as long as store-bought filler. Store-bought options are easy to use and very reliable, but they can cost more. So, it depends on what you need for your project!
How Do You Apply Homemade Wood Filler For The Best Results In Wood Repairs?To apply homemade wood filler, first clean the area where you need to fix the wood. Use a putty knife to spread the filler into the hole or crack. Press it down so it fills completely and is smooth on top. Let it dry as directed, then sand it down until it’s nice and even. Finally, you can paint or stain it to match the wood.
How Long Does Homemade Wood Filler Typically Take To Dry, And What Is The Best Way To Finish The Repaired Area?Homemade wood filler usually takes about one to two hours to dry. You should wait until it feels hard before you touch it. To finish the repaired area, you can sand it smooth after it dries. Then, you can paint or stain it to match the rest of the wood.