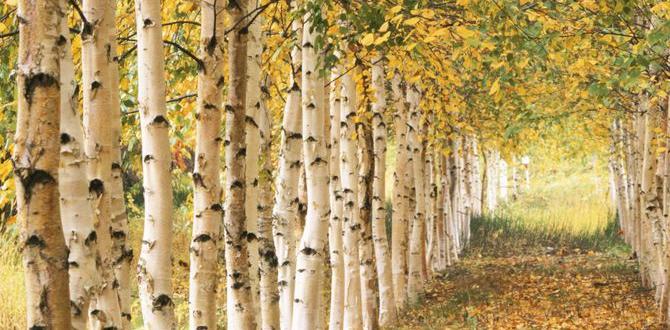
Have you ever noticed gaps or cracks in your beautiful hardwood floors? It can be frustrating, right? Those little flaws can spoil the look of your home. But here’s the good news: hardwood flooring wood filler can help fix those problems!
Imagine stepping onto your smooth, perfect floor again. How great would that feel? Wood filler is a simple solution that fills in the spaces and makes your floors look brand new.
Did you know that using wood filler can also protect your floors? It keeps dirt and moisture out. This not only improves the appearance but also helps your floors last longer. With a little effort, you can restore your hardwood floors to their original charm.
If you’re curious about how to use hardwood flooring wood filler, you’ve come to the right place. Let’s dive into the world of wood repair and discover the magic of making your hardwood floors shine again!
Table of Contents
Hardwood Flooring Wood Filler: The Essential Guide

Hardwood Flooring Wood Filler
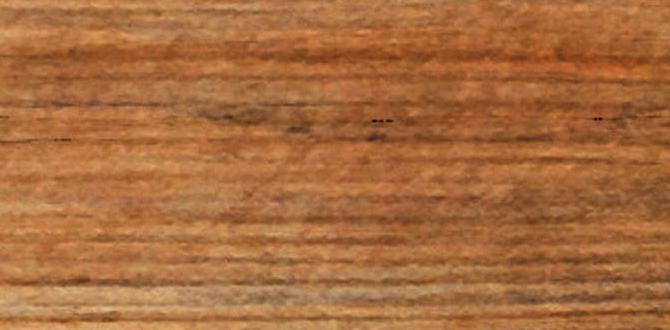
Hardwood flooring can look amazing, but what happens when there are dents or gaps? Using hardwood flooring wood filler is the solution! This handy product matches the color of the wood, helping to make repairs nearly invisible. Did you know that filling those gaps can also keep dirt and moisture away? Plus, applying filler is easy and can be a fun weekend project for families. It’s an essential step for keeping your floors looking beautiful!Understanding Hardwood Flooring Wood Filler
Definition and purpose of wood filler in hardwood flooring. Differences between wood filler and other types of fillers.Wood filler is like the superhero of hardwood flooring. It fills gaps, cracks, and holes in the wood, making your floors look as good as new. Unlike regular fillers, which may not blend well, wood filler is specially crafted for wood surfaces. It comes in various colors to match your flooring. Think of it as dressing up your floor for a big party! If you mix it wrong, it’s like wearing socks with sandals—definitely not a fashion win!
| Type of Filler | Best For | Key Feature |
|---|---|---|
| Wood Filler | Wood surfaces | Color matching |
| Spackle | Drywall | Quick drying |
| Joint Compound | Seams in drywall | Smooth finish |
So, if you want to keep your hardwood flooring happy and healthy, wood filler is a must-have tool in your DIY kit!
Choosing the Right Wood Filler for Your Project
Factors to consider (color matching, drying time, ease of application). Popular brands and their features.Picking the perfect wood filler matters! Consider these factors:
- Color matching: Choose a filler that closely matches your hardwood.
- Drying time: Fast-drying fillers save you time, typically taking 1-2 hours.
- Ease of application: Look for products that spread easily for a smooth finish.
Some popular brands include:
- Minwax: Known for color variety and quick drying.
- Bondo: Offers strong adhesion and durability.
- Elmer’s: User-friendly with a flexible texture.
With these tips, you’ll find the right wood filler for your project!
What should I look for in wood filler?
Look for color matching, drying time, and ease of application. These help ensure a neat finish that blends well with your floor.
Preparation Before Using Wood Filler
Steps to prepare the hardwood floor before application. Safety precautions to take while handling wood filler.Before diving into the exciting world of wood filler, take a moment to prep. Start by cleaning your hardwood floor. Sweep away dust and dirt—your filler deserves a clean stage! Next, sand those rough spots. It’s like Giving your floor a spa day! Don’t forget to wear safety goggles and a mask. You want to fill holes, not your lungs with dust. Safety first, right?
Here’s a fun table to help you remember the steps:
| Preparation Steps | Safety Precautions |
|---|---|
| Clean the floor | Wear a mask |
| Sand rough areas | Use safety goggles |
| Fill holes | Ventilate the area |
Ready to start? With these steps, your hardwood will look fantastic, and you’ll be safe while doing it!
Application Techniques for Wood Filler
Tools required for application (putty knife, scraper, etc.). Stepbystep guide on how to apply wood filler effectively.Using wood filler is like giving your hardwood floors a mini makeover! Start with a few tools: a putty knife, scraper, and maybe an old toothbrush for stubborn spots. Ready? Here’s how to apply that magic filler:
| Step | Action |
|---|---|
| 1 | Clean the area well. No one likes a messy job! |
| 2 | Grab your putty knife and scoop some wood filler. |
| 3 | Spread the filler into the gap. Think of it as frosting a cake! |
| 4 | Let it dry, then use the scraper for a smooth finish. |
| 5 | Sand lightly for perfection! |
And voilà! Your wood floors are happy again. Remember, it’s all about patience and a little fun. Don’t rush; let your floors shine like stars in Hollywood!
Finishing Touches After Applying Wood Filler
Sanding and refinishing techniques postapplication. Tips for achieving a smooth and even surface.After spreading your wood filler, it’s time for some TLC! First, let’s grab some sandpaper. Use a medium grit first and then switch to a finer grit for a silky-smooth finish. Remember, slow and steady wins the race! You don’t want to end up with a bumpy surface. A little elbow grease goes a long way. Don’t forget to clean up the dust afterward. Happy sanding!
| Steps | Tips |
|---|---|
| 1. Sand with Medium Grit | Start with 120 grit sandpaper. |
| 2. Switch to Fine Grit | Use 220 grit for smoothness. |
| 3. Clean the Surface | Use a vacuum or damp cloth. |
For those wondering, proper sanding can enhance the look of your hardwood. It’s like giving your floor a spa day! Keep it fun, and your floors will shine like a star!
Common Mistakes to Avoid When Using Wood Filler
Frequent errors users make during application. How to troubleshoot and fix issues with wood filler application.Using wood filler can be tricky! Many people make common mistakes that lead to problems. For example, they might not clean the area well before applying the filler. This can cause the filler to not stick properly. Another issue is applying too much filler at once. It’s better to add layers slowly.
If you notice cracks or uneven surfaces later, don’t worry! You can simply sand down the area and add more filler. Here are some tips:
- Always clean the surface.
- Use a small amount of filler.
- Sand between applications.
- Let the filler dry completely.
With these tips, you can fix mistakes and achieve great results!
What should I do if my wood filler dries too quickly?
If your wood filler dries too fast, try dampening the area before applying more filler. It helps the new filler bond better and blend in smoothly.
Maintaining and Caring for Hardwood Floors with Wood Filler
Best practices for maintaining filled areas. Recommendations for regular upkeep and cleaning.To keep filled areas on your hardwood floors looking fresh, it’s essential to follow some best practices. First, make sure to sweep away dust and debris regularly. Use a soft cloth or a vacuum with a brush attachment. Avoid harsh cleaners; they can be rude to your wood filler! Stick to a damp mop with warm water. Routine care can help your floors shine like a new penny. Don’t forget to check for any wear and touch up with filler if needed. And remember, a happy floor means a happy home!
| Maintenance Tip | Frequency |
|---|---|
| Sweep or Vacuum | Weekly |
| Damp Mop | Every 1-2 weeks |
| Check Filler Areas | Monthly |
Conclusion
In conclusion, hardwood flooring wood filler is key for repairing gaps and holes. It blends well with your floor for a smooth finish. You can choose colors that match your wood type. For best results, always follow the instructions. Now, grab your tools and start your repair project! For more tips, check out additional flooring resources online.FAQs
What Types Of Wood Fillers Are Best Suited For Use With Hardwood Flooring?For hardwood flooring, we can use a few types of wood fillers. A good choice is wood putty. It can match the color of the wood. There are also liquid fillers that work for small holes. We want to pick a filler that dries hard and can be sanded well.
How Do You Properly Apply Wood Filler To Gaps And Imperfections In Hardwood Floors?To fix gaps and bumps in hardwood floors, start by cleaning the area. Then, take some wood filler and scoop a little onto a putty knife. Spread it into the gap or bump, pushing it down well. Let the filler dry completely. Finally, sand it smooth so it blends in with the wood.
Can Wood Filler Be Stained Or Finished To Match The Color Of Hardwood Flooring?Yes, wood filler can be stained or finished. You need to choose a color that matches your hardwood floor. After applying the stain, let it dry completely. Test it on a small area first to see if you like the match. This helps your repair look better!
What Are The Advantages And Disadvantages Of Using Wood Filler Compared To Replacing Damaged Hardwood Boards?Using wood filler is cheaper and faster than replacing damaged boards. It helps fix small holes and scratches, making your floor look better. However, wood filler might not last as long as new boards and can break or crack. Replacing boards takes more time and money, but the new wood is strong and lasts longer. So, you have to decide what’s more important: saving money or having perfect floors.
How Can You Prevent Gaps In Hardwood Flooring That Might Require Filler In The First Place?To stop gaps in hardwood flooring, keep the room at a steady temperature. We should also use a humidifier in dry months to add moisture. Make sure to clean the floors and not let dirt build up. Finally, always leave enough space around the edges for the wood to expand and shrink.