This guide helps you choose and understand hardwood flooring in the USA. We’ll cover types, installation basics, and maintenance tips in simple terms, making your flooring project a success.
Hey there, DIY enthusiasts! Jack Shaffer from Nailerguy here. Dreaming of that beautiful, timeless look of hardwood floors in your home? You’re not alone! Hardwood flooring brings warmth, elegance, and a touch of nature right into your living space. But when you start researching, it can feel a bit overwhelming with all the different wood types, finishes, and installation methods. Don’t worry, I’ve got your back! We’re going to break down everything you need to know about hardwood flooring in the USA, making it easy to choose the perfect option for your home and your budget. Get ready to create a floor you’ll love for years to come!
Table of Contents
Why Choose Hardwood Flooring?
Hardwood floors are a classic for a reason. They offer a unique blend of beauty, durability, and timeless appeal that synthetic materials just can’t match. Beyond their good looks, they can actually add significant value to your home. Plus, they’re a joy to live with – warm underfoot in winter and cool in summer. Let’s dive into why they’re such a brilliant choice for your USA home.
Timeless Beauty and Enduring Appeal
There’s a natural elegance to hardwood that instantly elevates any room. The intricate grain patterns, rich colors, and natural variations in each plank create a unique canvas that complements any decor style, from modern minimalist to rustic farmhouse. Unlike trends that come and go, hardwood flooring remains consistently in vogue, offering a lasting aesthetic that can be updated with different rugs or furniture.
Increased Home Value
Investing in hardwood flooring is often seen as a smart financial move. Many homebuyers actively seek out homes with hardwood floors, recognizing their quality and beauty. This can translate into a higher resale value for your property. It’s a feature that says “quality” to potential buyers.
Durability and Longevity
When installed and maintained properly, hardwood floors can last for generations. They are incredibly durable and can withstand heavy foot traffic. Unlike carpet, which can harbor allergens and wear out over time, hardwood is relatively easy to clean and can even be refinished to look like new again, extending its lifespan significantly.
A Healthier Home Environment
Hardwood floors are a great choice for those who suffer from allergies or asthma. They don’t trap dust, dander, or other allergens like carpeting does. Regular sweeping and occasional damp mopping are usually all that’s needed to keep them clean and contributing to better indoor air quality.
Types of Hardwood Flooring Available in the USA
When you’re looking at hardwood flooring in the USA, you’ll encounter a few main categories. Understanding these will help you make the best choice for your project.
Solid Hardwood Flooring
Solid hardwood is exactly what it sounds like: one solid piece of wood, from top to bottom. It’s the traditional choice and offers the most versatility when it comes to refinishing.
Construction: Each plank is milled from a single piece of timber.
Thickness: Typically 3/4 inch thick.
Installation: Most commonly nailed or stapled down to a subfloor. It can also be glued down in some situations.
Refinishing: Can be sanded and refinished multiple times over its life, making it a long-term investment.
Pros: Highest resale value, can be refinished many times, classic beauty.
Cons: Can be more expensive, susceptible to moisture and humidity changes (not ideal for basements or bathrooms).
Engineered Hardwood Flooring
Engineered hardwood is made with multiple layers of wood or composite material that are glued together under heat and pressure. The top layer is a veneer of real hardwood. This construction makes it more stable and versatile.
Construction: Features a top layer (veneer) of genuine hardwood bonded to a core of plywood or high-density fiberboard.
Thickness: Varies, but the top hardwood veneer is typically 1/8 inch or thicker.
Installation: Can be glued, stapled, nailed, or floated (where planks lock together and aren’t attached to the subfloor). This makes it very DIY-friendly.
Refinishing: Can usually be refinished, but only once or twice, depending on the thickness of the top veneer.
Pros: More stable in varying humidity conditions, can be installed in more places (including basements and over concrete), often more affordable, easier DIY installation.
Cons: Limited refinishing potential compared to solid hardwood.
Pre-finished vs. Site-finished Flooring
This distinction refers to when the wood is stained and sealed.
Pre-finished Flooring: Comes from the factory with its stain and protective finish already applied.
Pros: Faster installation, no mess or fumes from site-finishing, consistent factory-applied finish, often more durable finish.
Cons: Limited color and finish options compared to custom site-finishing, can be slightly more expensive per square foot initially.
Site-finished Flooring: The raw wood planks are installed, and then they are sanded, stained, and sealed on-site.
Pros: Custom color and finish options, seamless look, can be sanded out imperfections during installation.
Cons: Longer installation time, requires specialized equipment, involves strong fumes and dust, can be more labor-intensive.
Popular Hardwood Species in the USA
The type of wood you choose is crucial for both aesthetics and durability. Here are some of the most popular hardwood species found in the USA:
Oak (Red Oak & White Oak)
Oak is the most popular hardwood flooring choice in the USA, and for good reason. It’s durable, readily available, and offers beautiful grain patterns.
Red Oak: Has a pinkish to reddish hue with a warmer tone. Its grain is typically more pronounced. It’s known for its strength and resistance to wear.
White Oak: Offers a more neutral, grayish-brown tone with straighter, cleaner grain patterns. it is known for its exceptional durability and resistance to moisture, making it a great choice for kitchens and other high-traffic areas. According to the U.S. Forest Products Laboratory, oak boasts a Janka hardness rating of around 1,290, indicating its toughness.
Maple
Maple is a very hard and dense wood, making it incredibly resilient to dents and scratches. It has a fine, subtle grain and a generally lighter, creamy color, offering a clean, modern look.
Janka Hardness: Around 1,450, making it harder than oak.
Appearance: Light, consistent color with a subtle grain.
Hickory
Hickory is one of the hardest domestic woods available. It’s known for its dramatic color variation, from light creams to deep browns, and its prominent, often wavy grain patterns. This makes for a very distinctive and rustic look.
Janka Hardness: Can range from 1,820 to 2,350, making it one of the hardest domestic options.
Appearance: Strong color contrast and bold grain.
Walnut
Walnut is a premium hardwood known for its rich, deep brown color and beautiful, often wavy grain. It offers a luxurious and sophisticated look, though it’s softer than oak or maple.
Janka Hardness: Around 1,010, making it softer than many domestic hardwoods but still suitable for flooring.
Appearance: Rich chocolate-brown hues, elegant grain.
Cherry
American Cherry is prized for its smooth, fine grain and its ability to deepen in color over time, transforming from a light pinkish-brown to a rich, reddish-brown. It’s softer than oak but offers a warm, inviting aesthetic.
Janka Hardness: Around 950.
Appearance: Changes color significantly with UV exposure, showing a warm, aged patina.
Understanding Hardwood Flooring Finishes
The finish on your hardwood floor is critical for its protection and appearance. It shields the wood from spills, scratches, and wear.
Surface Finishes (Polyurethane-Based)
These are the most common finishes today. They create a protective layer on top of the wood.
Aluminum Oxide: A very strong, durable finish often found on pre-finished floors. It’s highly resistant to scratches and wear but can be difficult to repair if deeply damaged.
Urethane/Polyurethane: The traditional go-to. These provide good protection and can be found in various sheens (matte, satin, semi-gloss, high-gloss). They can be recoated or refinished.
Oil-Based vs. Water-Based Polyurethane:
Oil-based: Dries to a harder finish, offers excellent durability, and tends to have a warmer, amber tone. However, it has strong fumes and a longer drying time.
Water-based: Dries faster, has lower VOCs (volatile organic compounds), and dries clear, maintaining the natural color of the wood. It’s less durable than oil-based but easier for DIYers to manage.
Penetrating Finishes (Hardwax Oils)
These finishes soak into the wood rather than forming a film on top. They create a more natural, matte look and feel.
Pros: Emphasize the natural beauty of the wood, easy to spot-repair, low VOCs, can be a good choice for those seeking a more natural aesthetic.
Cons: Generally less durable than surface finishes, require more frequent maintenance and reapplication.
Sheen Levels:
Matte: Offers a subtle sheen, disguising minor scratches and imperfections. Very natural look.
Satin: A popular choice, offering a soft, low-sheen appearance that provides a good balance between natural look and durability.
Semi-Gloss: Has a noticeable shine. More reflective and shows fingerprints and scratches more readily.
High-Gloss: A very shiny, reflective surface. Makes a bold statement but shows every little mark and dust bunny.
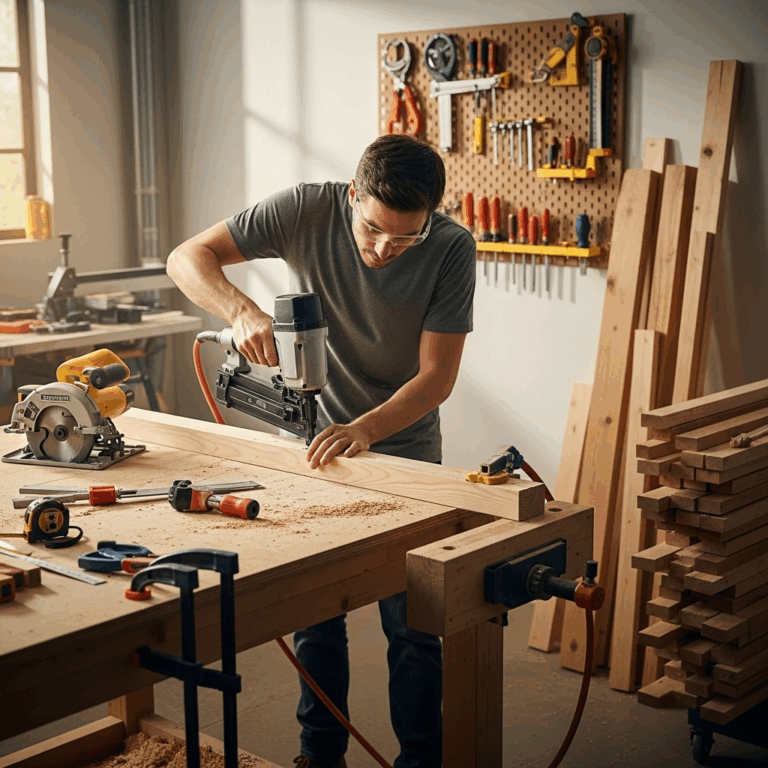
Hardwood Flooring Installation: A Beginner’s Overview
Installing hardwood flooring can be a rewarding DIY project, but it requires patience and attention to detail. Here’s a simplified look at the process. Remember, for solid hardwood, it’s best to have a wooden subfloor. Engineered options offer more flexibility.
Tools You Might Need:
Measuring tape
Pencil
Chalk line
Miter saw (for cutting planks)
Jigsaw (for cuts around obstacles)
Flooring nailer or stapler (for solid hardwood)
Underlayment (for engineered hardwood, especially floating floors)
Tapping block and pull bar (for engineered hardwood)
Hammer or mallet
Safety glasses and gloves
Moisture meter (crucial for ensuring the subfloor is dry)
Vacuum cleaner
The Basic Steps (for Nail-Down Installation):
1. Acclimate the Flooring: Let the wood planks sit inside your home in their boxes for at least 48 hours (or as recommended by the manufacturer) to adjust to your home’s humidity and temperature. This prevents warping and gapping later.
2. Prepare the Subfloor: Ensure your subfloor is clean, dry, and level. Remove any old flooring, nails, or staples. A moisture reading below 12% (or as per manufacturer specs) is essential for solid hardwood.
3. Lay the First Row: Start in a corner, usually the longest, straightest wall. Measure out the distance for your first plank’s tongue or groove (depending on your system) from the wall. This ensures your last row isn’t incredibly narrow. Use spacers between the wall and the first plank to allow for expansion. Secure the first plank through both the face (face-nailing) and the tongue.
4. Continue Laying Planks: Work across the room, staggering the end joints of each plank. This means the seams between planks in one row shouldn’t line up with seams in the next row. Aim for at least a 6-inch stagger. Use your chalk line to ensure your rows are straight.
5. Nailing/Stapling: For solid hardwood, use your flooring nailer or stapler to fasten each plank. Typically, you’ll nail or staple into the tongue of the plank at an angle. Follow the manufacturer’s recommended spacing.
6. Cutting and Fitting: Use your miter saw for straight cuts and a jigsaw for curves or irregular shapes (like around doorways or pipes). Always measure twice and cut once!
7. The Final Row: You’ll likely need to rip (cut lengthwise) the last row of planks to fit. Use a pull bar to gently snug the last plank into place against the wall. Face-nail this final row, being careful to keep the nails as inconspicuous as possible.
For engineered flooring, follow the manufacturer’s specific instructions, as installation methods can vary. Always prioritize safety. Wear safety glasses when cutting and using tools.
DIY vs. Professional Installation
Deciding whether to tackle hardwood flooring installation yourself or hire a professional is a big decision.
DIY Installation:
Pros: Significant cost savings on labor, immense satisfaction from completing a big project, complete control over the process.
Cons: Requires specialized tools and skills, time-consuming, risk of costly mistakes, potential for improper installation leading to future problems (warping, gapping).
Professional Installation:
Pros: Quicker installation, less hassle, expertise in handling different wood types and subfloors, warranty on labor.
Cons: Higher upfront cost, need to schedule with a contractor.
A good rule of thumb: if you’re comfortable with basic carpentry, have the right tools, and plenty of time, a DIY installation of engineered hardwood might be achievable. For solid hardwood, especially if you’re new to flooring, a professional is often the safer bet.
Maintaining Your Hardwood Floors
Proper maintenance is key to keeping your hardwood floors looking brilliant for years to come.
Daily/Weekly Care:
Sweep or Vacuum Regularly: Use a soft-bristle broom or a vacuum with a hardwood floor attachment. This removes dirt and grit that can scratch the finish.
Wipe Up Spills Immediately: Use a soft, damp cloth. Standing liquids can damage the wood or seep into seams.
Monthly/As Needed Care:
Damp Mopping: Use a hardwood floor cleaner specifically designed for your floor’s finish. Wring out the mop until it’s barely damp. Over-wetting is the enemy of hardwood floors.
Use Rugs and Mats: Place doormats at all entrances to trap dirt and moisture. Use rugs in high-traffic areas and under furniture to protect the floor.
Protect Furniture: Use felt pads on the legs of all furniture. Lift, don’t drag, furniture when moving it.
Avoid Harsh Cleaners: Never use ammonia-based cleaners, abrasive powders, or steam mops, as these can damage the finish and the wood.
Refinishing and Recoating:
Over time, even with the best care, hardwood floors can show wear.
Recoating (Screening): This is a light process where the existing finish is abraded and a new top coat is applied. It’s done when the finish is worn but the wood is still in good shape.
Refinishing: This involves sanding down the old finish and any light scratches to the bare wood, then reapplying stain (if desired) and a new protective finish. This is a more intensive process but can revitalize heavily worn floors. Solid hardwood can be refinished multiple times, while engineered hardwood’s refinishing potential depends on veneer thickness.
Janka Hardness Scale for Wood Flooring
The Janka hardness test measures the resistance of wood species to denting and wear. A higher number indicates a harder, more durable wood. This is a useful metric when comparing different species for flooring.
| Wood Species | Janka Hardness (lbs) | Relative Hardness |
| :—————- | :——————- | :—————- |
| Hickory | 1,820 – 2,350 | Very Hard |
| Maple | 1,450 | Hard |
| White Oak | 1,360 | Hard |
| Red Oak | 1,290 | Hard |
| Walnut | 1,010 | Medium |
| Cherry | 950 | Medium-Soft |
| Pine (Southern Yellow) | 690 – 870 | Soft |
Note: Janka ratings can vary slightly based on the specific subspecies and environmental conditions.
The Environmental Impact of Hardwood Flooring
For many homeowners, sustainability is an important consideration. Hardwood flooring can be a responsible choice when sourced properly.
Renewable Resource: Wood is a renewable resource. Forests managed sustainably can provide an ongoing supply of timber. The U.S. Forest Service emphasizes sustainable forest management practices that ensure the long-term health and productivity of our forests.
Durability: As mentioned, hardwood floors last a very long time and can be refinished, reducing the need for frequent replacement and the associated waste.
Certifications: Look for flooring with certifications like those from the Forest Stewardship Council (FSC). FSC certification ensures that wood comes from responsibly managed forests that protect biodiversity and the rights of workers and local communities.
Lifespan: A well-maintained hardwood floor can last 50-100 years or more. This longevity means fewer materials are consumed over the lifetime of your home compared to materials that need frequent replacement.
Recycling and Reuse: Old hardwood flooring can often be salvaged and reused for other projects or recycled