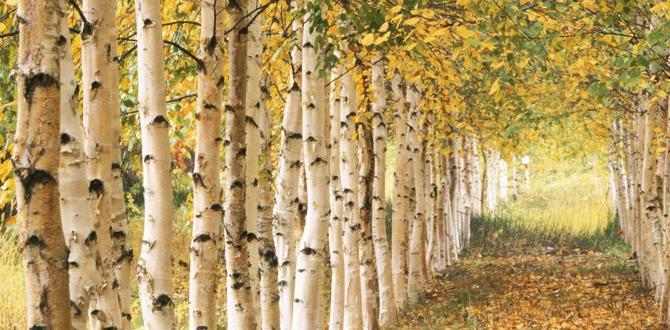
Have you ever looked at old hardwood floors and wondered how to bring back their shine? Sanding hardwood flooring can make a big difference. It’s like giving your floors a fresh start! Imagine how exciting it would be to see the beauty of the wood come alive again.
Many people think sanding is hard, but it can be a fun project. Just think about how smooth and clean your floors will feel under your feet. Plus, a well-sanded floor lasts longer and looks great.
Did you know that sanding can also remove scratches and dents? This process helps your hardwood floor look brand new. You won’t believe the difference it can make!
In this article, we’ll explore the magic of hardwood flooring sanding. Get ready to learn how to revitalize your floors and impress your friends and family!
Table of Contents
Hardwood Flooring Sanding: Essential Tips And Techniques

Hardwood Flooring Sanding
Sanding hardwood floors is a magic trick that can revive tired wood. This process helps remove scratches, stains, and old finishes, making your floor look new again. Have you ever wondered how a simple sanding can transform a room? By using the right tools and techniques, you can achieve a smooth surface ready for refinishing. Remember, the more you know about sanding, the better results you’ll get! It’s like giving your floors a fresh start.
Understanding Hardwood Flooring Sanding
Definition and purpose of sanding in hardwood flooring. Importance of sanding for finish and aesthetics.
Have you ever wondered why sanding is so important for hardwood floors? Sanding is the process of smoothing the wood surface by removing the old finish and imperfections. It’s like giving your floor a fresh haircut! This step is crucial for a great finish and better looks. A well-sanded floor shines bright and catches eyes. When done right, it’s like magic! It prepares the wood for a finish that can last for years. Think of it as the secret ingredient in a delicious recipe.
| Purpose of Sanding | Benefits |
|---|---|
| Prep for Finish | Ensures a smooth, even layer |
| Enhances Beauty | Makes your floor shine! |
| Removes Imperfections | Gets rid of scratches and dents |
Tools Required for Sanding Hardwood Floors
Essential tools for DIY sanding. Recommended brands and models for professional results.
To sand hardwood floors like a pro, you’ll need some handy tools. First, grab a belt sander. It’s like a superhero for floors! Brands like Makita and DeWalt make great models. Then, a random orbit sander swoops in for those tricky spots. Don’t forget sandpaper of various grits – because smoothness is key, just like a dancer’s moves.
| Tool | Recommended Brand |
|---|---|
| Belt Sander | Makita |
| Random Orbit Sander | DeWalt |
| Sandpaper | 3M (Various Grains) |
These tools ensure you get smooth floors. Happy sanding! Remember, even the best floors started as rough timber!
Step-by-Step Guide to Sanding Hardwood Floors
Preparing the space and moving furniture. Sanding process: coarse to fine grits.
Start by moving all furniture out of the room. This makes the space empty and safe. Next, clean the floor well. Dirt can mess up the sanding process. Now, get ready to sand! Begin with a coarse grit paper. This helps remove old finishes. Work your way to finer grits. Each one smooths the floor more. Take your time!
How do you prepare for sanding hardwood floors?
To prepare for sanding hardwood floors, clear the room of furniture and debris. Ensure the floor is clean, as dirt can affect the sanding.
Steps include:
- Move out all furniture.
- Clean the floor thoroughly.
- Choose coarse grit sandpaper first.
- Gradually switch to finer grits.
Common Mistakes to Avoid When Sanding
Oversanding vs. undersanding: finding the balance. Ignoring prep work and its impact on results.
Sanding your hardwood floors can feel like a game of Goldilocks. Too much sanding? You’re left with bare wood snacks for the pets. Too little? Well, you might as well keep the carpet. Finding the right balance is crucial! Also, don’t skip the prep work! Cleaning and filling gaps makes a huge difference in how your floors turn out. So, prep like a pro and sand like a champ! Here’s a quick table to keep your sanding straight:
| Common Mistakes | Effects |
|---|---|
| Oversanding | Can damage the wood and change colors. |
| Undersanding | Leaves scratches and makes finishing harder. |
| Skipping Prep | Poor finish and uneven surfaces. |
Post-Sanding Finishing Options
Types of finishes: oilbased vs. waterbased. How to choose the right finish for your hardwood flooring.
Choosing a finish for your hardwood flooring is important. There are two main types: oil-based and water-based. Oil-based finishes give a rich look and are very durable. They take longer to dry. Water-based finishes dry quickly and are better for the environment. Here’s what to think about:
- **Durability:** Oil-based lasts longer.
- **Drying Time:** Water-based dries fast.
- **Color:** Oil-based adds warmth; water-based stays clear.
Consider your needs and preferences. This choice will affect the look and life of your floor!
How do I select the right finish for hardwood floors?
Your choice depends on your lifestyle and look you want. Think about how much traffic your floors will get. If you have pets or kids, go for something more durable. If you want quick results, a water-based finish might be best!
Maintenance Tips for Sanded Hardwood Floors
Best practices for preserving sanded floors. Recommended cleaning products and techniques.
To keep your sanded hardwood floors shining, gentle care is key. Sweep regularly to banish dust bunnies, but avoid rigid brooms! Opt for soft bristles instead. Use a damp mop with a mild cleaner to wipe away spills quickly—nobody likes sticky floors! Stay clear of harsh chemicals as they can sneak in and ruin that lovely finish. For the best products, check out our handy table below!
| Cleaning Product | Best Use |
|---|---|
| Simple Green | Mild cleaner for regular use |
| Bona Hardwood Floor Cleaner | Safe for finished floors |
| vinegar & water mix | Acts like a superhero for stains! |
And remember, those high heels might be fabulous, but they can also scratch! Keep them on the rack to protect your beautiful floors.
When to Hire a Professional vs. DIY Sanding
Factors to consider for professionals vs. DIY enthusiasts. Cost analysis and timeframe for both options.
Choosing between professionals and DIY for hardwood flooring sanding is no small feat. You’ll want to think about your budget and time. If you’re counting pennies and have some free hours, DIY might be your buddy. But, if you’re scared of tools and dust, calling in the pros might save you from a floor disaster! Here’s a quick look:
| Factor | DIY | Professional |
|---|---|---|
| Cost | Less expensive, materials only | Higher cost, includes labor |
| Time | Could take days | Usually completed in a day |
| Skill Level | Requires some experience | Experts know what they’re doing |
So, before you grab that sander or hand over your wallet, consider these points carefully. Remember, a smooth floor can make your home shine, but the journey to get there might need some thought!
Conclusion
In conclusion, hardwood flooring sanding helps restore your floors’ beauty and smoothness. You can improve your home’s look and value with this easy process. Always prepare well, choose the right tools, and follow safety tips. If you want to learn more, consider reading tutorials or watching videos online. Start your sanding project and enjoy amazing results!
FAQs
What Are The Essential Tools And Materials Needed For Sanding Hardwood Floors?
To sand hardwood floors, you need some important tools and materials. First, you need a drum sander or a floor sander. These machines help smooth the wood. Then, you need sandpaper in different grits, which are rough and fine types. You’ll also want safety goggles and a dust mask to protect your eyes and lungs from dust. Finally, don’t forget a broom and vacuum to clean up the mess!
How Do You Determine The Right Grit Sandpaper To Use For Different Stages Of Hardwood Floor Sanding?
To choose the right grit sandpaper for sanding hardwood floors, start with rough grit, like 36 or 40, to remove old finish. After that, switch to medium grit, like 60 or 80, to smooth the surface. Finally, use fine grit, like 100 or 120, for a nice finish. Each grit helps make the floor smoother as you work.
What Are The Best Techniques For Sanding Hardwood Floors To Achieve A Smooth Finish?
To sand hardwood floors and make them smooth, you should start with a rough sandpaper. Use a floor sander to help. Move in the direction of the wood grain to avoid scratches. Then, switch to a finer sandpaper for a smoother look. Finally, clean up dust with a vacuum or a cloth. This will make your floor shiny and nice!
How Can You Safely Remove Stains And Scratches From Hardwood Flooring During The Sanding Process?
To safely remove stains and scratches from hardwood floors while sanding, first, clean the area well. Use a vacuum to get rid of dust and dirt. Next, use sandpaper to gently rub the stained or scratched spots. Move in the same direction as the wood grain. Keep checking to make sure you aren’t sanding too deep. Finally, clean the floor again to see how it looks.
What Are Some Common Mistakes To Avoid When Sanding Hardwood Floors?
When sanding hardwood floors, you should avoid a few common mistakes. First, don’t rush it. Take your time to do a good job. Second, make sure to use the right grit paper. Starting too rough can hurt the wood. Lastly, always keep the sander moving. Stopping in one place can make big dents.
{“@context”:”https://schema.org”,”@type”: “FAQPage”,”mainEntity”:[{“@type”: “Question”,”name”: “What Are The Essential Tools And Materials Needed For Sanding Hardwood Floors? “,”acceptedAnswer”: {“@type”: “Answer”,”text”: “To sand hardwood floors, you need some important tools and materials. First, you need a drum sander or a floor sander. These machines help smooth the wood. Then, you need sandpaper in different grits, which are rough and fine types. You’ll also want safety goggles and a dust mask to protect your eyes and lungs from dust. Finally, don’t forget a broom and vacuum to clean up the mess!”}},{“@type”: “Question”,”name”: “How Do You Determine The Right Grit Sandpaper To Use For Different Stages Of Hardwood Floor Sanding? “,”acceptedAnswer”: {“@type”: “Answer”,”text”: “To choose the right grit sandpaper for sanding hardwood floors, start with rough grit, like 36 or 40, to remove old finish. After that, switch to medium grit, like 60 or 80, to smooth the surface. Finally, use fine grit, like 100 or 120, for a nice finish. Each grit helps make the floor smoother as you work.”}},{“@type”: “Question”,”name”: “What Are The Best Techniques For Sanding Hardwood Floors To Achieve A Smooth Finish? “,”acceptedAnswer”: {“@type”: “Answer”,”text”: “To sand hardwood floors and make them smooth, you should start with a rough sandpaper. Use a floor sander to help. Move in the direction of the wood grain to avoid scratches. Then, switch to a finer sandpaper for a smoother look. Finally, clean up dust with a vacuum or a cloth. This will make your floor shiny and nice!”}},{“@type”: “Question”,”name”: “How Can You Safely Remove Stains And Scratches From Hardwood Flooring During The Sanding Process? “,”acceptedAnswer”: {“@type”: “Answer”,”text”: “To safely remove stains and scratches from hardwood floors while sanding, first, clean the area well. Use a vacuum to get rid of dust and dirt. Next, use sandpaper to gently rub the stained or scratched spots. Move in the same direction as the wood grain. Keep checking to make sure you aren’t sanding too deep. Finally, clean the floor again to see how it looks.”}},{“@type”: “Question”,”name”: “What Are Some Common Mistakes To Avoid When Sanding Hardwood Floors?”,”acceptedAnswer”: {“@type”: “Answer”,”text”: “When sanding hardwood floors, you should avoid a few common mistakes. First, don’t rush it. Take your time to do a good job. Second, make sure to use the right grit paper. Starting too rough can hurt the wood. Lastly, always keep the sander moving. Stopping in one place can make big dents.”}}]}