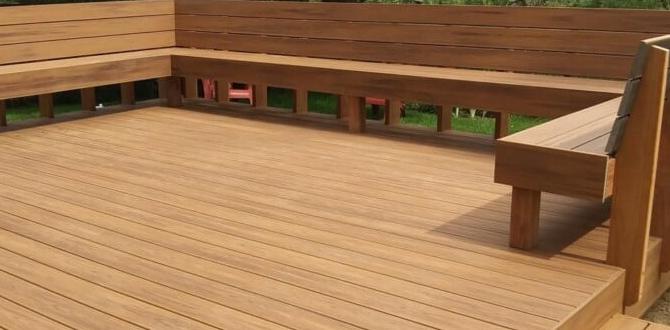
Have you ever looked down at your beautiful hardwood floor and noticed a scratch? It’s frustrating, right? You may wonder how you can fix those pesky marks without a full replacement. That’s where hardwood flooring repair comes in!
Many homeowners think replacing a scratched plank is the only answer. But guess what? There are simple ways to restore your floor’s beauty and save money too! Did you know that some minor issues can be fixed with everyday items you probably already have at home?
Imagine impressing your friends with your knowledge of easy hardwood flooring repairs. You can tell them that fixing scratches is just the beginning. You can also learn how to handle more complex issues, like water damage. With a little time and effort, your floors will look brand new!
This article will guide you through essential tips and tricks for repairing hardwood flooring. So, if you’re ready to dive in and revitalize your floors, keep reading!
Table of Contents
Essential Hardwood Flooring Repair Tips For Homeowners

Understanding Hardwood Flooring Repair
Hardwood flooring repair is crucial for maintaining beautiful floors. Did you know small scratches can be fixed with just a bit of wood filler? For deeper damage, consider sanding and refinishing. Afraid of a creaky floor? Tightening loose boards might do the trick! Regular maintenance can extend your floor’s life. Wouldn’t it be great to preserve that elegant look? With proper care, your hardwood floor can shine for years to come!Common Types of Hardwood Flooring Damage
Scratches and dents. Water damage and warping.Hardwood floors can face some tough times. Common issues include scratches and dents, which can come from pets, shoes, or even your dance moves. Then there’s water damage—the sneaky villain that causes warping and buckling. A spilled drink or a leak can turn your beautiful floor into a wavy sea! Let’s break it down further:
| Type of Damage | Description |
|---|---|
| Scratches & Dents | Caused by pets, furniture, or wear and tear. |
| Water Damage | Leads to warping from spills or leaks. |
Taking care of these issues early can save you from more trouble later on—plus, nobody wants to trip over a wavy floor! So, keep your eye out for these common problems.
Tools and Materials Needed for Repairs
Essential tools for DIY repairs. Recommended materials for effective fixes.Before diving into repairs, gather your tools and materials. You’ll need essentials like a hammer, a pry bar, and wood glue. Think of these items as your superhero squad, ready to save your floor! For the best fix, consider using quality hardwood patches and finishing products. They make a big difference and help your floor sparkle like new! Check out the handy table below for a quick list:
| Tools | Materials |
|---|---|
| Hammer | Wood Glue |
| Pry Bar | Hardwood Patches |
| Flooring Nailer | Finishing Sealant |
With the right kit in hand, you’re ready to tackle those pesky floor problems! Remember, nobody likes squeaky floors, except maybe mice!
Step-by-Step Guide to Fixing Scratches
Identifying the severity of scratches. Techniques for buffing and refinishing.First, check how deep the scratches are on your hardwood floor. Shallow scratches can be fixed easily. Use a microfiber cloth to wipe the area clean. For deeper scratches, you might need to buff or refinish. This helps make the scratches less visible. Here are simple methods to try:
- Use a wood filler for deep marks.
- Rub a finishing wax over shallow scratches.
- Buff the floor with a soft cloth to add shine.
How can I tell if a scratch is deep?
Look closely. If a scratch catches your fingernail, it is likely deep. Shallow scratches feel smooth under your fingers. If you see the wood grain, it might need more care.
Repairing Water Damage in Hardwood Floors
Assessing the extent of water damage. Methods for drying and restoring warped boards.When you spot water damage on your hardwood floors, the first step is to see how bad it is. Look for warping or dark spots. A small puddle is like a tiny hiccup, but big leaks are serious business. You’ll need to act fast! For drying, place fans around the area to blow away moisture, or use a dehumidifier to suck it up. It’s like giving your floors a fresh breeze! Remember, restoring warped boards might need some extra love, like light sanding or replacing them entirely.
| Signs of Water Damage | Actions to Take |
|---|---|
| Warping | Dry and Sand |
| Dark Spots | Assess and Restore |
| Puddles | Drain and Dry |
Replacing Damaged Boards
Identifying which boards need replacement. Stepbystep replacement process.Not every board in your hardwood floor needs to be replaced. First, look for signs of damage, like deep scratches or water stains. Once you’ve found the culprits, it’s time for the fun part: replacing them! Here’s a simple process:
| Step | Action |
|---|---|
| 1 | Gather your tools: a saw, hammer, and replacement boards. |
| 2 | Remove the damaged board carefully. |
| 3 | Install the new board by inserting it snugly. |
| 4 | Finish with nails and a bit of polish to make it shine! |
And remember, even if you’re a bit clumsy, you’re not alone. This repair can be a real ‘board’ game, but with each step, you’ll fit right in. Happy fixing!
Professional vs. DIY Repairs
Situations where professional help is recommended. Cost comparison of DIY versus hiring professionals.Some repairs are tough. If you face serious damage, professional help is best. Professionals have skills and tools. They can fix problems safely. DIY repairs can save money but might not work well. Here’s a quick cost comparison:
- DIY: Low costs, about $50-$150 for materials.
- Professional: Higher cost, ranging from $200-$600 or more, but done right.
Remember, it’s okay to ask for help. Sometimes, paying a little more is worth it for peace of mind!
When should I hire a professional for hardwood flooring repair?
You should hire a professional for major damages or if you’re unsure how to fix it safely. Professionals bring experience and can save time.
Maintaining Hardwood Floors to Prevent Damage
Regular cleaning and maintenance tips. Use of protective coatings and finishes.To keep hardwood floors looking great, regular cleaning is key. Sweep or vacuum them often to avoid dirt build-up. For a deep clean, use a damp mop with a safe wood cleaner. Remember to dry the floor right after!
Applying protective coatings helps prevent scratches and stains. Choose a good finish that suits your floor type. It can save you from expensive repairs later.
- Clean spills right away.
- Avoid harsh chemicals.
- Use furniture pads to prevent scratches.
- Consider refinishing every 5-7 years.
How can I clean my hardwood floors safely?
Use a soft broom or vacuum for dirt. Damp mop with a wood-safe cleaner for deeper dirt.
FAQs About Hardwood Flooring Repair
Common questions and answers regarding repair processes. Troubleshooting issues that may arise during repairs.Many people have questions about hardwood flooring repair. Here are some answers to help you understand the process better.
What are common repairs for hardwood floors?
Common repairs include fixing scratches, replacing damaged boards, and addressing water damage. These issues can be manageable with the right tools and knowledge.
How long does the repair process take?
The time varies, but most repairs can take from a few hours to a couple of days. It depends on the damage and the type of repair needed.
What if I notice squeaks during repair?
Squeaks can occur due to loose boards or nails. Check whether the boards are secure. You may need to add nails or glue.
Can I fix water damage myself?
You can fix minor water damage yourself. If it’s severe, it’s better to seek help from a professional.
Repairing hardwood floors can seem tough, but with some patience, you can handle many issues yourself. Keep these tips handy, and you’ll be ready for any challenges!
Conclusion
In conclusion, hardwood flooring repair is crucial for keeping your floors looking great. You can fix scratches, dents, and water damage with the right tools. Always clean your floors regularly to prevent future issues. If you’re unsure, consider hiring a professional. For more tips and detailed guides, check out DIY videos and articles online. You can make your floors beautiful again!FAQs
What Are The Most Common Types Of Damage That Occur In Hardwood Flooring, And How Can They Be Repaired?Hardwood floors can get scratches, dents, and water stains. You can fix scratches by rubbing in special wood filler. Dents might need steam to puff the wood back up. For water stains, cleaning with a cloth and applying furniture polish can help. If the damage is too bad, you might need to sand the area and refinish it.
How Can Homeowners Identify Whether They Need To Repair Or Replace Their Hardwood Floors?To check if your hardwood floors need fixing or replacing, look for big scratches or deep dents. Try to see if the boards are loose or cupping. If you can feel bumps or see gaps, that might mean you need new floors. If the wood is too worn out or damaged, it’s time to replace it. Always think about how safe and nice your floor looks.
What Tools And Materials Are Necessary For Diy Hardwood Flooring Repairs?To fix hardwood floors, you need some important tools and materials. First, gather a hammer and nails. You’ll also need a saw to cut wood pieces. Sandpaper will help smooth edges. Don’t forget wood glue and a finish to protect the floor!
Can Professional Hardwood Flooring Repair Services Save Time And Money In The Long Run?Yes, using professional hardwood flooring repair services can save you time and money. Experts can fix problems faster than we might do on our own. They also know how to do it right, preventing costly mistakes. In the end, it helps keep your floors looking great for many years.
What Preventive Measures Can Be Taken To Minimize The Need For Hardwood Flooring Repairs In The Future?To keep your hardwood floors safe, we can do a few things. First, use rugs in busy areas to protect the wood. Second, clean up spills right away to avoid water damage. Third, always take off shoes when entering the house to reduce scratches. Finally, make sure the humidity is right at home, so the wood doesn’t change shape.
{“@context”:”https://schema.org”,”@type”: “FAQPage”,”mainEntity”:[{“@type”: “Question”,”name”: “What Are The Most Common Types Of Damage That Occur In Hardwood Flooring, And How Can They Be Repaired? “,”acceptedAnswer”: {“@type”: “Answer”,”text”: “Hardwood floors can get scratches, dents, and water stains. You can fix scratches by rubbing in special wood filler. Dents might need steam to puff the wood back up. For water stains, cleaning with a cloth and applying furniture polish can help. If the damage is too bad, you might need to sand the area and refinish it.”}},{“@type”: “Question”,”name”: “How Can Homeowners Identify Whether They Need To Repair Or Replace Their Hardwood Floors? “,”acceptedAnswer”: {“@type”: “Answer”,”text”: “To check if your hardwood floors need fixing or replacing, look for big scratches or deep dents. Try to see if the boards are loose or cupping. If you can feel bumps or see gaps, that might mean you need new floors. If the wood is too worn out or damaged, it’s time to replace it. Always think about how safe and nice your floor looks.”}},{“@type”: “Question”,”name”: “What Tools And Materials Are Necessary For Diy Hardwood Flooring Repairs? “,”acceptedAnswer”: {“@type”: “Answer”,”text”: “To fix hardwood floors, you need some important tools and materials. First, gather a hammer and nails. You’ll also need a saw to cut wood pieces. Sandpaper will help smooth edges. Don’t forget wood glue and a finish to protect the floor!”}},{“@type”: “Question”,”name”: “Can Professional Hardwood Flooring Repair Services Save Time And Money In The Long Run? “,”acceptedAnswer”: {“@type”: “Answer”,”text”: “Yes, using professional hardwood flooring repair services can save you time and money. Experts can fix problems faster than we might do on our own. They also know how to do it right, preventing costly mistakes. In the end, it helps keep your floors looking great for many years. “}},{“@type”: “Question”,”name”: “What Preventive Measures Can Be Taken To Minimize The Need For Hardwood Flooring Repairs In The Future? “,”acceptedAnswer”: {“@type”: “Answer”,”text”: “To keep your hardwood floors safe, we can do a few things. First, use rugs in busy areas to protect the wood. Second, clean up spills right away to avoid water damage. Third, always take off shoes when entering the house to reduce scratches. Finally, make sure the humidity is right at home, so the wood doesn’t change shape.”}}]}