Quick Summary: Choosing hardwood flooring offers a naturally beautiful, durable, and timeless option for your home. Learn the basics of selecting, installing, and caring for hardwood to create a stunning and valuable upgrade that lasts for generations. This guide makes understanding hardwood easy for any DIYer.
Hey everyone, Jack Shaffer here, your go-to guy for all things DIY and woodworking! Today, we’re diving into a topic that can really elevate the look and feel of your home: hardwood flooring. You see it in beautiful houses, and maybe you’re thinking about it for your own place. But where do you even start? It can seem like a big project, and picking the right material feels crucial. Don’t worry! We’ll break down everything you need to know in simple terms, from understanding the different types of wood to making sure your new floor looks amazing and lasts for years. Get ready to transform your space!
Table of Contents
Why Hardwood Flooring is a Classic Choice
There’s a reason hardwood flooring has been a favorite for centuries. It’s more than just a floor; it’s a statement. The natural beauty of wood grain brings warmth and character to any room that synthetic materials just can’t replicate. Each plank tells a unique story with its knots, color variations, and texture. Plus, when it comes to adding lasting value to your home, you really can’t beat it. Many homeowners find that a well-maintained hardwood floor is a significant selling point.
Beyond aesthetics, hardwood is surprisingly durable. While it’s natural, modern finishing techniques make it resistant to everyday wear and tear. And if it does get scratched or worn down over time? That’s the beauty of solid hardwood – it can be sanded and refinished multiple times, effectively giving you a brand-new floor without the full replacement cost. This makes it a smart, long-term investment for your home.
Understanding the Types of Hardwood Flooring
When you start shopping for hardwood flooring, you’ll quickly discover there are two main categories: solid hardwood and engineered hardwood. Each has its own advantages and is suited for different situations. Let’s break them down so you can make the best choice for your project.
Solid Hardwood Flooring
Solid hardwood is exactly what it sounds like: planks milled from a single piece of timber. This is the traditional choice and offers the most authentic wood experience. For a truly premium feel and the ability to refinish it countless times throughout its lifespan, solid hardwood is a top contender.
- Thickness: Typically 3/4 inch thick.
- Installation: Usually nailed or stapled down to a subfloor. This method requires a wooden subfloor and is not suitable for installation directly over concrete without a proper wooden subfloor built on top.
- Refinishing: Can be sanded down and refinished many times, allowing you to change the look or repair damage.
- Moisture Sensitivity: More susceptible to moisture and humidity changes, which can cause expansion or contraction. Best suited for main living areas, bedrooms, and dining rooms on the ground floor or above.
- Cost: Generally more expensive than engineered hardwood.
Engineered Hardwood Flooring
Engineered hardwood looks just like solid hardwood on the surface, but it’s constructed differently. It’s made from multiple layers (plies) of wood or composite materials that are cross-laminated together, with a top layer of real hardwood veneer. This construction makes it more stable and versatile.
- Construction: A real wood veneer on top, with layers of plywood or composite material underneath.
- Installation: Can be glued down, stapled down, or in some cases, floated (click-lock systems). This versatility makes it a great option for basements and areas prone to slight moisture changes. It can often be installed over concrete subfloors.
- Refinishing: The number of times you can refinish depends on the thickness of the top hardwood veneer. Thicker veneers allow for more refinishing opportunities.
- Stability: More resistant to changes in temperature and humidity compared to solid hardwood.
- Cost: Often more affordable than solid hardwood options.
Choosing Your Wood Species and Finish
Once you’ve decided between solid and engineered, you’ll face another fun decision: the wood species and the finish! The type of wood you choose impacts the look, durability, and cost of your floor.
Popular Wood Species
Each wood species has its own unique characteristics:
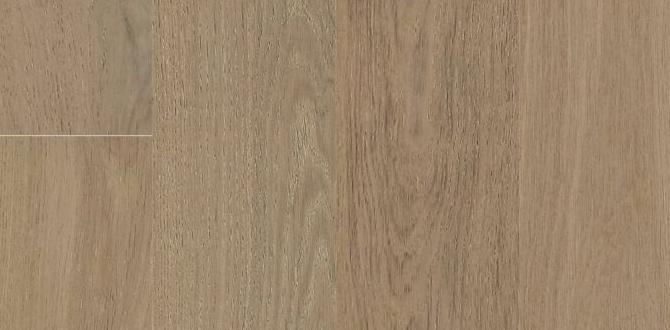
- Oak (Red & White): The most popular choice for American hardwood flooring. It’s durable, readily available, and takes stains well. Red oak has a pinkish hue, while white oak has more of a greyish-brown tone and is generally harder and more water-resistant.
- Maple: Known for its light color and smooth, fine grain. Maple is very hard and durable, making it excellent for high-traffic areas. Its light color can make rooms feel brighter.
- Hickory: One of the hardest domestic woods. Hickory offers a lot of color variation and prominent grain patterns, adding a rustic or natural charm.
- Walnut: A premium choice, walnut has a rich, deep brown color with beautiful grain patterns. It’s softer than oak or hickory, so it might show dents and scratches more easily, but it offers a luxurious look.
- Cherry: Offers a warm, reddish-brown color that deepens with age. Cherry is softer than oak and can be prone to dents.
For those looking for something a bit different or exotic, there are also options like Brazilian Cherry, Teak, or Bamboo (though technically a grass, it’s often treated and installed like hardwood and is incredibly durable). Always check the Janka hardness rating for each wood species. The Janka scale measures the resistance of wood to denting and wear. Higher numbers mean harder wood. You can find detailed Janka ratings from sources like the Wood Database.
Finishes: Pre-finished vs. Site-finished
How your floor is finished is just as important as the wood itself. You have two main options:
- Pre-finished Flooring: This is the most common choice for DIYers. The planks are factory-finished with multiple coats of stain and protective sealants (like polyurethane). They arrive ready to be installed.
- Pros: Easier and faster installation (no drying time for finish), consistent color and sheen, often more durable finish than site-applied.
- Cons: Limited customizability of color and sheen, can be harder to perfectly blend repairs if needed later.
- Site-finished Flooring: This involves installing unfinished wood planks and then sanding, staining, and sealing them on-site.
- Pros: Complete control over color, stain, and sheen. Can achieve a perfectly seamless look and easily match existing woodwork.
- Cons: Much more labor-intensive and messy (sanding dust everywhere!). Requires specialized tools (sanders, vacuums) or professional installation. Drying times for stain and finish mean longer project duration.
Installation: Doing it Yourself
Installing hardwood flooring can be a rewarding DIY project! The method you use will depend on the type of flooring you choose (solid vs. engineered) and your subfloor. Always make sure your subfloor is clean, level, and dry before you begin. A good rule of thumb is that the subfloor should be within 3/16-inch variation over a 10-foot span.
Preparation is Key
Before you even open a box of flooring, get these steps done:
- Acclimation: This is SUPER important! Let the hardwood planks sit in the room where they will be installed for at least 72 hours (sometimes longer, depending on manufacturer instructions). This allows the wood to adjust to the room’s humidity and temperature, preventing future warping or gapping.
- Subfloor Check: Ensure your subfloor is clean, dry, and level. Old flooring like carpet must be removed. If you have concrete, check moisture levels – you might need a vapor barrier.
- Gather Tools: Make sure you have everything you need. For nail-down installations, you’ll need a flooring nailer (rental is often a good option for DIYers), a miter saw for precise cuts, a pry bar, a chalk line, a measuring tape, safety glasses, and a good utility knife. For floating floors, you might need a jigsaw and tapping blocks.
Installation Methods
Here are the most common ways to install hardwood:
- Nail-Down Installation (Common for Solid Hardwood): This is the traditional and most secure method. The planks are fastened to a wooden subfloor using a specialized flooring nailer (or stapler) that drives nails at an angle through the tongue of the plank. The nailer is often powered by compressed air, so you’ll need a compressor.
- Step 1: Lay down a moisture barrier if recommended by the manufacturer (especially if over a crawl space).
- Step 2: Start your first row with the tongue side facing the wall. You might need to trim off the tongue on the first row of planks. Leave about a 1/2-inch to 3/4-inch expansion gap around the perimeter of the room (this is covered by baseboards later).
- Step 3: Use your flooring nailer to secure each plank. Aim to get a nail into the joist below for maximum security. Start subsequent rows, staggering the end joints by at least 6 inches for a natural look.
- Step 4: Use a pry bar to pull the last row tight against the wall and nail it through the face (this is called face-nailing and will be hidden by baseboards).
- Glue-Down Installation (Common for Engineered Hardwood): This involves adhering the planks directly to the subfloor using a specialized flooring adhesive.
- Step 1: Apply the adhesive evenly to the subfloor using a notched trowel as per the adhesive manufacturer’s instructions.
- Step 2: Lay the planks into the wet adhesive, ensuring proper staggering of joints.
- Step 3: Ensure good contact between the plank and the adhesive. Some adhesives require rolling the floor afterward.
- Considerations: This method can be messy if not done carefully. It’s a good option for basements or over concrete.
- Floating Installation (Common for some Engineered & Laminate): In this method, planks are not attached to the subfloor or walls. Instead, they are joined to each other using a click-lock system or adhesive along the edges.
- Step 1: Install an underlayment, which provides cushioning and moisture protection.
- Step 2: Connect the planks using their tongue-and-groove or click-lock mechanisms, working row by row.
- Step 3: Leave expansion gaps around the perimeter, just as with nail-down and glue-down installations.
- Pros: Often the easiest and quickest DIY method, can be installed over many existing floor types (check manufacturer specs).
Always refer to the specific installation instructions provided by the flooring manufacturer for your chosen product. They have specific recommendations and warnings that are crucial for a successful installation.
Hardwood Flooring Maintenance and Care
Keeping your hardwood floors looking great is easier than you might think. Regular, simple maintenance will protect your investment and keep them beautiful for years to come.
Daily and Weekly Care
- Sweep or Vacuum Regularly: Use a soft-bristle broom or a vacuum cleaner with a hard-floor attachment. This removes abrasive dirt and grit that can scratch the finish. Avoid vacuums with beater bars that spin, as they can damage the wood.
- Wipe Up Spills Immediately: Wood and moisture are not best friends. Blot up any spills with a soft cloth as soon as they happen. Don’t let liquid sit on the surface.
- Use Doormats: Place doormats both inside and outside all exterior doors. This is your first line of defense against dirt, sand, and moisture being tracked onto your floors.
Monthly and As-Needed Care
- Damp Mopping: For routine cleaning, use a damp mop with plain water. For tougher grime, use a pH-neutral wood floor cleaner recommended by the manufacturer. Never use excessive water, steam mops, or harsh cleaning chemicals (like ammonia or bleach), as these can damage the finish and the wood itself.
- Protect from Furniture: Use felt pads on the bottom of all furniture legs. This prevents scratches when furniture is moved. Check them periodically to ensure they are clean and not worn down.
- Avoid High Heels and Pet Nails: Sharp heels can gouge wood, and long pet nails can create a network of fine scratches over time.
Dealing with Scratches and Wear
Minor scratches can sometimes be buffed out with a soft cloth. Deeper scratches or worn areas might require touch-up pens or kits designed for your specific floor color and finish. For significant damage or wear over many years, remember that solid and many engineered hardwoods can be sanded and refinished.
A professional refinishing job involves sanding the floor down to bare wood, applying stain if desired, and then sealing it with multiple coats of a protective finish. This process can completely restore the look of your floor and is a fantastic way to give an old hardwood floor a new lease on life.
Pros and Cons of Hardwood Flooring
Like any flooring material, hardwood has its advantages and disadvantages. Understanding these will help you decide if it’s the right fit for your home and lifestyle.
| Pros of Hardwood Flooring | Cons of Hardwood Flooring |
|---|---|
| Natural Beauty: Unique grain patterns and warmth that enhances any décor. | Cost: Generally more expensive upfront than laminate or vinyl flooring. |
| Durability & Longevity: Can last for generations with proper care; can be refinished. | Moisture Sensitivity: Susceptible to damage from standing water or high humidity (especially solid hardwood). Not ideal for bathrooms or laundry rooms. |
| Increased Home Value: A significant selling point that adds value to your property. | Scratching & Denting: Can be nicked or dented by heavy objects, sharp heels, or pet claws. |
| Easy to Clean (Surface Dirt): Simple sweep or vacuuming removes most surface debris. | Can be Noisy: May produce more echo than carpeted floors, requiring rugs for sound dampening. |
| Hypoallergenic: Doesn’t trap dust mites or allergens like carpet does. | Installation Complexity: Can be more challenging and time-consuming to install than click-together alternatives; may require specialized tools or professional help. |
| Versatility: Available in many species, colors, and finishes to match any style. | Refinishing Dust: Site-finishing creates a lot of dust, requiring thorough cleanup or professional services. |
Environmental Considerations and Sustainability
When discussing wood, the environmental aspect is important. Fortunately, hardwood flooring can be a sustainable choice, especially when sourced responsibly. Reputable manufacturers often provide information about the origin of their wood. Look for:
- FSC Certification: The Forest Stewardship Council (FSC) is a global organization that promotes responsible forest management. Products with the FSC label come from forests that are managed in an environmentally sound, socially responsible, and economically viable way. The FSC website offers more details on their certification process.
- Reclaimed Wood: Using reclaimed wood, sourced from old buildings or structures, is an excellent way to reduce demand for new timber and gives beautiful, aged wood a second life.
- Local Sourcing: Choosing wood species that are native to your region can reduce the carbon footprint associated with transportation.
Responsible forestry practices ensure that forests are managed for long-term health, including replanting and biodiversity. This makes hardwood a renewable resource that can be enjoyed for many years without depleting natural resources.
Frequently Asked Questions (FAQ)
Q1: Is hardwood flooring good for basements?
Solid hardwood is generally not recommended for basements due to the higher risk of moisture and humidity fluctuations. Engineered hardwood, especially with a good vapor barrier and adhesive, is a much better option for basements as it is more dimensionally stable.
Q2: How much does hardwood flooring cost?
The cost varies widely based on wood species, grade, width of planks, and whether it’s solid or engineered. Generally, you can expect to pay anywhere from $3 to $10+ per square foot for materials alone. Installation costs can add another $3 to $10+ per square foot, depending on complexity and your region.