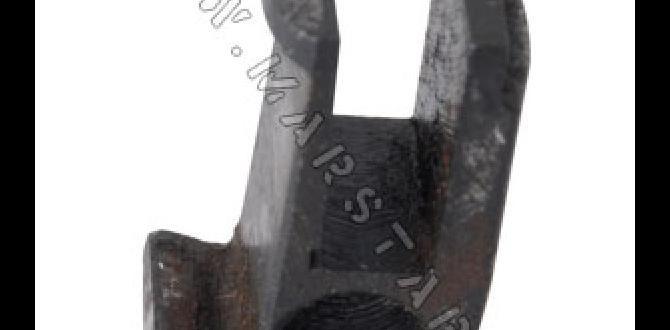
Have you ever thought about upgrading your home with beautiful hardwood floors? Installing hardwood floors can change a room’s look. But did you know that the right tools make a big difference? One important tool is a hardwood floor cleat nailer.
Imagine spending hours working on your floor, only to find it looks uneven. How frustrating that would be! A cleat nailer helps you avoid such problems. It fastens the boards tightly, making your floor strong and looking great.
In this guide, we will explore everything about hardwood floor cleat nailers. You will learn what to look for when choosing one, how to use it, and some tips for a perfect finish. So, get ready to dive into the world of hardwood flooring!
Table of Contents
The Ultimate Hardwood Floor Cleat Nailers Guide: Tips & Tricks

Hardwood Floor Cleat Nailers Guide Summary
Choosing the right cleat nailer for your hardwood flooring can be tricky. This guide simplifies your decision. Learn about different types of nailers and their uses. Discover tips for selecting the best one based on your project needs. Did you know using the right nailer can save you time and effort? With this knowledge, you can make your floor installation smooth and hassle-free. Say goodbye to flooring problems and hello to beautiful hardwood!Benefits of Using Cleat Nailers for Hardwood Flooring
Enhanced efficiency and speed in installation.. Improved quality and strength of the flooring holds..Using cleat nailers for hardwood flooring offers big perks. First off, they speed up installation. No more hammering one nail at a time, which can feel like watching paint dry! With cleat nailers, you can install floors faster than your dog can chase a squirrel. Plus, these tools improve the quality and strength of your flooring. They ensure each board is snug and secure, making your floor last longer. Who wouldn’t want a strong floor that can handle dancing or a runaway toy car?
| Benefit | Description |
|---|---|
| Speed | Faster installation means less time working! |
| Strength | Better hold leads to a more durable floor! |
So, grab that cleat nailer and enjoy the benefits. Your feet—and floors—will thank you!
Types of Cleat Nailers
Different designs: manual vs. pneumatic.. Comparison of various brands and models available..There are two main types of cleat nailers: manual and pneumatic. Manual nailers are simple to use and don’t need electricity or air. They are great for small jobs. Pneumatic nailers require air compressors but work faster and easier for big projects.
Here are some popular brands you might like:
- DeWalt
- Makita
- Bostitch
- Hitachi
Each brand has different models suited for various needs.
What is the difference between manual and pneumatic cleat nailers?
Manual nailers are simple and portable, while pneumatic ones are powerful and faster. This difference affects how you work and the job’s size. For quick jobs, manual nailers work well, but for larger tasks, pneumatic nailers save time.
How to Choose the Right Cleat Nailer
Factors to consider: nail size, weight, and ease of use.. Understanding the specific needs of your flooring project..Choosing the right cleat nailer is like picking the perfect pizza topping—it’s all about your taste! First, think about nail size. Make sure your nailer can handle the size you need for your floor. Next, consider the weight of the nailer. A heavier tool can tire you out faster than a treadmill on a rainy day! Finally, look for ease of use. You want something that won’t make you feel like you’re wrestling an octopus. Understanding your flooring project’s needs helps you find the perfect match!
| Factor | Consideration |
|---|---|
| Nail Size | Ensure compatibility for your floor type |
| Weight | Choose a manageable option to reduce fatigue |
| Ease of Use | Look for features that simplify operation |
Preparation for Using a Cleat Nailer
Necessary tools and materials required before starting.. Guidelines for preparing the hardwood flooring area..Before diving into using a cleat nailer, gather your tools and materials. You’ll need a cleat nailer, cleats or nails, safety glasses, and a tape measure. Don’t forget the wood glue or spacers too! They’re like the cherry on top of your flooring project.
Next, prepare your hardwood flooring area. Make sure the room is clean and dry. Trim any stray carpets or obstacles. It’s like cleaning your room before your mom comes home—absolutely necessary! And don’t forget to let the wood acclimate to room temperature.
| Tools/Materials | Purpose |
|---|---|
| Cleat Nailer | Drives in cleats |
| Cleats/Nails | Secure the flooring |
| Safety Glasses | Protect your eyes |
| Tape Measure | Ensure accurate cuts |
With everything set up and your space ready, you’ll be nailing down your beautiful hardwood floors in no time—maybe even faster than you can say “cleat nailer!”
Step-by-Step Guide to Using a Cleat Nailer
Detailed instructions on loading the cleat nailer.. Best practices for nailing technique and spacing..First, let’s load your cleat nailer so you’re ready to rock! Start by grabbing your cleats. They look like tiny, shiny dino teeth. Load them in the magazine, making sure they’re facing the right way. You don’t want a nail upside down—that would be a nail catastrophe!
Now, about nailing technique and spacing: keep your eye on the prize (or the floor). Always space your nails about 8 inches apart. This helps keep everything nice and sturdy. It’s like giving your hardwood a cozy hug! If you get too close, you might be in for a nail fight!
| Nailing Technique | Spacing |
|---|---|
| Keep a steady hand and don’t rush | 8 inches apart |
| Use a light touch on the trigger | Check alignment often |
Follow these steps, and you’ll nail it—literally! Happy flooring!
Maintenance and Care of Cleat Nailers
Routine maintenance tips to extend the lifespan of the tool.. Troubleshooting common issues encountered during use..To keep your cleat nailer in great shape, follow these tips. Regular cleaning helps remove dust and debris. Check the oil levels and add oil as needed. Use the right nails to avoid jams. If you face issues, like it not firing, check for nail jams first. Also, ensure the air pressure is correct. Here are some quick maintenance steps:
- Clean after each use
- Inspect for loose parts
- Keep it well-oiled
- Use the right nails
These tips can help your tool last longer. A bit of care can save you time and money.
How to fix common issues?
If your cleat nailer won’t fire, check this: Look for clogs or low air pressure. If it jams, remove the magazine and clear out any stuck nails. Always refer to the manual for further assistance.
Safety Precautions When Using a Cleat Nailer
Essential safety gear to wear during operation.. Key safety tips to prevent accidents and injuries..Wearing the right safety gear is super important when using a cleat nailer. Think of goggles, gloves, and ear protection as your superhero outfit! These items keep you safe from flying bits and loud noises that can sneak up on you.
| Essential Safety Gear |
|---|
| Safety Goggles |
| Gloves |
| Ear Protection |
Accidents can happen, so follow some important tips. Always keep your hands away from the nailer’s path. Also, make sure your work area is clean. You wouldn’t want to trip over a rogue banana peel!
In short, protect yourself and stay alert. Safety first makes for a smoother project. Happy nailing!
Cost Considerations When Purchasing Cleat Nailers
Breakdown of price ranges for different models.. Longterm cost benefits of investing in a quality cleat nailer..Buying a cleat nailer can cost between $100 to $400. Price depends on the brand and features. Spending more might seem tough, but quality tools last longer and work better. A sturdy nailer can save money on repairs and replacements. Here’s a quick breakdown:
- Basic Models: $100 – $200
- Mid-Range Models: $200 – $300
- Advanced Models: $300 – $400
Investing in a top-notch cleat nailer means you will have less trouble in the future. Saving on tools today gives you better results tomorrow.
What should I consider before buying a cleat nailer?
Look at price, features, and quality. Cheaper nailers might break easily. Think of what you need the nailer for and check reviews, too.
Frequently Asked Questions about Hardwood Floor Cleat Nailers
Common queries and concerns from DIYers and professionals.. Expert answers to help tackle specific issues or confusion..Many DIY enthusiasts and pros have questions about cleat nailers for hardwood floors. A common query is, “How many nails do I need?” The answer is simple: nail every 6 to 8 inches for strength. Another worry is, “What’s the best size of cleat nails?” Generally, 1.5 to 2 inches works well. People also wonder, “Can I use these on any wood?” Nope! Stick to hardwood. Remember, safety first—wear goggles or you might end up looking like a raccoon!
| Question | Answer |
|---|---|
| How many nails should I use? | Every 6 to 8 inches |
| What size cleat nails are best? | 1.5 to 2 inches |
| Can I use them on any wood? | No, stick to hardwood. |
Conclusion
In summary, a hardwood floor cleat nailer is vital for installing beautiful floors. It uses special nails to secure planks tightly. Remember to choose the right nailer for your project. Always practice safety when using tools. Now that you have this guide, you can start your flooring project! For more tips, check out additional resources online. Happy DIYing!FAQs
Sure! Here Are Five Related Questions About Hardwood Floor Cleat Nailers:Sure! A hardwood floor cleat nailer is a tool that helps you put down wooden floors. It shoots small nails called cleats into the wood. This keeps the floor pieces tightly together. Using the cleat nailer makes the job faster and easier. It’s like using a strong stapler but for wood!
Sure! Just let me know what question you want me to answer.
What Are The Key Features To Look For When Choosing A Hardwood Floor Cleat Nailer?When choosing a hardwood floor cleat nailer, look for a few key things. First, check the weight. A lighter nailer is easier to use. Next, see how easy it is to load nails. You want something simple. Finally, look for a good grip. A comfortable handle helps you work better without feeling tired.
How Do Cleat Nailers Differ From Floor Staplers When Installing Hardwood Flooring?Cleat nailers and floor staplers are two tools for putting down hardwood floors. Cleat nailers shoot small nails called cleats to hold the wood in place. Floor staplers use metal staples that go through the wood to keep it tight. Cleat nailers can work better on harder woods, while staplers are great for softer woods. We choose one based on the type of wood we use.
What Type Of Cleats Are Recommended For Use With Hardwood Floor Cleat Nailers?For hardwood floor cleat nailers, you should use 16-gauge cleats. These are small metal pieces that help hold the wood down. They are strong enough to keep the floor in place. Make sure to choose the right size for your nailer. This will help your flooring stay secure and look great!
How Do You Maintain And Troubleshoot A Hardwood Floor Cleat Nailer For Optimal Performance?To keep a hardwood floor cleat nailer working well, you should clean it often. After each use, remove dust and debris. Check the air supply line for leaks and make sure it’s connected tightly. If the nailer jams, turn it off, clear the stuck nails, and check for any broken parts. Always follow the instructions in the user manual for safety.
What Are Some Tips For Achieving The Best Results When Installing Hardwood Flooring With A Cleat Nailer?To get the best results with a cleat nailer, start by checking your wood and floor for dirt. Make sure the floor is clean and dry. You should also let the wood sit in the room for a few days to adjust to the temperature. When you nail, keep the cleat nailer straight and press firmly. Finally, check that the nails are all secure before finishing up.
{“@context”:”https://schema.org”,”@type”: “FAQPage”,”mainEntity”:[{“@type”: “Question”,”name”: “Sure! Here Are Five Related Questions About Hardwood Floor Cleat Nailers:”,”acceptedAnswer”: {“@type”: “Answer”,”text”: “Sure! A hardwood floor cleat nailer is a tool that helps you put down wooden floors. It shoots small nails called cleats into the wood. This keeps the floor pieces tightly together. Using the cleat nailer makes the job faster and easier. It’s like using a strong stapler but for wood!”}},{“@type”: “Question”,”name”: “”,”acceptedAnswer”: {“@type”: “Answer”,”text”: “Sure! Just let me know what question you want me to answer.”}},{“@type”: “Question”,”name”: “What Are The Key Features To Look For When Choosing A Hardwood Floor Cleat Nailer?”,”acceptedAnswer”: {“@type”: “Answer”,”text”: “When choosing a hardwood floor cleat nailer, look for a few key things. First, check the weight. A lighter nailer is easier to use. Next, see how easy it is to load nails. You want something simple. Finally, look for a good grip. A comfortable handle helps you work better without feeling tired.”}},{“@type”: “Question”,”name”: “How Do Cleat Nailers Differ From Floor Staplers When Installing Hardwood Flooring?”,”acceptedAnswer”: {“@type”: “Answer”,”text”: “Cleat nailers and floor staplers are two tools for putting down hardwood floors. Cleat nailers shoot small nails called cleats to hold the wood in place. Floor staplers use metal staples that go through the wood to keep it tight. Cleat nailers can work better on harder woods, while staplers are great for softer woods. We choose one based on the type of wood we use.”}},{“@type”: “Question”,”name”: “What Type Of Cleats Are Recommended For Use With Hardwood Floor Cleat Nailers?”,”acceptedAnswer”: {“@type”: “Answer”,”text”: “For hardwood floor cleat nailers, you should use 16-gauge cleats. These are small metal pieces that help hold the wood down. They are strong enough to keep the floor in place. Make sure to choose the right size for your nailer. This will help your flooring stay secure and look great!”}},{“@type”: “Question”,”name”: “How Do You Maintain And Troubleshoot A Hardwood Floor Cleat Nailer For Optimal Performance?”,”acceptedAnswer”: {“@type”: “Answer”,”text”: “To keep a hardwood floor cleat nailer working well, you should clean it often. After each use, remove dust and debris. Check the air supply line for leaks and make sure it’s connected tightly. If the nailer jams, turn it off, clear the stuck nails, and check for any broken parts. Always follow the instructions in the user manual for safety.”}},{“@type”: “Question”,”name”: “What Are Some Tips For Achieving The Best Results When Installing Hardwood Flooring With A Cleat Nailer?”,”acceptedAnswer”: {“@type”: “Answer”,”text”: “To get the best results with a cleat nailer, start by checking your wood and floor for dirt. Make sure the floor is clean and dry. You should also let the wood sit in the room for a few days to adjust to the temperature. When you nail, keep the cleat nailer straight and press firmly. Finally, check that the nails are all secure before finishing up.”}}]}