Quick Summary:
A guide to heavy-duty industrial nail guns means understanding their power, choosing the right type for your tough job, and using them safely. This involves knowing about pneumatic vs. cordless options, selecting the correct nail size, and mastering basic operation and maintenance for ultimate efficiency and project success.
Hey there, fellow woodworkers and DIY enthusiasts! Jack Shaffer here, your go-to guy for all things nailers. Do you ever look at a really demanding project – like framing a deck, building a sturdy workbench, or even working with dense hardwoods – and think, “My little palm nailer just isn’t going to cut it here”? You’re not alone! Tackling those bigger, tougher jobs can feel a bit daunting when your tools seem too small for the task. But don’t worry, that’s exactly where heavy-duty industrial nail guns shine. They’re built for power, speed, and serious work. In this guide, we’ll demystify these powerful tools, making sure you know exactly how to choose, use, and care for them, so you can confidently conquer any heavy-duty project that comes your way. We’ll cover everything you need to know, from picking the perfect gun to staying safe on the job site.
Table of Contents
Unpacking the Powerhouses: What Are Heavy-Duty Industrial Nail Guns?
So, what exactly sets a “heavy-duty industrial nail gun” apart from the ones you might use for delicate trim work or upholstery? Think of it like comparing a sports car to a pickup truck. Both are vehicles, but they’re designed for fundamentally different tasks. Heavy-duty industrial nailers are the workhorses of the nail gun world. They’re engineered for brute strength, meant to drive larger nails into tougher materials with speed and reliability. These aren’t your weekend project companions; they’re the serious tools for contractors, builders, and serious woodworkers who demand performance and durability on demanding job sites.
These nailers are built to handle a constant workload and materials that would make lighter-duty tools struggle. This includes:
- Framing Walls: Driving nails through multiple layers of dimensional lumber.
- Roofing: Securing shingles and sheathing for long-lasting protection from the elements.
- Deck Building: Fastening deck boards and structural components.
- Crating and Pallet Manufacturing: High-volume nailing for sturdy shipping solutions.
- Heavy Timber Construction: Working with large, dense wooden beams.
- Subflooring Installation: Ensuring a solid base for your finished floors.
Essentially, if your project involves significant structural work or driving nails into dense, thick wood consistently, you’re in heavy-duty territory. These tools are designed to make those jobs faster, easier, and more secure.
Choosing Your Heavy-Duty Champion: Types of Industrial Nail Guns
When you’re ready to step up to a heavy-duty nailer, you’ll find a few main players, each with its strengths. The primary distinction often comes down to their power source. Understanding these differences will help you pick the best tool for your specific job and your existing setup.
1. Pneumatic Nail Guns (Air-Powered)
These are the classic, and often the most powerful, heavy-duty nail guns. They run on compressed air supplied by an air compressor. If you envision a busy construction site, you’re probably picturing pneumatic tools!
Pros of Pneumatic Nail Guns:
- Unmatched Power: They deliver the highest driving force, essential for dense materials and long nails.
- Lightweight Tool Body: The compressor does the heavy lifting, so the gun itself is often lighter and more maneuverable for its power.
- Reliability: Generally very durable and have fewer moving parts than other types, leading to longer lifespans.
- Cost-Effective (Long Run): While the initial compressor investment is significant, the guns themselves can be less expensive, and air is a cheap power source.
- Consistent Performance: Air pressure ensures consistent nail driving power.
Cons of Pneumatic Nail Guns:
- Requires an Air Compressor: This is the biggest hurdle. Compressors are bulky, noisy, and require an available power outlet.
- Hose Management: You’ll need to manage an air hose, which can get tangled, snagged, or restrict movement.
- Setup Time: Filling the compressor tank and waiting for it to reach operating pressure adds to your initial setup.
When to Choose Pneumatic: If you have a dedicated workshop, are doing extensive framing, or need the absolute most power for driving large nails through the hardest woods, pneumatic is likely your best bet. They excel in situations where consistent, high-volume nailing is required.
2. Cordless Nail Guns (Battery-Powered)
Cordless nail guns have come a long way! Modern battery technology means these tools offer incredible convenience without sacrificing too much power. They typically use a battery to power a motor, which then drives the nail, or they may use a small fuel cell and battery combination much like some cordless framing nailers.
Pros of Cordless Nail Guns:
- Ultimate Portability: No cords, no hoses! This means freedom of movement on any job site, from attics to remote locations.
- Quick Setup: Grab and go! No compressor to start or hoses to connect.
- Convenient for Small Jobs: Perfect for quick repairs or tasks where running an air hose would be a hassle.
- Modern Features: Often come with advanced features like battery charge indicators and tool-free depth adjustments.
Cons of Cordless Nail Guns:
- Weight: The battery adds weight to the tool, which can make it more fatiguing during long use.
- Power Limitations: While improving rapidly, some models may not have quite the raw driving power of high-end pneumatics for the very densest woods or longest nails.
- Battery Dependency: You need charged batteries for the tool to work. Running out of juice mid-job can be a setback.
- Higher Initial Cost: The battery and motor systems drive up the purchase price compared to pneumatic tools.
- Maintenance: Batteries and motors can eventually wear out, requiring replacement.
When to Choose Cordless: For maximum flexibility, remote job sites, or if you simply hate dealing with air hoses, modern cordless nail guns are fantastic. They are excellent for framing, subflooring, and many other heavy-duty tasks where speed and convenience are paramount. Brands like DeWalt, Milwaukee, and Metabo HPT offer excellent cordless options.
3. Corded Electric Nail Guns (Less Common for True Heavy-Duty)
While common for lighter finish or brad nailers, true heavy-duty industrial applications rarely rely solely on corded electric nail guns that plug directly into the wall. These tools often use a motor to power a mechanism that drives the nail. Their power is typically limited by the electrical outlet’s capacity and the length of the cord, making them less suitable for extensive structural work across large areas.
Pros of Corded Electric Nail Guns:
- No Batteries or Air Source Needed: Powered directly by a wall outlet, making them simple to operate as long as power is available.
- Lower Initial Cost: Usually less expensive than their cordless or pneumatic counterparts.
- Lighter than Cordless: No heavy battery pack.
Cons of Corded Electric Nail Guns:
- Limited Power: Generally not as powerful as pneumatic or high-end cordless options, limiting their use with dense materials or large nails.
- Cord Restriction: The power cord is a significant limitation on mobility and can be a tripping hazard or get in the way on large jobs.
- Not Truly “Industrial”: Typically designed for lighter-duty tasks, you’ll rarely find them used for serious construction framing.
When to Choose Corded Electric: These are best for lighter-duty DIY projects where mobility isn’t a major concern and you won’t be driving nails into exceptionally hard materials. They are not typically considered for heavy-duty industrial applications.
The Nailer’s Diet: Understanding Nail Types and Sizes
Just as important as the nail gun itself is the ammunition it uses – the nails! Heavy-duty nail guns drive different types and lengths of nails designed for specific structural purposes. Using the wrong nail can lead to weak joints, damaged materials, or a jammed nailer. Let’s break down the common types you’ll encounter:
Common Nail Gun Nails:
- Framing Nails: The workhorses for building walls, roofs, and floors. They are typically round-head or clipped-head nails and come in lengths from 2 inches up to 3.5 inches. They are designed to provide maximum holding power in structural lumber.
- Siding Nails: Longer and thinner than framing nails, often with a slightly countersunk head to sit flush or just below the surface of siding materials.
- Roofing Nails: Short, wide-headed nails specifically designed to hold down roofing materials like shingles effectively.
- Sheathing Nails: Similar to framing nails but often designed for specific sheathing applications, sometimes with specific coatings for corrosion resistance.
Nail Head Styles:
This is crucial for structural integrity and code compliance. For heavy-duty work, you’ll primarily deal with:
- Round Head (Full Round Head): These are the standard for most framing applications. Their full round head provides excellent shear strength and is required in many building codes for critical structural connections to prevent pull-through.
- Clipped Head: These nails have a portion of their head “clipped” off to allow them to be placed closer together in the magazine. While they allow for denser nailing, they offer less holding power than round heads and are often not permitted by building codes for structural framing in many areas. Always check local building codes!
Nail Material and Coating:
- Bright (Uncoated): Suitable for interior use where moisture is not a concern.
- Galvanized: Coated with zinc to resist rust. Essential for exterior applications like decks and framing exposed to the elements. Electro-galvanized is adequate for many jobs, while hot-dip galvanized offers superior corrosion resistance for harsher environments.
- Stainless Steel: The premium choice for extreme corrosion resistance, often used in coastal areas or with naturally acidic woods like Western Red Cedar or redwood.
Choosing the Right Nail: Always consult your nail gun’s manual to see the range of nail sizes (length and diameter) and head styles it can accept. For structural work, prioritize round-head nails and ensure they are sufficient length to penetrate adequately into the second piece of wood (aim for at least 3/4 inch into the receiving piece, but longer is often better for strength). You can refer to resources like the Tools Today nail size chart for a visual guide, but always prioritize your tool’s specifications and local building codes.
Essential Features to Look For in an Industrial Nail Gun
Beyond just the power source, several features can make a significant difference in your experience and the performance of a heavy-duty industrial nail gun.
- Magazine Capacity: How many nails does the gun hold? A higher capacity means fewer reloads, especially important for high-volume tasks like framing.
- Nail Length Range: Ensure the gun can handle the nail lengths you need for your typical projects.
- Depth Adjustment: This is critical! It allows you to control how deep the nail is driven. You want it to countersink slightly into the wood without overdriving and damaging the surface, or underdriving and leaving the head proud. Tool-free depth adjustment is a huge convenience.
- Selectable Trigger: Most heavy-duty nailers offer a selectable trigger. This lets you switch between sequential firing (one nail per trigger pull – for precision) and contact firing (hold the trigger and bump the nose for rapid firing – for speed). Double-check the specific mode you’re in before firing, especially when switching to sequential for critical joints.
- Rafter Hook: A small but incredibly useful feature for framing, allowing you to hang the tool on a rafter or joist when not in use.
- No-Mar Tip: Some nailers come with a soft rubber tip that prevents marring softer woods when you’re working on visible surfaces.
- Jam Clearing Mechanism: Most modern nailers have tool-free jam clearing, which is a lifesaver when a nail does get stuck.
- Ergonomics and Weight: Especially for cordless tools, consider how the weight is balanced and how comfortable the grip is for extended use.
Mastering the Tool: How to Use Your Heavy-Duty Industrial Nail Gun Safely and Effectively
These are powerful tools, and their effective use hinges on safety and proper technique. Treat every nail gun with respect, and you’ll be rewarded with speed and excellent results.
Safety First: The Non-Negotiables
This is the most important section. Nail guns can cause serious injury if not handled correctly. Make these a habit:
- Always Wear Safety Glasses: This is paramount. Eye protection is essential to guard against flying debris, nails, or accidental firings. Consider a full face shield for extra protection.
- Wear Hearing Protection: Nail guns, especially pneumatic ones, can be very loud. Prolonged exposure can damage your hearing.
- Wear Sturdy Footwear: Good boots protect your feet from dropped tools or materials.
- Never Point the Nail Gun at Yourself or Others: Treat it like a firearm in this regard. Always assume it’s loaded.
- Keep Your Fingers Away from the Trigger and Nose: Unless you are actively firing a nail, keep your finger off the trigger. Do not place your finger on the nose of the gun.
- Engage Safety Features: Ensure the selectable trigger is in the correct mode for your task (sequential is safest when you need control).
- Disconnect Power When Not in Use or When Clearing Jams: For pneumatic tools, disconnect the air hose. For cordless tools, remove the battery.
- Be Aware of Your Surroundings: Ensure no one is behind the material you are nailing into. They could be injured by a fastener that passes through.
- Use the Correct Nails: Mismatched nails can cause jams and increase the risk of misfires.
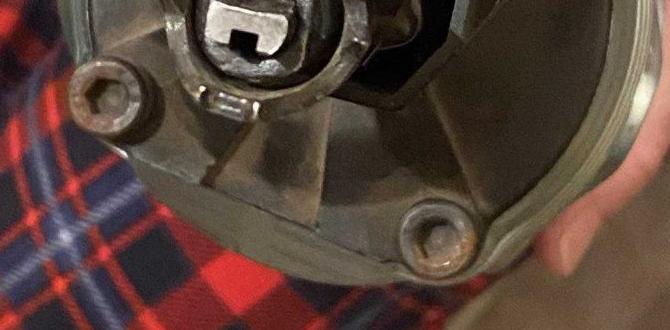
- Inspect the Tool Regularly: Check for damaged cords, hoses, or parts before each use.
For comprehensive safety guidelines, always refer to the Occupational Safety and Health Administration (OSHA) guidelines on power-actuated tools, which include nail guns.
Step-by-Step Operation (General Guide)
The exact steps might vary slightly between models, but the core process is similar:
- Check Your Air Supply/Battery: If pneumatic, ensure your compressor is charged and connected with a solid air hose. If cordless, make sure your battery is fully charged and inserted.
- Load the Nails: Open the magazine, insert the correct type and length of nails, and slide the magazine follower until it locks. Ensure the nails are seated properly against the magazine walls.
- Select the Firing Mode: Choose between sequential (single shot) or contact (bump fire) mode based on your needs. Use sequential for precise placement and contact for speed.
- Adjust Depth Setting: Set the desired nail depth. Test on a scrap piece of the same material to confirm. You want the nail head to be flush or slightly countersunk.
- Position the Nail Gun: Place the nose of the nail gun firmly against the surface where you want the nail to go. Ensure the safety contact element is depressed against the wood.
- Pull the Trigger:
- Sequential Mode: Pull the trigger completely. Then, position the gun for the next nail and bump the nose against the wood.
- Contact Mode: Hold the trigger down. Then, bump the nose of the gun against the wood to drive each nail.
- Continue Nailing: Work your way across the material, paying attention to the nail depth and ensuring secure joints.
- When Finished: Release the trigger. Disconnect the air hose/remove the battery. Clear any remaining nails from the magazine if storing for an extended period.
Tips for Maximizing Performance and Preventing Problems
- Use the Right Air Pressure (Pneumatic): While a general range might be 70-120 PSI, always check your tool’s manual. Too low pressure leads to insufficient driving power; too high can damage the tool or over-drive nails.
- Keep the Tool Clean: Dust and debris are the enemies of nail guns. Regularly blow out the magazine and main body with compressed air.
- Lubricate (Pneumatic Tools): Many pneumatic nail guns require a few drops of specialized pneumatic tool oil in the air inlet daily. Check your manual! This is