Glossy hardwood floors add beautiful shine and value to your home. This guide explains how to achieve and maintain that stunning look. Learn about different finishes, the application process, and essential care tips to keep your floors looking their best for years, even if you’re new to the game.
Walking into a room with glossy hardwood floors is like stepping into a magazine spread. That deep, uniform shine just screams elegance and luxury. But if you’ve ever tried to get that kind of finish yourself, or even just keep it looking great, you might have run into a few snags. Maybe your last attempt ended up streaky, or perhaps the beautiful sheen faded faster than you expected. Don’t worry, you’re not alone!
Many homeowners dream of that mirror-like finish on their wood floors, but the process and upkeep can seem a bit daunting. The good news is, with the right approach, achieving and maintaining glossy hardwood floors is totally within your reach. We’ll break down everything you need to know, from picking the perfect finish to simple steps that keep them looking brand new.
Ready to transform your space and keep that gorgeous gleam? Let’s dive in and make those floors the showstoppers they deserve to be!
Table of Contents
Understanding Glossy Finishes for Hardwood Floors
When we talk about “glossy” hardwood floors, we’re really talking about the type of finish applied to the wood. This finish is what seals and protects the wood, while also giving it its shine. The level of gloss can actually vary quite a bit, and understanding these differences is key to getting the look you want.
Think of it like paint finishes – you can have matte, satin, semi-gloss, and high-gloss. For wood floors, these terms translate similarly. The higher the gloss level, the more reflective the surface will be. This means it will bounce more light around the room, making it feel brighter and more open.
Types of Wood Floor Finishes and Their Gloss Levels
The “gloss” you see on hardwood floors comes from the protective topcoat. These finishes not only make the floor shine but also protect it from spills, scratches, and everyday wear and tear. The main players in the wood floor finish game are usually polyurethane-based.
Here are the common finish types and their general gloss levels. We’ll explore how they’re applied and what makes them tick.
Polyurethane Finishes: The Most Common Choice
Polyurethane is the workhorse of wood floor finishes. It’s durable, readily available, and comes in a few different formulations. For that coveted gloss, you’ll typically be looking at three main types:
- Oil-Based Polyurethane: This is a classic choice. It tends to be very durable and gives wood a warm, amber tone over time. It’s also known for its excellent resistance to wear and tear. The shine from oil-based polys can range from a soft sheen to a very high gloss.
- Water-Based Polyurethane: These finishes are known for drying quickly and having a very low odor. They’re also great for maintaining the natural, lighter color of the wood, as they don’t amber as much as oil-based options. Water-based finishes are great for achieving a brilliant, clear gloss.
- Moisture-Cured Polyurethane: This is a super-tough, professional-grade finish. It’s highly resistant to scuffing and chemicals, making it ideal for high-traffic areas. Moisture-cured finishes can provide an incredibly durable and high-gloss surface.
Other Finish Types (Less Common for DIY Gloss)
While polyurethane dominates, you might occasionally encounter other finishes:
- Varnish: A more traditional finish, often containing natural resins. It offers good protection but can be trickier to apply evenly for a DIYer aiming for a perfect gloss.
- Shellac: Natural and beautiful, but not as durable as polyurethane for floors. It’s sensitive to heat and alcohol, so it’s less suitable for high-traffic, potentially spill-prone floor areas where you want a robust gloss.
- Wax: Often applied over other finishes or directly to wood (though not recommended for high-gloss, lasting results). Wax gives a soft sheen but requires frequent buffing and recoating. It’s not the best choice for a truly “glossy” and low-maintenance floor.
Gloss Levels Explained
Within polyurethane finishes, the gloss level is usually specified. Here’s what those terms mean:
| Gloss Level | Reflectivity | Appearance | Best For |
|---|---|---|---|
| Matte | Low | Subtle, natural look. Hides imperfections well. | Rustic or traditional styles. High traffic areas where scratches are a concern. |
| Satin | Medium | Soft sheen, elegant. A good balance of shine and practicality. | Most rooms, versatile. Hides minor wear better than higher glosses. |
| Semi-Gloss | High | Noticeable shine, reflects light well. Offers good durability. | Entryways, living rooms, kitchens. Where you want a bit more sparkle but still some practicality. |
| High-Gloss (or ‘Gloss’) | Very High | Mirror-like finish, maximum reflection. Makes rooms feel larger and brighter. | Formal rooms, dining rooms, bedrooms where you want to make a statement and durability is less critical than pure shine. |
For that true “glossy hardwood floors” look, you’ll want to be aiming for Semi-Gloss or High-Gloss finishes. These will give you the most dramatic reflective surface.
Achieving Glossy Hardwood Floors: A Step-by-Step Guide
Getting glossy hardwood floors can mean two things: either you’re installing new floors and finishing them, or you’re refinishing existing floors to bring back that shine. Both processes share a common goal of a smooth, clean surface to apply the finish. Let’s focus on the refinishing process, as it’s a common DIY project.
Refinishing involves sanding down the old finish to bare wood, then applying new coats of your chosen finish. It’s more involved than just applying a new coat of polish, but the results are transformative. Safety first is always my motto when working with tools and finishes! Make sure you have good ventilation and wear protective gear.
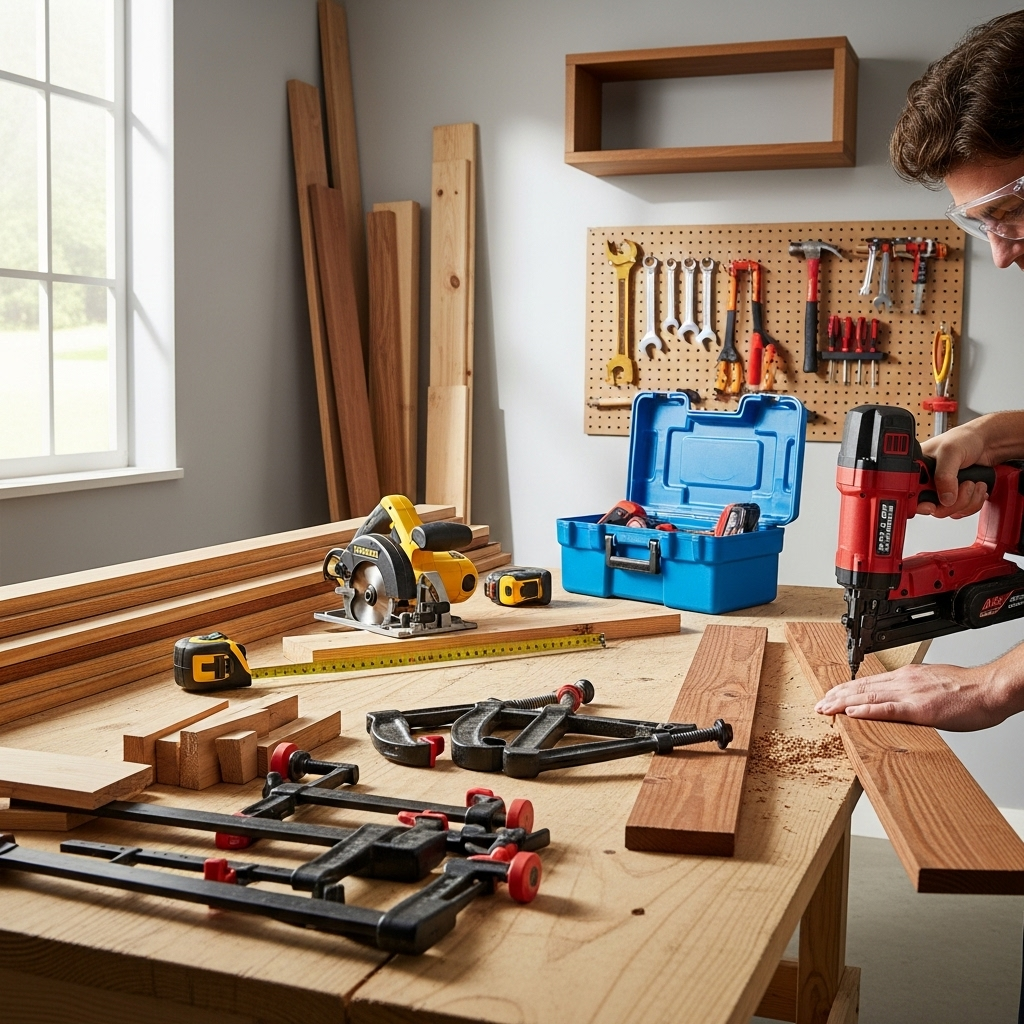
Step 1: Prepare the Area and Gather Your Tools
Before you even think about sanding, you need to get your workspace ready. This means moving all furniture out of the room, and protecting anything that can’t be moved. Think about dust control!
Essential Tools and Materials:
- Safety Gear: Respirator (organic vapor cartridge is best for finishes), safety glasses, gloves, knee pads.
- Vacuum Cleaner with Hose: For picking up dust.
- Duct Tape or Painter’s Tape: To seal vents and doorways.
- Drop Cloths or Plastic Sheeting: To protect walls and furniture.
- Sanding Equipment:
- Orbital Floor Sander: You can rent these from most tool rental places.
- Handheld Orbital Sander: For edges and corners.
- Sandpaper: Various grits (e.g., 36, 60, 100, 150).
- Shop Vacuum: Essential for dust removal between sanding stages.
- Tack Cloths: For picking up fine dust particles after sanding.
- Applicators: High-quality synthetic-bristle brush, lambswool applicator, or a good quality paint roller (ensure it’s suitable for the finish you’re using).
- Chosen Finish: Your high-gloss polyurethane (oil-based or water-based).
- Mineral Spirits or Appropriate Cleaner: For oil-based finishes, or a specific cleaner for water-based finishes.
Clear the room completely. Every piece of furniture, every rug, every picture frame. Seal off doorways with plastic sheeting and tape to prevent dust from spreading to other parts of your house. Turn off your HVAC system to avoid circulating dust. Open windows for ventilation if the weather permits (but be mindful of pollen or dust from outside.
Step 2: Sand Down the Old Finish
This is the most physically demanding part, but crucial for a smooth, even finish. You’re not trying to remove all the wood, just the old varnish, paint, and minor imperfections.
Start with a coarser grit sandpaper (like 36 or 60) on your floor sander. Make long, even passes in one direction across the floor. Overlap each pass by about half the width of the sander. Then, go over the floor again at a 45-degree angle to the first passes to catch any missed spots.
After the initial coarser grit, switch to a finer grit (like 100) and repeat the process. Then, move to an even finer grit (like 150). The goal is to get the wood smooth and free of the old coating. For the edges and corners where the big sander can’t reach, use your handheld orbital sander with the appropriate grit sandpaper.
Important Tip: Always sand in the direction of the wood grain. With your floor sander, make sure it’s running when you set it down and lifting it up, to avoid creating gouges.
Step 3: Thoroughly Clean and Dust Removal
This is probably the second most critical step after proper sanding. Any speck of dust left behind will show up as a bump or imperfection under your new glossy finish. Take your time here!
- Vacuum Everything: Use your shop vacuum to meticulously clean up all the sanding dust. Get into every corner and crevice.
- Wipe Down: Sweep or vacuum again with a good household vacuum.
- Tack Cloths: This is where the magic happens for a truly smooth finish. Use tack cloths (they are slightly sticky and designed to grab fine dust) to wipe down the entire floor surface. Work in small sections and use a fresh tack cloth as soon as one starts to get dirty.
Ensure the air is as still as possible while you’re doing this. Again, keep those HVAC vents sealed.
Step 4: Apply the First Coat of Finish
Now for the exciting part! Open your chosen high-gloss finish. Stir it gently – don’t shake it, as this can create air bubbles. If you’re using an oil-based product, be extra mindful of ventilation and wear your respirator.
Start in the corner furthest from your exit. Apply the finish using your chosen applicator. Whatever tool you use, aim for thin, even coats. Long, smooth strokes are best.
- Using a Roller: Load the roller evenly and apply in long, overlapping strokes.
- Using a Lambswool Applicator: This is a classic tool for even finish application.
- Using a Brush: Best for edges and detailed areas.
Work your way backward out of the room. Don’t overwork the finish; apply it and move on. The goal is a uniform sheen, not a thick buildup.
Step 5: Allow Drying Time and Light Sanding Between Coats
This is where patience pays off. Read the manufacturer’s instructions on your finish for the exact drying times. Usually, this is anywhere from 6 to 24 hours, depending on the product and room conditions.
Once the first coat is completely dry, you’ll need to do a light buffing before applying the next coat. This isn’t heavy sanding, but rather a very light scuffing to knock down any stray dust nibs and ensure good adhesion for the next layer. Use 220-grit sandpaper or a sanding screen attached to your handheld orbital sander, or even just a sanding block for small areas. Again, vacuum thoroughly and use tack cloths to remove all dust.
Step 6: Apply Subsequent Coats
Apply your second coat of high-gloss finish just as you did the first. Again, thin, even coats are key. You could potentially do 3-4 coats for maximum durability and depth of shine, depending on the product and your expected wear and tear.
Again, allow ample drying time between coats, and always perform that light sanding and dust removal. The final coat should be applied without any sanding afterward. For a truly brilliant glossy finish, allow this final coat to cure for the recommended time (often several days to a week) before placing furniture back on it or allowing heavy foot traffic.
Maintaining Your Glossy Hardwood Floors
You’ve worked hard to get those beautiful glossy floors! Now, the job isn’t quite done. Proper maintenance is key to keeping them looking their best and protecting your investment.
The enemy of a high-gloss finish is anything that can scratch, dull, or wear away the surface. This includes dirt, grit, improper cleaning products, and abrasive damage.
Daily and Weekly Care
- Sweep or Vacuum Regularly: This is your first line of defense. Use a soft-bristle broom or a vacuum cleaner with a hardwood floor attachment (make sure any beater bar is turned off or can be disengaged). Aim to sweep or vacuum at least a few times a week, or daily in high-traffic areas.
- Wipe Spills Immediately: Don’t let liquids sit on the floor. Use a soft, absorbent cloth to blot up any spills as soon as they happen.
- Use Entryway Mats: Place mats both inside and outside all exterior doors. This traps dirt, sand, and moisture before they can be tracked onto your floors.
Monthly or As-Needed Cleaning
This is where you’ll use a cleaning solution. Crucially, never use overly wet mops or harsh cleaning chemicals.
What to Use:
- Recommended Cleaners: Look for specific hardwood floor cleaners designed for the type of finish you have (e.g., for polyurethane). Brands like Bona or Bruce offer good options. Follow the directions on the bottle precisely. Typically, you’ll lightly mist the floor or your mop head with the cleaner.
- Slightly Damp Mop: Use a microfiber mop that is only slightly damp, never soaking wet. Wring it out thoroughly.
- Plain Water (Sparingly): In some cases, a very lightly damp mop with plain water can be sufficient for a quick clean.
What to Avoid:
- Ammonia-based cleaners: These can damage the finish.
- Wax or oil-based soaps: Unless your floor has a specific wax finish, avoid these. They can build up and create a dull, slippery surface.
- Steam mops: The heat and moisture can damage the wood and finish over time.
- Soaking wet mops: Excess water can seep into the wood and cause warping or damage.
- Abrasive cleaners or scrub brushes: These will scratch the glossy finish.
Follow this cleaning routine consistently. A light, damp mop with the right cleaner about once a month is usually plenty for most homes.
Protecting Against Damage
- Furniture Pads: Put felt pads on the legs of all furniture – chairs, tables, sofas, etc. This prevents scratches when furniture is moved. Check these pads periodically as they can wear down or collect grit.
- Area Rugs: Place area rugs in high-traffic zones like hallways, entryways, and under dining tables. This protects the flooring from the most wear and tear.
- Remove Shoes: Encourage family and guests to remove their shoes, especially those with hard soles or heels. High heels, in particular, can cause dents in softer wood floors, even with a good finish.
- Trim Pet Nails: Keep your pets’ nails trimmed to reduce scratching.
- Avoid Direct Sunlight: Prolonged exposure to direct sunlight can fade and damage wood finishes over time. Use curtains or blinds to protect your floors.
Dealing with Scratches and Wear
Even with the best care, minor scratches can happen. For very light scratches, sometimes a specific hardwood floor repair pen or putty matching your floor’s color can help camouflage them. These are generally less effective on high-gloss finishes where perfection is the goal.
If you notice significant wear or deep scratches appearing, it might be time to consider a refresh. This could involve applying an additional maintenance coat of finish (if the manufacturer allows and the floor isn’t too damaged) or a full refinishing down the line. For a professional opinion on wear and tear, you can always consult a flooring specialist.
Pros and Cons of Glossy Hardwood Floors
Like any design choice, opting for glossy hardwood floors comes with its own set of advantages and disadvantages. It’s good to weigh these out to make sure it’s the right fit for your lifestyle and