Quick Summary:
Choosing the right nail gauge for furniture is crucial for a strong, professional finish. For most furniture projects, particularly those involving hardwoods or intricate joinery, 18-gauge and 16-gauge nails are your go-to options. 18-gauge nails (brad nails) offer a delicate touch for trim and fine details, while 16-gauge nails (finish nails) provide more holding power for structural joints and heavier pieces.
Hey there, fellow DIYers! Jack Shaffer here, your go-to guy for all things nailers and woodworking. If you’ve ever found yourself staring at a pile of nails, wondering which one is right for that beautiful piece of furniture you’re building, you’re not alone. It’s a common puzzle, and getting it wrong can mean wobbly joints or unsightly holes. But don’t worry, we’re going to sort this out together. Today, we’re diving deep into the world of nail gauges, specifically for furniture making. By the end of this guide, you’ll be confidently choosing the perfect nails for any furniture project, big or small. Ready to build something amazing?
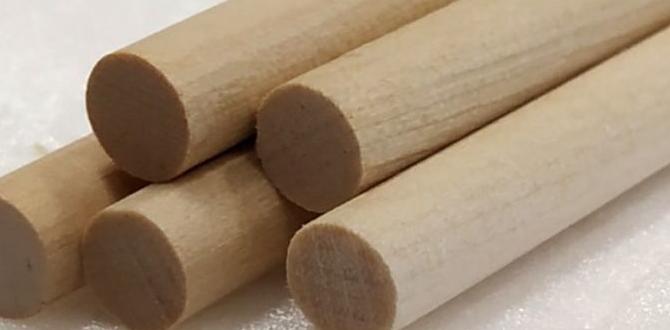
Understanding nail gauge is fundamental to woodworking success. Think of gauge as a way to measure the thickness of a nail. It’s a bit counter-intuitive, actually: the higher the gauge number, the thinner the nail. This means an 18-gauge nail is much thinner than a 14-gauge nail. This distinction is vital because different furniture components and wood types require different nail thicknesses for optimal strength and appearance.
Using the wrong gauge can lead to a cascade of problems. A nail that’s too thick might split the wood, especially softer timbers like pine or when working near edges. A nail that’s too thin might not have enough holding power, leading to weak joints that can fail over time. We want our furniture to be sturdy, beautiful, and last for years, right? That’s where knowing your gauges comes in.
In this guide, we’ll cover:
- What nail gauge actually means.
- The most common gauges used in furniture making and why.
- How wood type influences your nail choice.
- When to use different nail types (like brad, finish, and annular ring).
- Tips for choosing the right nail for your specific project.
Let’s get down to it and become nail gauge pros!
Table of Contents
Understanding Nail Gauge: The Basics
As I mentioned, nail gauge is a way to measure the diameter of the nail shank. It’s an old system, and manufacturers follow specific standards. The key takeaway is: Higher Gauge Number = Thinner Nail. This might seem backward at first, but it’s how it works. This thickness directly impacts how much holding power a nail has, its tendency to split wood, and how visible the final hole will be.
Here’s a simple way to visualize it:
- 18-Gauge: Very thin, almost like a pin.
- 16-Gauge: Slightly thicker than 18-gauge, still relatively slim.
- 14-Gauge: Noticeably thicker, offering more strength.
- 12-Gauge: Quite thick, used for heavy-duty construction.
For furniture making, especially for DIYers and beginners, we’re typically working with gauges that offer a balance of holding power and minimal impact on the wood’s appearance. This means you’ll be focusing on the slimmer end of the spectrum.
Common Nail Gauges for Furniture Making
When you’re building furniture, certain nail gauges rise to the top because they offer the best combination of strength, aesthetics, and ease of use. For most projects involving domestic hardwoods and even some softwoods, these two are your best friends:
18-Gauge Nails (Brad Nails)
These are your go-to for delicate work. An 18-gauge nail is very thin, measuring approximately 1mm in diameter. They are often called “brad nails.”
Why use 18-gauge nails?
- Minimal Damage: Their thinness means they leave very small holes, which are easily filled with wood putty or filler, making them excellent for visible areas.
- Reduced Splitting: They are far less likely to split the wood, especially thin pieces or those close to an edge. This is a huge advantage when working with hardwoods or delicate trim.
- Versatility for Trim and Detail: Perfect for attaching decorative trim, moldings, thin back panels, and small joinery where strength isn’t the primary concern, but appearance is.
- Easy to Drive: They drive in easily with an 18-gauge brad nailer, often without needing a pilot hole.
Where to use 18-gauge nails:
- Attaching chair aprons to legs (if the joinery itself is strong).
- Securing trim and decorative elements to cabinets or furniture frames.
- Fastening thin back panels on bookcases or entertainment units.
- Assembling small boxes or decorative chests.
- Inlay work and detailed piece assembly.
16-Gauge Nails (Finish Nails)
A step up in thickness from 18-gauge, 16-gauge nails are a bit more robust. They measure about 1.6mm in diameter. These are typically referred to as “finish nails.”
Why use 16-gauge nails?
- More Holding Power: They offer a good balance of strength and a relatively small head, providing significantly more holding power than 18-gauge nails.
- Stronger Joints: Ideal for applications where the nail is contributing more to the structural integrity of the joint.
- Less Visible than Thicker Nails: While they do leave a slightly larger hole than 18-gauge nails, they are still small enough to be easily concealed with wood filler.
- Versatile for Framing and Assembly: Suitable for assembling furniture frames, attaching cabinet face frames, and other areas that require a bit more rigidity.
Where to use 16-gauge nails:
- Assembling cabinet boxes.
- Joining chair and table legs to aprons (often used in conjunction with wood glue).
- Securing baseboards or crown molding to furniture pieces (like a built-in bookcase).
- Attaching heavier drawer fronts or cabinet doors.
- Framing out smaller pieces of furniture.
When Other Gauges Might Come into Play (Less Common for Fine Furniture)
While 18-gauge and 16-gauge are the stars of furniture making, you might encounter or use others for specific purposes or different styles of construction:
- 15-Gauge Nails (Fencing or Construction Nails): These are thicker still, offering substantial holding power. They are usually larger and have a more prominent head. You might see these on very robust, heavy-duty furniture construction, but they are less common for fine furniture where aesthetics matter most. The holes they leave are more challenging to hide.
- 14-Gauge Nails (Angled Finish Nails): Similar to 16-gauge but thicker. Some specialized nailers use 14-gauge nails at an angle to reach into tight spots. They offer good holding power but still leave a visible hole that needs filling.
- 12-Gauge Nails (Kitchenette or Pocket Hole Screws): These are stout nails, often used in framing or for attaching cabinet hardware. For furniture making, anything this thick is usually reserved for very heavy structural components or if you’re deliberately going for a rustic, exposed-fastener look, which is rare in fine furniture.
Nail Length: Just as Important as Gauge!
Choosing the right gauge is only half the battle. Nail length is equally critical for ensuring a secure hold without punching through to the other side. The general rule of thumb for nails in woodworking is that they should penetrate the receiving piece to about two-thirds of its thickness.
Key considerations for nail length:
- Avoid Blowout: The nail shouldn’t pierce the opposite surface of the wood. This looks unprofessional and weakens the joint.
- Adequate Grip: The nail needs to embed deeply enough into the secondary piece of wood to provide strong holding power.
- Wood Thickness: Always consider the thickness of BOTH pieces you are joining.
Example: If you are attaching a 3/4-inch thick apron to a leg that is 1 1/2 inches thick:
- You want the nail to go through the 3/4-inch apron.
- It should then embed about 2/3 of the way into the 1 1/2-inch leg.
- So, into the leg alone, you’d want about 1 inch of penetration (2/3 of 1.5 inches).
- Add the 3/4-inch thickness of the apron, and you’re aiming for a total nail length of around 1 3/4 inches.
For common furniture projects using 3/4-inch and 1-inch thick lumber, you’ll frequently find yourself reaching for nails in the 1 1/4-inch to 2-inch range. Always consult nail manufacturer charts or use a calculator if you’re unsure, but this rule of thumb is a great starting point.
Types of Nails and Their Furniture Applications
Beyond gauge and length, the head style and shank type of a nail also play a role:
Nail Head Styles
1. Brad Nails (Typically 18-Gauge):
- Heads: Have a very small head, often referred to as a “minimal head” or “pin head.”
- Best For: Trim, moldings, delicate joinery, anything where you want the nail head to be virtually invisible or easily filled. The small size minimizes damage to the wood surface.
2. Finish Nails (Typically 16-Gauge):
- Heads: Have a slightly larger, but still relatively small, conical head. They are designed to be set slightly below the wood surface (countersunk) and then filled with putty.
- Best For: Assembling cabinet frames, attaching face frames, chair/table leg construction, and anywhere a bit more holding power is needed than a brad nail can provide, while still aiming for a clean, finished look.
3. Common Nails (Thicker Gauges, Larger Heads):
- Heads: Large, flat heads.
- Best For: Rough construction, framing, and applications where holding power is paramount over appearance. Not usually recommended for fine furniture projects.
4. Duplex Nails (Double-Headed Nails):
- Heads: Have two heads, one above the other.
- Best For: Temporary construction, like building jigs or temporary forms, where you need to easily remove the nail later by pulling on the exposed top head. Not for permanent furniture construction.
Nail Shank Types
1. Smooth Shank:
- Description: The most common type, with a smooth surface.
- Best For: General woodworking, especially when paired with wood glue. The glue provides most of the long-term structural integrity.
2. Ring Shank Nails (Annular Ring Nails):
- Description: The shank is encircled with rings. These act like small barbs, biting into the wood fibers and significantly increasing holding power.
- Best For: Applications where extra holding power is needed and the nail might be subject to movement or stress over time. Excellent for chair rungs, drawer construction, or anywhere you want to prevent the nail from backing out. They can be harder to remove than smooth shank nails. You’ll often find 16-gauge ring shank nails as a great compromise for strength and finish.
3. Spiral Shank Nails:
- Description: The shank is twisted in a spiral pattern.
- Best For: Similar to ring shank nails, providing increased rotational resistance and holding power. They can be somewhat harder to drive than smooth shank nails.
For furniture, I most often recommend smooth shank 18-gauge brad nails and smooth or ring shank 16-gauge finish nails. The choice between smooth and ring shank for 16-gauge often comes down to how critical holding power is versus the slight difficulty in driving and removal.
Choosing the Right Nail for Your Furniture Project: A Step-by-Step Approach
Let’s walk through a process to help you make informed decisions for your next project.
Step 1: Assess the Wood Type
The hardness and density of the wood are primary factors.
- Softwoods (Pine, Fir, Cedar): Easier to work with, but more prone to splitting. Thinner nails (18-gauge) are often preferred, especially near edges. Always consider pilot holes if using thicker nails or working close to the end grain.
- Hardwoods (Oak, Maple, Cherry, Walnut): Denser and stronger, but they can be tougher to drive nails into without splitting if not careful. 18-gauge nails are excellent for trim, but for structural joints, 16-gauge nails are often a better choice for holding power. Pilot holes are almost always a good idea with hardwoods, even for 16-gauge nails, especially when joining pieces end-to-end or near edges.
- Plywood & MDF: These engineered materials can be prone to chipping or delaminating. Thinner nails (18-gauge) are generally safer. When attaching to the edges of MDF, pilot holes are essential to prevent blow-out.
Step 2: Determine the Joinery Method
How are the pieces being joined? Is the nail the primary fastener, or is it supplementary to glue or other joinery?
- Primary Fastener (Rare in Fine Furniture): If a nail is the only thing holding two pieces together, you need the thickest gauge that the wood can handle without splitting, combined with the longest length that ensures deep penetration. This is uncommon for most furniture build where strength comes from joinery and glue.
- Supplementary Fastener (Most Common): When nails are used alongside strong wood glue, they primarily serve to hold the pieces tightly together while the glue dries. In this scenario, the glue is doing the heavy lifting for long-term strength. This is where 18-gauge and 16-gauge nails shine, acting as clamps.
- Decorative Elements/Trim: For attaching decorative trim, moldings, or thin back panels, appearance is key. 18-gauge brad nails are almost always the best choice here due to their minimal impact.
Step 3: Consider the Aesthetic Impact
How visible will the nail heads be? How important is it that they disappear?
- Unseen Areas: If the nail will be hidden on the underside, inside, or behind other components (like a cabinet back panel), you have more flexibility. You can use a thicker nail (like 16-gauge) for more strength if needed.
- Highly Visible Areas: For surfaces that will be seen and handled daily (like table tops, chair seats, drawer fronts), you want the smallest possible nail hole. 18-gauge nails are ideal. Even 16-gauge nail heads should be set below the surface and carefully filled.
Step 4: Select Nail Gauge and Type
Based on the above, make your choice:
- Small, delicate trim, moldings, or thin panels on softer woods or where splitting is a concern: 18-gauge brad nails.
- Structural joinery with hardwoods, cabinet frames, or where more holding power is needed alongside glue: 16-gauge finish nails.
- Needing extra gripping power on potentially shaky joints (e.g., chair parts) but still wanting a clean finish: 16-gauge ring shank finish nails.
Step 5: Choose Nail Length
Apply the “two-thirds into the receiving piece” rule. Ensure the total length doesn’t protrude through the opposite side.
Step 6: Drive with Confidence (and Safety!)
Use the correct nail gun for your chosen nail type (e.g., an 18-gauge brad nailer for 18-gauge nails). Always wear safety glasses. If using denser hardwoods, consider pre-drilling pilot holes, even for finish nails, to make driving easier and prevent splitting. A good external resource for understanding wood joinery and fasteners is the Woodworking Network, which offers insights into various construction techniques.