For baseboards, a 16-gauge finish nailer is your best bet. It provides a strong hold without splitting the wood and its narrow head leaves a small, easily filled hole for a clean, professional look. This is the ideal tool for achieving an effortless, professional finish on your baseboard installation.
Hey there, DIYers! Jack Shaffer here from Nailerguy. Ever looked at those beautiful baseboards in magazines and wondered how they got them looking so perfect? You might think it’s all about fancy woodworking skills, but often, the secret weapon is the right nailer. Installing baseboards can seem a bit daunting, especially when you’re just starting out. You want them to be secure, look great, and not end up with split wood or massive holes. It’s a common project, and thankfully, one that’s totally achievable with the right guidance. Today, we’re diving deep into finding the perfect nailer for your baseboard projects. We’ll break down exactly what you need to know, making this task feel much simpler and a lot more fun. Let’s get those baseboards looking sharp!
Table of Contents
Choosing the Right Nailer Gauge for Baseboards
When you’re ready to install baseboards, the tool you choose makes a huge difference. You’ll see a lot of talk about different nailer “gauges.” Think of gauge like the thickness of the finished nail – a lower number means a thicker nail, and a higher number means a thinner nail. For baseboards, we’re aiming for a balance. We need enough holding power to keep that molding firmly against the wall, but we don’t want a nail so thick that it cracks the wood, especially with softer woods or thinner profiles. This is where understanding nailer gauges becomes crucial for a smooth, professional finish.
The primary goal is to have your baseboards installed securely without unsightly damage. This means the nail needs to be strong enough to hold the baseboard against the wall, but slim enough to avoid splitting the wood. It also needs to leave a hole that’s easy to conceal with wood filler or putty. Get this right, and your baseboards will look like they were installed by a seasoned pro, making your whole room feel more polished.
Why Gauge Matters for Baseboard Installation
So, why all the fuss about gauge? It directly impacts the outcome of your project. A nail that’s too thick can:
- Split the Wood: Especially with softer woods like pine or poplar, or with thinner baseboard profiles, a chunky nail can easily cause the wood to crack. This is a repair job you definitely want to avoid!
- Leave a Large Hole: Thicker nails create wider entry points. While you can fill them, a larger hole is more noticeable and harder to make disappear seamlessly.
- Require More Force: Thicker nails might require a more powerful nailer, adding complexity and potentially more recoil.
Conversely, a nail that’s too thin might not have enough holding power. You don’t want your baseboards sagging or coming loose over time. You need a nail that’s robust enough for the job but refined enough for a beautiful finish. This is precisely why the 16-gauge finish nailer shines as the go-to tool.
The Reigning Champion: The 16-Gauge Finish Nailer
For installing baseboards, the 16-gauge finish nailer is almost universally recommended, and for good reason. It strikes the perfect balance between holding power and finish aesthetics.
- The Nail Size: A 16-gauge nail is relatively slim (about 1.6mm in diameter). This thickness is ideal for most trim work, including baseboards.
- Holding Power: While slender, these nails provide ample strength to keep your baseboards securely attached to wall studs. You can confidently trust your installation.
- Minimal Damage: The slimmer profile significantly reduces the risk of splitting the wood, letting you work with confidence even on delicate or thinner moldings.
- Discreet Holes: The nail head is small and leaves a hole that’s easy to fill with wood putty or filler, often becoming virtually invisible once painted or stained.
Using a 16-gauge nailer means you’re less likely to make costly mistakes, and your finished product will have that clean, professional look that makes all your hard work worthwhile. It’s the workhorse for trim carpentry for a reason!
When to Consider Other Gauges (and Why They’re Usually Not Ideal for Baseboards)
While the 16-gauge is king, you might encounter other nailer types. Let’s briefly touch on them and see why they aren’t the best fit for baseboards:
- 18-Gauge Brad Nailer: These are even thinner than 16-gauge nails. They are fantastic for very delicate trim, crown molding where you don’t want to see any holes, or attaching small decorative elements. However, for baseboards, 18-gauge nails often lack the necessary strength for long-term secure attachment, especially for heavier profiles or if you’re not hitting studs consistently. You might find your baseboards sag over time or pull away from the wall.
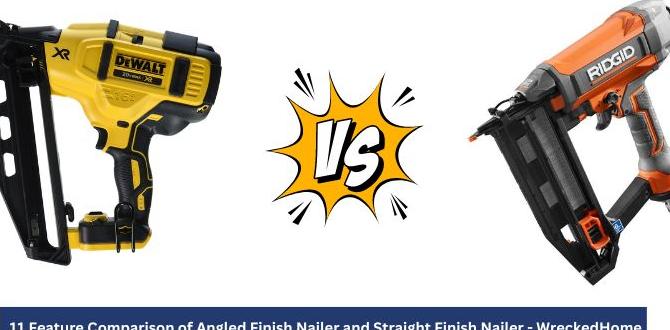
- 15-Gauge or 14-Gauge Finish Nailer (Angled): These use thicker nails, sometimes called “finner” or “angular finish” nails. While offering more holding power, the nails are noticeably thicker. This increases the risk of splitting your baseboard material, especially in sensitive areas like corners or near the edges. The holes they leave are also larger and more difficult to conceal. They are better suited for heavier trim or structural applications where appearance is less critical or where you’re confident in filling larger holes.
- Framing Nailer: These are for heavy-duty construction, like building walls or decks. Their nails are massive and would utterly destroy baseboards. Needless to say, these are not for trim work!
For baseboards, the 16-gauge nailer hits that sweet spot. It’s the smart choice for both durability and a beautiful final appearance. You’re investing in a tool that will serve you well on this project and many others.
Key Features of a Good Baseboard Nailer
Beyond the gauge, a few other features can make your baseboard installation process smoother and more successful. When you’re looking for a nailer, keep these in mind:
1. Power Source: Pneumatic vs. Battery-Powered
This is a big decision and often comes down to your personal preference and existing tool collection. Both have their pros and cons.
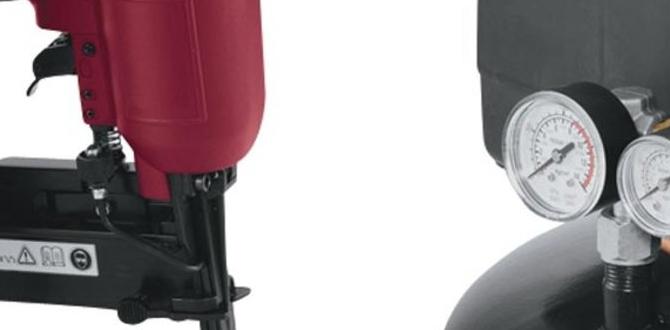
- Pneumatic (Air-Powered) Nailers:
- Pros: These are typically lighter, less expensive upfront, offer less recoil, and are very reliable. They deliver consistent power.
- Cons: You need an air compressor and a hose, which adds bulk and limits your mobility. Setting up can take a few extra minutes to connect and ensure the compressor is ready.
- Battery-Powered (Cordless) Nailers:
- Pros: Ultimate portability! No hoses or compressors mean you can move freely around the room and even take it to other job sites easily. They are incredibly convenient to grab and go.
- Cons: They are generally heavier due to the battery pack. The initial cost can be higher, and you need to keep batteries charged. Some cheaper models might have less consistent power, especially as the battery drains.
For baseboards, which you often install in rooms with access to power outlets, a pneumatic nailer is a fantastic, budget-friendly, and reliable choice. If you prioritize ultimate freedom of movement or already own batteries for other tools, a good quality cordless 16-gauge nailer is also an excellent option.
2. Depth Adjustment and Safety Features
These are non-negotiables for a clean and safe job.
- Depth Adjustment: This lets you control how far the nail drives into the wood. You want to be able to set it so the nail head sits just below the surface of the wood, ready for filling. If it drives too deep, it can damage the molding’s surface. If it doesn’t go deep enough, it will stick out and be very difficult to hide. Look for nailers with an easy-to-use, tool-free depth adjustment mechanism.
- Contact Trip Mechanism (Sequential Firing): This is a crucial safety feature. It means you have to press the tip of the nailer against the surface (contact trip) and pull the trigger for a nail to fire. This prevents accidental nail fires when you’re just positioning the tool or if it’s bumped. Always ensure your nailer has this! NEVER use a nailer that fires whenever the trigger is pulled without contact.
- No-Mar Tip: Many finish nailers come with a rubber or plastic tip designed to protect the surface of the wood from accidental dents or scratches as you’re firing nails. This is a small feature but makes a big difference in achieving a flawless finish.
3. Magazine Capacity and Loading
The magazine is the part of the nailer that holds the nails. For baseboards, you’ll be firing a lot of nails, so a larger capacity is convenient.
- Capacity: Look for a magazine that holds at least 100 nails. This means fewer interruptions to reload, keeping your workflow smooth.
- Loading Mechanism: It should be easy to slide the nails into the magazine and secure them. Most modern nailers have straightforward loading systems.
4. Ergonomics and Weight
You’ll likely be holding the nailer for extended periods, often overhead or at awkward angles, especially when working around doors and windows. Therefore, how the tool feels in your hand is important!
- Weight: Lighter is generally better, especially for long jobs. Compare the weights of different models.
- Grip: A comfortable, non-slip grip will reduce fatigue and improve control.
- Balance: A well-balanced tool feels less cumbersome.
Don’t underestimate these factors. A comfortable tool leads to better results and less physical strain. If possible, try holding a few different models in a store to get a feel for them.
Tools and Materials You’ll Need
Beyond the star of the show – your 16-gauge finish nailer – there are a few other essential items to gather for a successful baseboard installation. Having everything ready before you start will save you time and frustration.
Essential Tools:
- 16-Gauge Finish Nailer: As we’ve discussed!
- Air Compressor & Hose (if pneumatic): Ensure it’s appropriately sized for your nailer.
- Air Hose Fittings: Make sure you have the right quick-connect fittings.
- Safety Glasses: Absolutely critical! Always protect your eyes.
- Ear Protection: Nailers can be loud.
- Measuring Tape: For accurate cuts.
- Pencil: For marking measurements.
- Miter Saw: For accurate angled cuts on your molding. A good miter saw is a game-changer for trim work.
- Stud Finder: To locate wall studs for secure attachment.
- Level: To ensure your baseboards are straight.
- Hammer: For any minor adjustments or to set nails if needed (though the nailer should do the heavy lifting).
- Wood Chisel or Nail Set: To slightly recess nails that don’t go deep enough, or for stubborn nails.
- Utility Knife/Multi-tool: For trimming excess caulk or making small adjustments.
- Caulking Gun: Loaded with paintable caulk.
Essential Materials:
- Baseboard Molding: Choose your desired profile and material (MDF, pine, poplar, PVC, etc.).
- 16-Gauge Finish Nails: Make sure they are the correct length for your application. Generally, 1 1/2″ to 2″ nails are suitable for baseboards, depending on the thickness of the molding and the wall structure.
- Paintable Wood Filler or Wood Putty: For filling nail holes.
- Sandpaper: Fine grit (e.g., 180-220 grit) for smoothing filled nail holes.
- Primer & Paint (or Stain & Finish): To finish the baseboards after installation.
- Paintable Caulk: For sealing gaps between the molding and the wall/floor.
Having all these items on hand means you can move smoothly from measuring and cutting to fastening and finishing. It makes the whole process much more enjoyable and less rushed. Good preparation is key to a great outcome!
Step-by-Step Guide: Installing Baseboards with a 16-Gauge Nailer
Alright, let’s get down to business! Here’s a straightforward guide to installing your baseboards using your trusty 16-gauge finish nailer. We’ll focus on getting a secure and beautiful finish.
Step 1: Preparation is Key!
Before you even think about cutting, do this:
- Clear the Area: Remove furniture and cover floors with drop cloths to protect them.
- Remove Old Baseboards (if applicable): Carefully pry off any existing baseboards. Try to avoid damaging the drywall behind them.
- Prepare the Wall Surface: Ensure the wall is clean and free of debris. Patch any holes or damage in the drywall.
- Locate Wall Studs: Use your stud finder to mark the location of wall studs along the bottom of the wall where the baseboards will be installed. Mark these with a pencil. This is crucial for secure fastening. Refer to resources for best practices on locating studs, such as those provided by the U.S. Department of Energy, which often discuss building structures.
Step 2: Measure and Cut Your Baseboards
Accuracy here saves you headaches later.
- Measure Each Wall Section: Measure the length of the wall where the baseboard will go.
- Account for Corners: For inside corners, measure from the edge of the adjacent wall. For outside corners, measure from the outermost point of the corner.
- Make Your Cuts: Use your miter saw to cut the molding.
- Inside Corners: Typically require a 45-degree cut (or the complementary angle for the corner’s specific degree) on each piece, with the longer edge on the side facing into the room.
- Outside Corners: Also require a 45-degree cut, but the cuts are mirrored so the pieces meet flush.
- Straight Runs: Cut to the exact measurement.
- Test Fit: Before nailing, hold the cut pieces in place to check the fit, especially at corners. Make adjustments as needed.
Step 3: Nailing the Baseboards
This is where your 16-gauge nailer comes into play!
- Load Your Nailer: Load your 16-gauge finish nailer with the appropriate length and type of nails. Ensure the magazine is seated properly.
- Set the Depth: Adjust your nailer’s depth setting. Aim to have the nail head sink about 1/16″ to 1/8″ below the surface of the wood. Test this on a scrap piece of your baseboard material first!
- Position the Nailer: Place the tip of the nailer against the baseboard, near the edge furthest from the wall (where it meets the stud).
- Fire the Nail: Press the contact tip firmly against the wood and pull the trigger sequentially. You should hear a satisfying “thwack” as the nail drives in.
- Nail Placement Strategy:
- Into Studs: Fire nails into the marked stud locations for the strongest hold. Aim for at least one nail per stud, spaced about 16-20 inches apart.
- Along Edges: Fire nails along the top edge of the baseboard, into the wall studs. This is where the wood meets the wall securely.
- Into the Wall (if no stud): If you absolutely cannot hit a stud, you can fire nails into the wall. The drywall will hold, but it’s not as secure as hitting a stud. Consider firing some nails along the bottom edge, into the top plate of the wall framing, if accessible. A good rule of thumb is to nail into studs whenever possible. Fine Homebuilding offers excellent visual guides on stud placement.
- Check for Flushness:** After firing each nail, ensure the nail head is properly countersunk. If it’s too proud, use a nail set and hammer to gently tap it flush or slightly below the surface. If it’s too deep, you may need to adjust your nailer’s