A framing nailer is primarily used for driving large nails quickly into wood for constructing or repairing structural framing. It’s essential for building, framing walls, decks, fences, and creating sturdy wooden structures with speed and ease compared to manual nailing.
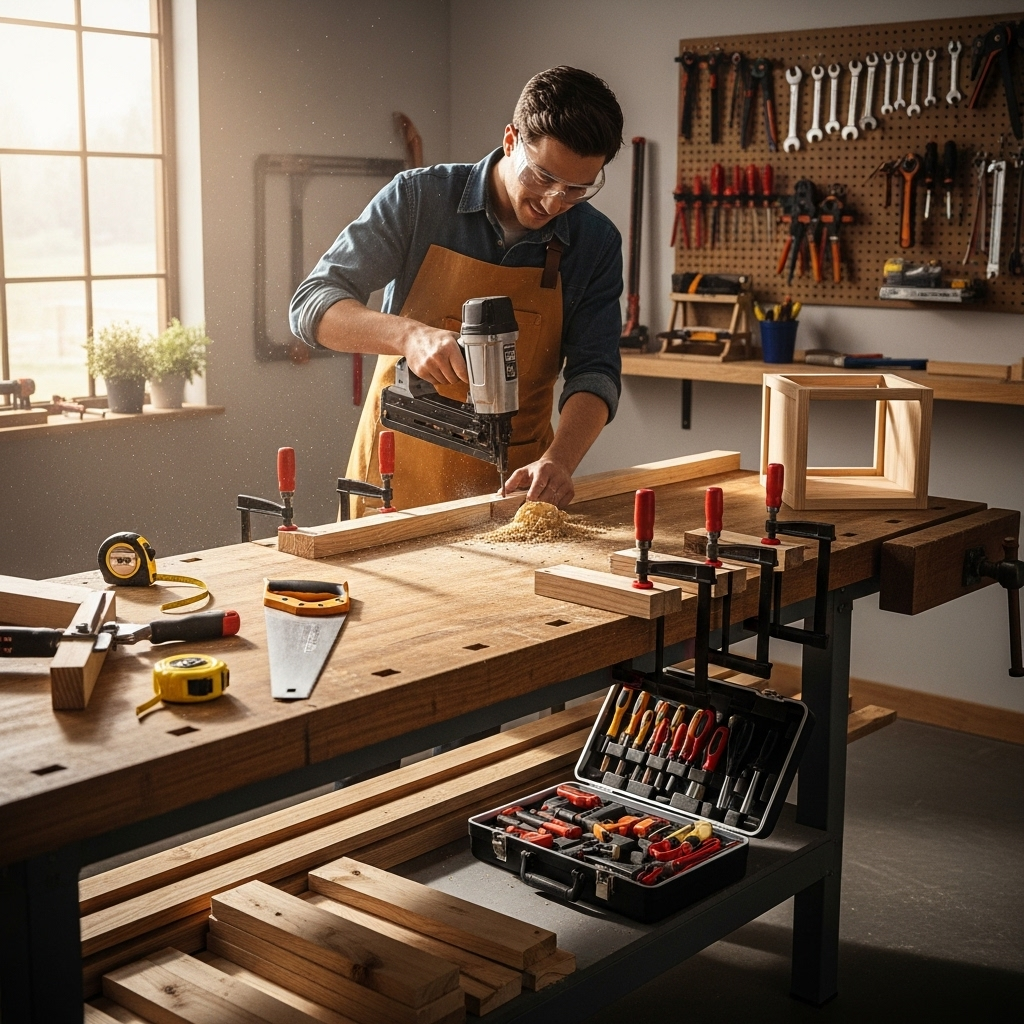
Hey there, fellow DIYers and aspiring builders! Jack Shaffer from Nailerguy here. Ever found yourself staring at a pile of lumber, wondering how those professional builders seem to assemble structures so fast? A lot of their secret weapon comes down to the right tools, and today, we’re diving deep into one of the most powerful construction companions: the framing nailer.
If you’re new to woodworking or home improvement, the idea of a powerful nail gun might seem a bit intimidating. But trust me, once you understand what it is and how it works, you’ll see how it can transform your projects, making them faster, stronger, and frankly, a lot more fun. We’ll break down exactly what this tool is best for, what makes it different, and why it’s a game-changer for any serious DIYer. Get ready to build with confidence!
Table of Contents
What Exactly Is a Framing Nailer Used For?
Alright, let’s get straight to the heart of it. The main purpose of a framing nailer is to fasten together the structural components of a wooden building or project. Think of it as a super-powered hammer that drives nails in almost instantly. It’s designed for heavy-duty tasks where you need to join thick pieces of lumber securely and efficiently.
This isn’t the tool for delicate trim work or intricate furniture. No, the framing nailer is built for the heavy lifting in construction. Its job is to create the skeleton of your project, ensuring everything is held together tightly and can withstand significant stress. If you’re building something that needs to be strong and durable, like a house frame, a deck, or a sturdy shed, a framing nailer is your go-to tool.
The Core Purpose: Building Frameworks
When we talk about “framing” in construction, we’re referring to the foundational structure that supports the walls, roof, and floors of a building. This includes:
- Wall Studs: The vertical beams that form the walls of a house or shed.
- Floor Joists: The horizontal beams that support the flooring.
- Rafters and Trusses: Structural elements that form the roof.
- Beams: Larger, load-bearing horizontal supports.
A framing nailer makes connecting these heavy pieces of wood incredibly fast. Instead of manually hammering dozens, or even hundreds, of nails, you can drive them with a single squeeze of a trigger. This significantly speeds up the framing process, which is often the most labor-intensive part of a construction project.
Speed and Efficiency Are Key
Imagine building a deck frame. You might need to connect dozens of joists to a rim joist. If you were using a hammer, each nail would require multiple swings. With a framing nailer, it’s usually one quick press. This isn’t just about saving time; it’s about reducing fatigue, especially on large projects. The sheer repetitive nature of nailing by hand can wear you out quickly. A framing nailer lets you get more done with less physical strain.
Strength and Durability of Connections
Framing nailers drive nails that are typically longer and thicker than those used for other purposes. These robust nails create exceptionally strong joints. When driven properly, they create connections that are often stronger than hand-nailed joints. This is critical for the structural integrity of any building. The power of the nailer ensures the nails are driven deep into the wood, providing a secure hold that can withstand wind, weight, and the general stresses a structure endures over time. For safety and longevity, this is incredibly important. You can learn more about proper nailing techniques from resources like Fine Homebuilding, a reputable source for construction information.
What Types of Projects Are Best Suited for a Framing Nailer?
So, where does a framing nailer truly shine? It’s best for projects where structural integrity and speed are paramount. Here are some of the most common and effective uses:
Residential and Commercial Construction
This is the bread and butter of framing nailers. They are indispensable tools for building the skeletal structure of houses, apartment buildings, office blocks, and any other structure with wooden framing. From the initial foundation framing to the roof trusses, framing nailers are used constantly to join studs, joists, beams, and sheathing.
Deck Building and Renovation
Building a new deck or repairing an old one? A framing nailer is a must-have. It makes attaching joists to beams, securing ledger boards, and fastening deck boards much faster and more secure. The robust nails ensure your deck can handle weight and weather.
Shed and Outbuilding Construction
Whether you’re building a small garden shed, a workshop, or a larger garage, the framing nailer makes quick work of assembling the walls, roof structure, and any internal framing. It’s perfect for DIYers looking to build these structures efficiently.
Fence Building and Repair
Constructing a new fence involves lots of repetitive nailing for posts, rails, and pickets. A framing nailer drastically cuts down the time and effort needed. It also makes repairing existing fences much easier, allowing you to quickly reattach loose panels or replace damaged sections.
General Heavy-Duty Woodworking
Beyond standard construction, if you have any woodworking project that requires joining thick, heavy timbers – like rugged outdoor furniture, rustic shelving units, or even some types of timber framing – a framing nailer can be extremely useful. It simplifies the process of creating strong, permanent joints.
Types of Framing Nailers
Before you rush out and grab one, it’s good to know there are a few main types, each with its own power source and set of advantages. Understanding these will help you pick the right one for your needs and workshop setup.
Pneumatic Framing Nailers
These are the most common and often the most powerful. They run on compressed air supplied by an air compressor. You’ll need an air compressor and a hose to use one.
- Pros: Lightweight in hand (since the motor is in the compressor), powerful, reliable, generally less expensive upfront (though you need the compressor).
- Cons: Requires an air compressor and hose, which can be bulky and noisy. Limited by hose length.
Cordless Electric Framing Nailers
These nailers are powered by rechargeable batteries. Many are also “gas-powered,” meaning they use a small fuel cell (like a propane-like canister) combined with a battery. The battery powers the fan and ignition system, while the fuel cell provides the power for the nail firing.
- Pros: Highly portable, no hoses or compressors needed, great for job sites with no power or for working in tight spaces.
- Cons: Can be heavier in hand due to the battery/fuel cell, may be less powerful than pneumatic for very dense woods, fuel cells can be an ongoing cost, batteries need charging.
Electric Corded Framing Nailers
Less common for heavy-duty framing, these are plugged into a standard electrical outlet. They are usually lighter and less expensive than cordless options but are limited by the power cord.
- Pros: Unlimited power as long as it’s plugged in, generally lighter than cordless versions, no fuel cells or batteries to manage.
- Cons: Limited by the power cord, less portable, not ideal for large-scale construction or moving around a big job site.
Choosing the Right Framing Nailer: Key Considerations
Selecting the best framing nailer for your needs involves looking at a few key factors beyond just the power source. Here’s what to consider:
Nail Type and Size
Framing nailers use specific types of nails, usually collated at an angle. The most common are 21-degree and 30-degree nails. The angle is important because it determines the shape of the nail collation and how the nails feed into the gun. Ensure the nailer you choose accepts the type of nails you intend to use.
- 21-Degree Nailers: Use plastic-collated nails. They are very common and offer good performance, but plastic collation can sometimes break and scatter in extreme weather.
- 30-Degree Nailers: Use paper-collated nails. These are generally more resistant to weather and the collation often disintegrates cleanly, leaving less debris.
Nail length is also crucial. You’ll want a nailer that can drive nails long enough to go through your material and into the underlying piece for a strong hold. Common lengths range from 2 inches up to 3.5 inches.
Weight and Ergonomics
You’ll be holding this tool for extended periods. Its weight and how it feels in your hand (ergonomics) are very important. A heavy nailer can lead to increased fatigue and potential strain. Many professionals prefer lighter pneumatic models because the weight of the tool itself is less, with much of the weight distributed to the compressor. Try to hold a few different models if possible to see which feels best.
Power and Driving Depth
Make sure the nailer has enough power to drive nails consistently into the type of wood you’ll be using. Hardwoods can be more challenging for less powerful nailers. Most framing nailers allow you to adjust the driving depth, so you can ensure nails are set flush, slightly countersunk, or even fully buried without damaging the wood surface. The hardness of different wood species can significantly impact how easily nails drive. For example, oak is much harder than pine.
Depot Capacity and Loading
Consider how many nails the magazine (depot) can hold and how easy it is to reload. A larger capacity means fewer stops to reload, boosting efficiency. Easy loading mechanisms prevent fumbling and keep you on task.
Features Like Sequential vs. Contact Fire
Most framing nailers offer a mode switch for firing.
- Sequential Fire (Single Shot): You must press the nailer against the wood and pull the trigger for each nail. This offers the most control and precision, ideal for exact placement.
- Contact Fire (Bump Fire): You can hold the trigger down and “bump” the nose of the nailer against the wood to fire nails rapidly. This is much faster for general framing where speed is essential.
The ability to switch between these modes is highly beneficial for versatility.
Durability and Brand Reputation
Framing nailers are an investment. Look for brands known for their durability and reliability in the construction industry. Reading reviews and checking warranties can give you a good sense of a nailer’s longevity.
How to Use a Framing Nailer Safely and Effectively
Using a framing nailer can be incredibly efficient, but safety must always come first. These are powerful tools, and improper use can lead to serious injury. Here’s a breakdown of safe and effective operation:
Step 1: Safety First, Always!
Before you even pick up the nailer, put on your safety gear. This is non-negotiable.
- Safety Glasses: Essential to protect your eyes from flying debris or ricocheting nails.
- Hearing Protection: Nail guns are loud and can cause hearing damage over time.
- Work Gloves: Protect your hands from splinters and provide a better grip.
- Sturdy Footwear: Protect your feet from dropped materials or tools.
Step 2: Understand Your Nailer
Read the manufacturer’s manual! Every nailer is slightly different. Familiarize yourself with its specific controls, settings, and maintenance requirements.
- Power Source: If pneumatic, ensure your compressor is set to the correct PSI (pounds per square inch) as recommended by the nailer’s manual. Too high, and you risk damaging the tool or workpiece; too low, and nails won’t drive properly.
- Nail Type: Double-check that you’re using the correct size and type of nails for your specific nailer.
- Firing Mode: Understand how to switch between sequential and contact firing modes.
Step 3: Loading the Nailer
Always ensure the tool is not powered (air disconnected for pneumatic, or battery/fuel removed for cordless) when loading nails.
- Pull back the magazine’s feeder arm.
- Insert a full stick of the correct nails.
- Gently release the feeder arm to hold the nails in place.
- Reconnect the power source.
Step 4: Proper Placement and Positioning
Always place the nose of the nailer firmly against the wood you intend to nail. Do NOT rest the nailer on your hand or leg and then pull the trigger, even in contact-fire mode. This is how accidents happen. Keep your free hand and fingers away from the nailing path and the nose piece.
Step 5: Firing the Nail
- For Sequential Fire: Press the nose of the nailer firmly against the wood where you want the nail. Then, pull the trigger.
- For Contact Fire: With the trigger held down, firmly press the nose of the nailer against the wood. The nail will fire. To fire another nail, lift the nose slightly and reposition, then press down again. Practice to get a feel for the rhythm.
Ensure you are driving the nail into the structural part of the wood, not just the edge, and that it goes into the intended second piece of lumber for a strong connection.
Step 6: Troubleshooting and Maintenance
If nails aren’t driving properly, first check your air pressure (PSI) or battery charge. Ensure the nails aren’t bent or jammed. Consult your manual for specific troubleshooting steps. Regular cleaning and lubrication, as recommended by the manufacturer, will keep your nailer in top working condition. You can find maintenance guides on manufacturer websites or resources like Pro Tool Reviews.
Framing Nailer vs. Other Nail Guns: What’s the Difference?
It’s easy to get confused by the wide array of nail guns available. While they all drive nails, their design and purpose are very different. A framing nailer is built for power and speed in structural applications, whereas others are designed for more delicate or specific tasks.
| Nail Gun Type | Primary Use | Nail Size | Nail Head | Power | Best For |
|---|---|---|---|---|---|
| Framing Nailer | Structural framing, decks, fences, sheds | 2″ – 3.5″ | Round Head (mainly) | High Power | Speed, strength in |