Finish nailer depth gauge calibration ensures nails sink perfectly, preventing frustrating over- or under-driven fasteners. Adjusting this crucial setting correctly makes your woodworking projects look professional and saves you time and rework. Nailerguy’s simple guide will have you calibrating like a pro in no time.
Hey there, fellow DIYers and woodworkers! Jack Shaffer here from Nailerguy. Ever load up your finish nailer, ready to tackle that beautiful trim or build that cabinet, only to have the nails either pop out proud of the wood or get driven so deep they tear through the delicate surface? It’s a common frustration, and I’ve seen it more times than I can count at workshops and job sites. This usually means your finish nailer’s depth gauge needs a little adjustment. Don’t worry, it’s not complicated! We’re going to walk through how to calibrate your finish nailer’s depth gauge step-by-step. This simple fix will have your nailer driving nails perfectly flush, making your projects look fantastic and saving you a ton of headaches and rework.
So, let’s get started and make sure your nailer is always set for success!
—
Table of Contents
Why Calibrating Your Finish Nailer Depth Gauge Matters
Imagine putting the finishing touches on a piece of furniture, and every nail you drive sticks out like a sore thumb. Or perhaps you’re attaching delicate molding, and the nails shatter the wood around them. These are classic signs that your finish nailer’s depth gauge isn’t set correctly. The depth gauge, sometimes called the depth adjustment or nosepiece, controls how far the nail is driven into the material. Getting it right is critical for a clean, professional finish.
A properly calibrated depth gauge ensures your nails are driven to the perfect depth:
Flush every time: Nails sit just below the surface, ready for a light touch-up of wood filler.
No surface damage: You won’t break or splinter the wood by driving nails too deep.
No proud nails: You won’t have nails sticking out, which looks unprofessional and can snag on things.
Consistent results: Every nail is driven to the same depth, providing a uniform appearance.
This simple calibration process is one of the most valuable skills for anyone using a finish nailer. It directly impacts the quality of your work and can save you significant time and effort in post-nailing corrections.
—
Understanding Your Finish Nailer’s Depth Adjustment Mechanism
Before we dive into calibration, it’s helpful to understand how the depth adjustment usually works on your finish nailer. Most modern finish nailers use a rotating collar or a thumbwheel located near the nose of the tool.
Rotating Collar: Many tools have a collar that you can twist. Often, turning it in one direction (usually marked with a “+” or higher numbers) drives the nail deeper, while turning it the other way (marked with a “-” or lower numbers) makes the nail sink less deeply.
Thumbwheel: Some models feature a small wheel that you can spin with your thumb. The principle is the same: adjust the wheel to control the nail depth.
Lever/Button Systems: Less common, but some nailers might have a button or lever you press to engage different depth settings.
Important Note: Always consult your specific tool’s manual for exact instructions on how to adjust the depth on your model. Tools can vary! You can usually find digital copies of your owner’s manual on the manufacturer’s website if you can’t find the physical one.
—
Tools You’ll Need for Calibration
Fortunately, calibrating your finish nailer depth gauge is straightforward and doesn’t require a lot of specialized tools. Here’s what you’ll want to have handy:
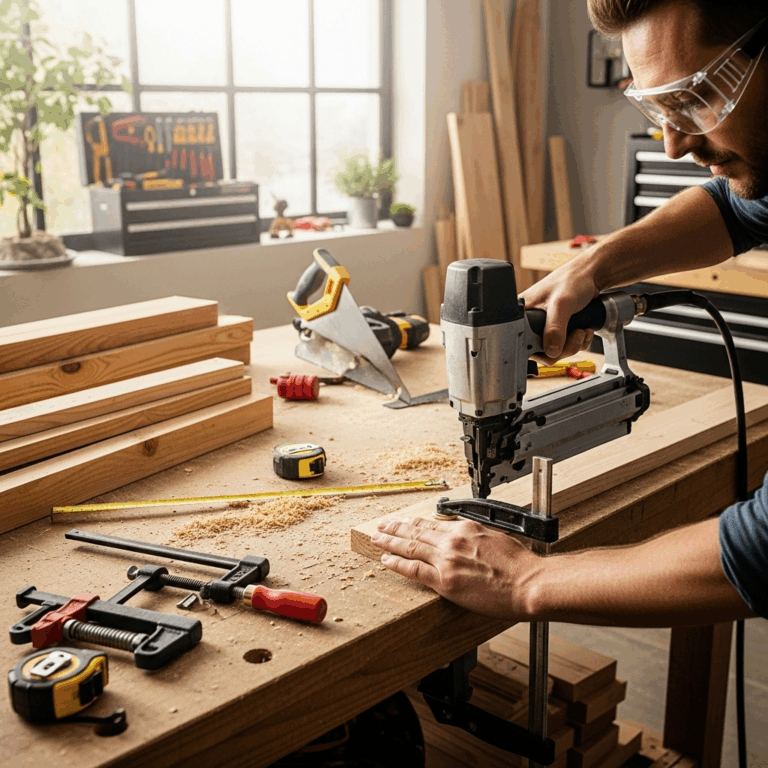
Your Finish Nailer: Of course! Make sure it’s charged with air and loaded with nails.
Air Compressor (if pneumatic): Ensure it’s set to the manufacturer’s recommended operating pressure. Over-pressurizing can lead to inconsistent nail depth and even damage your tool.
Scrap Wood: You’ll need pieces of the same material you plan to work with for testing. Different wood types and thicknesses behave differently.
Measuring Tape or Ruler: To accurately gauge how deep your nails are driven.
Safety Glasses: Always protect your eyes when working with power tools, especially when firing nails.
Optional: Utility Knife or Chisel: For gently removing any test nails that are too proud or slightly overdriven, without damaging the surrounding wood.
—
Step-by-Step: Calibrating Your Finish Nailer Depth Gauge
This process is all about trial and error, but by following these steps, you’ll efficiently find that sweet spot for perfect nail depths.
Step 1: Prepare Your Workspace and Nailer
Choose your Scrap Wood: Grab a piece of scrap wood that is the same species and thickness as your project material. This is crucial because different woods will accept a nail differently. A piece of 3/4-inch pine, for example, will behave differently than a piece of 1/2-inch oak.
Set Your Air Pressure: If you’re using a pneumatic nailer, connect it to your air compressor. Make sure the compressor is set to the recommended operating pressure for your nailer. This is usually listed in your tool’s manual and is often in the range of 70-120 PSI (pounds per square inch). Using too much or too little air pressure will affect how deep the nail drives, regardless of the depth gauge setting.
Load Your Nailer: Insert the correct size finish nails into your nailer according to the manufacturer’s instructions.
Step 2: The First Test Shot
Start with the “Medium” Setting: If your nailer has numbered settings or distinct positions, start somewhere in the middle. If it’s a continuous adjustment, just pick a neutral spot.
Position the Nailer: Hold the nailer firmly against the scrap wood. For most depth adjustments, you’ll want to press the nose of the tool firmly against the surface. Some nailers have a “contact trip” or “sequential trip” mode. For depth setting, you typically want to press the nose down first, then pull the trigger (sequential trip) or pull the trigger while pressing it down (contact trip – but ensure it’s in the correct mode for depth testing). The goal is to ensure the nailer is ready to fire.
Fire a Nail: Squeeze the trigger while the nosepiece is firmly against the wood and drive one nail.
Step 3: Assess the Nail Depth
Examine the Nail: Carefully look at the nail you just fired. Is it sticking out above the surface? Is it driven too deep, creating a divot or splintering the wood?
Measure (if needed): If it’s hard to tell, use your ruler or measuring tape to gauge the depth. A perfect drive should have the nail head just slightly below the surface, often referred to as “countersunk” or “flush.” This allows for a thin layer of wood filler or putty to conceal the nail without being too noticeable.
Step 4: Adjust the Depth Gauge
Too Proud (Sticking Out): If the nail head is clearly visible above the wood surface, you need to drive the nail deeper.
Action: Adjust your nailer’s depth setting to drive nails deeper. For a rotating collar, turn it towards the “+” or higher numbers. For a thumbwheel, spin it in the direction that indicates deeper penetration.
Too Deep (Splintering/Divot): If the nail has driven too far into the wood, tearing the surface or creating an excessive indentation, you need to drive nails less deeply.
Action: Adjust your nailer’s depth setting to drive nails shallower. Turn the collar towards the “-” or lower numbers. Spin the thumbwheel in the direction that indicates less force or shallower depth.
Just Right: If the nail head is just slightly below the surface and the wood is not damaged, you’ve found your setting!
Step 5: Repeat and Refine
Fire Another Nail: After making an adjustment, fire another nail into a different spot on your scrap wood.
Check Again: Assess the depth of this new nail. Is it closer to your desired setting?
Continue Adjusting: Keep making small adjustments and firing test shots until you achieve consistent, perfect nail depths. It might take 3-6 test nails to dial it in perfectly.
Fine-Tuning for Different Materials
Remember that your calibration might need slight adjustments if you switch materials. Softwoods like pine might require a shallower setting than hardwoods like oak or maple, as hardwoods are denser and resist nail penetration more.
Softwoods (Pine, Fir): Tend to be softer and easier to drive nails into. You might need a shallower setting to prevent overdriving and splintering.
Hardwoods (Oak, Maple, Cherry): Are denser and harder. You might need a slightly deeper setting, or at least ensure your air pressure is adequate, to drive nails sufficiently.
Veneers and Thin Materials: These are very delicate. You’ll likely need a much shallower setting to avoid puncturing through the veneer or cracking the thin core material.
Always perform a test shot on the exact material and thickness you’ll be using for your project. For very thin materials, you might want to test on two layers glued together to better simulate the conditions.
—
Troubleshooting Common Finish Nailer Depth Issues
Even after calibration, you might run into a few snags. Here are some common problems and their solutions:
Nails Consistently Not Driving Deep Enough
Check Air Pressure: Is your compressor regulator set low? Is your air hose kinked? Is the compressor running out of air? Ensure consistent, adequate air pressure reaching the tool. You can often find a gauge on your air compressor’s regulator.
Nailer Needs Lubrication: Air nailers require regular lubrication to operate smoothly. Check your manual for recommended lubrication schedules and types of oil (usually specialized air tool oil, not WD-40!).
Worn Spring or Driver Blade: Over time, internal parts like the spring that powers the driver blade or the driver blade itself can wear out. If your nailer is old or has seen heavy use, this could be the culprit.
Depth Adjustment Stuck: Make sure the depth adjustment collar or wheel isn’t jammed or obstructed.
Nails Consistently Driving Too Deep or Splintering Wood
Depth Adjustment Set Too Deep: This is the most obvious. Simply turn the depth adjustment to a shallower setting.
Excessive Air Pressure: While less common for over-driving (as the depth gauge is mechanical), extremely high air pressure can sometimes contribute by driving the nail with too much force before the mechanism stops it. Always use the recommended PSI.
Damaged Nosepiece: inspect the nosepiece of your nailer. If it’s damaged, bent, or has burrs, it might not be seating properly on the wood, leading to inconsistent depth.
Soft Wood: As mentioned, very soft woods might require a shallower setting.
Inconsistent Nail Depth (Some Nails Deep, Others Shallow)
Check Air Pressure Consistency: Is your compressor’s regulator fluctuating? Is the tool’s internal pressure regulator (if it has one) malfunctioning?
Loose Nosepiece: Ensure the nosepiece of your nailer is securely attached. If it’s loose, it won’t apply consistent pressure to the wood.
Trigger Mode: Make sure your nailer is in the correct firing mode for depth testing (usually sequential trip, where you press to the wood, then pull the trigger). Some contact trip modes can be finicky if not pressed perfectly flush.
Nail Strips Not Feeding Correctly: Ensure nails are feeding smoothly from the magazine. A jam or misfeed can cause inconsistent firing.
—
Maintaining Your Finish Nailer for Optimal Performance
Keeping your finish nailer in good working order contributes to consistent depth control and overall performance. Here are a few maintenance tips to keep in mind:
Regular Lubrication: As mentioned, air tools need oil. Consult your manual for how often and how much to lubricate. Usually, this involves adding a few drops of air tool oil to the air inlet before each use or after a certain number of hours.
Cleanliness: Keep the tool clean, especially the nosepiece and magazine. Debris can affect how the tool seats and fires. Wipe it down after use.
Check for Damage: Periodically inspect the tool for any cracks, worn parts, or damage, particularly around the nose where it contacts the workpiece.
Proper Storage: Store your nailer in a dry place, disconnected from air, and ideally in its case to protect it from dust and damage.
Understand Air Pressure: Always use the recommended air pressure. Too high and you risk damage and inconsistent drives; too low and you won’t get proper power.
A well-maintained nailer is a reliable nailer, and a reliable nailer makes your projects go much smoother.
—
When to Consider Professional Help or Replacement
For most DIYers and hobbyists, the depth gauge calibration described above will be sufficient. However, if you’ve tried everything and are still experiencing significant issues, it might be time to consider other options.
Persistent Inconsistency: If no amount of adjustment yields reliable results, and you’ve checked air pressure, lubrication, and basic wear, the internal mechanisms might be faulty.
Physical Damage: If the nosepiece is significantly bent, cracked, or damaged, it can affect seating and depth. This might be a replaceable part, but on some cheaper models, it could be cost-prohibitive.
Constant Jams: While some jams are user error or nail-related, if your nailer is constantly jamming despite using correct nails and maintaining it, it could indicate a deeper internal problem.
* Age and Wear: Like any tool, finish nailers have a lifespan. If yours is very old, has seen heavy professional use, and is constantly giving you trouble, it might be more economical and less frustrating to invest in a new one.
You can often find replacement parts and repair guides on the manufacturer’s website or through reputable tool repair shops. For many common models, simple repairs are very achievable.
—
Conclusion
There you have it! Calibrating your finish nailer’s depth gauge is a fundamental skill that will elevate the quality of your woodworking projects. By understanding how the adjustment works, using the right tools, and following a systematic approach with test shots, you can achieve perfectly set nails every time. Remember to test on your specific material, make small adjustments, and be patient. A little bit of care and attention to this detail will save you countless hours of rework and make your finished pieces look incredibly professional.
So, next time you pick up your finish nailer, take a moment to ensure its depth gauge is perfectly calibrated. Your trim work, furniture builds, and DIY projects will thank you for it! Happy Nailing!
—
Frequently Asked Questions About Finish Nailer Depth Gauge Calibration
Q1: What is the ideal depth for a finish nail?
The ideal depth is typically flush with or slightly sunk below the surface of the wood. This allows you to easily cover the nail head with a tiny bit of wood filler or putty, making it virtually invisible without creating a deep divot that requires a lot of filling or risks cracking the surrounding material.
Q2: Do I need to calibrate my finish nailer for every new type of wood I use?
While a good starting point is often found, it’s highly recommended to do a quick depth check and minor adjustment when switching between significantly different wood types (like pine versus oak) or thicknesses. Softwoods are easier to drive into, while hardwoods require more power, affecting the final depth.
Q3: How do I know what air pressure to use for my finish nailer?
Always refer to your finish nailer’s user manual. It will specify the recommended operating air pressure range, typically measured in PSI (pounds per square inch). Using an air compressor with a regulator helps you maintain this crucial setting for consistent performance.
Q4: My nailer is driving nails too deep and splitting the wood. What should I do?
This indicates that the depth setting is too aggressive. You need to adjust your nailer to drive nails shallower. Look for the depth adjustment collar or wheel near the nose of the tool and turn it in the direction that reduces the nail penetration (often marked with a “-” or lower numbers).
Q5: What if my nails are not driving in deep enough?
First, ensure your air pressure is set correctly and is consistent. If the air pressure is adequate, you’ll need to adjust the depth setting to drive nails deeper. Turn the adjustment collar or wheel in the direction that increases penetration (often marked with a “+” or higher numbers).
Q6: Can I use a finish nailer on very thin material like 1/4-inch plywood or veneer?
Yes, but you’ll need to be extremely careful and set your depth gauge to its shallowest possible setting. Thin materials are easily damaged or split. It’s advisable to test on scrap pieces that mimic the thin material or a double layer of it to find the right setting before working on your actual project.
Q7: How often should I lubricate my finish nailer?
It’s generally recommended to lubricate pneumatic nailers with a few drops of specialized air tool oil before each day of use or after approximately 1000-2000 shots, depending on the manufacturer’s instructions. Over-lubricating can also cause issues, so follow your manual’s guidance.