This essential tutorial breaks down how to adjust your finish nailer’s depth setting. Proper adjustment ensures nails are driven flush or slightly countersunk without damaging your workpiece, leading to cleaner, professional results on all your DIY projects.
Hey DIYers, Jack Shaffer here from Nailerguy! Ever fired a nailer and had the nail pop out too far, or worse, sink so deep it ripped through your beautiful woodworking? It’s a bummer, I know. But don’t worry, getting that perfect nail depth is totally achievable. It’s one of those little tweaks that make a HUGE difference in how your projects look and hold up. We’re going to walk through exactly how to get your finish nailer’s depth adjustment just right, so you can tackle those trim pieces, furniture builds, and home repairs with confidence. Ready to master this crucial setting? Let’s dive in!
Table of Contents
Why Finish Nailer Depth Adjustment Matters
Imagine you’re attaching delicate trim to a wall. If your finish nailer drives the nails too deep, you’ll create unsightly divots, requiring extra filling and sanding. On the flip side, if the nails don’t go in far enough, they’ll stick out, creating a tripping hazard and looking unfinished. Getting the depth just right means your nails will sit flush with the surface, or sink just enough to be hidden by a touch of wood filler or paint. This precision is the hallmark of professional craftsmanship, and it’s within your reach!
This adjustment isn’t just about looks; it’s about the structural integrity of your work. Properly set nails hold components together securely without compromising the wood’s surface. For example, when building cabinets or installing baseboards, the nail depth needs to be consistent to prevent joints from pulling apart or surfaces from being marred.
Understanding Your Finish Nailer’s Depth Adjustment Mechanism
Most modern finish nailers have a straightforward depth adjustment system. Typically, it’s a rotating wheel, a thumb screw, or a lever located near the nose of the tool. These mechanisms control how far the firing pin drives the nail into the material.
Rotating Wheels/Dials: These are often the most common. You’ll usually see markings or arrows indicating “deeper” or “shallower.” Turning the wheel in one direction drives nails deeper, and in the other, it makes them shallower.
Thumb Screws: Similar to wheels, these can be tightened or loosened to adjust depth.
Levers: Some tools use a lever that you slide up or down.
The key is to understand how your specific model works. Check your owner’s manual if you’re unsure – it’s the best guide for your tool!
Common Depth Adjustment Locations
Here’s a quick rundown of where you might find the adjustment control on your finish nailer. Always refer to your specific model’s manual for exact placement and operation.
| Nailer Type | Typical Adjustment Location | Adjustment Method |
|---|---|---|
| Pneumatic Finish Nailer | Near the nose of the gun, often behind or above the magazine. | Rotating wheel, thumb screw, or sometimes a small lever. |
| Cordless (Battery-Powered) Finish Nailer | Similar to pneumatic, usually near the nose. Some models might have digital interfaces. | Rotating wheel or dial is most common. |
| Electric (Corded) Finish Nailer | Often located on the body of the tool or near the nose. | Dial or wheel. |
Pre-Adjustment Safety Checks
Before you even think about adjusting anything, safety FIRST! It’s the golden rule of DIY and woodworking. A loaded nailer can be dangerous, so always follow these steps:
1. Disconnect Power: For pneumatic nailers, this means unhooking the air hose. For cordless and electric models, remove the battery or unplug the tool from the power source.
2. Remove All Nails: Eject any nails currently loaded in the magazine. This prevents accidental firing while you’re working on settings.
3. Point in a Safe Direction: Always aim the nailer away from yourself and others. Even without power, it’s good practice.
Think of these as your pre-flight checks. They’re quick, easy, and crucial for preventing injuries.
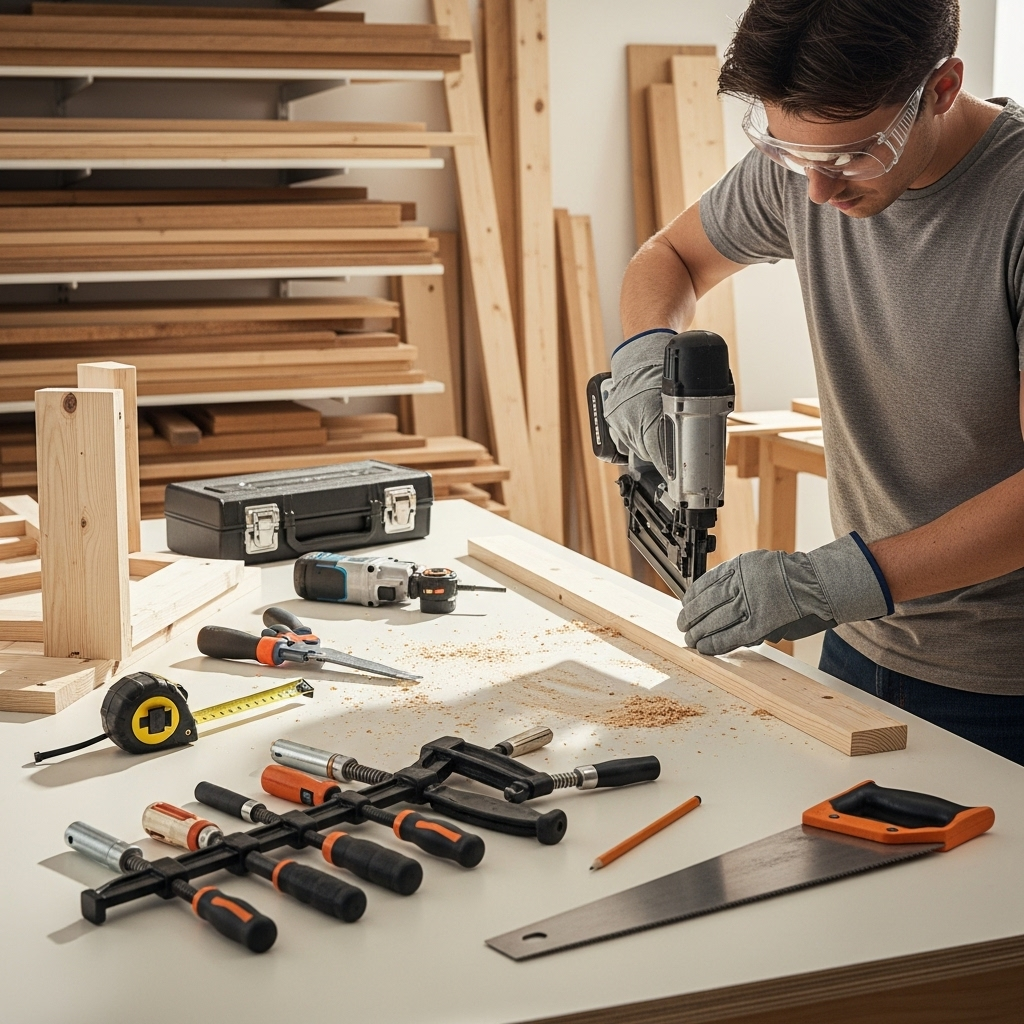
Step-by-Step: Your Finish Nailer Depth Adjustment Tutorial
Now for the main event! Getting the depth adjustment right is all about trial and error, but we can make that process efficient and painless.
Step 1: Gather Your Materials
You’ll need:
Your finish nailer
Air compressor and hose (if pneumatic)
Battery and charger (if cordless)
Extension cord (if electric)
Wood scraps for testing – ideally, the same type of wood you’ll be working on. Use a piece large enough to allow for several test nails and their removal if needed.
Eye protection (safety glasses or goggles) – absolutely essential!
Hearing protection (earplugs or earmuffs) – nailers can be noisy.
A hammer and nail set (optional, for removing test nails and checking depth).
Step 2: Connect and Prepare Your Nailer
Pneumatic: Connect your air hose. Set your compressor to the lower end of the nailer’s recommended operating pressure range. You can find this information in your tool’s manual, usually around 70-100 PSI for finish nailers.
Cordless/Electric: Ensure the battery is charged and inserted, or that the tool is plugged in.
Step 3: Perform Your First Test Shot
1. Load a few nails into your finish nailer as you normally would.
2. Place the nose of the nailer firmly against your scrap piece of wood.
3. Crucially, ensure the safety tip (the little metal piece at the nose) is depressed against the wood. This is what allows the nailer to fire.
4. Briefly pull the trigger. Listen for the “thwack” and feel the nail drive.
5. Release the trigger.
Step 4: Inspect the Nail Depth
Now, look closely at the nail you just fired.
Is it too high? The head of the nail is sticking out proud of the wood surface.
Is it just right? The head is flush with the surface, or slightly countersunk (a tiny bit below the surface). This is what we’re aiming for!
Is it too deep? The nail head has driven into the wood, creating a noticeable divot or even splitting the wood.
The ideal depth is usually flush or slightly countersunk. This allows for easy filling with wood putty or spackle before painting or finishing.
Step 5: Adjust the Depth Setting
Based on your inspection, it’s time to tweak.
If the nail is too high: You need to drive it deeper. Turn your depth adjustment mechanism in the direction that increases nail penetration. Usually, this is indicated by a “+” sign, an arrow pointing down, or simply by turning the dial/wheel in the direction that feels like it’s pushing the firing pin further out.
If the nail is too deep: You need to pull it back. Turn your depth adjustment mechanism in the direction that decreases nail penetration. This is often marked with a “-” sign or an arrow pointing up.
Remember, small adjustments often make a big difference. Don’t crank the dial all the way! Make one or two clicks or a slight turn, then test again.
Step 6: Test and Refine – The Iterative Process
This is where you hone in on that perfect setting.
1. After making an adjustment, fire another nail into a different spot on your scrap wood.
2. Inspect the depth again.
3. Repeat steps 5 and 6 until the nail depth is exactly how you want it. Be patient! It might take 3-5 test shots to get it perfect.
Pro Tip: Different wood species and densities will affect how nails drive. If you’re working with very soft pine, you might need a shallower setting than you would for hard oak. Also, if you change the air pressure on a pneumatic nailer, you’ll likely need to re-adjust your depth setting.
Step 7: Re-Check Air Pressure (for Pneumatic Nailers)
Once you’ve found the sweet spot for depth, double-check your air pressure. The ideal range for most finish nailers is between 70-120 PSI, but always consult your manual. Setting it too low can lead to under-driven nails, while setting it too high risks over-penetration and damaging your workpiece. Finding the right balance is key for consistent performance. According to Fine Homebuilding, maintaining consistent air pressure is vital for reliable nail gun operation.
Troubleshooting Common Depth Issues
Sometimes, even with adjustments, you might encounter problems. Here are a few common ones and how to fix them:
Nails Always Too High/Low, Regardless of Adjustment:
Check Air Pressure: Is it within the recommended range for your nailer? Too low for high nails, too high for low nails (though this is less common for over-penetration issues).
Mechanical Issue: There might be a problem with the depth adjustment mechanism itself, or a spring or seal inside the tool could be worn. If you’ve tried everything, it might be time for a service or replacement.
Damaged Nose Piece: Inspect the tip of the nailer for damage. A bent or worn nose can affect how the nail is presented and driven.
Nails Driving at Inconsistent Depths:
Uneven Air Pressure: If you’re using a compressor, ensure it’s maintaining consistent pressure. Check your regulator.
Nail Jams or Feeding Issues: A partially jammed nail or a misfed nail can cause inconsistent depth. Clear the magazine and check for any debris.
Tool Angle: Make sure you’re holding the nailer square to the surface. Firing at an angle can lead to uneven penetration.
Surface Irregularities: If you’re nailing into uneven wood grain or knots, expect some variation.
Wood Splitting or Mushrooming:
Nail Too Deep: This is the primary cause. Reduce your depth setting.
Air Pressure Too High: Lower the PSI on your compressor.
Nailing Too Close to Edge: Wood is weakest at the edges. Try nailing slightly further in, or consider a different fastening method like glue and clamps for critical joints.
Wrong Nail Size: Using too large a gauge nail for the wood can cause splitting. For delicate trim, a 16-gauge or 18-gauge nail is usually best.
Best Practices for Finish Nailer Depth Control
Beyond just adjusting the setting, a few habits will help you maintain excellent nail depth control:
Consistent Pressure: Apply firm, consistent pressure when firing the nailer. Don’t “stab” at the trigger; pull it smoothly while maintaining contact.
Square Contact: Always ensure the nose of the nailer is held perpendicular (90 degrees) to the surface you’re nailing. Angling the tool will cause inconsistent drives and can split wood.
Test on Scrap: I can’t stress this enough! Always, always, always test on a scrap piece of the exact material you’ll be working on before firing into your project.
Clean Tool: Keep your nailer clean. Dust and debris can interfere with the firing mechanism and affect depth consistency. Refer to your manual for cleaning instructions.
Regular Maintenance: For pneumatic nailers, oiling the air line regularly with tool oil is essential for longevity and performance. Check O-rings and seals periodically. The Occupational Safety and Health Administration (OSHA) provides guidance on safe operation of compressed air equipment, reminding users of the importance of proper maintenance.
Know Your Materials: Softer woods require less power and might be more prone to over-penetration. Hardwoods might require more power and can sometimes resist nails more. Adjust accordingly.
When to Use a Nail Set
Sometimes, despite your best efforts, a nail head might sit just a hair too proud of the surface, or you might want to ensure it’s perfectly flush. This is where a nail set comes in handy.
A nail set is a simple tool, essentially a metal rod with a pointed tip. You place the tip on the nail head and strike the other end with a hammer. This gently taps the nail head below the surface.
How to use a nail set:
1. Hold the nail set firmly against the nail head.
2. Tap it with a hammer, applying just enough force to sink the nail to your desired depth.
3. This is especially useful for hardwoods or areas where you want a perfectly flush finish for painting.
Frequently Asked Questions About Finish Nailer Depth Adjustment
Q1: How do I know what the “correct” depth is for my finish nailer?
A1: The correct depth is generally flush with the surface of the wood, or slightly countersunk (just below the surface). This allows for easy filling with wood putty or spackle before painting or finishing. It’s always best to test on scrap material first to determine what looks and feels right for your specific project.
Q2: Can changing the air pressure affect my nailer’s depth adjustment?
A2: Absolutely! For pneumatic nailers, air pressure directly influences the force driving the nail. If you adjust your depth setting and then change the air pressure, you will likely need to re-adjust your depth setting. Aim for consistency in both.
Q3: My nailer’s depth adjustment knob doesn’t seem to do anything. What’s wrong?
A3: This could indicate a mechanical issue. First, ensure the tool is powered (air connected, battery in, or plugged in) and that you’re attempting to fire it correctly (safety tip depressed). If that’s all fine, the adjustment mechanism might be stripped or jammed internally, or a crucial component like a spring or O-ring could be damaged. You may need to consult your manual for troubleshooting or consider professional repair.
Q4: Should I adjust my depth for different types of wood?
A4: Yes, you should. Softer woods like pine will accept nails more easily, so you might need a shallower setting or less air pressure. Hardwoods like oak or maple will resist nails more, requiring deeper settings or more air pressure to drive them flush. Always test on scrap material of the same wood type.
Q5: What’s the difference between a finish nailer and a brad nailer’s depth adjustment?
A5: The fundamental principle of depth adjustment is the same for both tools: controlling how deep the nail penetrates the material. However, finish nailers typically use larger gauge nails and may require more force, so their depth adjustment systems are often more robust. Brad nailers use smaller, thinner nails, making them ideal for delicate trim where over-penetration is a significant concern. Both require careful adjustment for optimal results.
Q6: How often should I check and adjust my nailer’s depth?
A6: You should check and adjust your depth setting every time you start a new project, switch to a different type of material, or if you notice inconsistent nail depths. It’s also a good idea to test after any significant maintenance or if you’ve changed your air pressure.
Q7: What if my nail is consistently not sinking deep enough, even on the lowest setting and highest pressure?
A7: This usually points to an issue with power. For pneumatic nailers, check that your air compressor is putting out sufficient PSI and that your regulator is set correctly. Ensure your air hose isn’t kinked or too narrow (e.g., using a 1/4-inch hose on a tool that needs 3/8-inch). For cordless tools, make sure the battery is fully charged. If all these are optimal, there might be an internal issue with the nailer, like a worn driver blade or internal seal, requiring professional attention. For instance, the U.S. Department of Labor’s Bureau of Labor Statistics notes that tools with a “sequential-trip trigger” (most finish nailers) are safer, but consistent operation still relies on proper power and tool health.
Conclusion
Mastering your finish nailer’s depth adjustment is a game-changer for any DIY enthusiast or woodworker. It’s the key to achieving clean, professional-looking results on trim, furniture, and countless other projects. By understanding your tool, prioritizing safety, and practicing the simple steps of testing and adjusting, you can ensure every nail driven contributes to the quality and beauty of your work.
Remember, patience and practice are your best friends here. Don’t get discouraged if it takes a few tries to get it perfect. Every nailer is a little different, and every piece of wood behaves uniquely. With this guide, you’re well-equipped to dial in that perfect depth. Now go forth and build something amazing, with nails driven just right! Happy Nailing!