Quick Summary
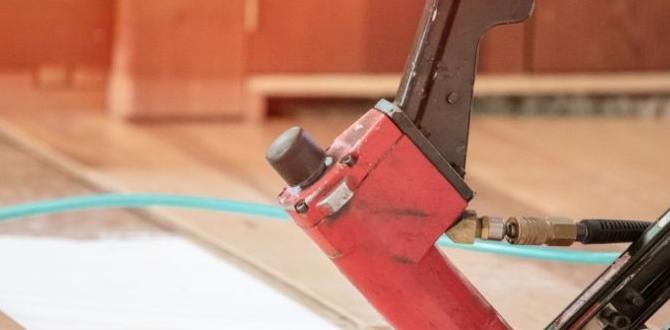
A finish nailer is the essential tool for cabinet building, providing fast, strong, and clean fastening for cabinet boxes, face frames, and trim. It drives nails with minimal surface damage, ensuring professional-looking results with ease, making it a must-have for DIYers and pros alike.
Hey there, fellow woodworkers! Jack Shaffer here, your guide from Nailerguy. Ever dreamt of building your own beautiful kitchen cabinets or custom storage solutions? It’s a fantastic way to personalize your space and save some money. But let’s be honest, getting those joints perfectly aligned and securely fastened can feel like a puzzle, especially when you’re just starting out. The good news? There’s a secret weapon that makes cabinet building a whole lot easier and the results look incredibly professional. We’re talking about the humble, yet mighty, finish nailer. This tool is a game-changer, and I’m here to show you exactly why and how it’s your best friend for cabinet projects.
Building cabinets involves a lot of connections. You need to join pieces of wood together firmly so your cabinets are sturdy and last for years. Clamps and wood glue are essential, sure, but a little extra help goes a long way. That’s where the finish nailer shines. It’s designed to drive small, slender nails that hold pieces together while glue dries, and they leave behind a much smaller hole than screws or larger nails, meaning less filling and sanding later. This means faster assembly and a cleaner look, which is exactly what most of us want when tackling a project like cabinet building.
In this guide, we’ll dive deep into why a finish nailer is so crucial for cabinet making. We’ll cover the different types, what to look for, and then walk through exactly how to use it effectively for various cabinet components. Ready to elevate your cabinet game? Let’s get started and make those dream cabinets a reality!
Table of Contents
Why a Finish Nailer is Your Cabinet Building MVP
When you’re building cabinets, precision and appearance are key. You want strong joints that will hold up to daily use, but you also want them to look clean and professional. This is where a finish nailer proves its worth. It’s not just about speed; it’s about the quality of the joinery it helps you achieve. Think of it as your reliable assistant, holding things steady and securely without making a mess of your beautiful wood.
Unlike a hammer and nails, a finish nailer drives nails quickly and accurately. This means you can assemble cabinet boxes, attach face frames, and install trim much faster. And the best part? The nail holes are small and neat, often disappearing once you fill them with wood putty and sand. This dramatically cuts down on finishing time and effort, leading to a professional-looking outcome that will make you proud.
Here’s a quick rundown of why it’s such a vital tool:
- Speed and Efficiency: Assemble cabinet parts in a fraction of the time it would take with manual nailing.
- Clean Aesthetics: Drives slender nails that leave minimal, easily concealable holes for a smooth finish.
- Strong Joints: Provides excellent holding power, especially when used with wood glue, ensuring durable cabinets.
- Versatility: Works well for various cabinet components, from carcass construction to attaching delicate trim.
- Reduced Fatigue: Takes the strain off your arms and wrists compared to hammering.
Choosing the Right Finish Nailer for Cabinet Building
Not all finish nailers are created equal, and picking the right one can make a big difference in your cabinet-building experience. The biggest decision you’ll face is between pneumatic (air-powered) and cordless (battery-powered) models. Each has its pros and cons, and what’s best for you often depends on your workspace and how often you’ll be using it.
Pneumatic Finish Nailers
These are the traditional workhorses. They are powered by an air compressor, which is a separate piece of equipment. They tend to be lighter in hand and often less expensive upfront than cordless models. If you already have an air compressor or plan on doing a lot of woodworking where you can set up an air line, a pneumatic nailer is a fantastic choice.
Pros:
- Generally lighter in the hand.
- Often more affordable for the tool itself.
- Reliable and powerful.
- No batteries to charge or maintain.
Cons:
- Requires an air compressor and air hose, adding bulk and setup time.
- The compressor can be noisy.
- Hose can get in the way during use.
Cordless Finish Nailers
These are battery-powered and offer incredible freedom of movement. They contain the motor and air mechanism (or in some cases, a gas cartridge) all within the tool itself. They are fantastic for portability and for working in areas where running an air hose is impractical, like on a job site or in a finished room.
Pros:
- Utterly portable with no hoses or compressors.
- Ideal for working in tight spaces or on-site.
- Easy and quick to set up and use.
Cons:
- Can be heavier due to the battery.
- Higher upfront cost.
- Battery life is a consideration; you might need extras.
- May have slightly less power or firing speed than some pneumatic models.
Key Features to Consider for Cabinet Building:
Regardless of the power source, a few features are particularly important for cabinet work:
- Nail Size Capacity: For cabinet building, you’ll typically use 16-gauge or 18-gauge finish nails. 16-gauge nails (often called “finish nails”) are a bit thicker and provide more holding power for structural joints like cabinet sides to bottoms. 18-gauge nails (often called “brad nails”) are thinner and are excellent for attaching face frames, drawer fronts, and delicate trim where a less visible hole is paramount. Many nailers can handle a range of nail lengths, which is also beneficial. Look for a nailer that can drive nails from about 3/4-inch up to 2 or 2.5 inches long.
- Depth Adjustment: This is crucial! You need to be able to control how deep the nail drives into the wood. Too deep, and you risk going through the other side of thin material or damaging delicate veneers. Too shallow, and the nail won’t be seated properly. A tool-free depth adjustment dial is a fantastic feature.
- No-Mark Tip: Some nailers come with a rubber or plastic tip on the muzzle. This prevents accidental denting or marring of the wood surface, which is especially important when working with pre-finished materials or hardwoods.
- Selectable Trigger: The ability to switch between single-sequential firing (one nail per trigger pull) and contact firing (hold the trigger and bounce the nose on the surface to fire nails rapidly) gives you control. For precise placement, sequential firing is best. For quickly attaching trim or many small pieces, contact firing is faster.
- Compact Design: A more compact and lightweight nailer will be easier to maneuver into corners and hold for extended periods.
For cabinet building specifically, a 16-gauge finish nailer is often considered the most versatile. It has enough holding power for cabinet carcasses and face frames while still being slender enough for clean results. If you plan on doing a lot of intricate trim work or attaching drawer fronts, an 18-gauge brad nailer might complement your 16-gauge. Many woodworkers own both!
Understanding Nail Gauges for Cabinetry
The “gauge” of a nail refers to its diameter – the lower the gauge number, the thicker the nail. This distinction is important for cabinet building because different tasks require different levels of holding power and subtlety.
Here’s a quick breakdown:
| Gauge | Nail Type | Typical Use in Cabinet Building | Advantages | Disadvantages |
|---|---|---|---|---|
| 15-Gauge | “F” Nail (Finish Nail) | Heavy-duty cabinet joinery, attaching thick cabinet backs. | Excellent holding power, very strong joints. | Larger head, more visible hole, requires a more powerful nailer. |
| 16-Gauge | “FN” Nail (Finish Nail) | The workhorse: Attaching face frames, cabinet carcasses (sides, top, bottom), drawer boxes. | Good balance of holding power and a relatively small, easy-to-fill hole. Versatile. | Slightly larger hole than 18-gauge. |
| 18-Gauge | “BN” Nail (Brad Nail) | Attaching thin cabinet backs, drawer fronts, delicate trim, moldings, hardware. | Smallest hole, almost invisible, minimal wood damage, great for delicate work. | Less holding power; best used with glue for structural joints. |
For most cabinet projects, a 16-gauge finish nailer is the sweet spot. It provides enough strength for the main cabinet structure and face frames, and the holes are manageable for finishing. If you are building very large, heavy cabinets or working with very thick plywood, you might consider a 15-gauge nailer for extra strength, but it’s often overkill for standard DIY projects. An 18-gauge brad nailer is a fantastic secondary tool for decorative elements and drawer fronts where a super-clean look is a priority.
How to Use a Finish Nailer for Cabinet Building: Step-by-Step
Using a finish nailer is straightforward, but a little technique goes a long way in achieving professional results. Let’s walk through the process for some common cabinet building tasks.
1. Safety First! Setting Up Your Nailer
Safety is always priority number one in the workshop. Before you even load a nail, make sure you’re prepared. A good quality pair of safety glasses is non-negotiable. Wood slivers and nail fragments can fly unexpectedly. Some people also like to wear hearing protection, especially if using a noisy air compressor.
Connecting and Preparing a Pneumatic Nailer
- Connect the Air Hose: Make sure your air compressor is turned off and unplugged. Connect the air hose securely to the compressor’s regulator and to the nailer’s air inlet.
- Set Air Pressure: Consult your nailer’s manual for the recommended air pressure. For most 16-gauge finish nailers, this is usually between 70-120 PSI. It’s often best to start on the lower end and increase if needed to drive nails consistently. Adjust the regulator on your compressor.
- Load Nails: Open the nail magazine on your finish nailer (usually by pulling back a spring-loaded piece). Insert a strip of the correct gauge and length nails, ensuring they are seated properly against the feed ramp. Close the magazine securely.
- Test Fire: Point the nailer at a scrap piece of wood. Depress the safety contact tip (the part that touches the wood) and squeeze the trigger. Fire a few nails to check the depth and air pressure. Adjust pressure or depth setting as needed.
Preparing a Cordless Nailer
- Charge the Battery: Ensure your battery is fully charged.
- Load Nails: Similar to pneumatic nailers, open the magazine, insert a strip of appropriate finish nails, and close it securely.
- Test Fire: Point the nailer at a scrap piece of wood, depress the safety contact tip, and squeeze the trigger to fire a nail. Check the depth. Adjust the depth setting on the tool if available.
2. Attaching Cabinet Face Frames
Face frames are the decorative front edges of your cabinets, and they add a lot of character. They’re typically made of solid wood pieces glued and nailed to the front edges of the cabinet box.
Steps:
- Apply Glue: Apply a thin, even bead of wood glue to the front edge of your cabinet box where the face frame will attach.
- Position the Face Frame: Carefully place the assembled face frame onto the glued edge of the cabinet box. Ensure it’s perfectly aligned and sitting flush. Clamps can help hold it in place while you nail.
- Nail from the Front: With the nailer set to sequential fire mode, place the nose of the nailer against the face frame and press the safety contact tip firmly onto the wood. Squeeze the trigger to drive a nail through the face frame and into the cabinet box.
- Strategic Placement: Drive nails every 6-8 inches along the length of the face frame and into any underlying structural components. If you have a center stile, place nails into that as well for extra rigidity. Drive nails at a slight angle if it helps ensure they go into the underlying structure.
- Check for Nail Head: Ensure the nail head is slightly below the surface of the wood (often called “countersunk”). If it’s sticking up, you need to set the depth deeper. If it’s too far in, you might be damaging the wood or sinking it too deep.
- Wipe Away Excess Glue: Use a damp cloth to wipe away any glue that squeezes out immediately. Dried glue is much harder to remove.
3. Assembling Cabinet Carcasses (The Box)
This is where your cabinet really takes shape. You’re joining the sides, top, bottom, and back panels together. For this, a 16-gauge nailer is usually perfect, especially when used in conjunction with glue.
Steps for Joining Sides to Top/Bottom:
- Apply Glue: Apply wood glue to the edge of the top and bottom panels where they will meet the cabinet sides.
- Align Pieces: Stand one side panel upright and position the glued top and bottom panels against it. Ensure all edges are flush and square. A corner clamp or a bench vise can be incredibly helpful here.
- Nail Securely: Using your 16-gauge finish nailer, drive nails through the side panel into the edges of the top and bottom panels. Aim for nails about 3/4 inch from the front and back edges, and spaced about 4-6 inches apart.
- Repeat for Other Side: Once the first side is attached, carefully flip the assembly and attach the second side panel in the same manner, again using glue and nails.
- Check for Squareness: Use a framing square to ensure your cabinet box is perfectly square before the glue fully dries. Adjust by gently pushing on diagonal corners if needed.
Attaching the Cabinet Back Panel:
The back panel not only closes the cabinet but also adds significant rigidity and squareness. Plywood is commonly used for this.
- Apply Glue (Optional but Recommended): Apply a thin bead of glue along the back edges of the cabinet box (sides, top, bottom).
- Position Back Panel: Lay your cabinet box face down on a flat surface. Place the back panel onto the glued edges, ensuring it’s perfectly aligned and the cabinet box remains square.
- Nail the Back: With your nailer, fire nails through the back panel into the edges of the cabinet box. Space nails about 4-6 inches apart around the entire perimeter and also into any internal dividers you might have. You can use an 18-gauge nailer here for a less visible fastener, but a 16-gauge offers a bit more holding power if you plan to mount heavy items directly to the back.
4. Nailing Drawer Boxes
Drawer boxes need to be strong to hold contents. While pocket holes are popular, a well-glued and nailed drawer box using a finish nailer (often 16-gauge for the main joinery, or 18-gauge for attaching drawer fronts) makes for a quick and sturdy assembly.
Steps:
- Apply Glue: Apply wood glue to the edges of the drawer sides where they will join the front and back pieces.
- Assemble Drawer Sides: Fit the pieces together and ensure they are square. Clamps are highly recommended here.
- Nail the Joints: Using your 16-gauge finish nailer, drive nails through the sides into the front and back pieces, and through the front/back pieces into the sides. Space nails about 3-4 inches apart.
- Attach Drawer Front (Face): Once the box is rigid, apply glue to the front edges of the box and position the decorative drawer front. Use an 18-gauge nailer for this to minimize visible holes, driving nails from the inside of the box into the drawer front, or from the front into the box if finishing allows and you’re careful.
- Attach Drawer Slides: You can use your finish nailer to temporarily hold drawer slides in place while you drive screws, or for attaching simpler wooden drawer runners.