Yes, a finish nailer is perfect for installing baseboards! It provides a clean, professional look by sinking nails just below the wood surface. This beginner-friendly guide will show you how to choose the right nailer, the essential tools, and a step-by-step process for a flawless baseboard installation.
Hey there, DIYer! Jack Shaffer, your go-to NailerGuy, is here to help you conquer your latest home project. Tired of those wobbly, old baseboards? Ready to give your rooms a crisp, finished look? You might be wondering if there’s a simpler way than wrestling with a hammer and nails. Good news – there is! Using a finish nailer for baseboards is a game-changer for DIYers. It’s faster, cleaner, and gives you that professional touch without the fuss. I’ll walk you through everything you need to know, from picking the best nailer to making those baseboards look like they came straight from a showroom.
Table of Contents
Why a Finish Nailer is Your Best Friend for Baseboards
When it comes to installing baseboards, precision and appearance are key. You want a smooth finish that doesn’t detract from the beauty of your molding. A hammer can leave dents and marks, and it’s easy to miss with nails, leading to frustration. That’s where the finish nailer shines.
A finish nailer is designed to drive slender nails with small heads (hence “finish” nails) into wood. These nails are strong enough to securely hold your baseboards in place, but their small size means they leave minimal damage. Many finish nailers also have adjustable depth settings, allowing you to control how far the nail sinks into the wood. This means you can often set it so the nail head is just slightly below the surface, making it easy to fill with putty and paint over for an invisible hold.
Using a finish nailer also significantly speeds up the installation process. Instead of carefully hammering each nail, you simply position the nailer and pull the trigger. This efficiency is a huge plus, especially when you have many feet of baseboards to install across multiple rooms.
Choosing the Right Finish Nailer for Baseboards: What You Need to Know
Not all finish nailers are created equal, and picking the right one for baseboards can make your project smoother. Let’s break down the key things to consider.
Nail Size Matters
For baseboards, you’ll primarily be working with moldings that are between 1/2 inch and 3/4 inch thick, and often 3 to 5 inches tall. The most common nail sizes for this job are:
- 16-gauge finish nailers: These are the workhorses for baseboards. They drive nails that are about 1.5 to 2.5 inches long. A 16-gauge nail offers a good balance of holding power and minimal visible damage.
- 15-gauge finish nailers: These drive slightly thicker nails (around 1.75 to 2.5 inches long) with a bit more holding power. They leave a larger headless pinhole than a 16-gauge, but are still very suitable for baseboards, especially for taller or heavier moldings.
- 18-gauge finish nailers: While great for delicate trim, 18-gauge nails (typically 5/8 inch to 2 inches long) might be a bit too slender for securely holding most baseboards, especially if the molding is heavy or you’re attaching it to studs that are not perfectly aligned.
For most DIYers tackling standard baseboards, a 16-gauge finish nailer is the most versatile and recommended choice.
Power Source: Pneumatic vs. Cordless
This is a big decision! Each type has its pros and cons:
Pneumatic Finish Nailers
These nailers are powered by compressed air from an air compressor. They are typically lighter, less expensive upfront, and known for their reliability and consistent power.
- Pros: Lightweight, powerful, consistent firing, generally more affordable.
- Cons: Requires an air compressor and hose, which adds to the setup time and cost, and can be noisy. Management of the hose can be a slight hassle when working around rooms.
Cordless Finish Nailers
These run on batteries. They offer the ultimate freedom of movement, as you don’t need to worry about an air compressor or power cord.
- Pros: Highly portable, no hoses or compressors needed, quick setup.
- Cons: Heavier due to the battery, can be more expensive upfront, battery life is a factor, and sometimes they might not have the same consistent driving power as a pneumatic nailer, especially in harder woods.
My Recommendation: If you’re just starting out and plan to do more DIY projects, a good 16-gauge pneumatic nailer is a fantastic investment. If portability and ease of use are your top priorities, and you don’t mind the higher cost, a cordless model is excellent.
Key Features to Look For
- Adjustable Depth of Drive: This is crucial for setting your nails just right, whether you want them flush for easy filling or slightly countersunk.
- Tool-Free Jam Release: Jams happen, and being able to clear them quickly without needing tools is a lifesaver.
- Swiveling Belt Hook: Handy for keeping the nailer close by when not in use.
- No-Mar Pad: Some nailers come with a rubber tip that prevents marring the surface of your delicate molding.
- Lightweight Design: You’ll be holding this tool for extended periods, so comfort is important.
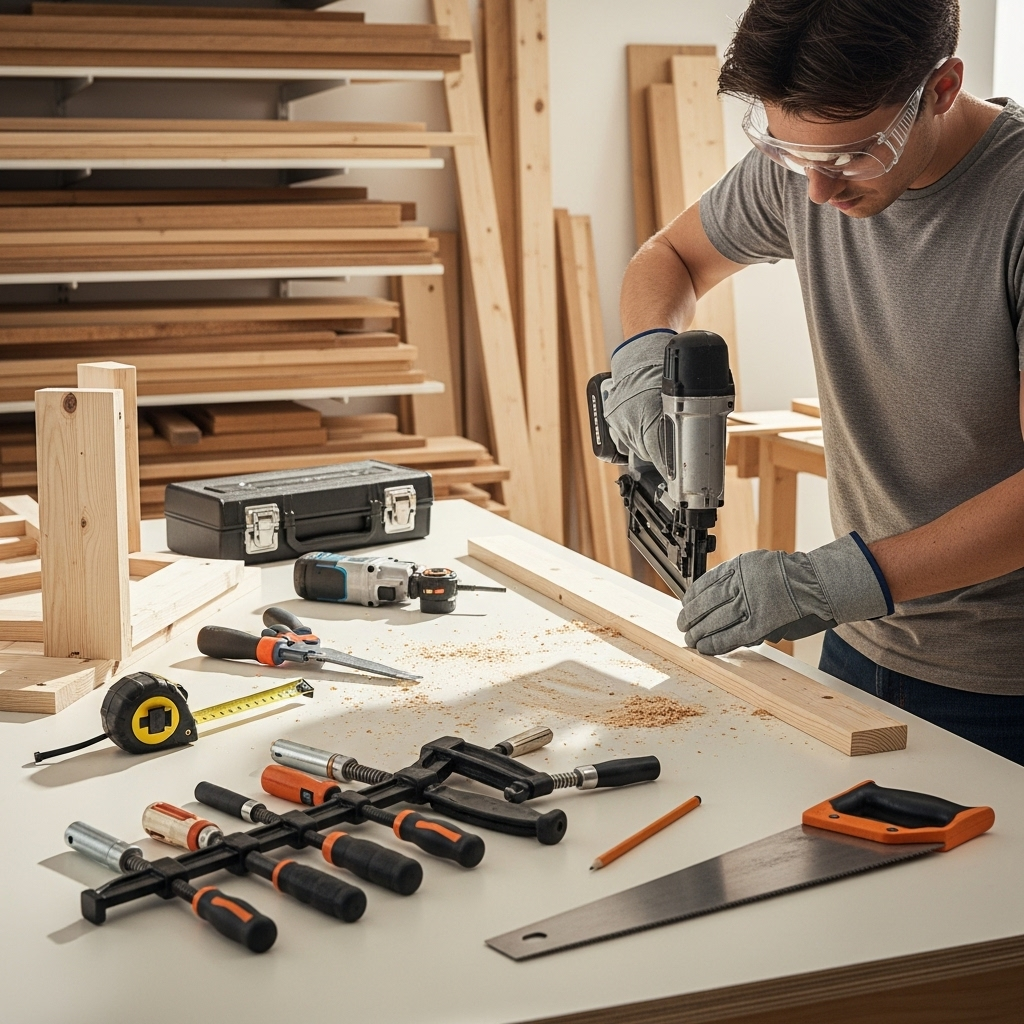
Essential Tools and Materials for Baseboard Installation
Once you’ve chosen your finish nailer, you’ll need a few other things to get the job done right. Here’s a checklist of essential tools and materials:
Tools You’ll Need
- Finish Nailer: (16-gauge recommended)
- Air Compressor and Hose: (If using a pneumatic nailer)
- Air Hose Fittings and Regulator: Ensure proper air flow and pressure. Consult your nailer’s manual for recommended PSI.
- Safety Glasses: Absolutely non-negotiable! Protect your eyes from flying debris.
- Hearing Protection: Nailers can be loud, especially when used with a compressor.
- Measuring Tape: For accurate measurements of your walls and baseboards.
- Pencil: To mark cuts and areas.
- Miter Saw or Hand Saw with Miter Box: For making precise angled cuts for corners. A miter saw is highly recommended for accuracy.
- Stud Finder: To locate wall studs for secure fastening.
- Caulk Gun and Paintable Interior Caulk: For filling gaps between the molding and the wall/ceiling, and for filling nail holes.
- Wood Filler or Wood Putty: To fill nail holes after painting.
- Putty Knife: For applying wood filler.
- Sandpaper (medium and fine grit): For smoothing any rough edges or filler.
- Level: To ensure your baseboards are installed straight.
- Utility Knife: For trimming caulk or other minor adjustments.
- Gloves: For better grip and hand protection.
Materials You’ll Need
- Baseboard Molding: Measure your room carefully and add about 10-15% extra for cuts, mistakes, and repairs.
- Finish Nails: Ensure they are the correct size for your nailer (e.g., 16-gauge, 1.5 to 2.5 inches long).
- Primer and Paint: For finishing the baseboards.
Step-by-Step: Installing Baseboards with a Finish Nailer
Now for the exciting part! Let’s get those baseboards installed. Read through all the steps before you begin.
Step 1: Preparation is Key
Before you even think about cutting molding, you need to prepare your workspace and walls.
- Remove Old Baseboards: If you have old baseboards, carefully pry them off. Use a pry bar and a putty knife to protect the wall surface.
- Clean the Walls: Wipe down the walls where the baseboards will go. Remove any dust, cobwebs, or loose paint.
- Mark Stud Locations: Use your stud finder to locate the wall studs. Mark their centerlines lightly with a pencil along the floor line where the baseboard will sit. Proper stud locating is vital for a secure installation. You can find helpful resources on locating studs from organizations like the U.S. Department of Energy’s Energy Saver website, which discusses building materials and tools.
Step 2: Measure and Cut Your Baseboards
Accuracy here saves a lot of headaches later.
- Measure Each Wall Section: Measure the length of each wall where a single piece of baseboard will run. Always measure from the longest point of your corner.
- Calculate Your Cuts: Remember to account for inside and outside corners. For inside corners, you’ll typically cut two pieces at 45-degree angles, with the longer edge of the cut facing the inside of the room. For outside corners, the shorter edge faces the outside.
- Make Your Cuts: Use your miter saw or hand saw with a miter box to make precise 45-degree cuts for corners. When cutting for a straight wall, cut slightly longer than your measurement to allow for adjustment.
- Test Fit: Before nailing, hold the cut piece up to the wall to ensure a good fit, especially at the corners. Trim if necessary.
Step 3: Load Your Finish Nailer
Ensure your finish nailer is ready to go.
- Connect to Air (Pneumatic): If using a pneumatic nailer, connect the air hose and set your air pressure according to the manufacturer’s instructions. Most 16-gauge nailers run between 70-100 PSI.
- Load Nails: Open the nail magazine and insert the correct size finish nails. Make sure they are seated properly.
- Test Fire: Do a test fire into a scrap piece of wood to ensure the nailer is working and the depth is set appropriately. Adjust the depth if needed so the nail head sinks just below the surface of the molding.
Step 4: Nailing the Baseboards
This is where the magic happens!
- Position the Baseboard: Place the first piece of baseboard against the wall, ensuring the bottom edge rests on the floor and the top edge is aligned where you want it (usually covering the top edge of the old flooring or just below the wall’s midway point).
- Locate Studs: Use your pencil marks to guide you.
- Drive the First Nail: Hold the nailer firmly against the baseboard. Aim for the thickest part of the molding, and drive a nail into a stud. For taller moldings, you’ll want to nail into studs at least every 16-20 inches.
- Securely Fasten: Drive nails every 16-20 inches along the length of the baseboard, hitting studs whenever possible. Also, drive a few nails into the top edge where it meets the wall, especially if you have a gap, to help pull it tight.
- Corners: For inside and outside corners, drive nails at an angle to help secure the joining pieces.
- Shorter Pieces: If you need to join two pieces of baseboard on a long wall, overlap the end of the first piece slightly and nail it securely, then butt the second piece tightly against it and nail both pieces into studs.
Safety First: Always ensure the nailer’s safety tip is engaged before firing. Keep your fingers away from the firing mechanism and nozzle. Never point the nailer at yourself or anyone else.
Step 5: Filling Gaps and Nail Holes
The final touches make all the difference.
- Caulk: Apply a bead of paintable interior caulk along the top edge where the baseboard meets the wall, and along any seams or corners that aren’t perfectly tight. Wipe away excess caulk with a damp cloth.
- Fill Nail Holes: Use a putty knife to fill each nail hole with wood filler or wood putty. Overfill it slightly, as it will shrink as it dries.
- Sand: Once the filler is completely dry, gently sand the filled areas smooth with fine-grit sandpaper until they are flush with the baseboard surface.
Step 6: Painting and Finishing
This is where your baseboards really come to life.
- Prime: Apply a coat of primer to the baseboards. This helps the paint adhere better and ensures a more uniform color.
- Paint: Once the primer is dry, apply one or two coats of your chosen paint color. Allow each coat to dry thoroughly before applying the next.
Troubleshooting Common Baseboard Installation Issues
Even with the best tools, you might run into a few snags. Here’s how to handle them:
Problem: Daisy-chaining (multiple nailers running off one circuit) trips the breaker.
Solution: If using multiple pneumatic nailers, ensure your compressor is on a dedicated circuit or a circuit with few other high-draw appliances. For cordless, ensure batteries are charged and not overworked. Avoid running other power-hungry tools on the same circuit.
Problem: Nailer jams frequently.
Solution: Check if you’re using the correct nail size and type for your nailer. Ensure the nails are loaded straight. Sometimes, a nailer needs a shot of lubricant in its air fitting to keep moving smoothly. Also, check the nosepiece for any debris.
Problem: Nails are not sinking deep enough or are sinking too deep.
Solution: Adjust the depth of drive setting on your nailer. For nails not sinking enough, increase the depth. For nails sinking too deep, decrease it. Ensure your air pressure is set correctly for pneumatic nailers.
Problem: Wood splitting when a nail is fired.
Solution: This often happens when nailing too close to the end of a board or into very hard wood. Try pre-drilling a pilot hole slightly smaller than the nail shank. Also, ensure your nailer’s depth is set correctly so it doesn’t over-drive.
Problem: Gaps between baseboard and wall.
Solution: Sometimes walls aren’t perfectly straight. You can use shims behind the baseboard in a few spots or apply a generous bead of caulk to fill minor discrepancies. For larger gaps, you might need to trim the back edge of the baseboard slightly with a router.
Frequently Asked Questions About Finish Nailers for Baseboards
Q1: Can I use a brad nailer instead of a finish nailer for baseboards?
A: While a brad nailer is similar, it drives much thinner nails with smaller heads. For baseboards, a 16-gauge or 15-gauge finish nailer is generally recommended for better holding power. Brad nails might not be strong enough for longer or heavier moldings.
Q2: What’s the best nail length for baseboards?
A: For most standard baseboards (1/2 to 3/4 inch thick), 1.5 to 2.5-inch nails are ideal. The key is to ensure the nail goes through the molding and at least 1 inch into the wall stud for a secure hold.
Q3: Do I need an air compressor for a finish nailer?
A: Traditional pneumatic finish nailers do. However, cordless electric models are available that run on batteries, eliminating the need for a compressor and hose.
Q4: How many nails should I use per stud?
A: Typically, one or two nails per stud is sufficient. Space your nails about 16 to 20 inches apart along the length of the baseboard, ensuring you hit studs whenever possible.
Q5: Can I fill nail holes before painting?
A: Yes, after the baseboards are installed and any gaps are caulked, fill nail holes with wood filler or putty. Sand smooth and then prime and paint.
Q6: Do I need to nail baseboards directly into studs?
A: Absolutely. Nailing into studs is critical for a secure, long-lasting installation. Relying only on drywall anchors or the drywall itself will lead to the baseboards pulling away over time.