Have you ever walked on a beautiful wood floor and wondered how it was made? Engineered wood flooring is a fantastic option for many homes today. It looks great, feels warm, and stands up well to daily life. But what makes it so special?
To install engineered wood flooring, you need the right tools. From saws to glue, each tool plays a role in creating that perfect finish. Imagine cutting precise pieces and fitting them snugly together. It’s like putting together a puzzle, but with a twist!
Many people don’t realize that the right tools can make all the difference. With just a few good tools, anyone can transform their home. Ready to learn more about engineered wood flooring tools? Let’s dive in and discover what you need for your next project!
Table of Contents
Essential Engineered Wood Flooring Tools For Every Diyer

Engineered Wood Flooring Tools
Engineered wood flooring tools are essential for any DIY enthusiast or professional installer. These tools help ensure precise cuts and smooth finishes, making installation easier. Do you enjoy home projects? Imagine transforming your space with beautiful flooring! You’ll learn about specific tools like saws, nail guns, and underlayment, all crafted to make your job simpler. Exploring this world can awaken your creative side while providing the durability and style your home deserves. What project will you tackle next?Essential Tools for Installation
List of required tools for engineered wood flooring installation. Brief descriptions of each tool’s function.Getting ready to install engineered wood flooring? You’ll need some trusty tools by your side! Here’s a quick peek at what you’ll need and what each tool does. Think of these tools as the superhero team for your flooring project. Every superhero has a power, right?
| Tool | Function |
|---|---|
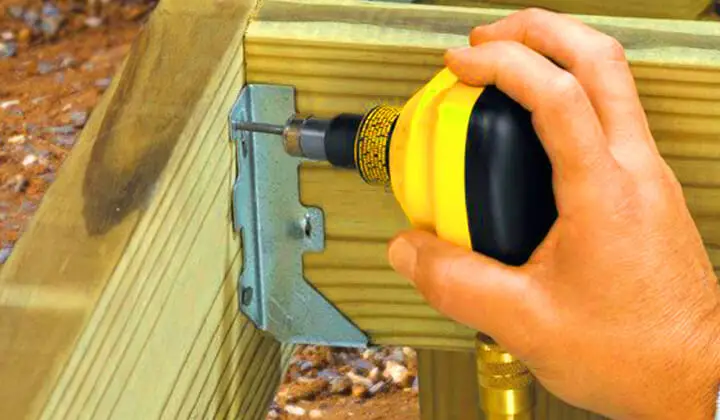
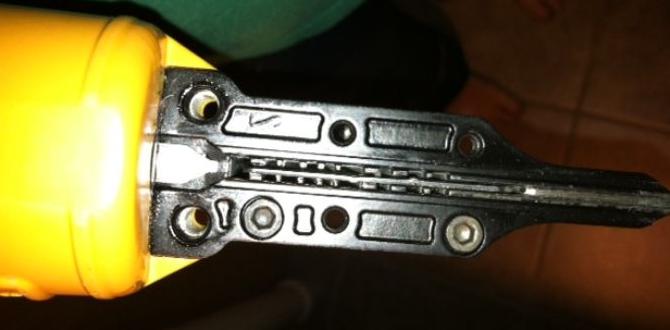
| Flooring Nail Gun | This nifty tool drives nails into the flooring. It’s like a high-speed superhero for securing your boards! |
| Laminate Cutter | This cuts pieces to fit perfectly. No such thing as a boring board here! |
| Measuring Tape | For measuring spaces. Remember, “measure twice, cut once”! Your future self will thank you. |
| Pull Bar | This tool helps keep boards snug together. It’s like a friendly hug for your flooring! |
With these tools, you’re ready to tackle that floor like a champ! Just remember, every hero needs the right gadgets to save the day!
Preparing the Installation Area
Steps to prepare the subfloor for installation. Importance of acclimating engineered wood flooring.Before laying engineered wood flooring, the area must be ready. First, check the subfloor for cleanliness. Remove any dirt or debris. Next, make sure the subfloor is dry and flat. Use a level to check for bumps or dips. This helps the floor sit evenly.
Another step is to let your new flooring adjust. Acclimating means leaving the wood in the room for a few days. This process helps the wood get used to the temperature and humidity. This way, it won’t expand or shrink after installation.
Why is acclimation important?
Acclimating ensures your flooring stays stable. Without this, the wood can warp or crack. It’s best to avoid problems later on!
- Clean the subfloor thoroughly.
- Check for moisture and level.
- Let the wood adjust for 48-72 hours.
Measuring and Planning**
Tips for accurate measurements before installation. Strategies for effective layout planning.Before you dive into installation, measuring your floor space is key. Grab a tape measure and note every inch. Simple, right? Make sure to double-check your numbers—no one wants a surprise floor puzzle! Think about the layout, too. A good plan saves time and avoids extra cuts. And, let’s be honest: nobody enjoys playing hide and seek with leftover boards! Here’s a quick table to help you plan:
| Step | Action |
|---|---|
| 1 | Measure length and width |
| 2 | Calculate area |
| 3 | Choose a layout style |
| 4 | Account for waste |
In the end, a little planning goes a long way. Remember, good measurements lead to great installations!
Installation Methods: Floating vs. Glue-Down**
Explanation of floating installation method. Stepbystep guide to gluedown installation.Floating installation is like magic! The planks just sit on the underlayment without any glue or nails. This method allows for movement, which is handy in different temperatures. Plus, it’s easy-peasy for you and your friends to do it together. No need for extra tools!
On the other hand, gluedown installation is a bit like a big puzzle. Here’s how it works, step by step:
| Step | Action |
|---|---|
| 1 | Prepare the floor by cleaning and leveling it. |
| 2 | Apply glue evenly on both the floor and the planks. |
| 3 | Place the planks firmly in their spots. |
| 4 | Let it dry—like waiting for cookies to bake! |
Both methods have their own perks, so choose what fits your style best. Remember, happy flooring equals happy dancing!
Finishing Touches and Maintenance Tools
Recommended tools for finishing edges and transitions. Tools for ongoing maintenance and cleaning of engineered wood flooring.To achieve a smooth finish on your engineered wood floors, you’ll need some handy tools. Use a jigsaw for those tricky edges and transitions. A flooring pull bar works wonders for fitting planks snugly together. For keeping your floors spotless, choose a microfiber mop for gentle cleaning, and a vacuum with a hardwood setting to catch those pesky crumbs. Remember, a happy floor equals a happy home! Now, let’s check out a handy tool table:
| Tool | Purpose |
|---|---|
| Jigsaw | Finishing edges and transitions |
| Flooring Pull Bar | Securing planks |
| Microfiber Mop | Cleaning floors gently |
| Vacuum for Hardwood | Removing dirt and crumbs |
Common Mistakes to Avoid**
List of frequent installation errors and how to prevent them. Importance of following manufacturer guidelines.Installing engineered wood flooring can be tricky. Many people make mistakes that can lead to big problems. For example, not letting the wood acclimate can cause warping later. Also, skipping the underlayment can lead to squeaky floors. Always read and follow the manufacturer’s guidelines. It’s like following a recipe—skip a step, and your cake may end up flat! Here’s a quick cheat sheet to help you avoid these common hiccups:
| Error | How to Prevent |
|---|---|
| Not acclimating the wood | Let it sit for at least 48 hours in the installation area. |
| Skipping underlayment | Use it to prevent squeaks and moisture issues. |
| Poor measurement | Double-check your measurements before cutting. |
| Incorrect nail placement | Follow the guideline or face a floor that sounds like a drum! |
Expert Tips and Tricks**
Insider advice for a seamless installation process. Recommendations based on professional experiences.Installing engineered wood flooring can be fun, but it can also be tricky. Here are some handy tips from experts to make it smooth:
- Prepare the space. Clear the room beforehand for easy movement.
- Check humidity. Make sure the room is not too humid or dry.
- Use the right tools. Tools like a saw and measuring tape are essential.
- Plan your layout. Pre-plan your board arrangement for a better look.
- Take your time. Rushing can lead to mistakes.
Follow these tips, and you’ll have a great-looking floor in no time!
What tools do I need for installation?
You will need tools like a saw, measuring tape, mallet, and spacers. These ensure accurate cuts and a tight fit when installing your flooring.
Conclusion
In summary, engineered wood flooring tools help you install beautiful floors easily. You need a few basic tools like saws and adhesives. Don’t forget proper measurements and safety gear for a smooth process. Explore more about these tools online or at your local hardware store. Get started on your flooring project today, and enjoy your new space!FAQs
What Are The Essential Tools Required For Installing Engineered Wood Flooring?To install engineered wood flooring, you need a few important tools. First, get a measuring tape to check the room size. You’ll also need a saw to cut the planks to fit. A hammer helps to tap the pieces together. Lastly, have a level to make sure the floor is even.
How Do You Properly Maintain And Care For The Tools Used In Engineered Wood Flooring Installation?To care for tools used in engineered wood flooring, start by cleaning them after each use. Wipe off dust and dirt with a cloth. Make sure to store tools in a dry place to avoid rust. Check for any damage and fix it right away. This helps your tools work well and last longer!
What Safety Equipment Should Be Used While Working With Tools For Engineered Wood Flooring?When working with tools for engineered wood flooring, you should wear safety goggles to protect your eyes. Use ear protection to keep your ears safe from loud noises. It’s also important to wear gloves to protect your hands. Lastly, wear sturdy shoes to keep your feet safe from heavy tools and wood pieces.
Are There Specific Tools Designed For Cutting Engineered Wood Flooring, And How Do They Differ From Standard Woodcutting Tools?Yes, there are special tools for cutting engineered wood flooring. These tools often include a chop saw or a table saw. They have sharp blades that make clean, straight cuts. Standard woodcutting tools can work too, but they might not cut as neatly. Special tools help you finish the job faster and easier.
What Are The Advantages Of Using Pneumatic Tools Versus Manual Tools In The Installation Of Engineered Wood Flooring?Using pneumatic tools makes installing engineered wood flooring faster and easier. They use air to help you work, so you don’t have to use much effort. This means your hands won’t get tired as quickly. Pneumatic tools also help make sure everything fits perfectly, which makes the floor look great. Overall, they save you time and energy!