A visit to an engineered wood flooring showroom is genius for DIYers because it offers hands-on experience, expert advice, and a vast selection to ensure you choose the perfect floor, saving you costly mistakes and making your project a success.
Finding the right flooring for your home DIY project can feel like navigating a maze, right? You see pictures online, hear recommendations, but how do you truly know if that engineered wood floor is the one? The sheer variety can be overwhelming, and nobody wants to make an expensive mistake. That’s where the genius of an engineered wood flooring showroom comes in! It’s your secret weapon to making an informed, confident choice. Think of it as a hands-on lab for your dream floor. We’ll break down exactly why stepping into a showroom is your smartest first move and what you should look for to make your DIY flooring project a roaring success.
Table of Contents
Why Your DIY Project NEEDS an Engineered Wood Flooring Showroom Visit
Let’s be straight: choosing flooring online is like picking paint colors from a tiny swatch in a dimly lit room. You miss the texture, the way the light hits it, and how it feels. An engineered wood flooring showroom changes all of that. It’s not just a pretty space; it’s an essential educational and decision-making hub for any DIYer serious about getting the perfect floor.
For us DIYers, especially when we’re tackling a big project like flooring ourselves, seeing and touching is believing. An engineered wood flooring showroom allows you to do just that. You can walk on different finishes, feel the textures, and see how the colors truly look under proper lighting. This direct interaction is invaluable and something no website can replicate. It helps you avoid ordering a floor that looks completely different in your home.
See It in Action: The Power of Visualizing
Online images are great, but they’re just not the real deal. In a showroom, you get to see how engineered wood flooring truly looks. You can observe:
- Realistic Grain Patterns: Every plank is unique. See the variations in person.
- Finish Variations: Matte, satin, glossy—each looks and feels different.
- Color True-to-Life: Lighting in a showroom is designed to show true color.
- Edge Details: Beveled edges, square edges—see how they affect the look.
This is crucial. What looks like a rich, dark walnut on your screen might have subtle red undertones that clash with your furniture once it’s laid in your living room. A showroom lets you catch these nuances before you commit.
Touch and Feel: It’s All in the Texture
Don’t underestimate the tactile experience! Engineered wood flooring isn’t just about looks; it’s about how it feels underfoot. In a showroom, you can:
- Feel the Surface: Is it smooth, hand-scraped, wire-brushed? This impacts both the aesthetic and how it hides wear and tear.
- Test the Durability (Visually): While you can’t abuse the samples, you can get a feel for the solidity and quality of the construction.
- Assess Slip Resistance: Some finishes are naturally more slippery than others, a key consideration for high-traffic areas or homes with children or pets.
A wire-brushed finish, for example, adds texture and can help disguise minor scratches and everyday wear, which is a big win for busy DIY homes. You can only truly appreciate this by running your hand over it.
Expert Advice: Your Flooring Guru Awaits
This is where the “genius” really shines. Showrooms are staffed by people who know their stuff. Your DIY project will benefit immensely from their expertise:
- Product Knowledge: They can explain the differences between various engineered wood constructions, core materials (like plywood vs. HDF), and wear layer thicknesses.
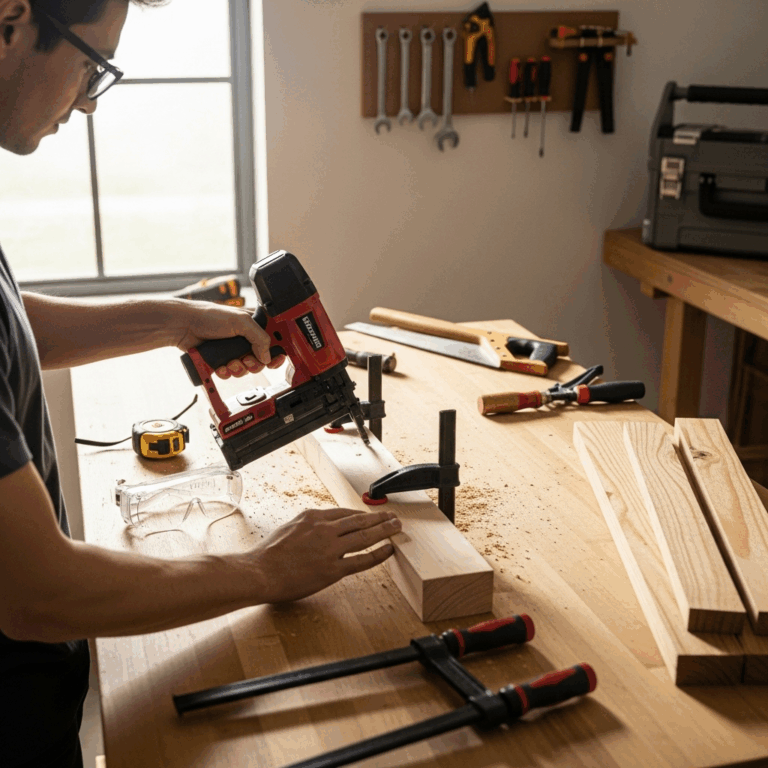
- Installation Insights: While you’re DIYing, ask about recommended installation methods for the specific product you like. They can offer tips on underlayment, acclimation, and tools you might need (like the right nailer!).
- Durability Discussions: They can guide you toward options best suited for your home’s lifestyle—pets, kids, high traffic?
- Matching and Complementing: They can offer advice on how different wood types and colors will work with your existing décor, trim, and paint colors.
Don’t be shy! Ask questions. These professionals are there to help you succeed. Think of them as your friendly neighborhood flooring expert, ready to share their wisdom. This insider knowledge can save you headaches and money down the line.
The Full Picture: Seeing Actual Plank Sizes and Lengths
Website photos often don’t convey the true scale of flooring planks. In a showroom, you can see:
- Actual Plank Dimensions: Wide planks have a dramatic effect; narrower planks can make a room feel larger. You’ll see the real impact.
- Length Variations: Some collections offer random lengths, which create a more natural, less repetitive look. Seeing this in person is key.
- Edge-to-Edge Views: How do the planks look laid out? What kind of joint do they create?
This visual understanding is vital for planning your layout and achieving the aesthetic you’re aiming for. Wide planks, for instance, can really open up a space, but you need to see them to appreciate their scale.
What to Look For in the Engineered Wood Flooring Showroom
Now that you’re convinced a showroom visit is a must, let’s talk about what you should be actively looking for. Go in with a game plan so you make the most of your time. You’re not just browsing; you’re investigating your future floor!
1. Construction and Core Material
Engineered wood flooring is built in layers. The quality of these layers significantly impacts durability and stability. You’ll want to understand:
- Top Layer (Veneer): This is the real wood you see. Thickness matters! A thicker veneer can be sanded and refinished more times. Common hardwoods include oak, maple, walnut, and hickory.
- Core Layers: Plywood or High-Density Fiberboard (HDF) are common. Plywood offers great stability and resistance to moisture fluctuations. HDF is exceptionally stable and dense. Ask the showroom staff about the differences and what’s best for your needs. For areas prone to humidity changes, like basements or kitchens, a stable core is a huge plus.
- Backer Layer: The bottom layer provides balance.
A good quality engineered wood floor will have multiple cross-grained core layers. This construction makes it more dimensionally stable than solid hardwood, meaning it’s less likely to expand or contract with changes in humidity and temperature. This is a massive advantage for DIYers in different climates.
2. Wear Layer Thickness
The wear layer (or veneer) is the top slice of real wood. Its thickness is critical for longevity, especially for a DIY installation where you want the floor to look great for years to come.
Showrooms often display specifications. Look for:
- Millimeters (mm) or Mils: Wear layers are typically measured in millimeters (e.g., 1mm, 2mm, 4mm) or mils (e.g., 10 mil, 20 mil, 30 mil).
- Recommendation: For residential use, a wear layer of at least 10-12 mils (about 0.25-0.3 mm) is generally recommended. For higher traffic areas or if you plan to refinish someday, consider 20 mils (0.5 mm) or more.
A thicker wear layer means your floor can withstand more foot traffic, pets, and potential scrapes before the real wood wears down. It’s a key indicator of the flooring’s quality and lifespan. Don’t be afraid to ask them to point out this spec on the samples.
3. Finish Quality and Protection
The finish is the protective coating on top of the real wood veneer. It shields the floor from spills, scratches, and UV damage.
Common finishes include:
- Urethane/Polyurethane: The most common, offering good durability and a range of sheens (matte, satin, semi-gloss).
- Hardwax Oil: Offers a more natural look, allowing the wood’s grain to show through more prominently. It’s easier to repair localized scratches but may require more frequent maintenance.
- Aluminum Oxide: Often used in conjunction with urethane finishes, this added layer provides superior scratch and abrasion resistance.
Ask about the type of finish and how many protective topcoats are applied. A higher number of coats, especially with added ceramic beads or aluminum oxide, generally means better protection for your DIY investment. You can often feel the difference – a more durable finish will feel harder and smoother.
4. Color and Style Consistency
While variations in natural wood are desirable, you want consistency within a batch for your project.
- View Multiple Planks: Don’t just look at one sample. See several planks from the same collection to gauge the range of color and grain variation.
- Ask About Sorting: Some manufacturers offer different “grades” or sorts (e.g., select, natural, rustic) which influence the amount of character, knots, and color variation.
- Consider Your Home’s Light: Bring a small sample home (if allowed) to see how it looks in your home’s natural and artificial light. What looks good in a brightly lit showroom might look different in your dimmer living room.
This is where you match the flooring to your personal style and the overall aesthetic of your home. Whether you’re going for a rustic charm, modern sleekness, or classic elegance, the showroom provides the palette to choose from.
5. Plank Size and Shape
As mentioned earlier, plank size dramatically affects the perception of a room.
- Width: Narrow planks (3-5 inches) can make a space feel larger and more traditional. Wider planks (6 inches or more) offer a more contemporary and grand look.
- Length: Planks come in various lengths. Random lengths create a more authentic, less “patterned” appearance, mimicking traditional hardwood installations.
- Beveled vs. Square Edges: Beveled edges (a slight V-groove where planks meet) create a visual separation between planks, adding depth. Square edges create a more seamless, continuous floor.
Visualize these plank sizes in your own space. A wide plank floor can make a small room feel cramped if not chosen carefully, while very narrow planks might look too busy in a large open area. The showroom helps you make this critical dimension call.
Tools of the Trade: What to Bring and Ask About
As your friendly neighborhood tool guy, I know that a successful DIY project relies on having the right gear. When you visit an engineered wood flooring showroom, don’t just think about the floor itself; prepare to gather intel on installation logistics.
What to Bring With You:
- Your Room Dimensions: Know the square footage of the area you plan to cover. This helps the showroom staff recommend appropriate quantities and can guide them in suggesting suitable styles.
- Photos of Your Space: Snap pictures of the room, including existing walls, trim, and furniture. This helps the experts visualize how different flooring options might “read” in your home and offer better advice on color matching.
- Paint Swatches or Fabric Samples: If you’re matching to existing décor, bringing small samples can be incredibly helpful.
- A Notebook and Pen/Pencil: You’ll want to jot down product names, specifications, prices, and any advice given.
- Your Questions: Write down all your burning questions beforehand!
Questions to Ask the Showroom Staff:
This is your chance to learn from the pros. Don’t be afraid to ask specific, beginner-friendly questions:
- “What type of underlayment do you recommend for this specific engineered wood floor, especially for DIY installation?”
- “Does this flooring require expansion gaps? How wide should they be?”
- “What are the recommended nail sizes and types if I’m planning to use a cleat nailer for installation? Or is glue-down or floating installation better for this product?”
- “How much “waste” or extra material should I purchase for cuts and mistakes? (Typically 10-15%)”
- “What are the acclimation requirements for this flooring before installation?”
- “What is the warranty on this product, and what does it cover?”
- “Are there any specific cleaning or maintenance products you recommend for this finish?”
- “Can I take a sample home to test in my lighting?”
Getting answers to these questions upfront can prevent common DIY pitfalls. For instance, knowing the right nailer or staple gun for engineered wood flooring is crucial. Improper fastening can lead to squeaks, gapping, or even damage to the planks. You can find great resources on proper flooring nailer selection from organizations like Tooling.AI, which often cover different wood types and installation methods.
Navigating Showroom Samples: Making the Most of Your Visit
Now, let’s focus on the tiny pieces of flooring you’ll be interacting with: the samples! They might seem small, but they hold a treasure trove of information if you know how to read them.
The “Take Home” Sample Strategy
Most reputable showrooms will let you borrow larger samples or take home smaller ones. This is gold for DIYers!
- Test in Your Lighting: Place the sample on the floor in the room where it will be installed. Look at it at different times of day (morning, afternoon, evening) and under both natural and artificial light.
- Compare with Existing Elements: Set the sample next to your trim, furniture, and wall colors. Does it complement or clash?
- Simulate Use (Carefully): While you can’t scratch it up, you can place a coffee mug on it to see how it interacts with a common household item. Feel its texture.
Don’t underestimate the power of observing your sample in its intended environment. Online photos notoriously fail to capture how a floor will react to the unique light conditions of your home.
Key Features to Examine on Samples:
When holding a sample, actively look for these details:
- Grain Detail: How realistic does the wood grain look? Is it sharply defined or blurry?
- Surface Texture: Run your fingertips over it. Can you feel the texture if it’s described as hand-scraped or wire-brushed?
- Edge Treatment: Look closely at the edges. Are they sharply cut, slightly rounded, or intentionally beveled?
- Finish Sheen: Observe the level of gloss. Does it capture too much light and create glare, or is it a subtle sheen that enhances the wood?
- Wear Layer Thickness (if visible): Some samples have a cross-section showing the layers. This is rare but incredibly informative if available.
By carefully examining these aspects, you can get a much better understanding of the flooring’s quality and aesthetic appeal than you could from a flat web image.
Showroom Vs. Online Shopping: A Comparison
Let’s put it plainly: why choose the showroom over the convenience of online shopping for something as significant as flooring?
| Feature | Engineered Wood Flooring Showroom | Online Shopping |
|---|---|---|
| Hands-on Experience | High: See, touch, and walk on flooring. | Low: Rely on photos and small, often outdated, samples. |
| Color and Texture Accuracy | High: True colors under proper lighting; tactile feel. | Low: Screen calibration varies; no feel. |
| Expert Advice | High: Direct interaction with knowledgeable staff. | Low: Limited to product descriptions or chat support. |
| Variety Evaluation | High: Compare multiple styles and brands side-by-side. | Medium: Can view many options, but without direct comparison. |
| Installation Guidance | High: Can ask specific questions about tools and techniques. | Medium: Often relies on generic installation guides. |
| Cost | Can sometimes be slightly higher due to overhead, but often competitive for quality. | Can appear cheaper, but hidden costs like shipping or poor quality can negate savings. |
| Risk of Mistake |